

Page 1
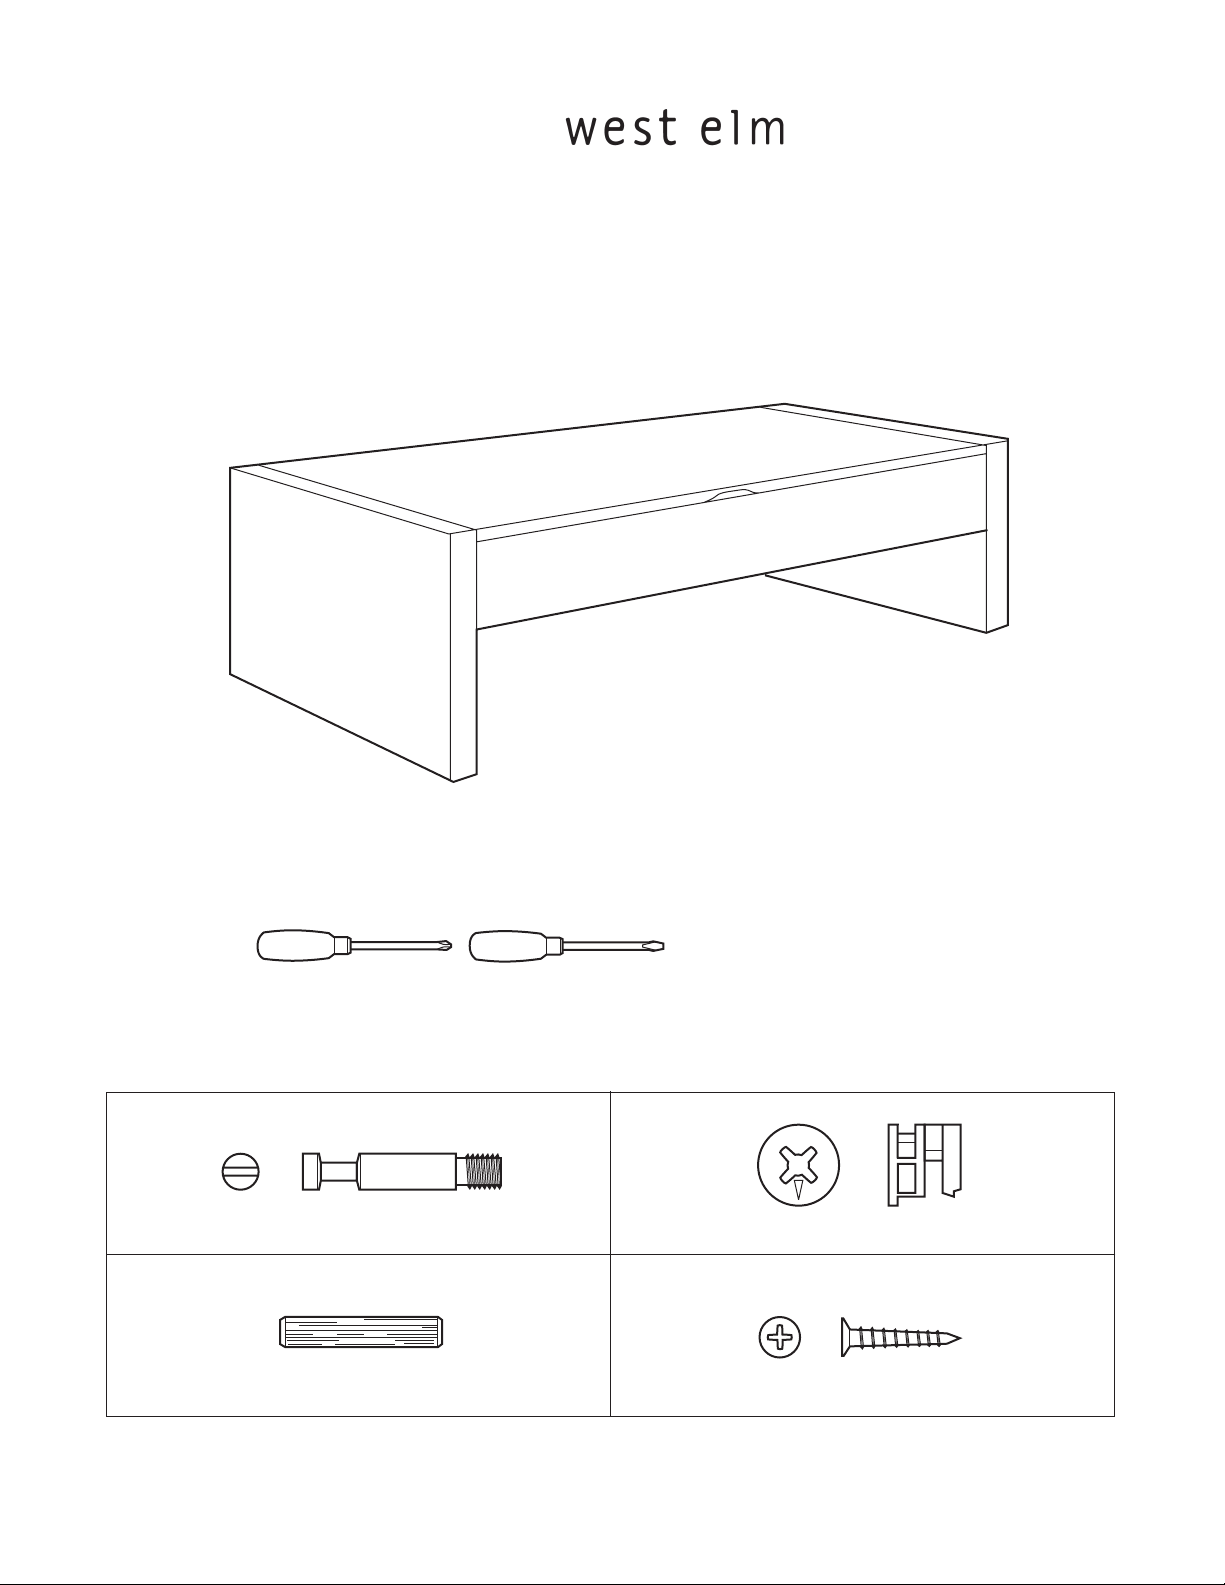
: storage bench
assembly instructions
!
Tools required:
! Do not throw away packaging materials until assembly is complete.
! Assemble this item on a soft surface, such as cardboard or carpet, to protect the finish.
! Proper assembly of this item requires 2 people.
A
cam 20x cam lock 20x
C
wooden dowel 18x
6559017 / 6559025 - 09/28/04
B
D
screw 10x
page 1 of 6
Page 2
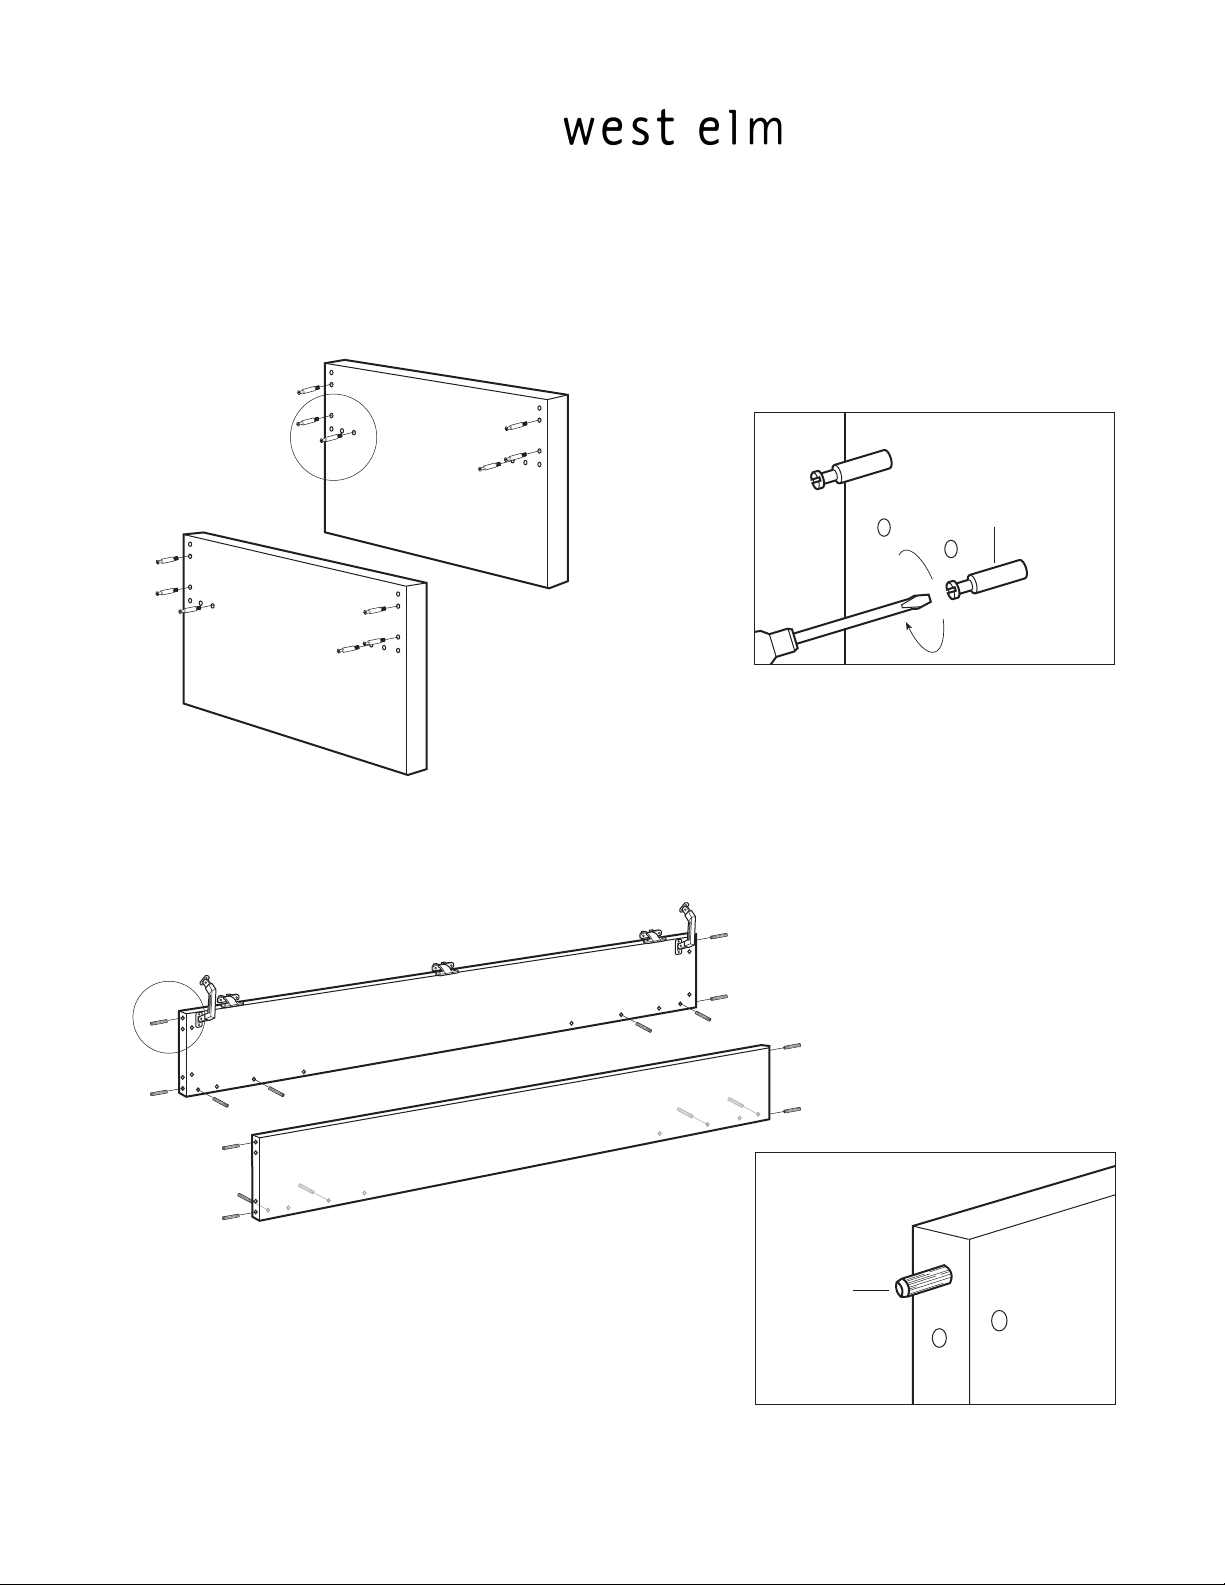
: storage bench
C
16x
A
12x
1. Insert cams (A) into holes on side panels as shown. Tighten with a flat head screwdriver.
RIGHT PANEL
LEFT PANEL
assembly instructions
2. Insert wooden dowels (C) into holes on front and back panels as shown.
6559017 / 6559025 - 09/28/04
BACK PANEL
FRONT PANEL
page 2 of 6
Page 3

: storage bench
D
6x
8x
A
4x
C
assembly instructions
3. Insert cams (A) into holes on front and back panels as shown. Tighten with a flat head screwdriver.
BACK PANEL
FRONT PANEL
(back view)
4. Insert wooden dowels (C) into holes on side of bottom panel as shown.
6559017 / 6559025 - 09/28/04
page 3 of 6
Page 4

: storage bench
4x
4x
assembly instructions
5. Attach bottom panel to back panel by aligning cams and dowels with holes. Insert cam locks (B) into holes on underside
of bottom panel as shown. Tighten with a Philip's head screwdriver.
6. Repeat step 5 to attach front panel.
B
B
6559017 / 6559025 - 09/28/04
page 4 of 6
Page 5

: storage bench
4x
B
8x
B
assembly instructions
7. Attach side panels by aligning dowels and cams with holes. Insert cam locks (B) into holes on inside of front and
back panels and on underside of bottom panel.
6559017 / 6559025 - 09/28/04
page 5 of 6
Page 6

: storage bench
D
10x
assembly instructions
8. Attach lid by inserting screws (D) into holes in the hinges and hinge stays. Tighten with a Philip's head screwdriver.
CARE INSTRUCTIONS.
Hardware may loosen over time. Periodically check
that all connections are tight.
Wipe with a soft, dry cloth. To protect the finish, avoid
the use of all chemicals and household cleaners.
6559017 / 6559025 - 09/28/04
page 6 of 6
 Loading...