

Page 1
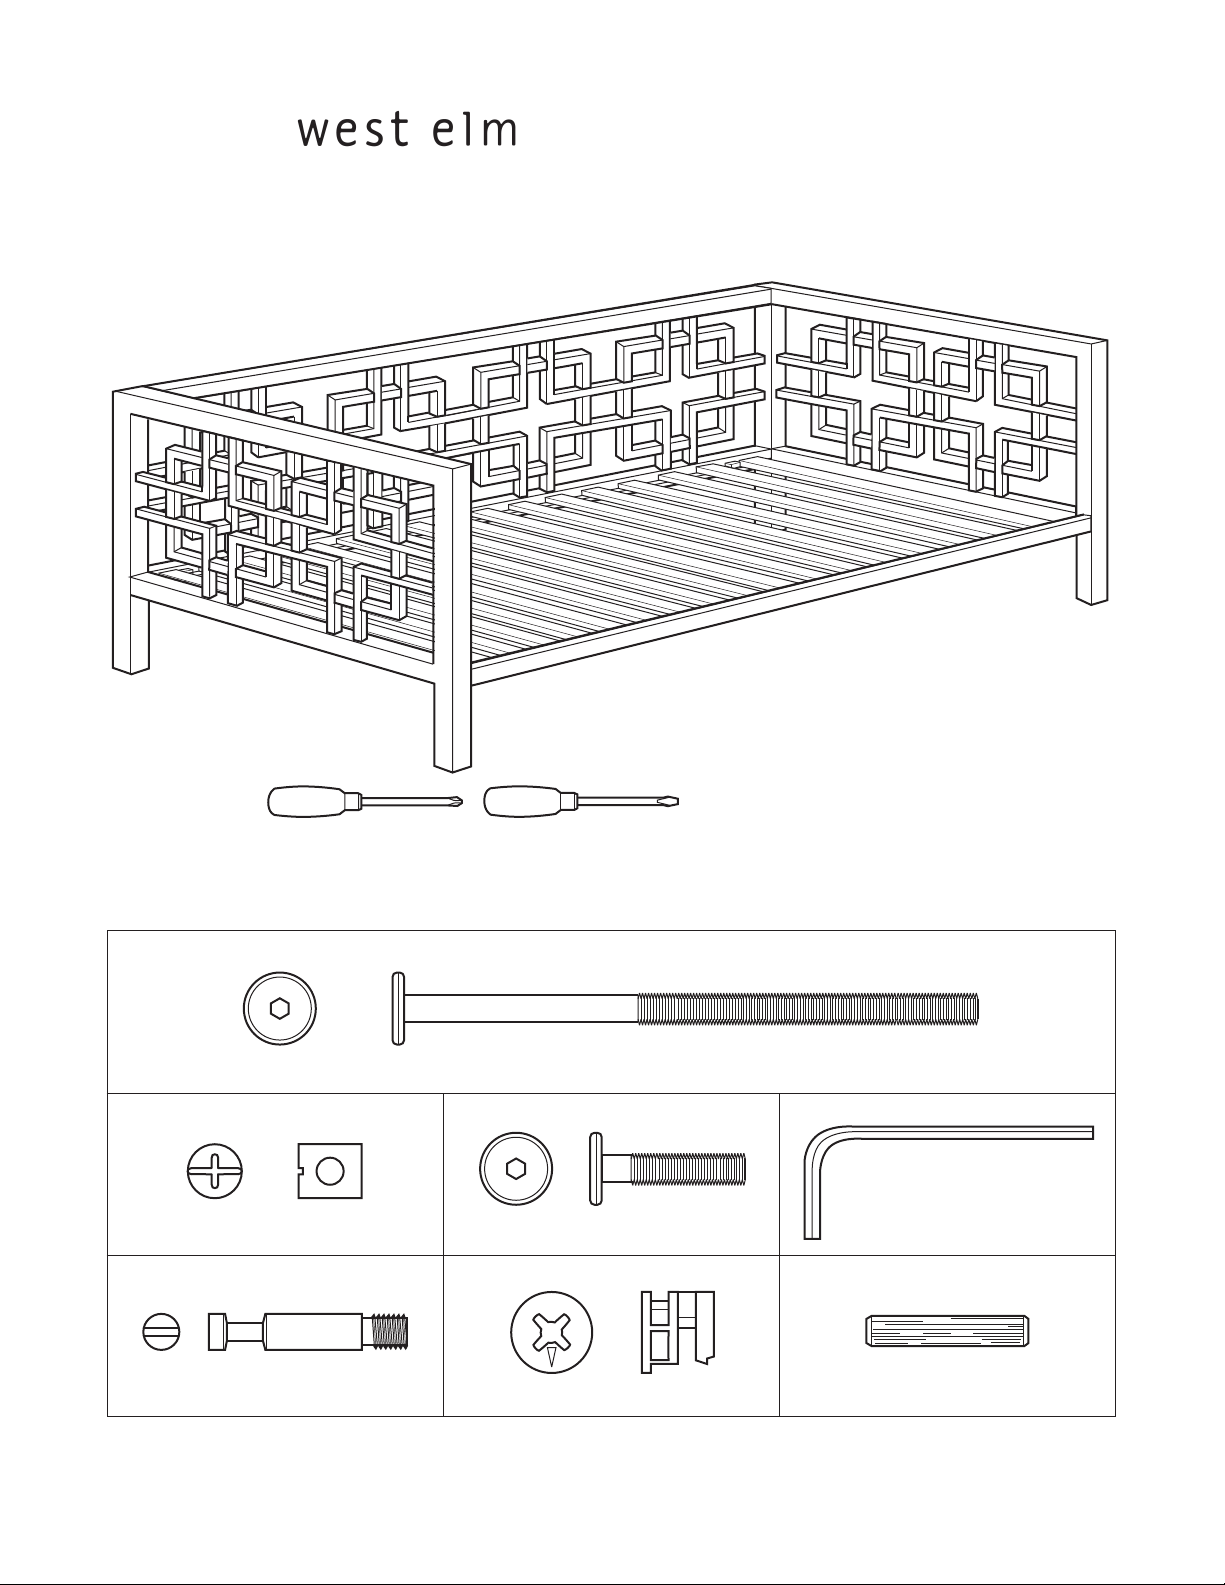
: overlapping squares daybed
assembly instructions
! Tools required:
! Do not throw away packaging materials until assembly is complete.
! Assemble this item on a soft surface, such as cardboard or carpet, to protect the finish.
! Proper assembly of this item requires 2 people.
A
bolt: 1/4" dia x 4" 2x
B C D
barrel nut 2x bolt: 3/8" dia x 1" 8x allen key 1x
E
F G
cam 4x cam lock 4x wooden dowel 4x
6204440 / 8234056 - 05/06
page 1 of 7
Page 2
: overlapping squares daybed
2x
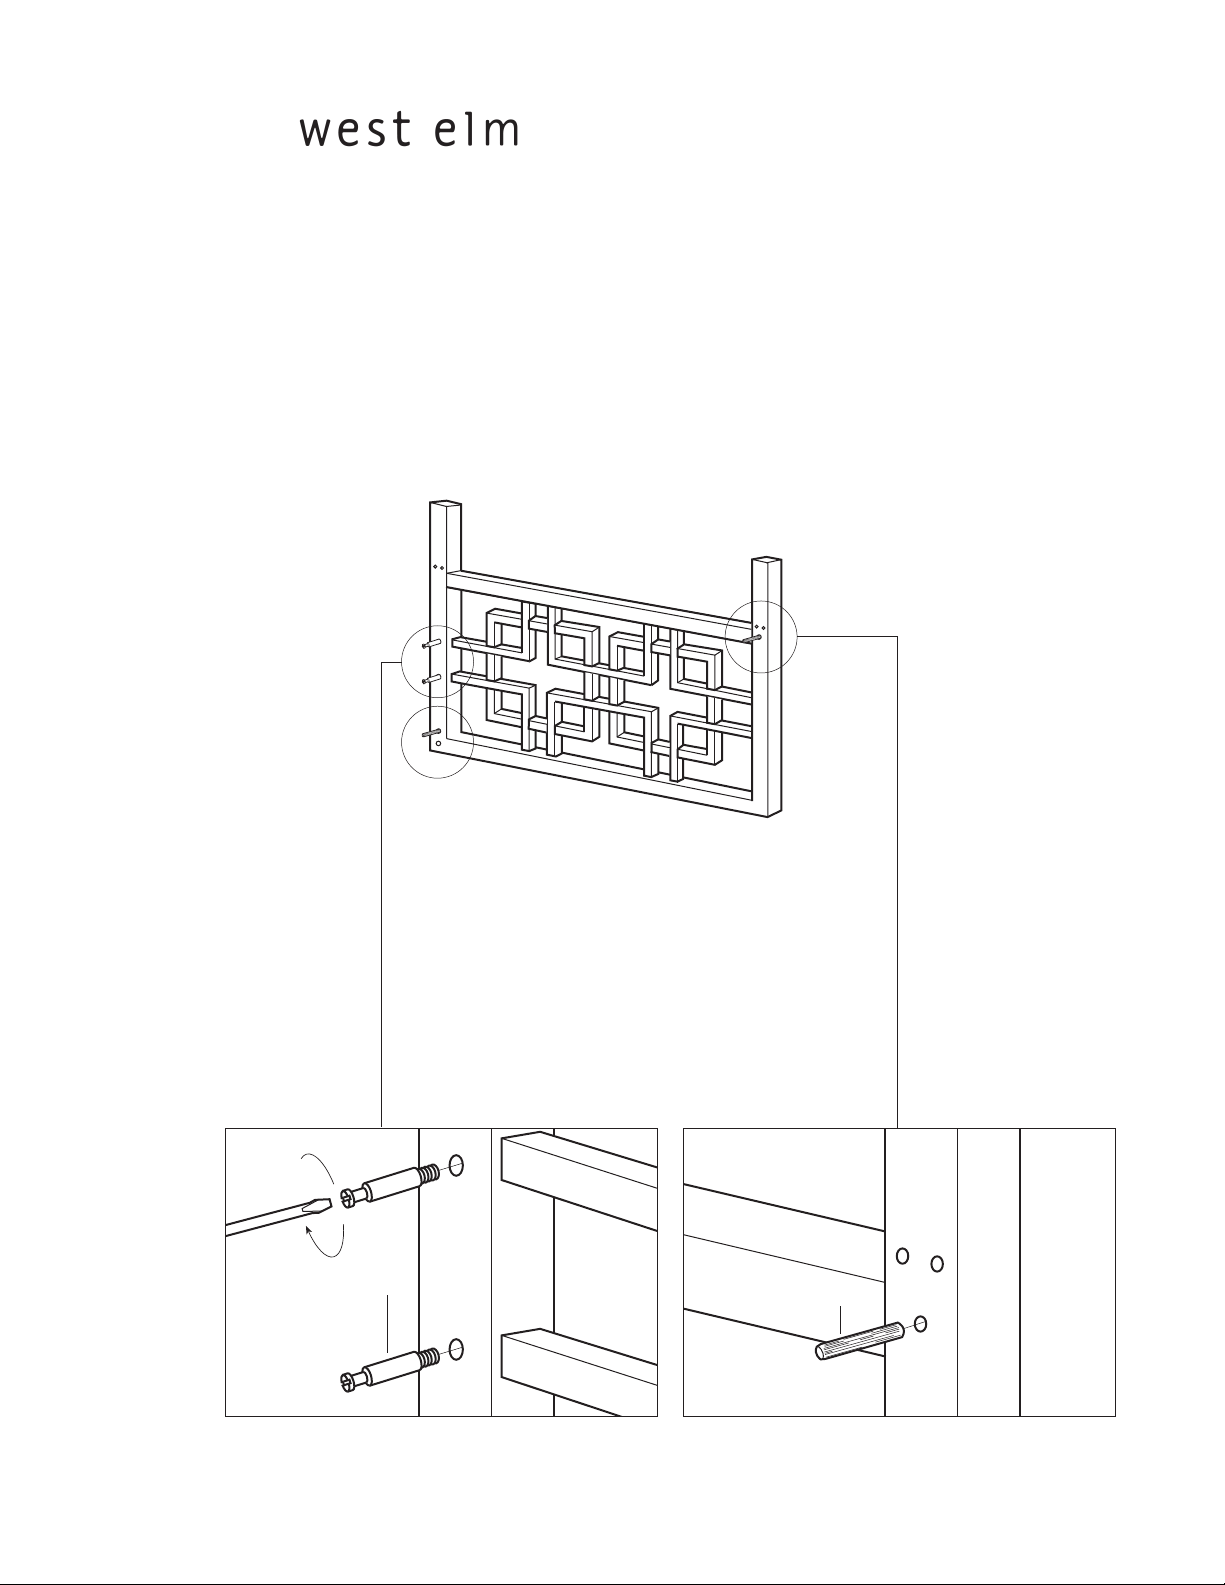
G
E
1. Turn left side panel upside down.
2. Insert wooden dowels (G) into the pre-drilled holes in side panel as shown.
3. Screw cams (E) into holes on side panel as shown. Tighten with a flat head screwdriver.
assembly instructions
2x
6204440 / 8234056 - 05/06
page 2 of 7
Page 3
: overlapping squares daybed
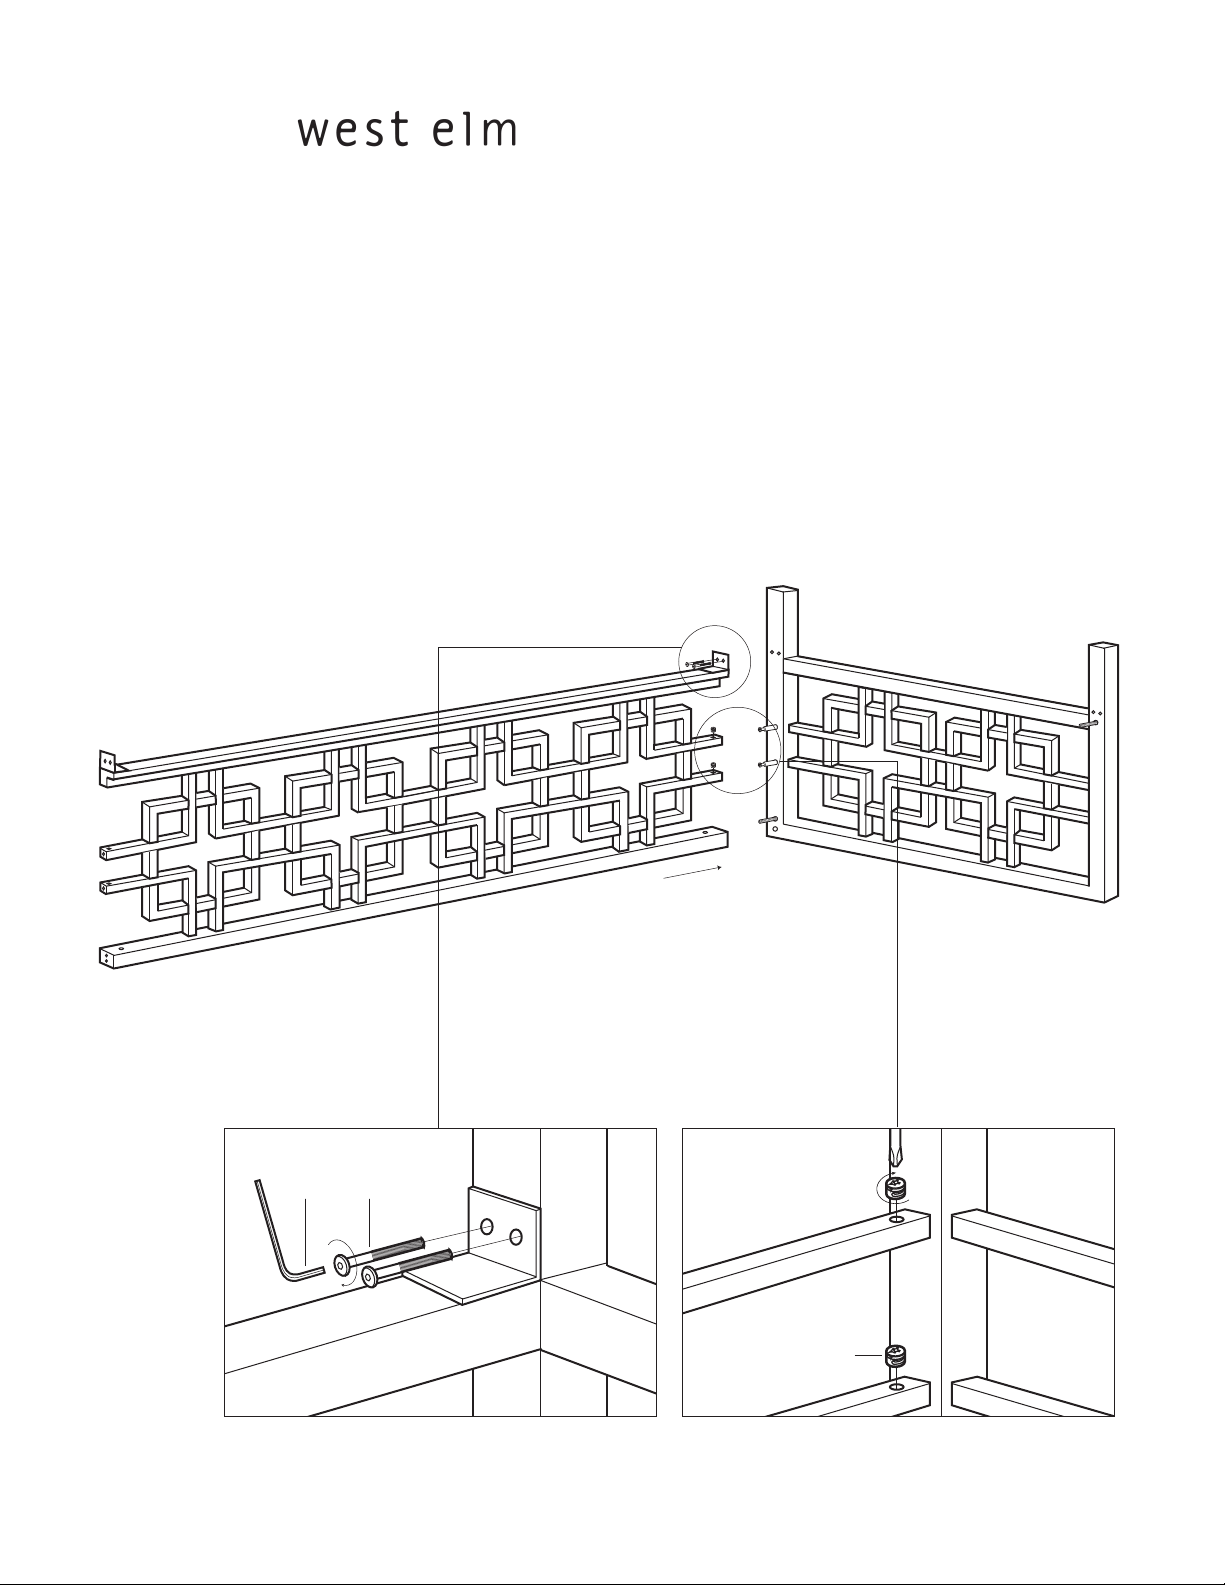
D C
2x
2x
F
assembly instructions
4. Turn back panel upside down as shown.
5. Align dowel and cams on side panel with holes on side of back panel. Attach back panel by inserting bolts (C) into
pre-drilled holes in metal bracket. Tighten with allen key (D).
6. Insert cam locks (F) into holes as shown. Tighten with a philip's head screwdriver.
LEFT SIDE PANEL
BACK PANEL
6204440 / 8234056 - 05/06
page 3 of 7
Page 4

: overlapping squares daybed
D C
2x
assembly instructions
7. Turn front rail upside down as shown.
8. Align dowel on side panel with hole on side of front rail. Attach front rail by inserting bolts (C) into pre-drilled holes in
metal bracket. Tighten with allen key (D).
FRONT RAIL
6204440 / 8234056 - 05/06
page 4 of 7
Page 5

: overlapping squares daybed
9. Attach right side panel repeating steps 2 through 8.
assembly instructions
6204440 / 8234056 - 05/06
page 5 of 7
Page 6

: overlapping squares daybed
2x
A
D
B
assembly instructions
10. With two people, carefully turn daybed upright.
11. Insert barrel nuts (B) into holes on bottom of top rail as shown. Hole in nut should be aligned with bolt hole. Insert
bolts (A) into holes on side panels. Use a screwdriver to hold barrel nut in place. Tighten bolts into barrel nuts with
allen key (D).
6204440 / 8234056 - 05/06
page 6 of 7
Page 7

: overlapping squares daybed
stopper
last slat
assembly instructions
12. Place bed slats on ledge on front rail and back panel. Stoppers on ledge hold last slats in place.
CARE INSTRUCTIONS:
Hardware may loosen over time. Periodically check that all connections are tight.
Wipe with a soft, dry cloth. To protect the finish, avoid the use of all chemicals
and household cleaners.
6204440 / 8234056 - 05/06
page 7 of 7
 Loading...