

Page 1
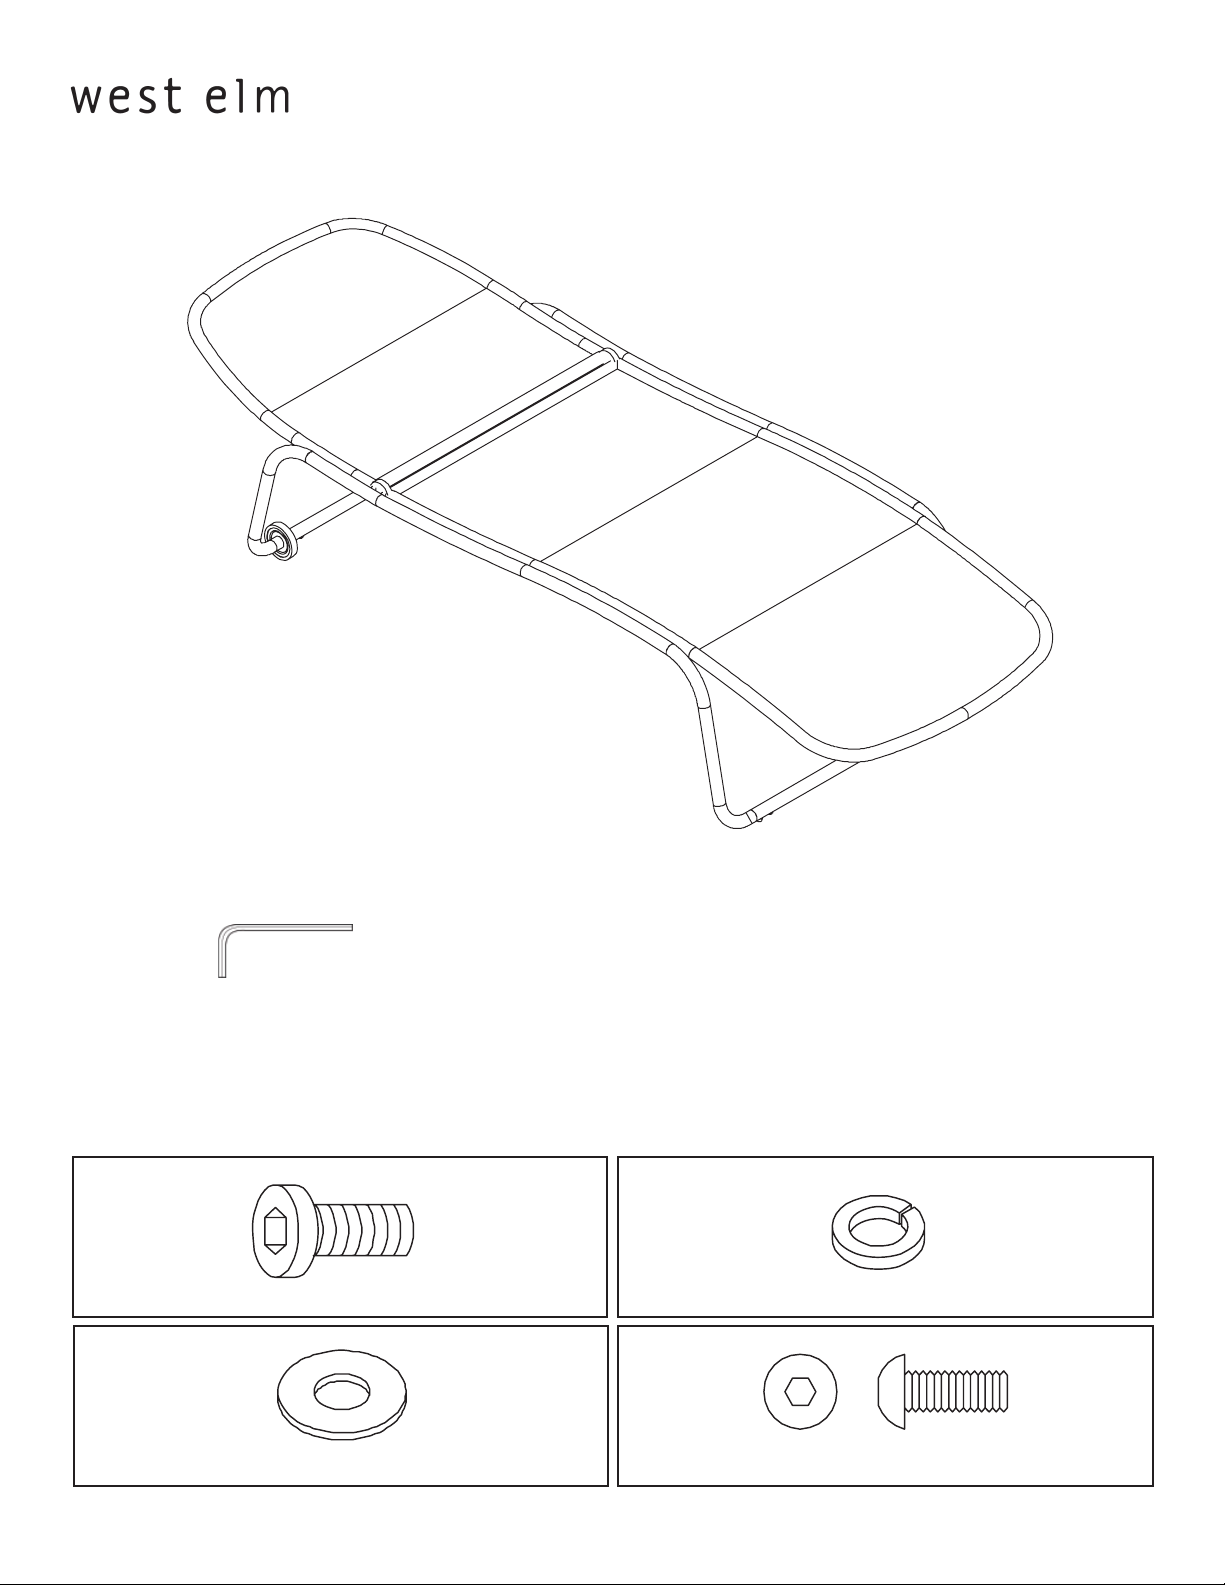
metal mesh lounger
assembly instructions
! Tools supplied:
! Do not throw away packaging materials until assembly is complete.
! Assemble this item on a soft surface, such as cardboard or carpet, to protect fi nish.
! Proper assembly of this item requires 2 people.
Hardware
AB
bolts 6mm x 19mm 16x lock washer 16x
C
fl at washer 16x
D
bolts M5 x 12mm 8x
Page 1 of 47853344 - 12/29/08
Page 2
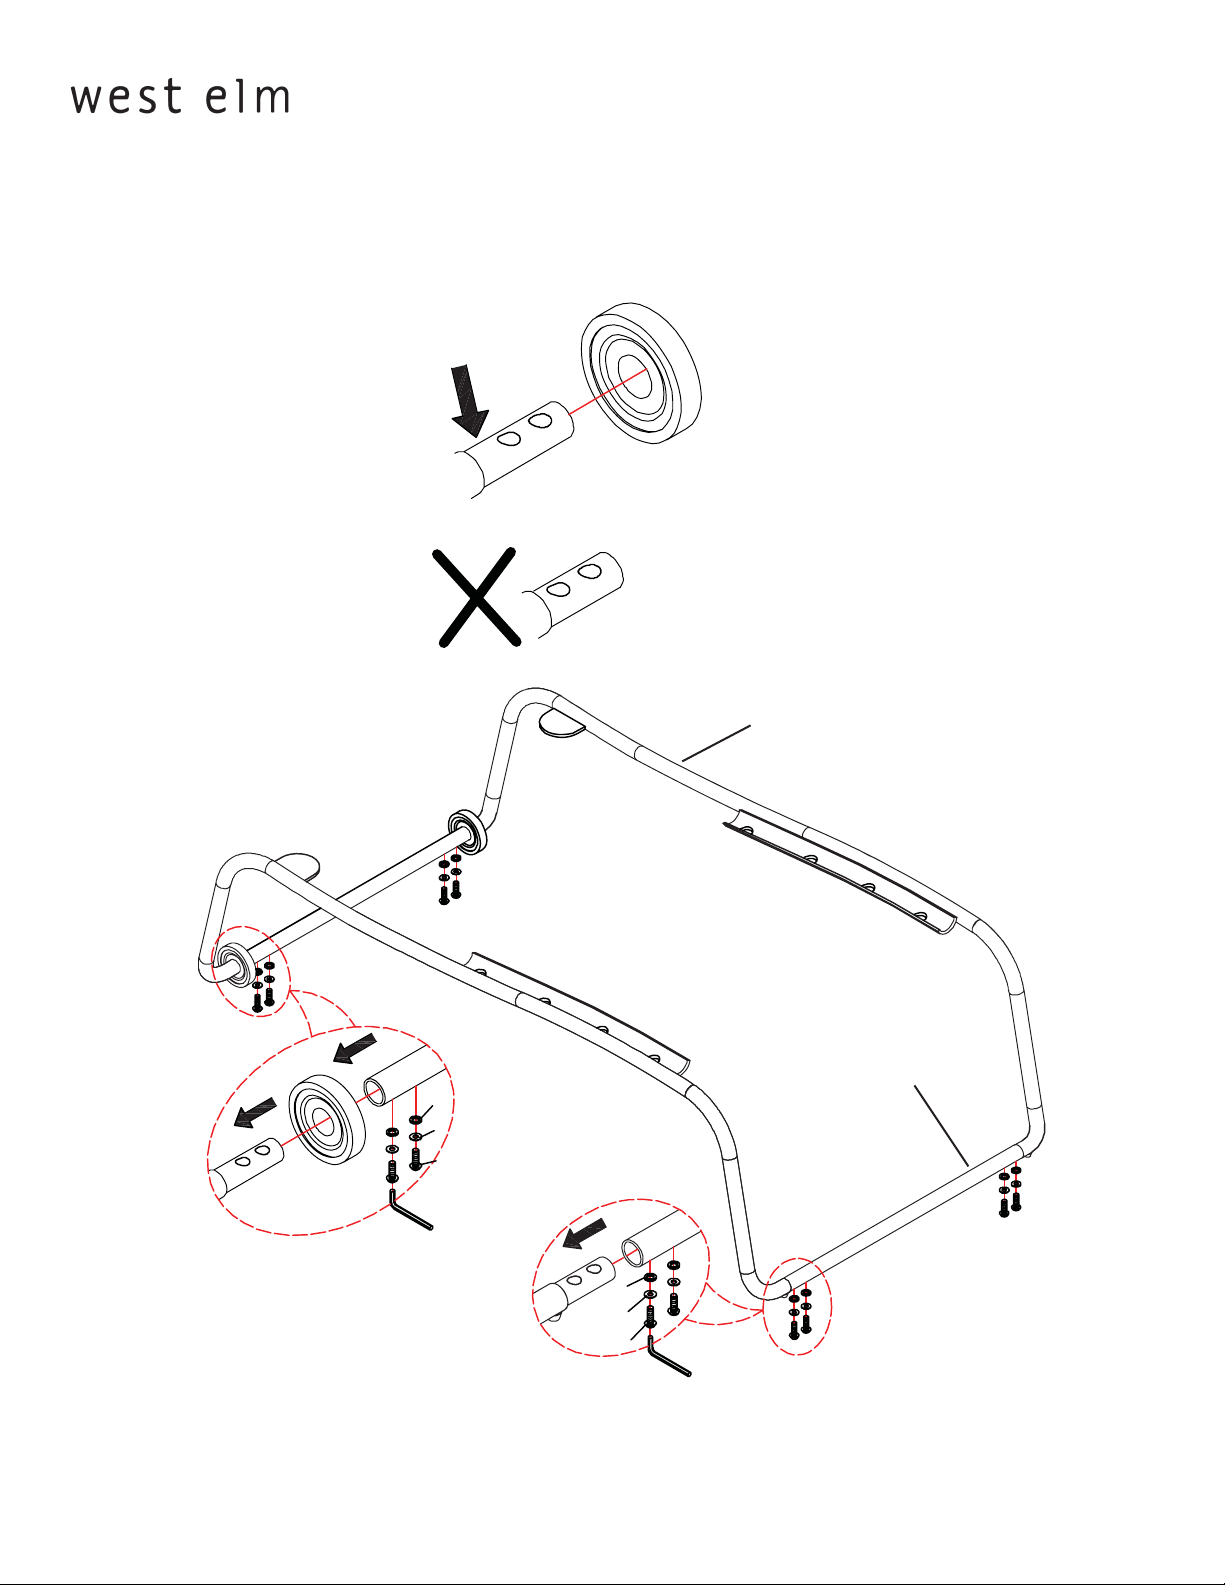
metal mesh lounger
assembly instructions
1. Align side frame rails with bottom cross rails as drawing shows. Slide the wheels over the side rail ends
with the longer shoulder section. Slide bottom cross rails onto side frame rails. Insert bolt (A), lock washer
(B), and at washer (C) into the holes in the bottom of the bottom cross rails. Tighten with supplied hex
key.
Long Shoulder
Side Frame Rails
Bottom Cross Rails
C
B
A
C
B
A
Page 2 of 47853344 - 12/29/08
Page 3

metal mesh lounger
assembly instructions
2. Align “clicker” with the end of the bottom section of the chair. Insert into tubing as shown in drawing.
Insert bolt (D) into holes and tighten with supplied hex key. Do not overtighten!
Bottom section
D
“Clicker”
3. Align bottom section onto assembled frame like the drawing shows. insert bolt (A), lock washer (B) & at
washer (C) into the bottom of the rails through into the bottom section of the lounger.
C
B
A
Page 3 of 47853344 - 12/29/08
Page 4

metal mesh lounger
assembly instructions
4. Align head section with the “Clicker” attached in step 2 as the drawing shows. insert bolt (D) into bottom
side and tighten with supplied hex key. Do not overtighten!
D
CARE INSTRUCTIONS
Hardware may loosen overtime. Periodically check that all connections are tight.
Wipe with a soft, dry cloth. To protect nish, avoid the use of chemicals and household cleaners.
Page 4 of 47853344 - 12/29/08
 Loading...