

Page 1
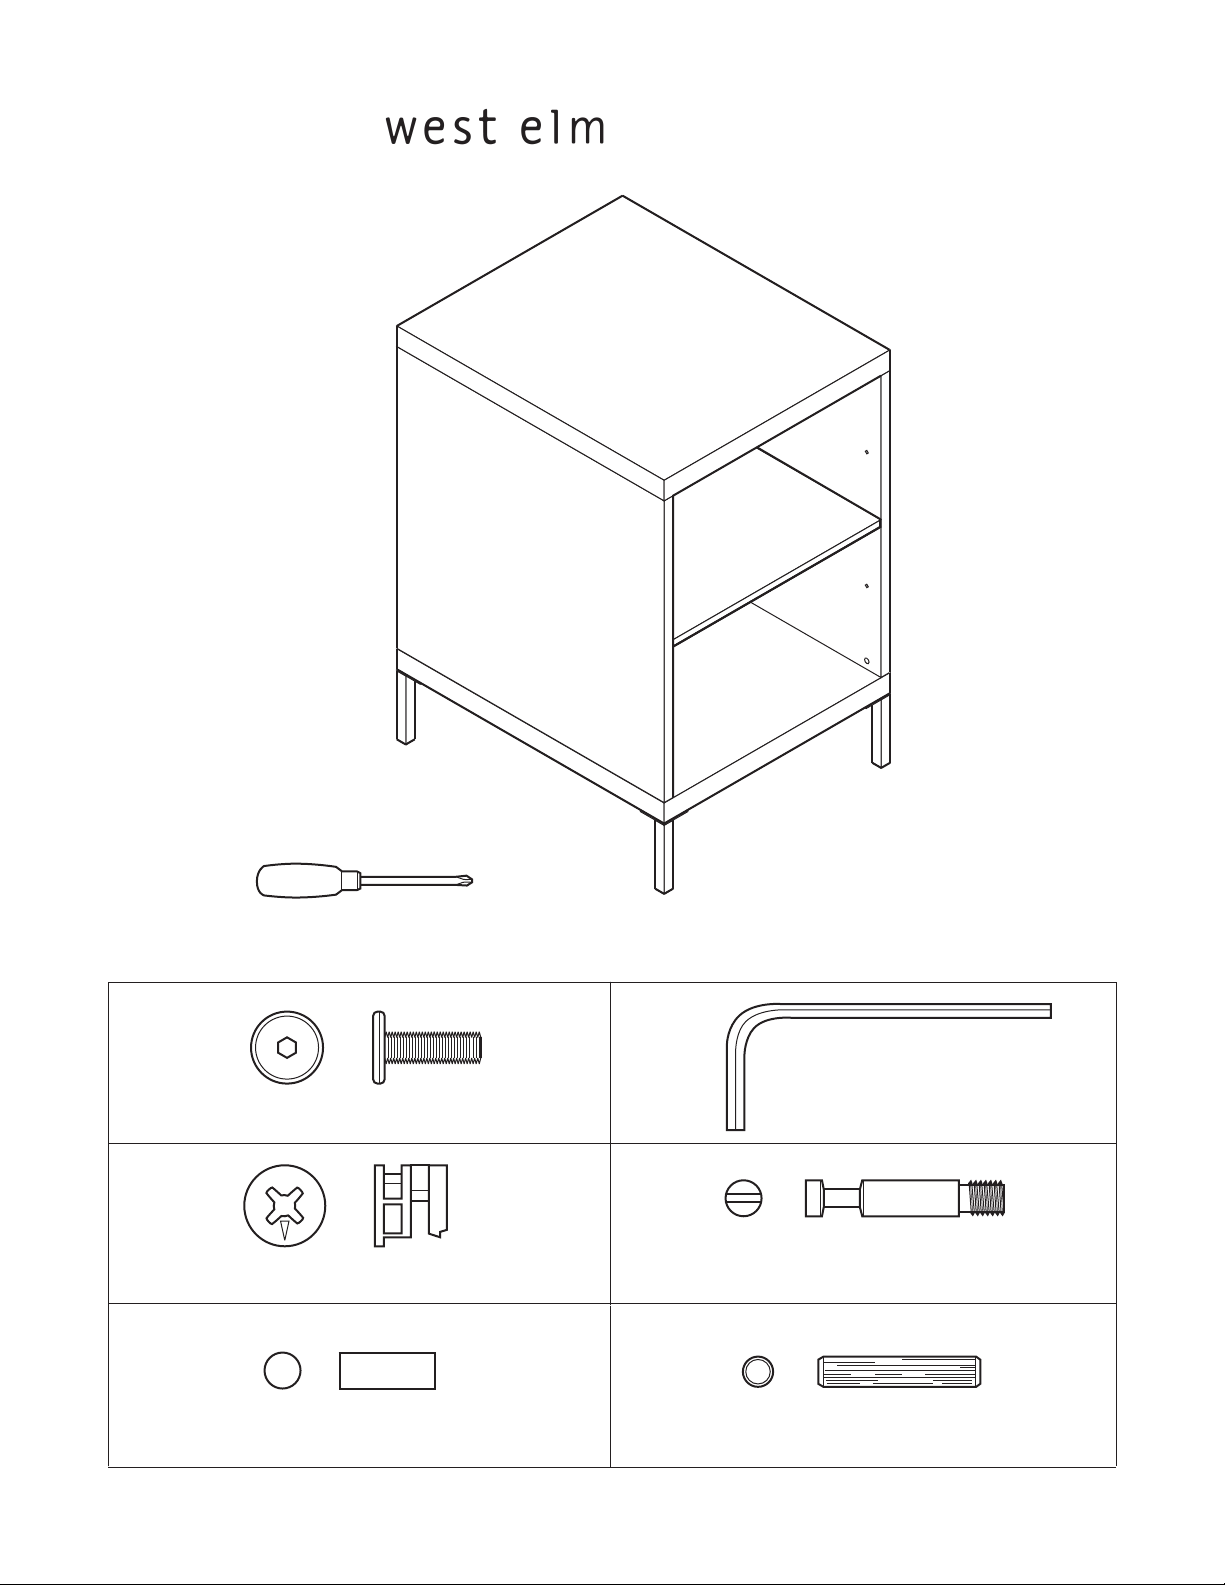
: metal leg cubby caddy
assembly instructions
! Tools required:
! Do not throw away packaging materials until assembly is complete.
! Assemble this item on a soft surface, such as cardboard or carpet, to protect the nish.
A
bolt: 1/4" dia x 3/4" 12x
C
cam lock 12x cam 12x
E
shelf pin 4x wood dowel 8x
B
D
F
allen key 1x
7241029 - 01.29.09
page 1 of 5
Page 2
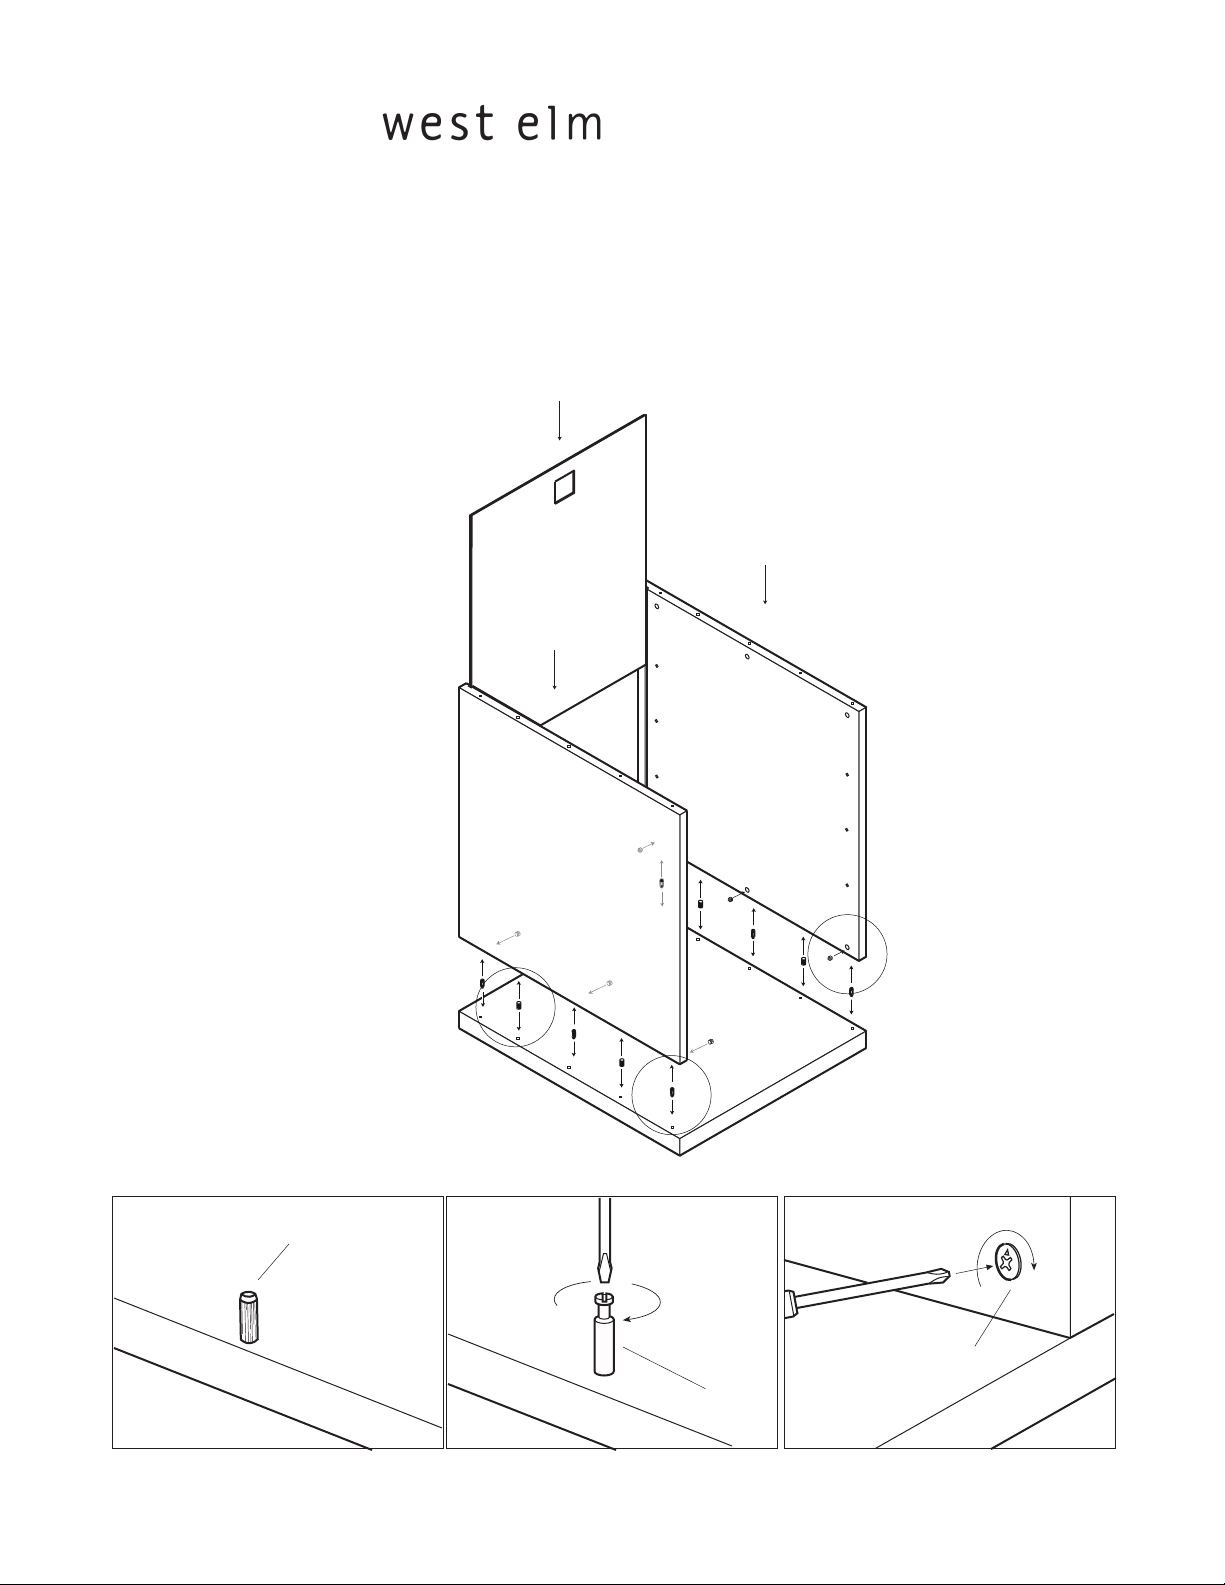
: metal leg cubby caddy
assembly instructions
1. Assembly begins with the cabinet upside down. Insert wooden dowels (F) into pre-drilled holes in the bottom-side of
the top panel as shown.
2. Insert cams (D) into pre-drilled holes in the bottom-side of the top panel as shown. Tighten with Phillips-head screw
driver.
3. Set side panels into place over cams and wooden dowels, and slide back panel into channels in side panels as shown.
Insert cam locks (C) into pre-drilled holes in the side panels as shown. Tighten with Phillips-head screw driver.
6x
7241029 - 1.29.09
F
6x
6x
C
D
page 2 of 5
Page 3

: metal leg cubby caddy
assembly instructions
4. Insert wooden dowels (F) into pre-drilled holes in top side of the bottom panel as shown.
5. Insert cams (D) into pre-drilled holes in top side of the bottom panel as shown. Tighten with Phillips-head screw driver.
6. Set bottom panel into place by aligning dowels and cams in bottom panel with pre-drilled holes in side panels and
inserting as shown. Insert cam locks (C) into pre-drilled holes in the side panels as shown. Tighten with Phillips-head
screw driver.
6x
7241029 - 01.29.09
F
6x
6x
C
D
page 3 of 5
Page 4
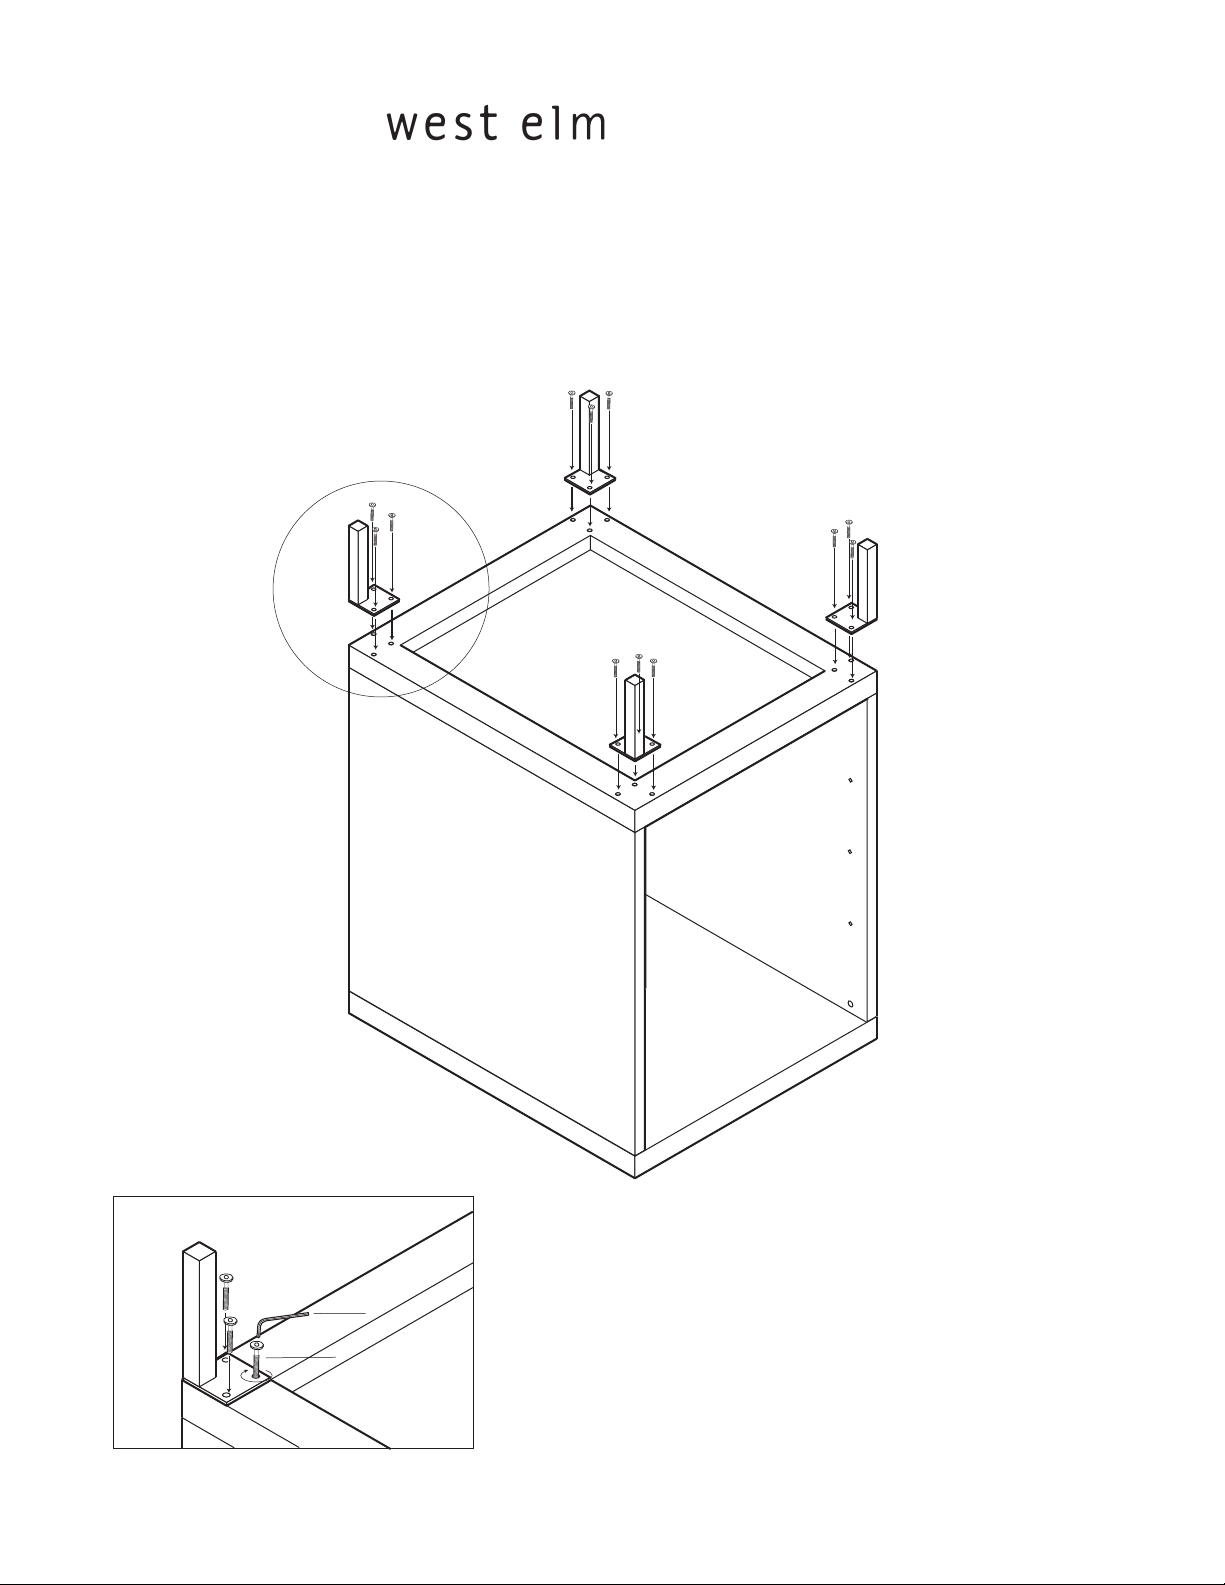
: metal leg cubby caddy
assembly instructions
7. Align legs with pre-drilled holes in cabinet bottom as shown. Insert bolt (A) through holes in leg mounting plates, into
pre-drilled holes in cabinet bottom, and tighten using allen key (B).
12x
7241029 - 01.29.09
B
A
page 4 of 5
Page 5

: metal leg cubby caddy
assembly instructions
8. Insert shelf pins at desired heights into predrilled holes along the sides of the vertical panels. Take care to align the
pins across the span as these are what will support the shelves.
9. Place the shelves on top of the shelf pins. There are short channels in the bottom of the shelves to accept the pins.
CARE INSTRUCTION
Hardware may loosen over time. Periodically check that all connections are tight.
Wipe with a soft, dry cloth. To protect nish, avoid the use of chemicals and household cleaners.
7241029 - 01.29.09
page 5 of 5
 Loading...