

Page 1
: metal bedframe
assembly instructions
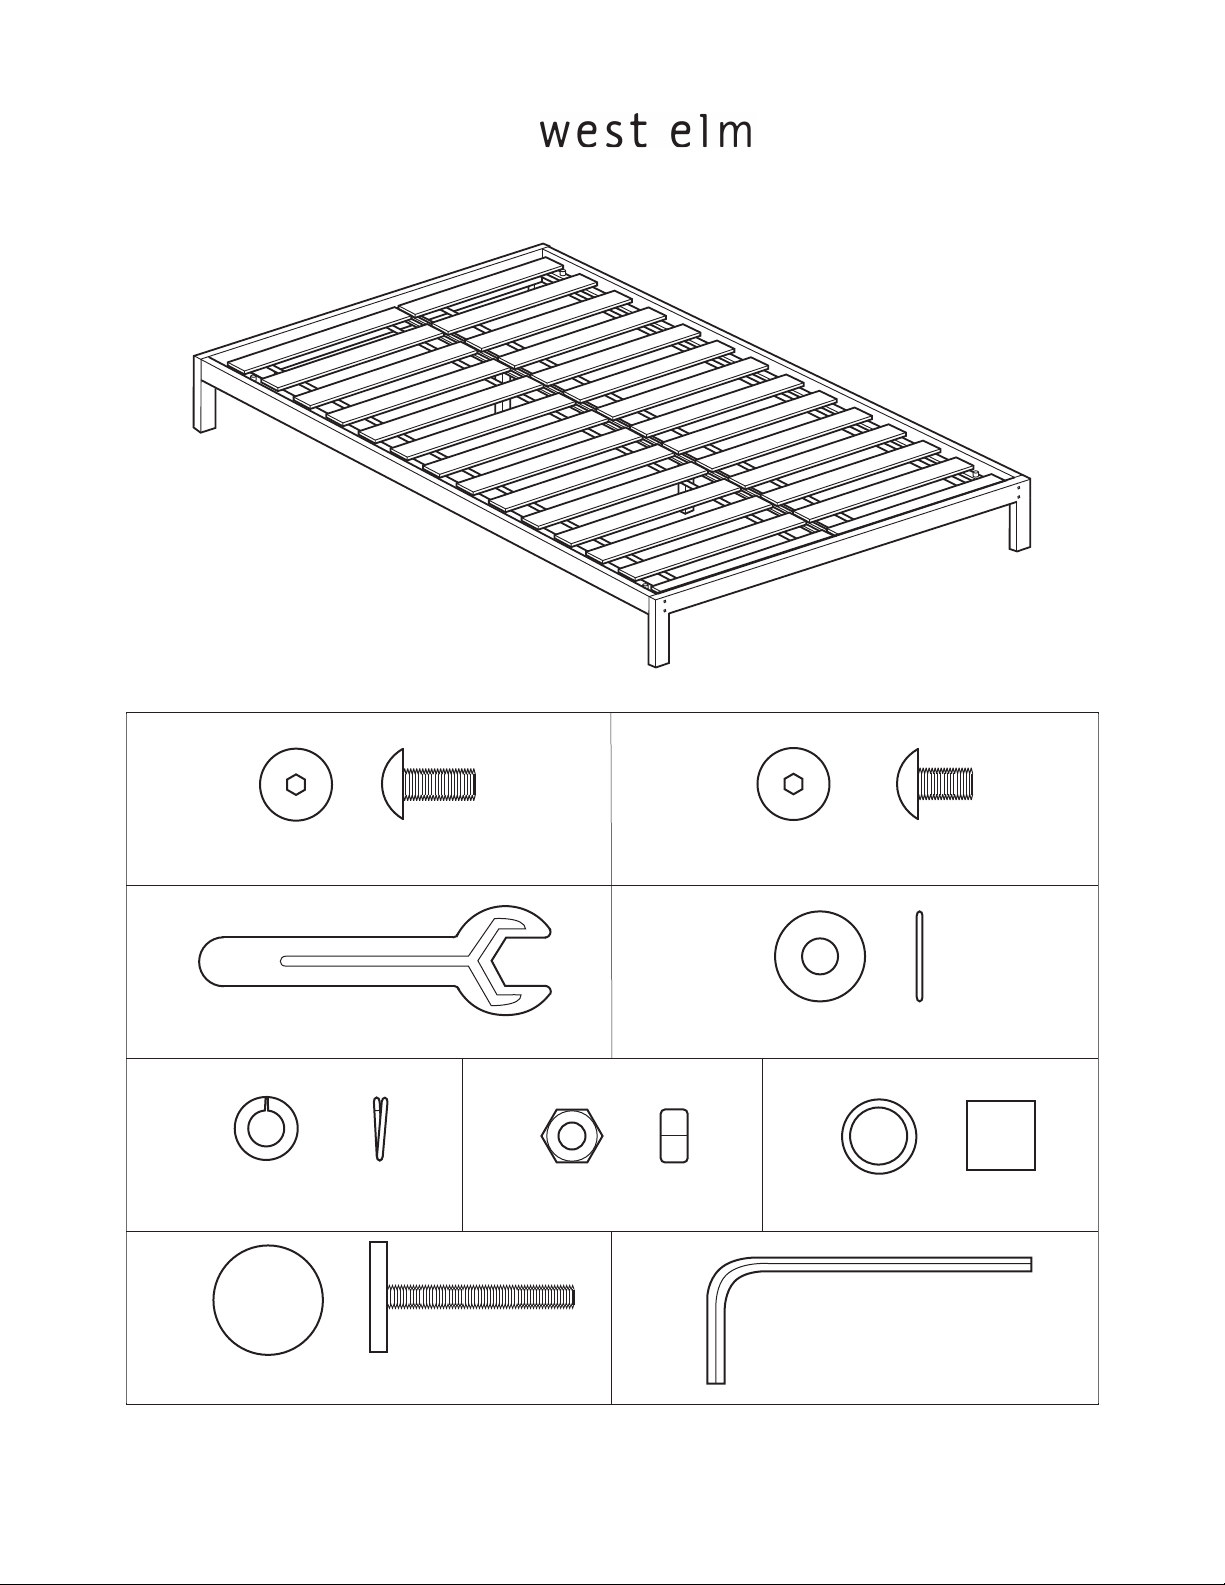
A
bolt: 1/4”DIA x 3/4”
24x
B
C D
wrench
1x
E
lock washer
28x
nut
4x
H
bolt: 1/4”DIA x 3/8”
metal washer
4x
32x
GF
stopper
8x
I
foot
6298749/6298756/7001761/7001696/6298566/6298699/7001399/7001621/7322423- 07/05
2x
allen key
1x
page 1 of 6
Page 2
: metal bedframe
assembly instructions
! Do not throw away packaging materials until
assembly is complete.
! Assemble this item on a soft surface, such as
cardboard or carpet, to protect the finish.
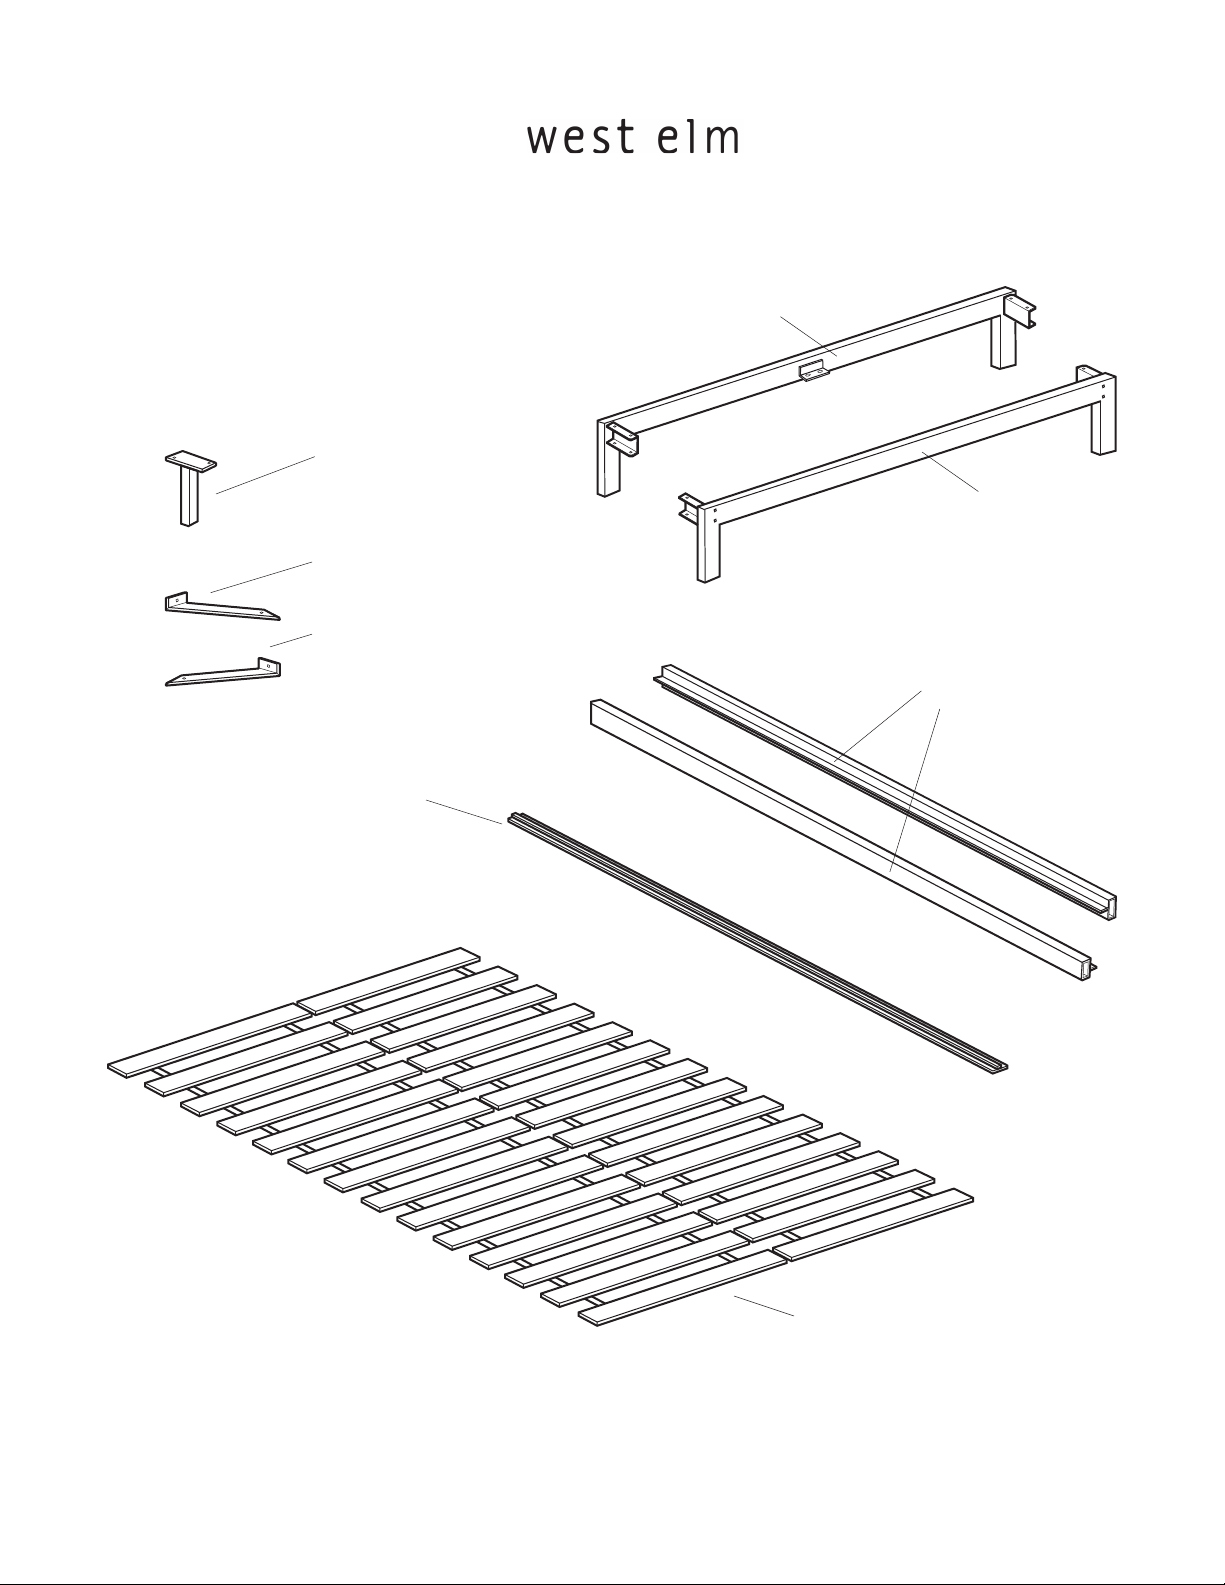
center leg (x2)
right corner bracket (x2)
left corner bracket (x2)
midbeam
footboard
headboard
side rails (2x)
6298749/6298756/7001761/7001696/6298566/6298699/7001399/7001621/7322423- 07/05
bedslats
page 2 of 6
Page 3

: metal bedframe
assembly instructions
1. Insert the connectors on the footboard into the side rails. Insert metal washer (D) and lock
washer (E) with bolt (A). Tighten with allen key (I).
2. Repeat step 1 with the headboard.
8x
D
E
A
I
6298749/6298756/7001761/7001696/6298566/6298699/7001399/7001621/7322423- 07/05
page 3 of 6
Page 4

: metal bedframe
assembly instructions
3. Attach the center legs to the midbeam as shown with bolt (A), metal washers (D) locking washer (E), and
nut (F) .
4. Attach the midbeam to the ledges on the inside center of the headboard and footboard with bolt (B), metal
washer (D) and locking washer (E).
Tighten with allen key (I) and wrench (C).
Tighten with allen key (I). Adjust feet (H) on center legs as needed.
4x
6298749/6298756/7001761/7001696/6298566/6298699/7001399/7001621/7322423- 07/05
A
E
D
D
F C
H
4x
I
D
E
B
page 4 of 6
Page 5
: metal bedframe
assembly instructions
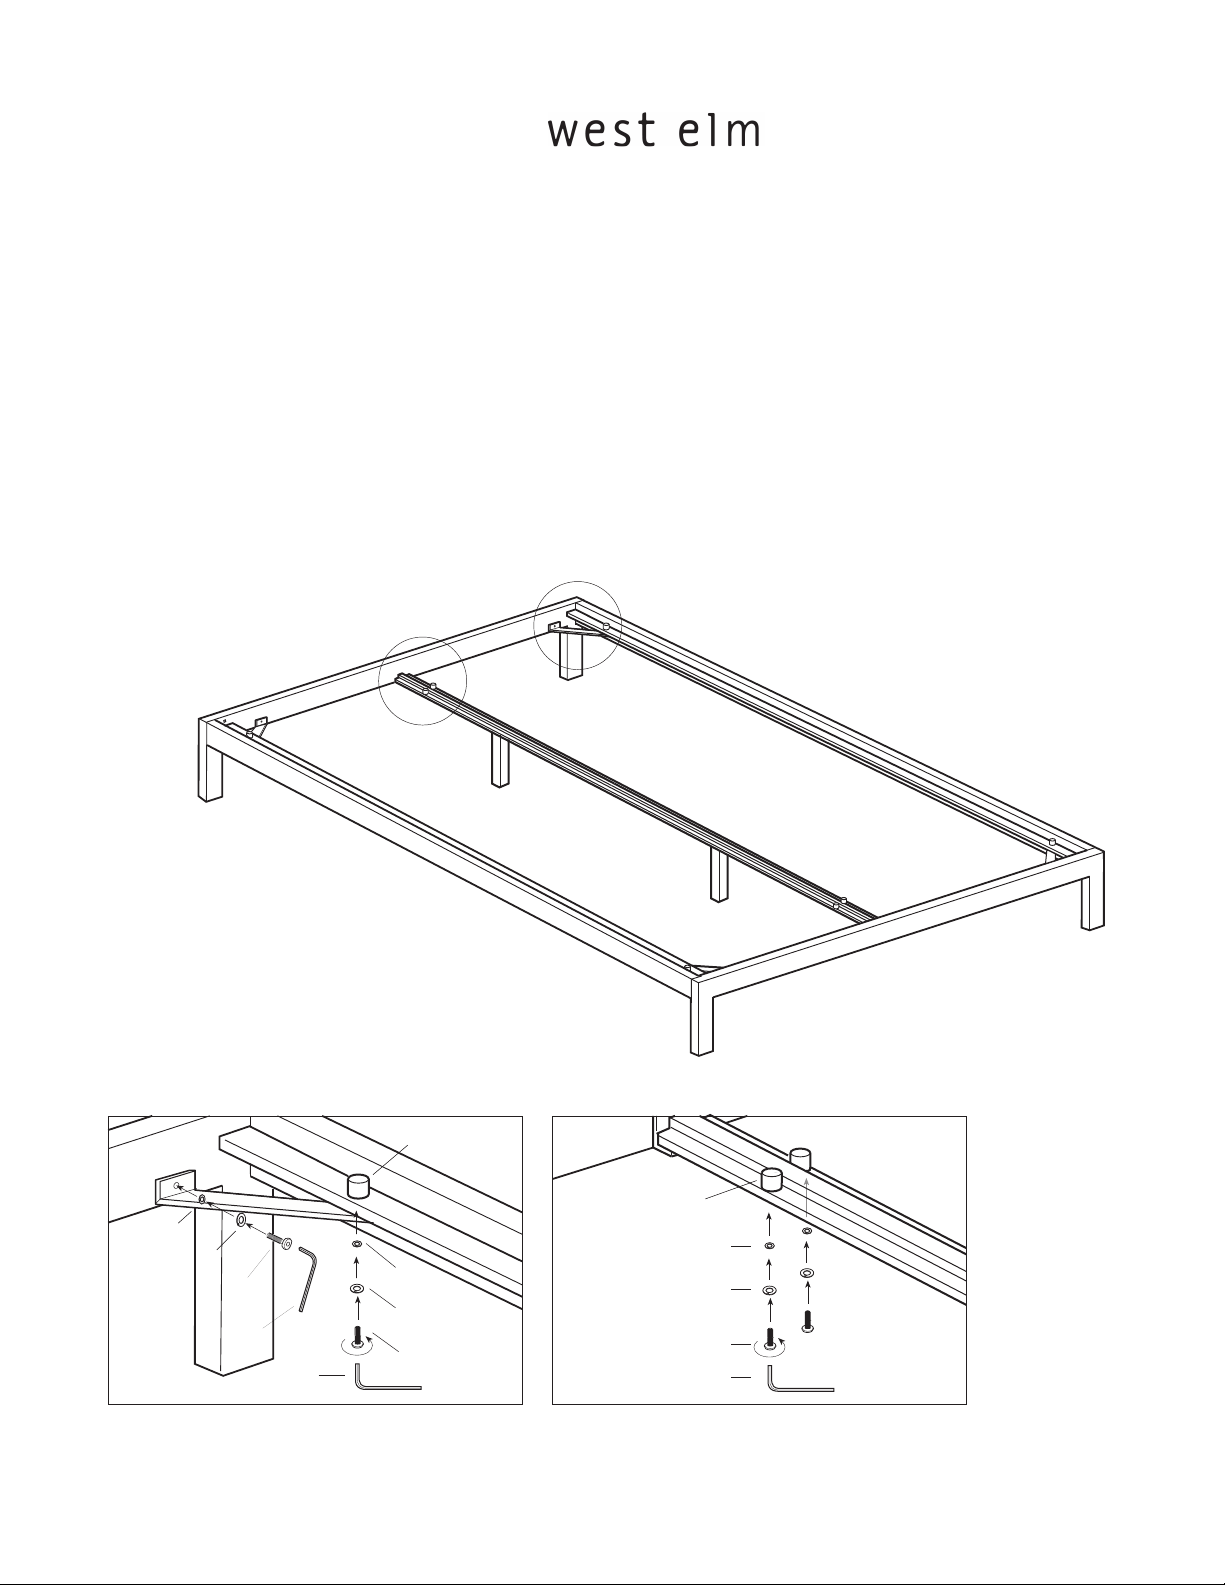
5. Attach corner brackets as shown. Insert metal washer (D) and lock washer (E) with bolt (A) through
side rail and into stopper (G). Tighten with allen key (I).
6. Next, insert metal washer (D) and lock washer (E) with bolt (A) into end-board.
allen key (I).
7. Repeat steps 5 and 6 at each corner.
8. Attach stoppers (G) to top side of midbeam as shown. Insert metal washer (D) and lock washer (E)
with bolt (A) through side rail and into stopper (G).
Tighten with allen key (I).
Tighten with
GG
4x
GG
D
E
D
A
D
E
E
I
A
I
6298749/6298756/7001761/7001696/6298566/6298699/7001399/7001621/7322423- 07/05
A
I
4x
page 5 of 6
Page 6

: metal bedframe
assembly instructions
9. Install slats. Position the bedslats as shown. The stoppers at each end of the bed prevent the bedslats
from moving.
CARE INSTRUCTIONS.
Hardware may loosen over time. Periodically check that all
connections are tight.
Headboards are designed for placement against a wall.
Moisten a clean, soft cloth with undiluted white or cider
vinegar and wipe the surface clean.
stains, dampen a clean, soft cloth with club soda and rub
the surface.
Do not use harsh abrasives or steel wool on stainless steel,
as they will create a network of tiny scratches on the surface.
As with other stainless steel products, such as cookware
and tools, some scratches are inevitable and should be
regarded as part of the natural patina.
6298749/6298756/7001761/7001696/6298566/6298699/7001399/7001621/7322423- 07/05
To remove streaks or
page 6 of 6
 Loading...