

Page 1

long hanging capiz pendant lamp
mounting instructions
! Tools required:
! BEFORE INSTALLATION:
Please note that these instructions are provided for your safety. It is very
important that they are read carefully and completely before beginning
the installation of the lamp. We strongly suggest that a qualied
electrician install all direct-wired xtures.
! Assembly requires two people.
! This xture is rated for two MAXIMUM 60-WATT type A bulbs. To
prevent the risk of re, do not exceed recommended wattage.
! Do not throw away packaging materials until assembly is complete.
BA
C
8121089 - 05/06
wire cap 3x
mounting screw 2x
SHORT screw 5x
Page 1 of 2
Page 2
long hanging capiz pendant lamp
1. SHUT OFF THE MAIN ELECTRICAL SUPPLY FROM THE MAIN
FUSE BOX/CIRCUIT BREAKER.
2. Carefully unpack all fixture parts and hardware and lay out on a clear
workspace.
3. Fasten the mounting plate (a) into ceiling using 2 mounting screws (B).
Be sure to fasten mounting plate into studs or a secured junction box.
4. Screw together poles (c), metal expander (d), and canopy plate (b).
Tighten by hand.
IF USING PORTABLE LAMP:
5. Tuck the wire connections into the ceiling junction box. Lift the canopy
plate (b) over the mounting plate (a) and fasten together using 2 short
screws (C) as shown. Tighten screws with a phillips screwdriver.
6. With the help of another person, lift shade canopy (f) up to the spider
(e). Insert 3 short screws (C) through spider and fasten into threaded
holes in shade canopy (f). Tighten screws with a phillips screwdriver.
mounting instructions
a
B
A
C
b
c
c
C
e
IF USING FIXTURE:
7. Cut off plug and switch near the canopy.
8. Carefully inspect the chandelier’s fixture wires. The neutral fixture wire
is white or marked “N”. The hot fixture wire is black or marked “L”. The
yellow-green or bare wire is the ground wire.
9. Attach the ground wire from the fixture to the ground junction box wire
from the outlet (usually green or bare wire). Fasten each together with
a plastic wire cap (A) and wrap the connection with electrical tape. Be
sure that no wire strands are exposed. IT IS IMPERATIVE THAT THE
OUTLET BOX IN YOUR HOME BE PROPERLY GROUNDED.
10. Connect the neutral fixture wire to the neutral junction box wire (white).
Fasten each together with a plastic wire connector (A) and wrap the
connection with electrical tape. Be sure no wire strands are exposed.
11. Connect the hot fixture wire to the hot junction box wire (black).
Fasten each together with a plastic wire connector (A) and wrap the
connection with electrical tape. Be sure no wire strands are exposed.
DO NOT REVERSE THE HOT AND NEUTRAL CONNECTIONS OR
SAFETY WILL BE COMPROMISED.
12. Follow the rest of the assembly as the portable lamp.
d
f
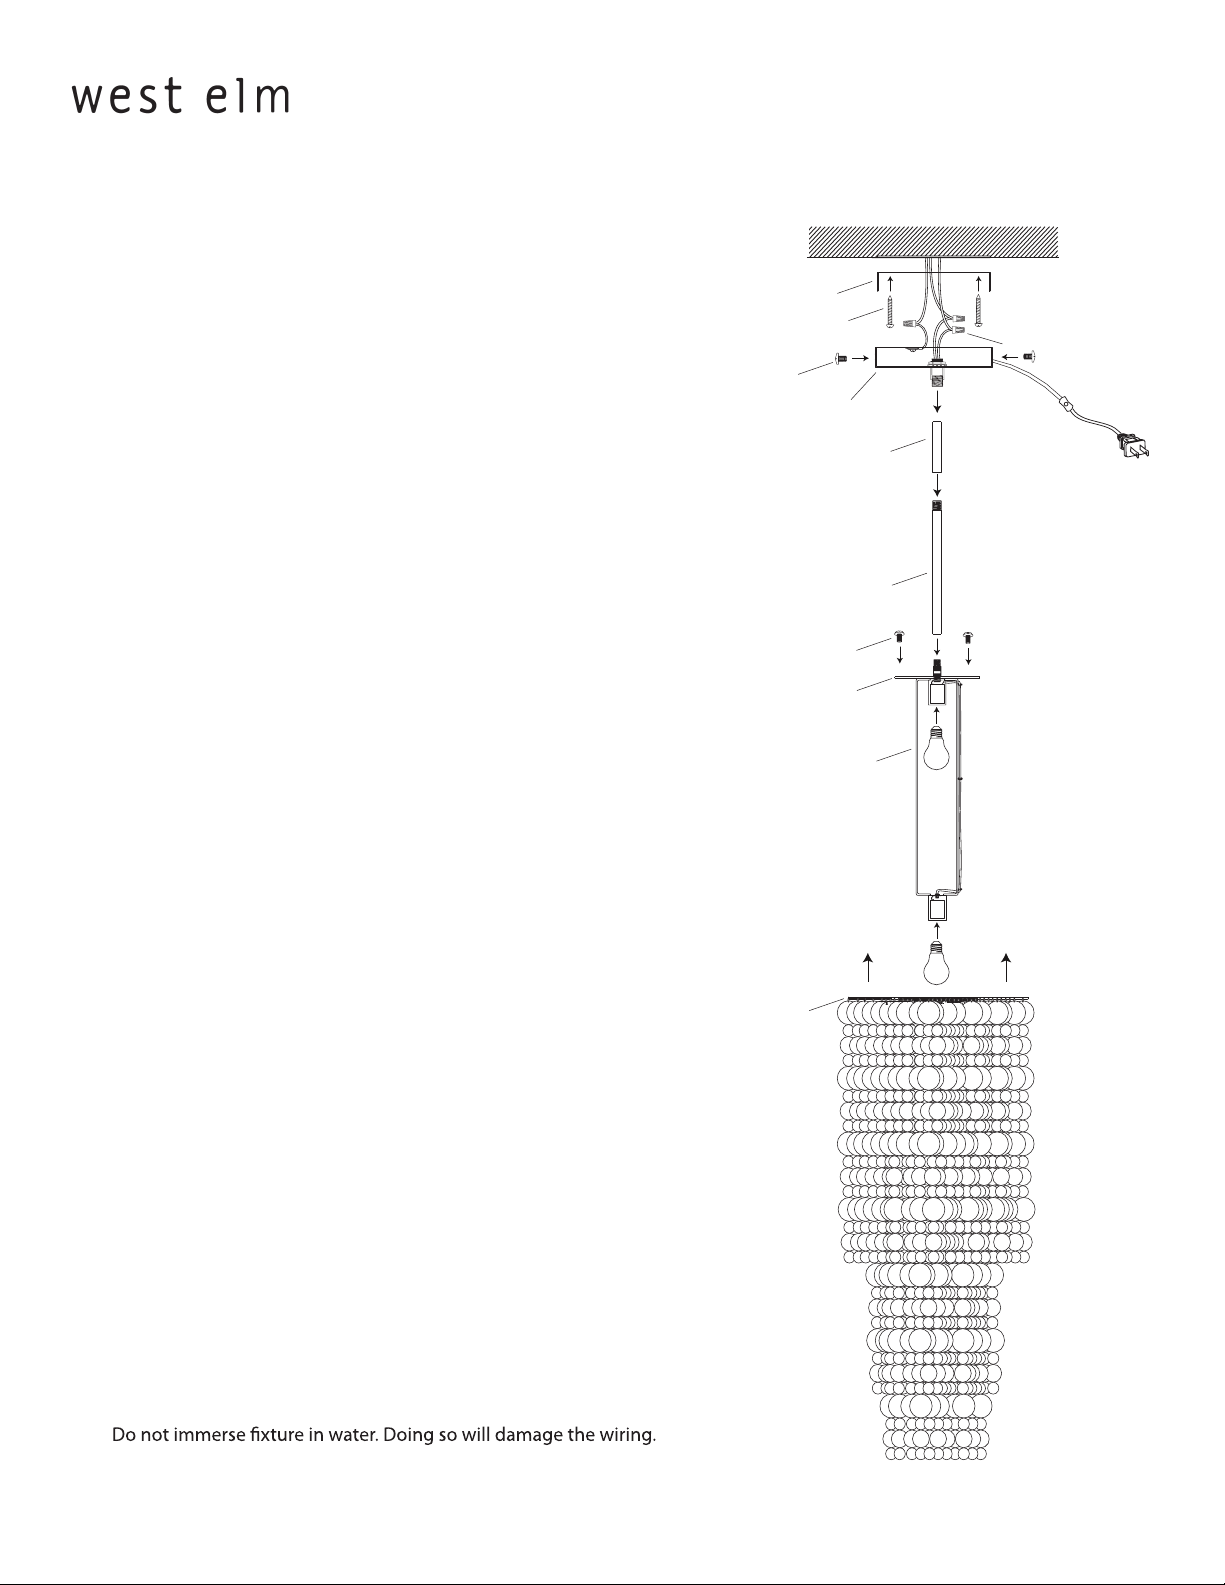
CARE INSTRUCTIONS
To clean, wipe with a soft dry cloth only.
Do not use abrasive cleaners
Page 2 of 28121089 - 05/06
 Loading...