

Page 1
hammered copper fl oor mirror
mounting instructions
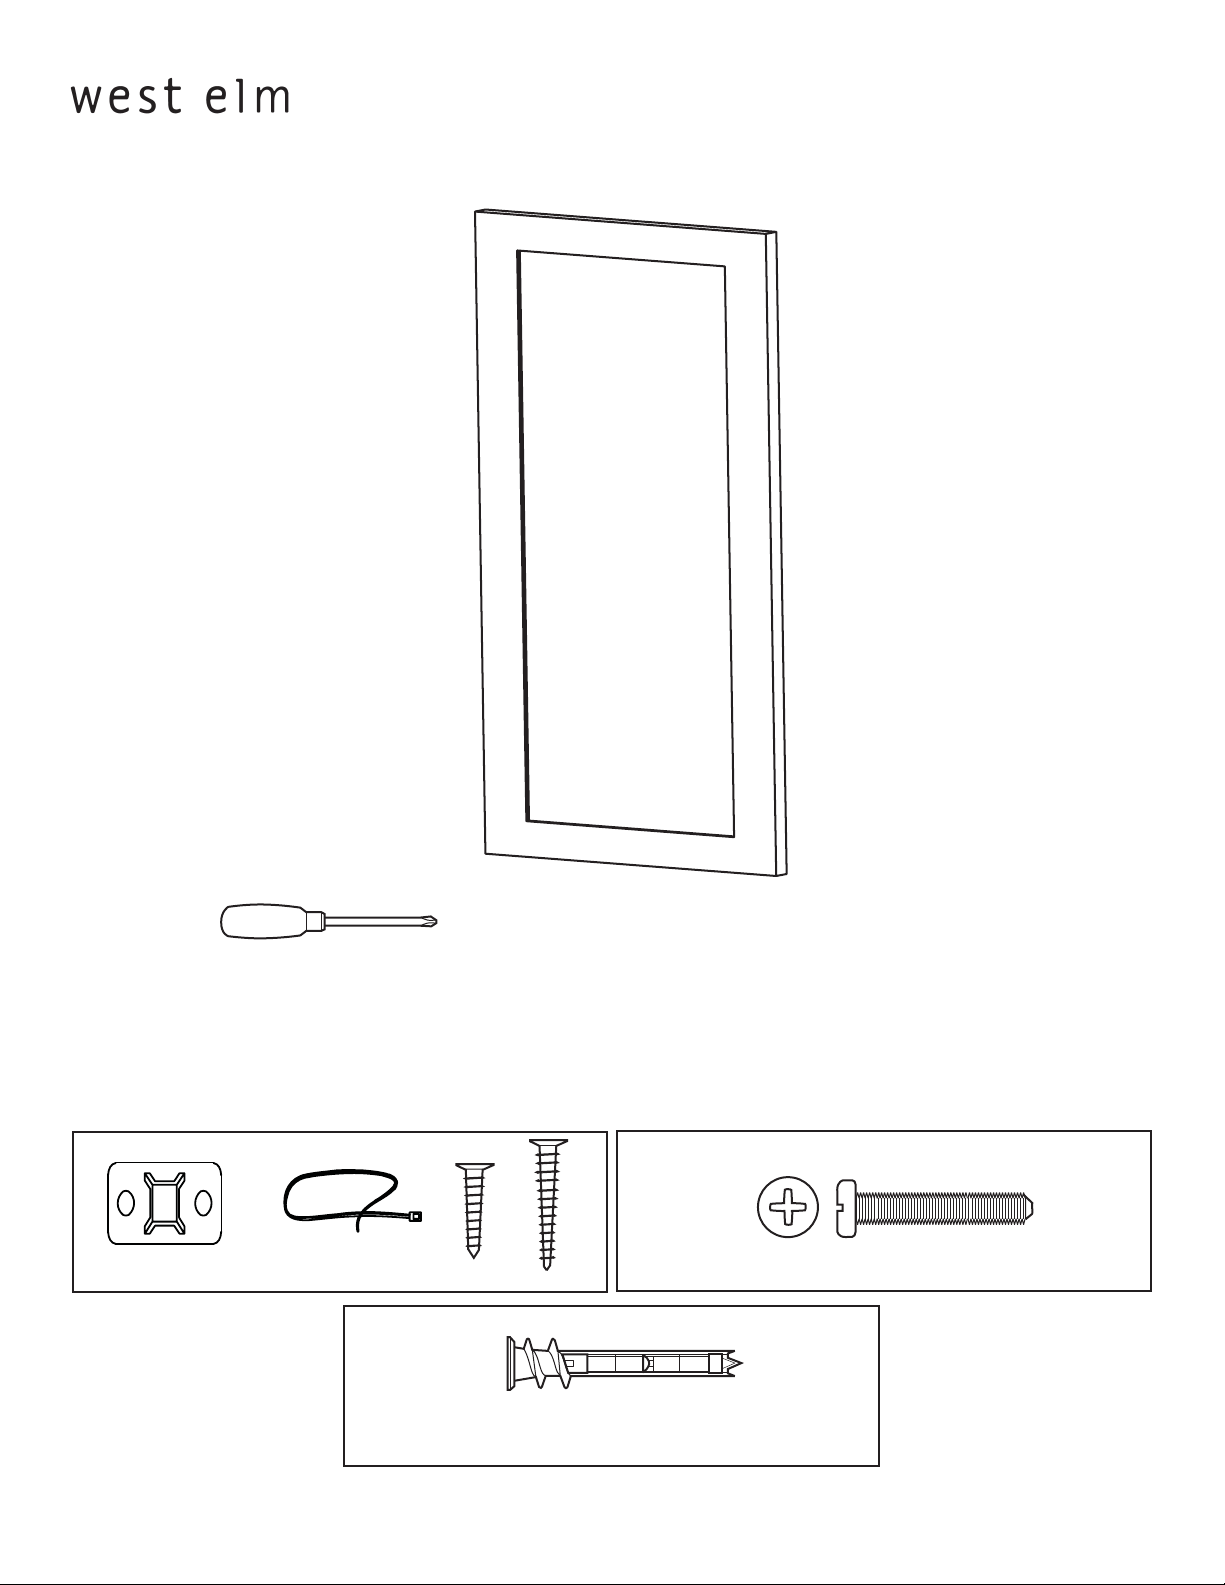
! Tools required:
! Do not throw away packaging materials until assembly is complete.
! Assemble this item on a soft surface, such as cardboard or carpet, to protect fi nish.
! Proper assembly of this item requires 2 people.
Parts:
A
Mounting Plate 2x
Anti Tip Kit
Nylon Strap 1x
C
Small Screw 3x
B
Large Screw 2x
Drywall Toggle Anchor 2x
Long Screw 2x
Page 1 of 35568720-02/04/08
Page 2
hammered copper fl oor mirror
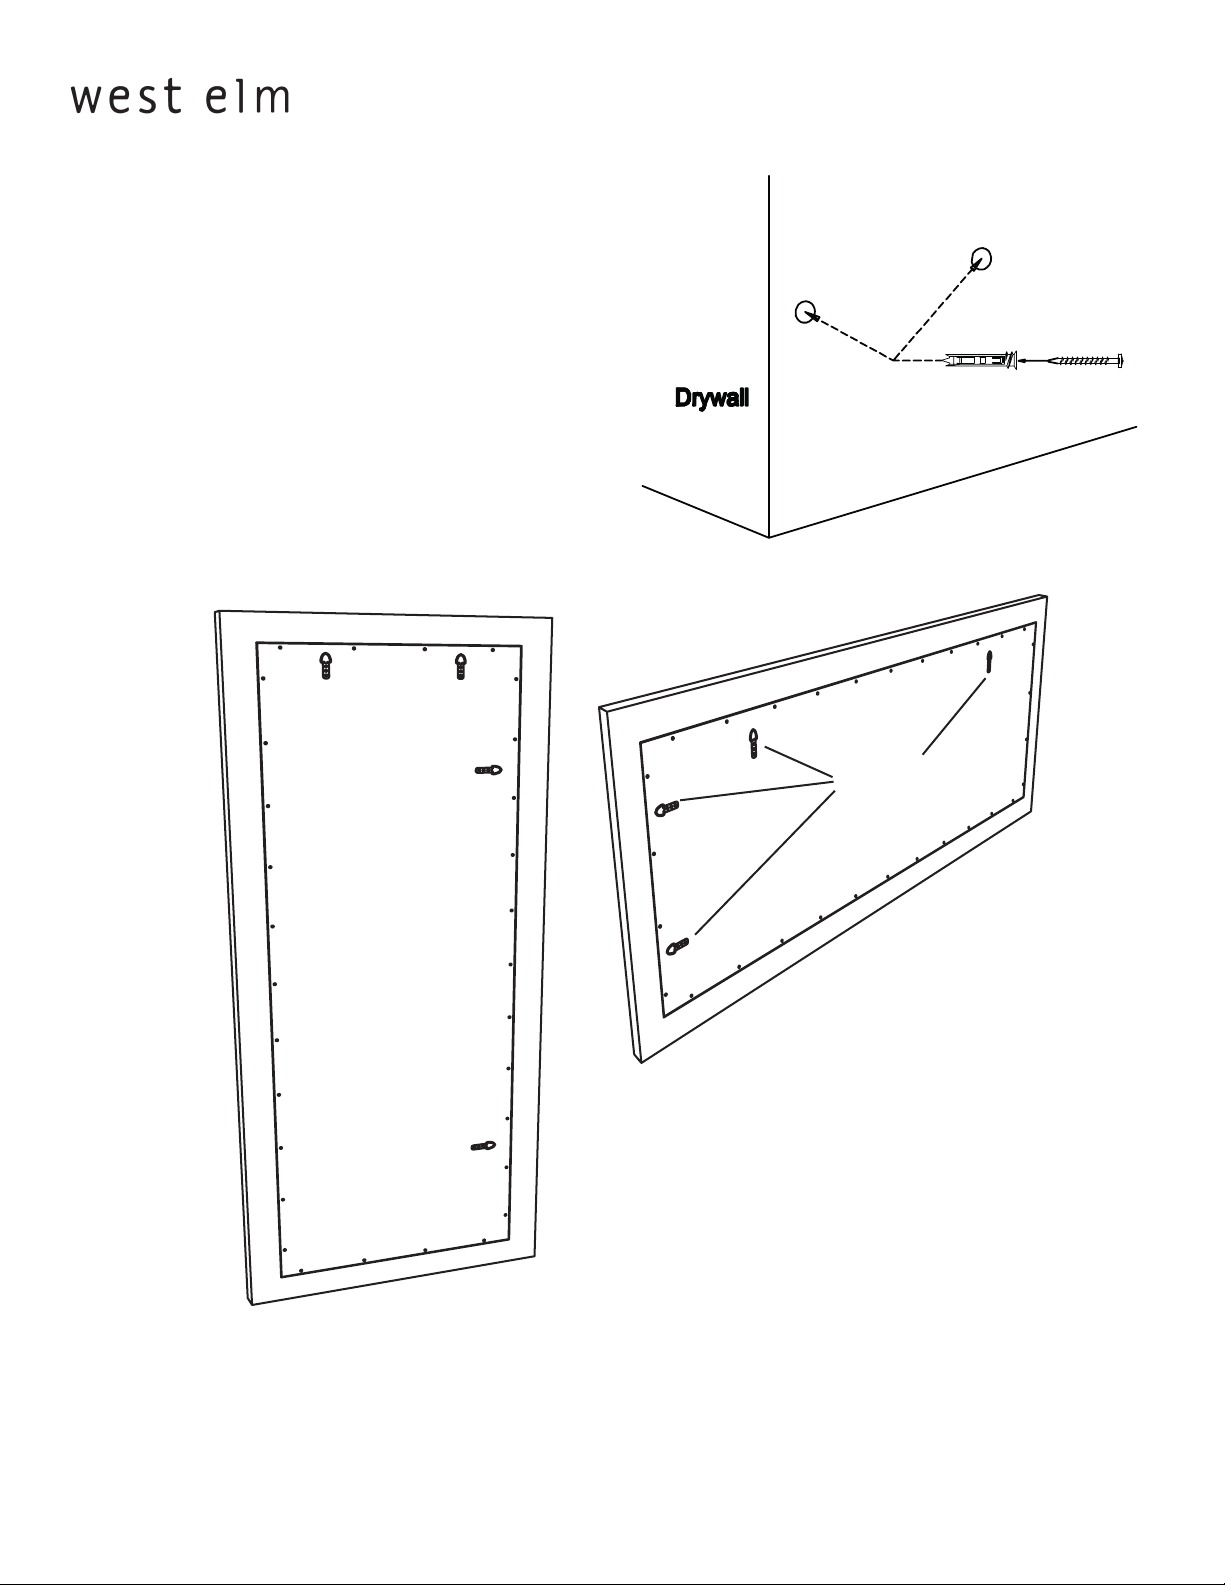
1. Using a pencil, mark the locations on the wall where
the hangers will line up. This is where the hardware will be
inserted.
2. Using a Philip’s head screwdriver, insert the drywall toggle
anchors (A) into the wall at the insertion points. Press and turn
clockwise until anchors are ush with the wall.
3. Insert screws (B) into the anchors (C), leaving approximately 1/2” between the back of the screw head and the wall.
4. Align “D” rings over the screw heads.
5. Slide the mirror down until it rests on the screws. Tighten
or loosen screws as needed to t the shelf snugly against the
wall.
mounting instructions
C
B
“D” Rings
Page 2 of 35568720-02/04/08
Page 3

hammered copper fl oor mirror
NOTICE:
To prevent injury and property damage from unexpected tipping of furniture, we highly
recommend installation of the anti-tip kit included with this product.
Attaching mirror to wall with anti-tip kit.
1. Determine where the mirror is to be placed and mark location on the wall for the mounting bracket
screw holes. They should be placed approximatly 2” below the “D” ring on the back of the mirror frame.
2. Attach the mounting bracket vertically to the wall by inserting the Long screws provided through the
holes in the bracket and tightening securely using screwdriver. Screws must penetrate wall studs for
proper installation.
3. Place mirror so the “D”-ring on the back edge is in line with the bracket on the wall.
4. Lace the nylon strap down through the bracket and “D”-ring. Slide the thin end of the strap through the
receiving end of the nylon strap. Pull to tighten mirror snug against wall.
Mounting backet
Long Screws
mounting instructions
Wall
Back of Mirror
D-Ring
NOTE: There will be extra pieces left over from the anti-tip kit, please discard.
CARE INSTRUCTIONS
Hardware may loosen overtime. Periodically check that all connections are tight.
Wipe with a soft, dry cloth. To protect nish, avoid the use of chemicals and household cleaners.
Page 3 of 35568720-02/04/08
 Loading...