

Page 1
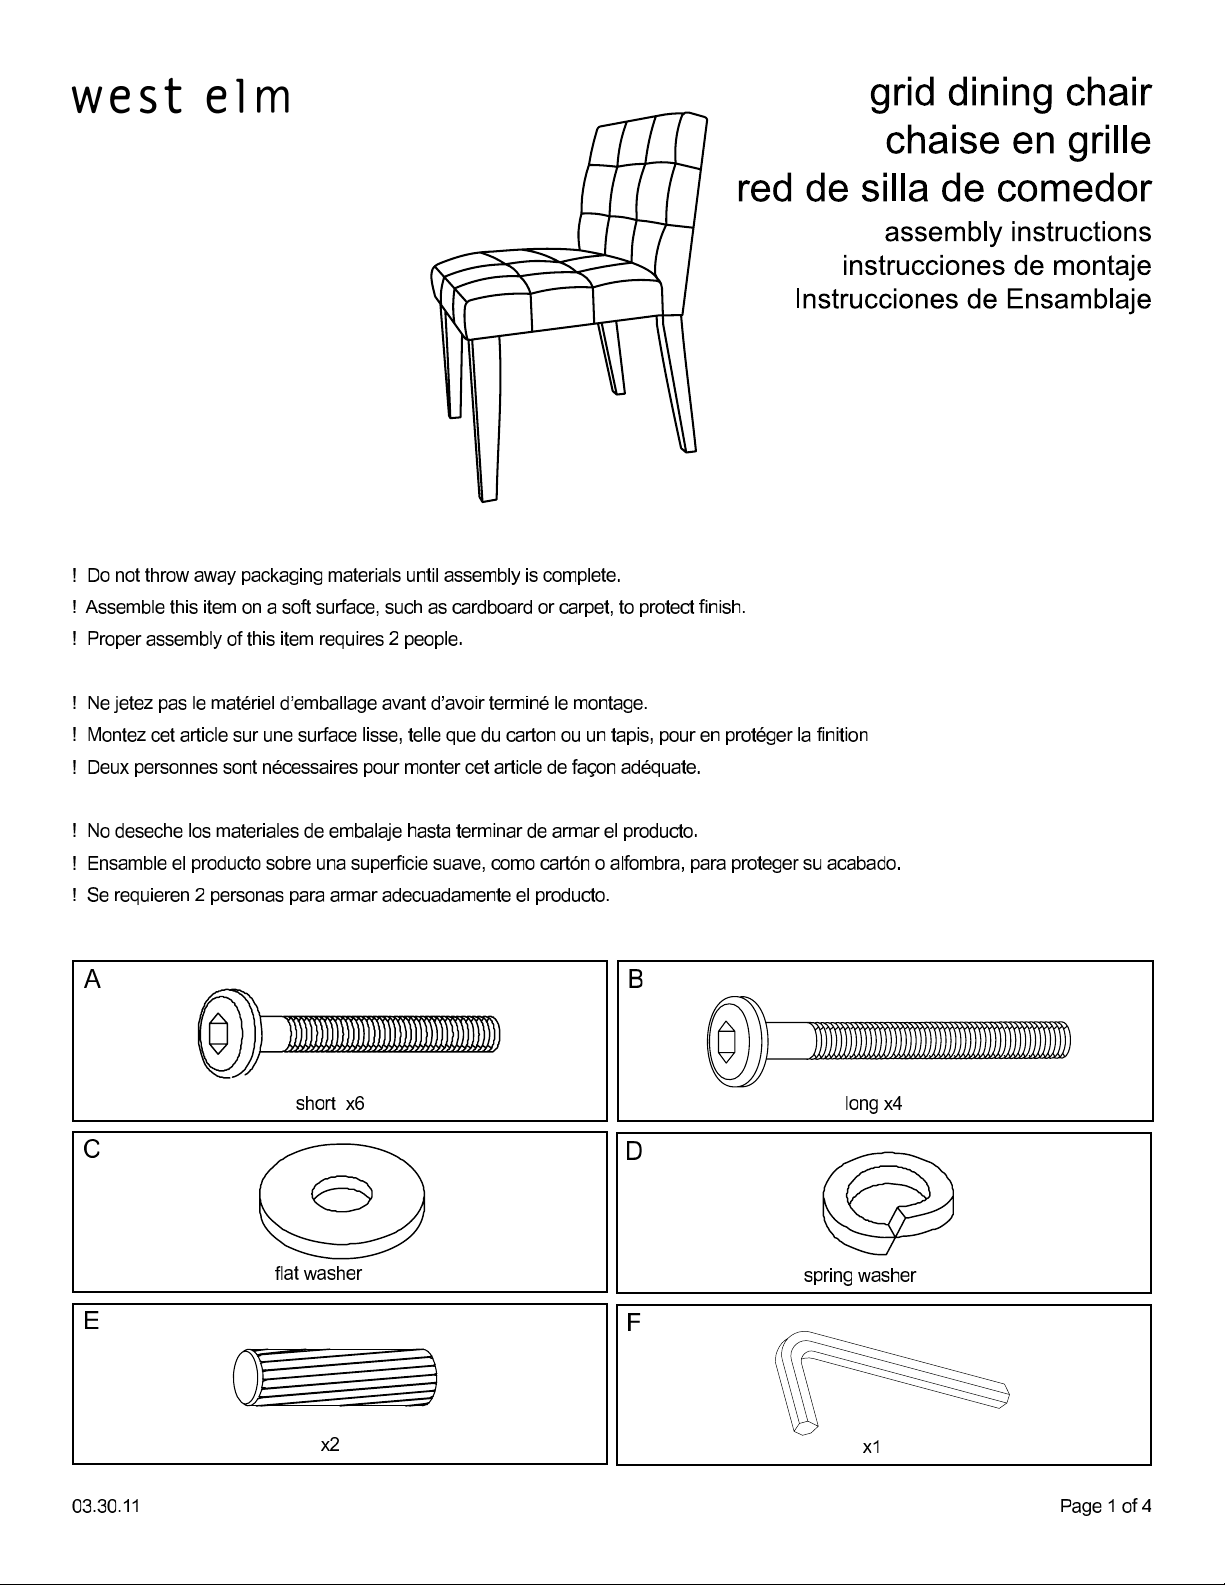
Hardware
10x
10x
Page 2
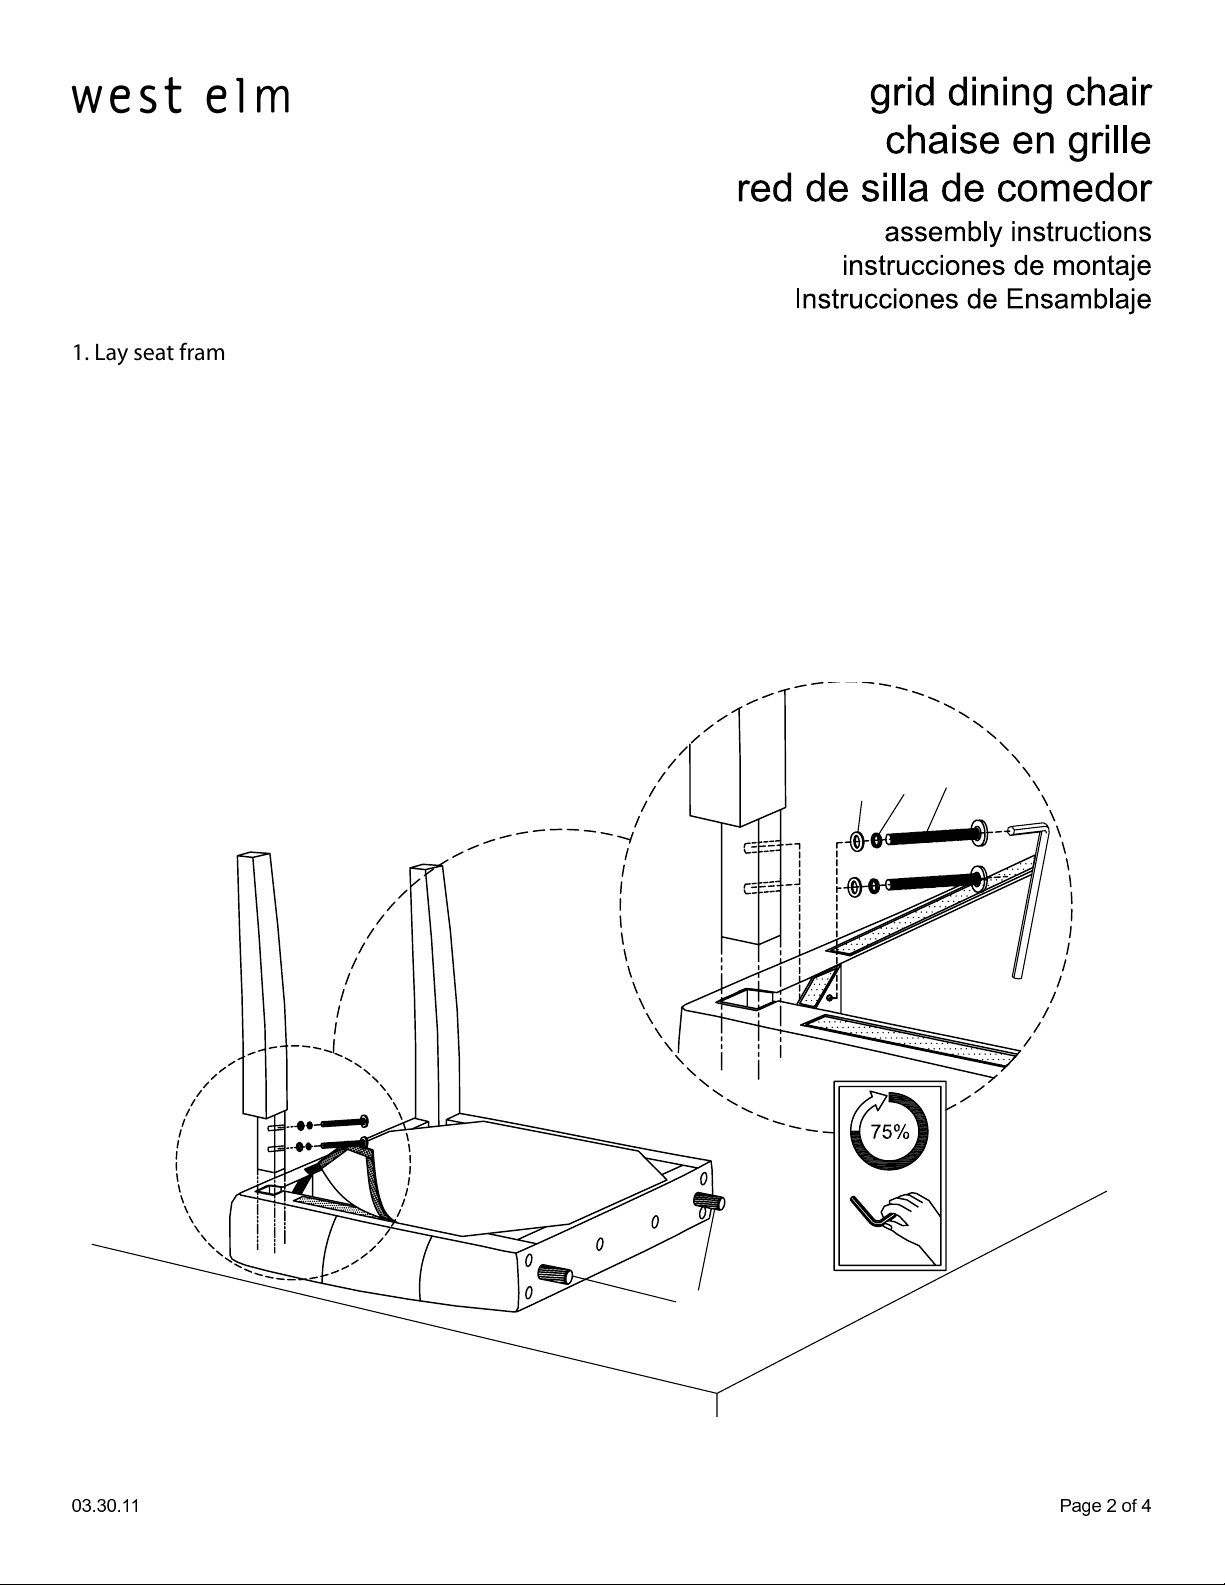
1. Lay seat frame on a clean smooth surface such as carpet or cardboard. Remove the black bottom fabric
that is velcroed onto the frame.Insert dowels (E). Align legs. insert bolt (A), lock washer (D), and at wash
er (C). Tighten loosely with supplied hex key (F).
1. Lay cadre du siège sur une surface propre et lisse comme la moquette ou du carton. Retirez le tissu fond
noir qui est velcro sur les goujons frame.Insert (E). Aligner les jambes. Insérez le boulon (A), la rondelle (D),
et la rondelle plate (C). Serrer doucement avec la clé hexagonale fournie (F).
1. Coloque la estructura del asiento en una super cie limpia y lisa como una alfombra o cartón. Saque la
tela fondo negro que se velcro en los tacos frame.Insert (E). Alinear las piernas. Inserte el perno (A), la
arandela de seguridad (D), y la arandela plana (C). Apriete suavemente con la llave hexagonal suminis
trada (F).
A
D
C
F
E
5 6 7 8 9 : ; <= > ? > = ? @ @
Page 3

2. Align back leg frame with the seat frame. Insert bolts (B) and (A), at washer (C) like
the drawing shows. Tighen loosely with supplied hex key (F).
2. Aligner cadre jambe arrière avec la structure du siège. Insérez les boulons (B) et (A), la rondelle (D), et la
rondelle plate (C) comme le montre le dessin. Serrez bien faiblement avec la clé hexagonale fournie (F).).
2. Alinear marco de la pierna de atrás con la estructura del asiento. Inserte los pernos (B) y (A), la arandela de
seguridad (D), y la arandela plana (C), como muestra el dibujo. Tighen ligeramente con la llave hexagonal
suministrada (F).).
C
D
A
F
F
C
D
B
Page 4

3. Sit in chair for 5 minutes then tighten all bolts.
raplace the black bottom fabric that is velcroed
onto the bottom of the seat frame.
3. Asseyez-vous dans le fauteuil pendant 5 min
utes puis serrer tous les boulons.
raplace le tissu fond noir qui est velcro
sur le fond du cadre du siège.
3. Siéntese en la silla durante 5 minutos y luego
apretar todos los tornillos.
raplace el tejido fondo negro que se velcro
en la parte inferior de la estructura del asiento.
CARE INSTRUCTIONS
Hardware may loosen overtime. Periodically check that all connections are tight.
Wipe with a soft, dry cloth. To protect nish, avoid the use of chemicals and household cleaners.
les pieces de xation peuvent se desserrer apres un certain temps. Veri ez de temps a autre
pour vous assurer que tous les raccords sont serrés.
Essuyez avec un chi on doux et sec. Pour eviter d’en dommager la nition, n’utilisez pas de
produits chimiques ni de nettoyants ménagers.
Los herrajes se peuden a ojar con el tiempo. Revise periodicamente qur todas las
conexiones estén bien apretadas.
Use un trapo suave y seco para limpiar. Para proteger el acabado, no utilice limpiadores
domésticos ni productos químicos.
L M N O P Q R PS T U T S U V V
 Loading...