

Page 1
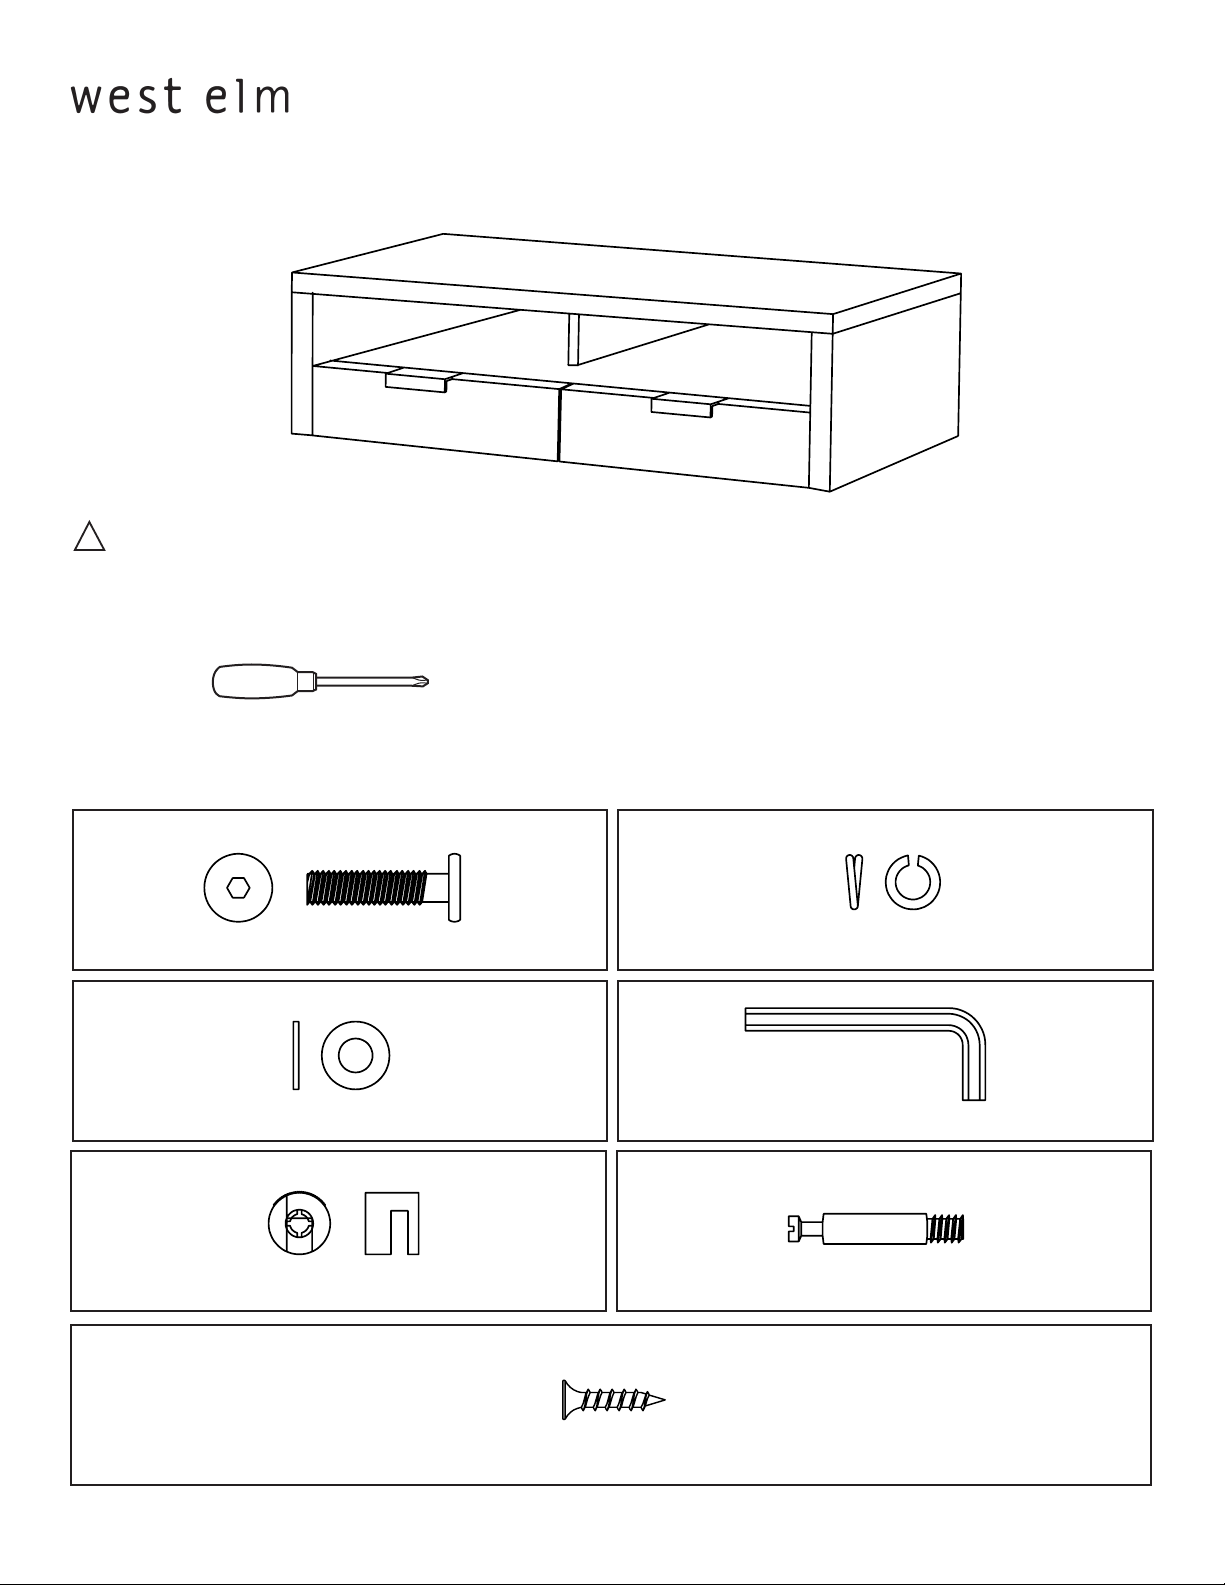
everywhere storage media unit
assembly instructions
!
CAUTION
The top shelf of this cart/stand is intended for use with: Plasma/HD televisions having a maximum screen size of 42 inches and weight of 00 lbs; or
Tube televisions having a maximum screen size of 27 inches and weight of 95 lbs.
! Tools required:
! Do not throw away packaging materials until assembly is complete.
! Assemble this item on a soft surface, such as cardboard or carpet, to protect nish.
! Proper assembly of this item requires 2 people.
A B
bolt (6mm dia x 22mm) 0x
C D
metal washer 0x
E F
cam lock 6x cam bolt 6x
G
lock washer 0x
allen key x
screw 8x
Page of 59700923 - 06/07
Page 2
everywhere storage media unit
assembly instructions
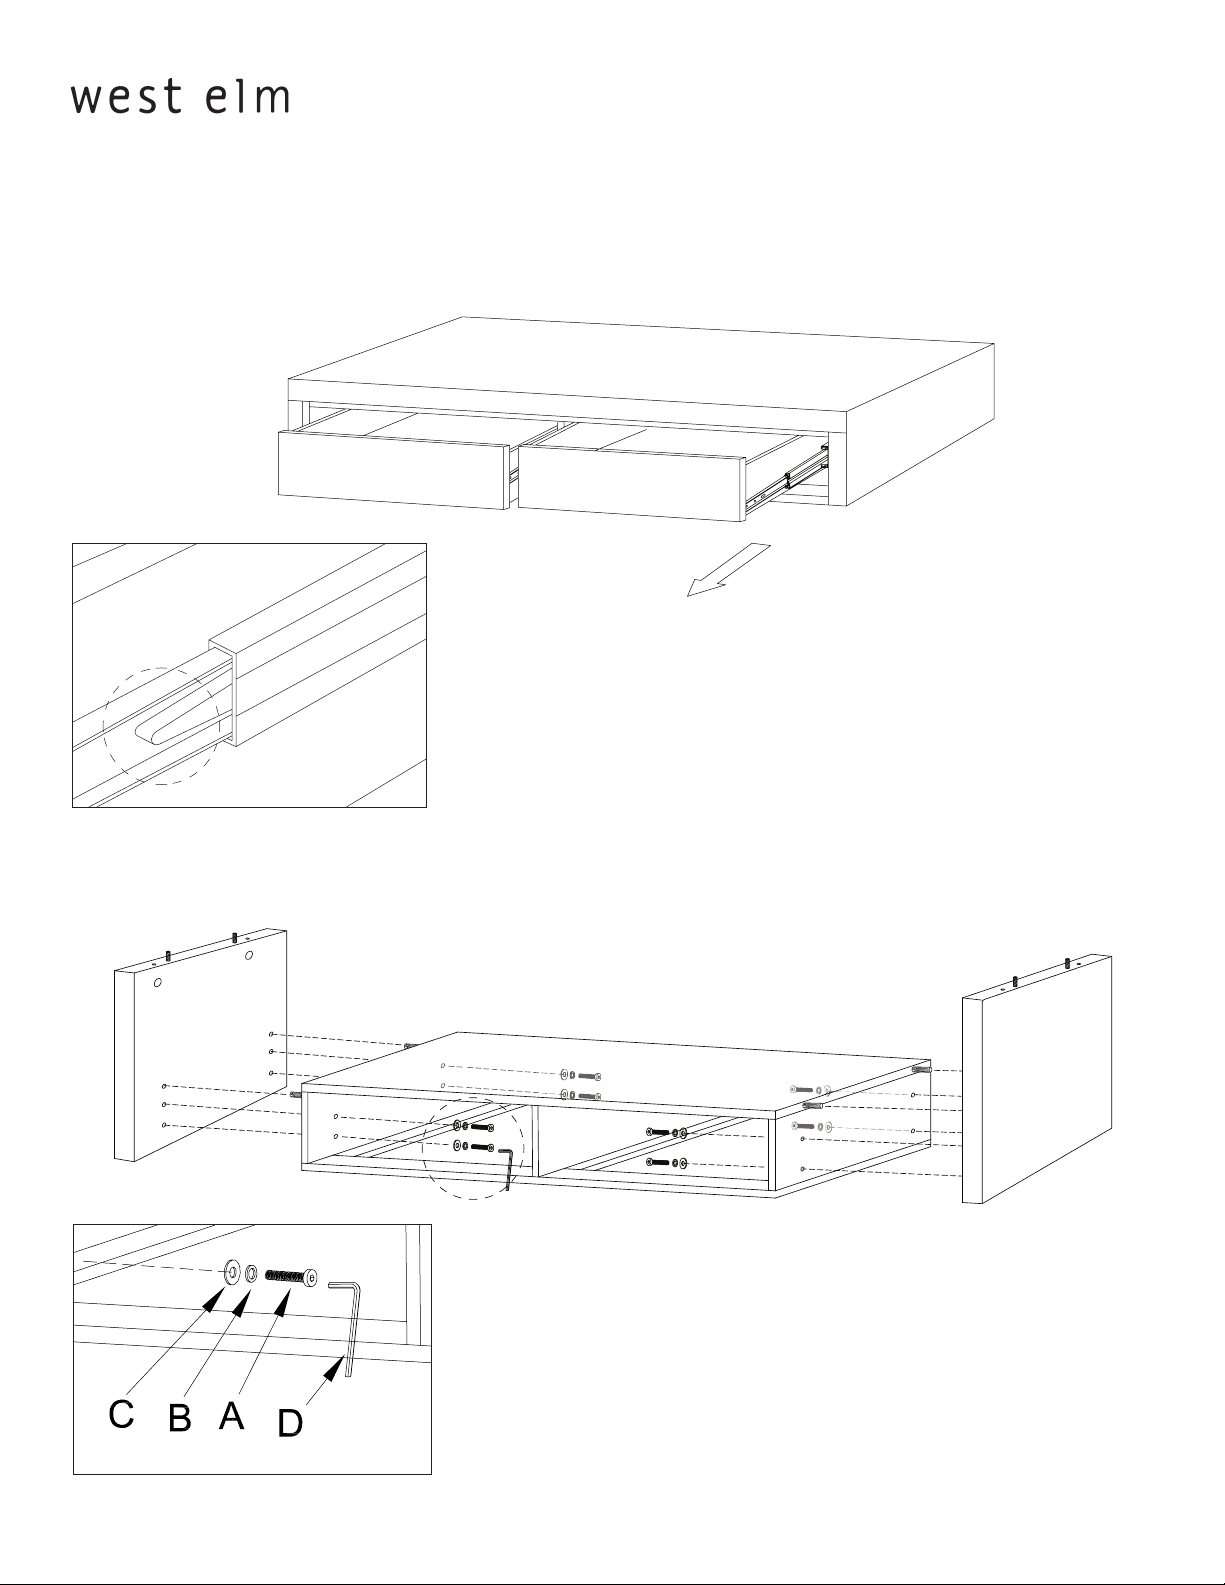
. Remove drawers from drawer unit. Lift up/push down plastic levers on opposite sides to release drawers while pulling out.
Facing the drawers, the left lever will need to be pushed up and the right lever will need to be pushed down at the same time while
pulling the drawer out. (Note : when handling the levers be aware that these may be greasy).
2. Fasten side panels to drawer unit using metal washers (C), lock washers (B), and bolts (A) in order as shown. Tighten bolts
using allen key (D).
Page 2 of 59700923 - 06/07
Page 3

everywhere storage media unit
assembly instructions
3. Set center panel with dowels into pre-drilled holes as shown. Slide back panel into grooves in side panels.
4. Screw cam bolts (F) into top panel. Insert cam locks (E) into holes in side panels, making sure the arrow on the cam locks points
towards the hole in the edge of the panel. Set top panel onto side panel, tting cam bolt into cam locks. Tighten cam locks with a
phillips screwdriver.
Page 3 of 59700923 - 06/07
Page 4

everywhere storage media unit
assembly instructions
5. Fasten back panel to center panel using metal washers (C), lock washers (B), and bolts (A) in order as shown. Tighten bolts
using allen key (D).
6. Insert drawers into drawer unit.
Page 4 of 59700923 - 06/07
Page 5

everywhere storage media unit
7. Turn over cabinet and fasten to base using screws (G). Tighten screws using a Phillips screwdriver.
G
assembly instructions
G
CARE INSTRUCTIONS
Hardware may loosen over time. Periodically check that all connections are tight.
Wipe with a soft, dry cloth. To protect nish, avoid the use of chemicals and household cleaners.
Page 5 of 59700923 - 06/07
 Loading...