

Page 1
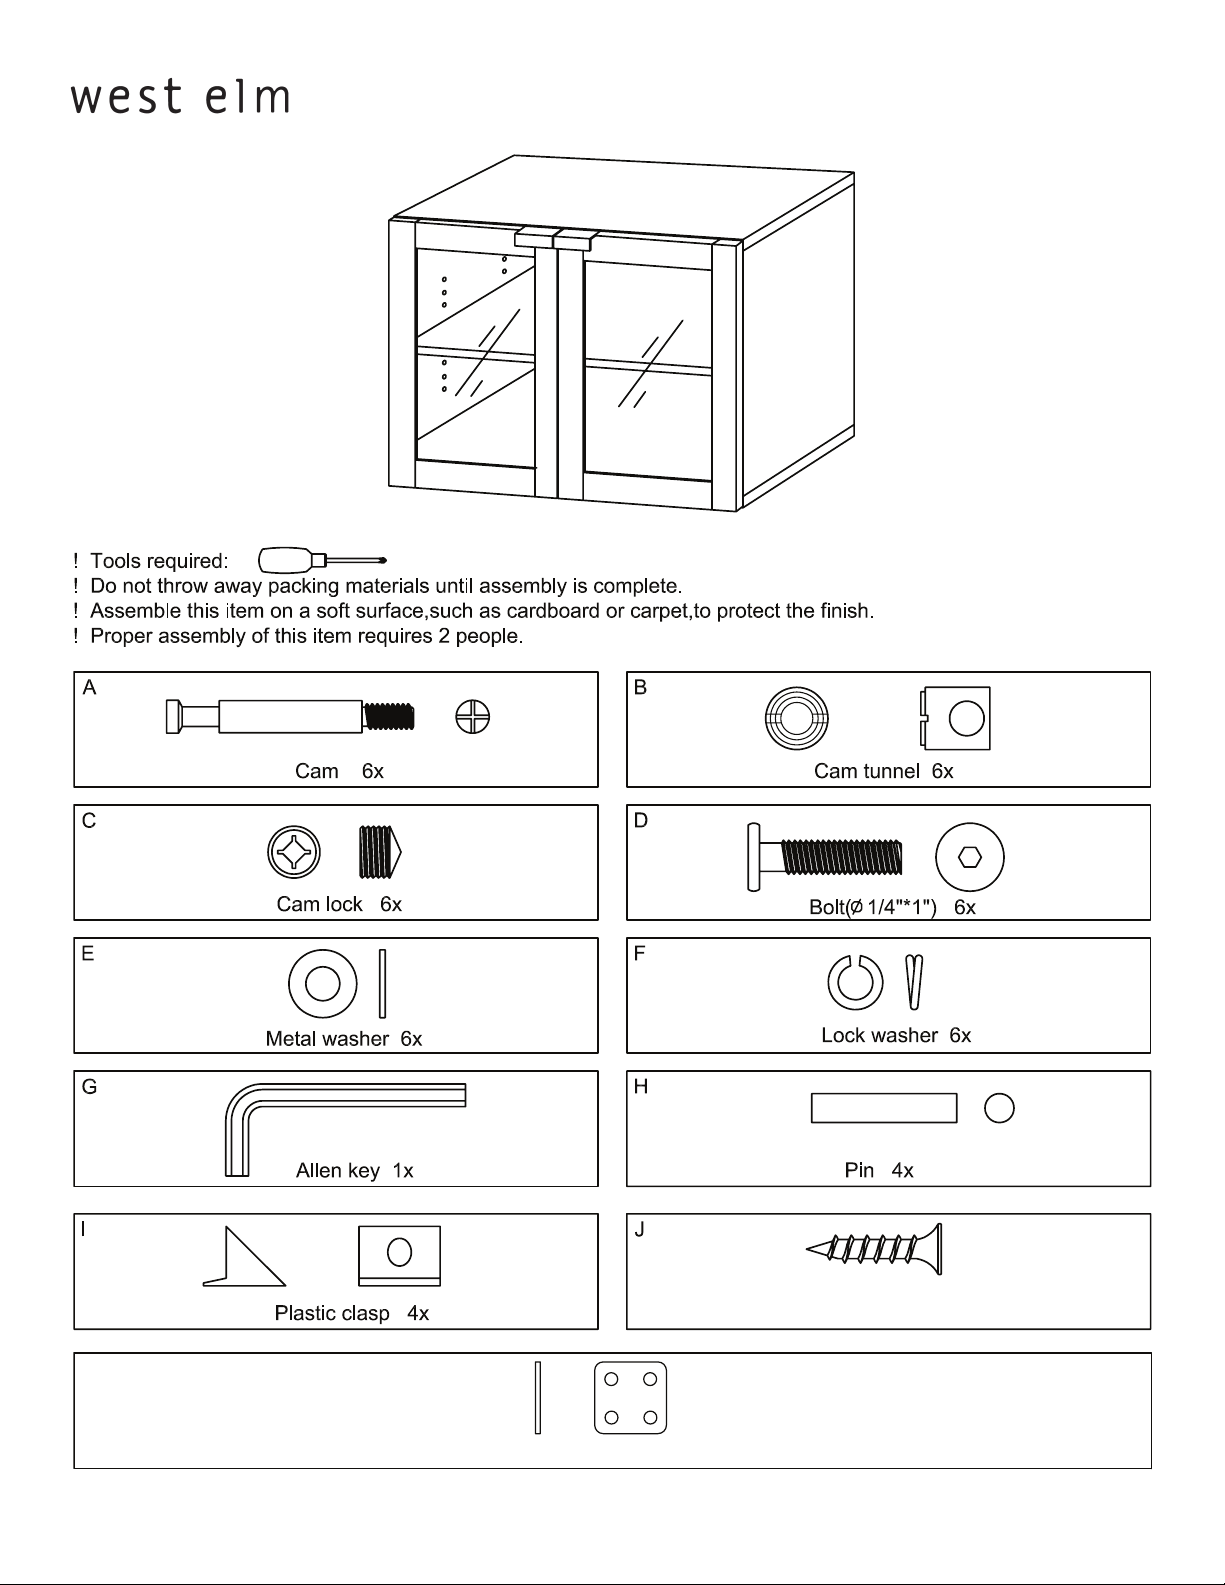
everywhere storage - glass double door
K
Tie plate 1x
Screw 8x
assembly instructions
Page 1 of 108405235 - 07/06
Page 2
everywhere storage - glass double door
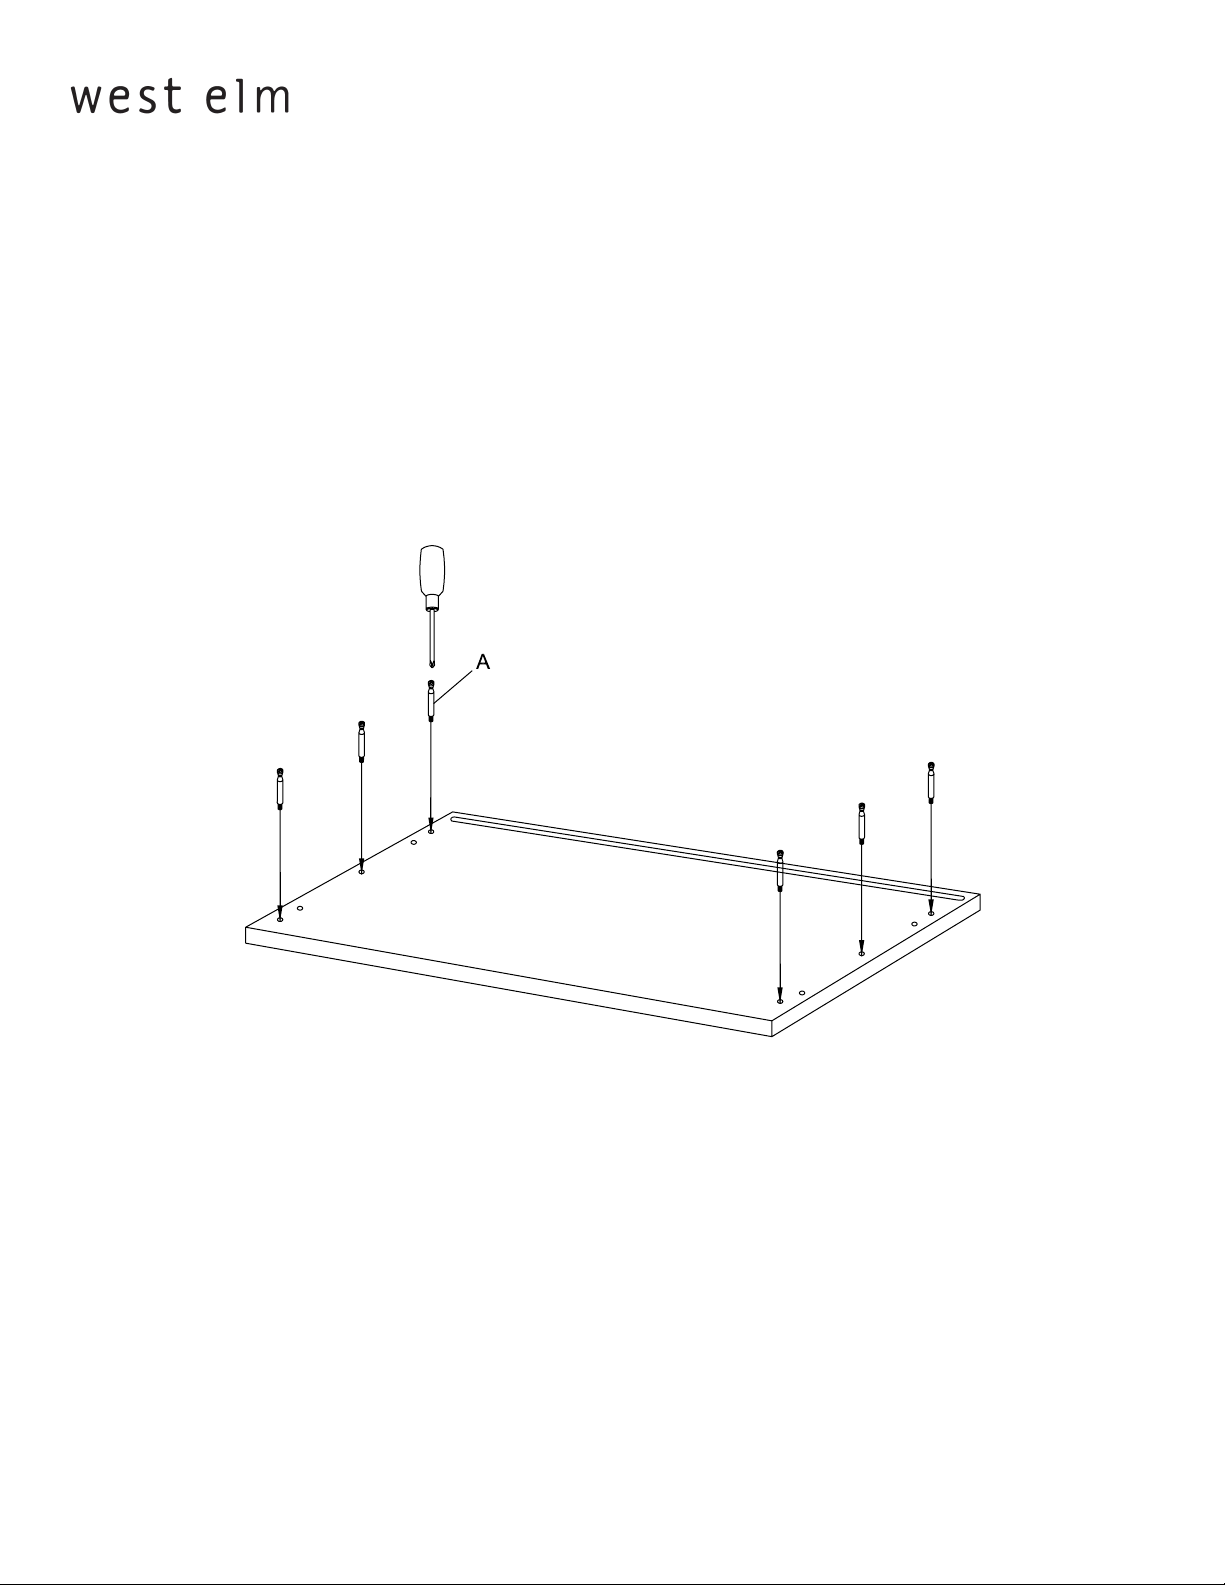
1. Screw cams into holes in top panel as shown. Tighten with phillips screwdriver.
assembly instructions
Page 2 of 108405235 - 07/06
Page 3
everywhere storage - glass double door
assembly instructions
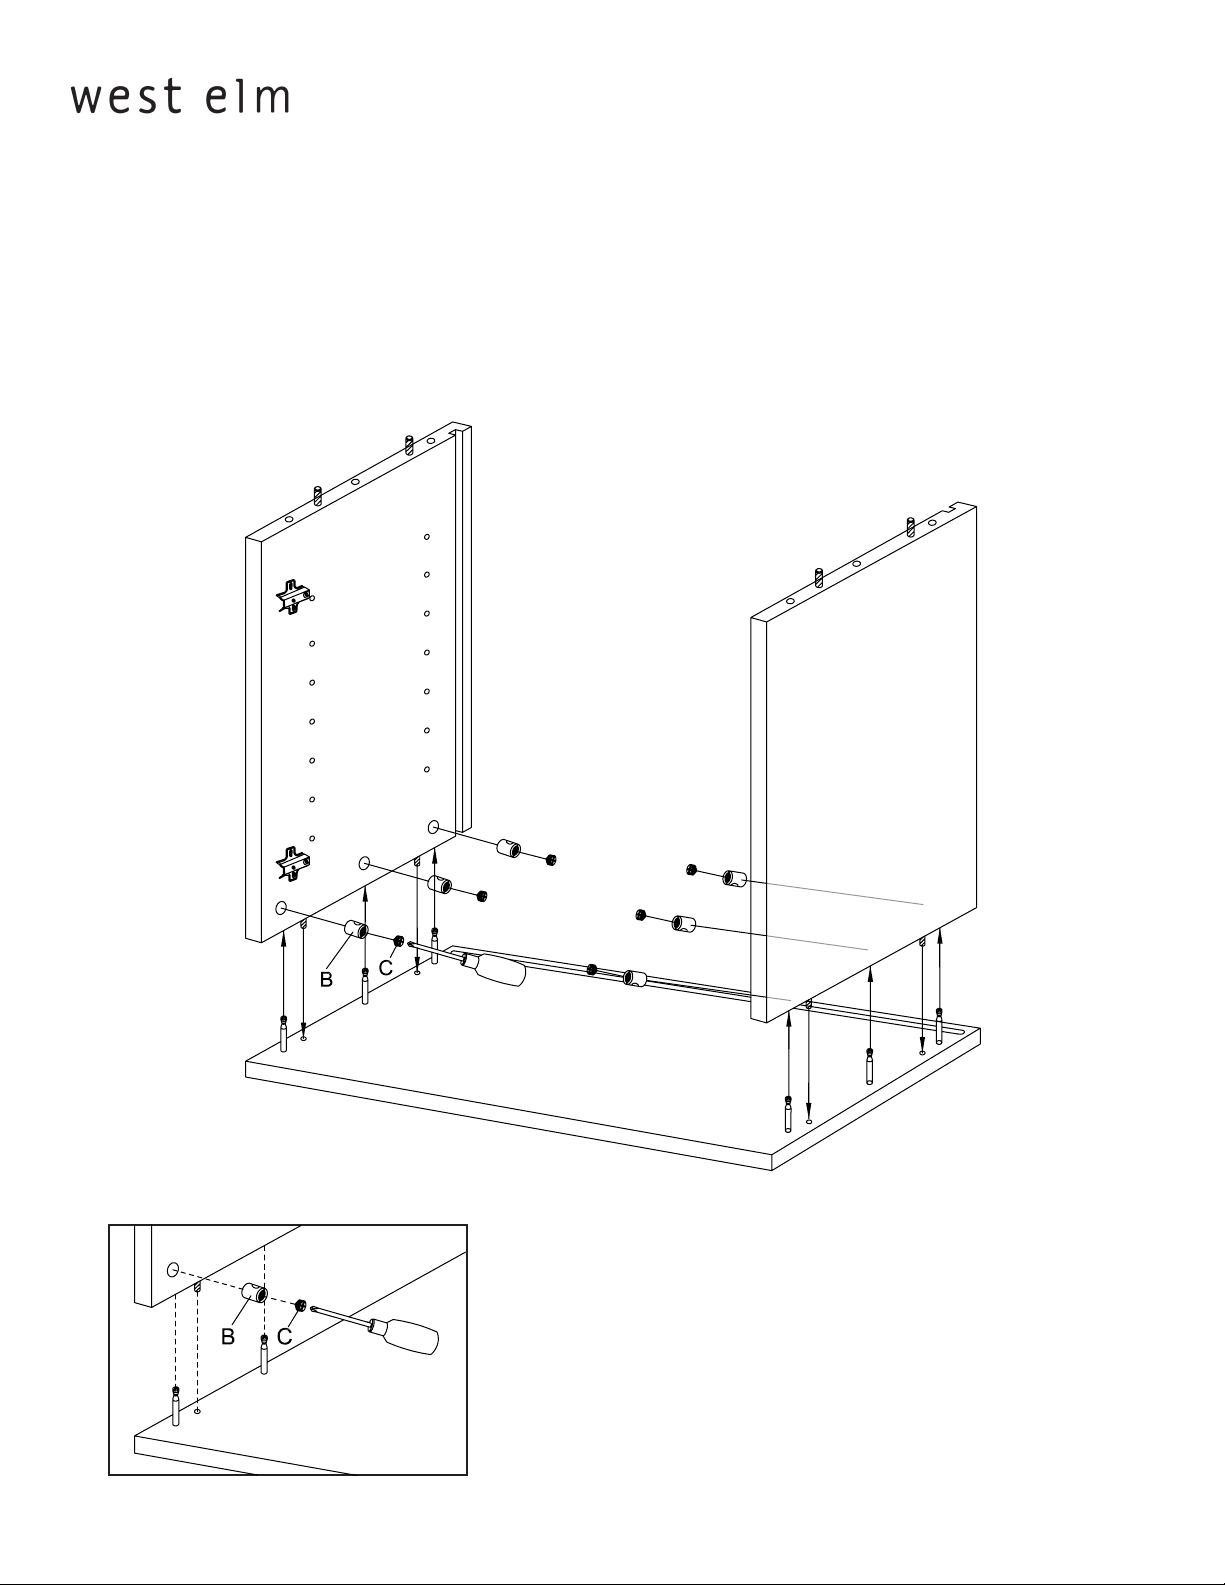
2. Connect top to sides as shown. Insert cam tunnels (B) into holes in side panels, insert cams into cam tunnels, and tighten together with cam locks (C) using phillips screwdriver.
Page 3 of 108405235 - 07/06
Page 4

3. Slide in back panel as shown.
everywhere storage - glass double door
assembly instructions
Page 4 of 108405235 - 07/06
Page 5

everywhere storage - glass double door
assembly instructions
4. Fasten top to sides using bolts (D), lock washers (F), and metal washers (E). Tighten with allen key (G).
Page 5 of 108405235 - 07/06
Page 6

everywhere storage - glass double door
5. Insert pins (H) and set in shelf at desired height as shown.
assembly instructions
H
Page 6 of 108405235 - 07/06
Page 7

everywhere storage - glass double door
assembly instructions
5. Insert door hinges into sides as shown. Tighten hinges and adjust hinge for door alignment using phillips screwdriver.
Page 7 of 108405235 - 07/06
Page 8

everywhere storage - glass double door
assembly instructions
6. Fasten together back and side panel using plastic clasps (I) and screws (J) as shown. Tighten with phillips screwdriver.
I
J
Page 8 of 108405235 - 07/06
Page 9

everywhere storage - glass double door
assembly instructions
For Multiple Storage Units:
7. Fasten storage units together in back using connection plate (K) and screws (J) as shown. Tighten with phillips screwdriver.
K
J
CARE INSTRUCTIONS
Hardware may loosen over time. Periodically check that all connections are tight.
Wipe with a soft, dry cloth. To protect nish, avoid the use of chemicals and household cleaners.
Page 9 of 108405235 - 07/06
Page 10

everywhere storage - glass double door
assembly instructions
OVER BALANCE. To prevent injury and property damage from unexpected tipping of furniture, we highly recommend
installation of the overbalance protection hardware included with this product.
1. Attach the mounting brackets horizontally to the top back edge of the furniture. Insert the
short screws through the holes in the bracket and tighten securely using screwdriver.
2. Determine where the furniture is to be placed and mark location on the wall for the other
mounting bracket screw holes. It should be placed approximately 2” below the bracket mounted
to the furniture.
3. Attach the mounting brackets vertically to the wall by inserting the long screws provided through
the holes in the bracket and tightening securely using screwdriver.
4. Place the furniture so the brackets on the back edge are in line with the brackets on the wall.
5. Lace an end of the nylon restraint strap down through each bracket. Bring both ends together
and slide the thin end of the strap through the receiving end of the strap until snug.
6. Check to make sure the strap is securely laced and locked to the brackets.
wall
back side
Page 10 of 108405235 - 07/06
 Loading...