

Page 1
! Tools required:
! Do not throw away packaging materials until assembly is complete.
! Assemble this item on a soft surface, such as cardboard or carpet, to protect fi nish.
! Proper assembly of this item requires 2 people.
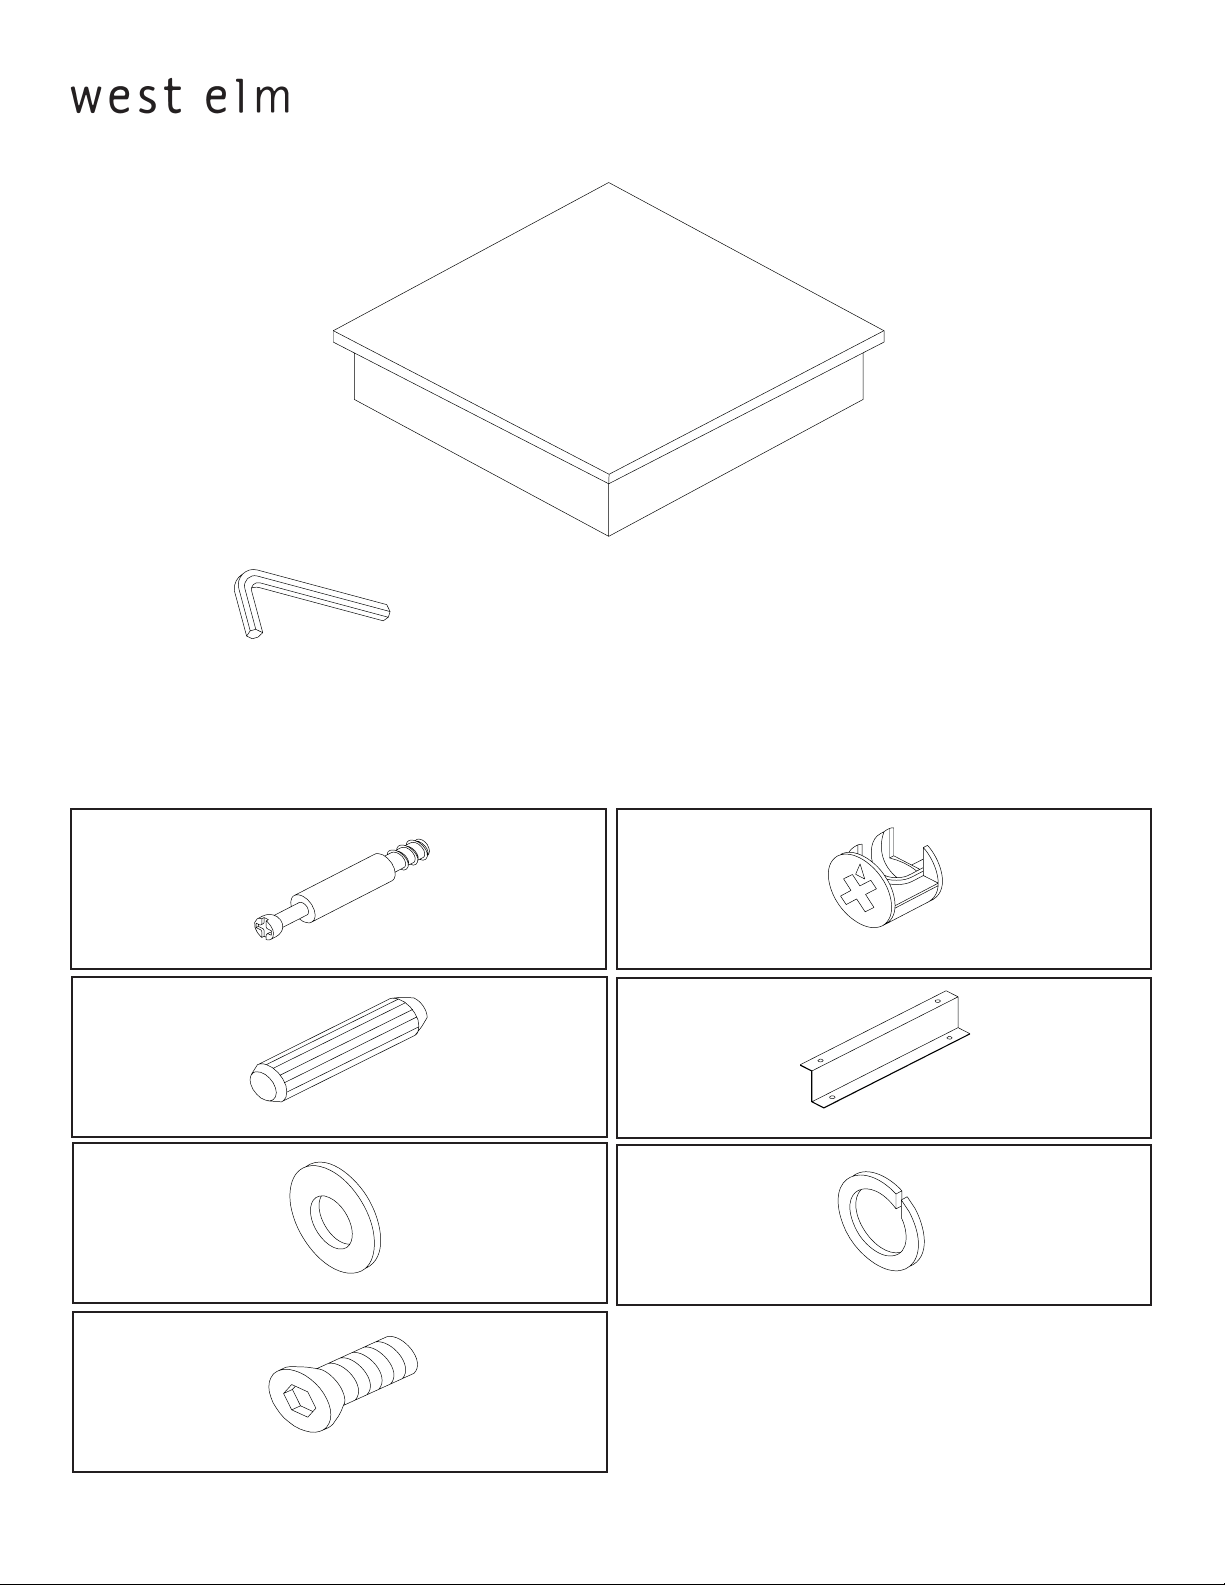
bond wedge
assembly instructions
Hardware
AB
cam bolt 4x cam lock 4x
C
wooden dowel 6x
E
fl at washer 8x
G
D
metal bracket 2x
F
spring washer 8x
bolt 8x
Page 1 of 47087737- 08-27-08
Page 2

bond wedge
assembly instructions
1. Lay wedge face down on a clean smooth surface. Insert 6 dowels (C) into wedge holes as shown.
Next screw in 4 cam bolts (A) into threaded holes as shown.
C
B
2. Open wedge rails to a 90 degree angle. Insert 4 cam locks (B) into the holes in the wedge. Make sure the
indicator mark points downward.
B
Indicator mark
Page 2 of 47087737- 08-27-08
Page 3

bond wedge
assembly instructions
3. Align the wedge rails onto the wedge. Tighten each cam lock (B) 1/2 turn clockwise with a
phillips head screwdriver.
4. Align large desk and small desk like the drawing shows. Attach a bracket to each desk using bolt (G),
spring washer (F), and at washer (G) tighten with allen key. Attach wedge to brackets using bolt (G)
spring washer (F) and at washer (G). Tighten with allen key.
D
E
F
G
Page 3 of 47087737- 08-27-08
Page 4

bond wedge
assembly instructions
CARE INSTRUCTIONS
Hardware may loosen overtime. Periodically check that all connections are tight.
Wipe with a soft, dry cloth. To protect nish, avoid the use of chemicals and household cleaners.
Page 4 of 47087737- 08-27-08
 Loading...