

Page 1
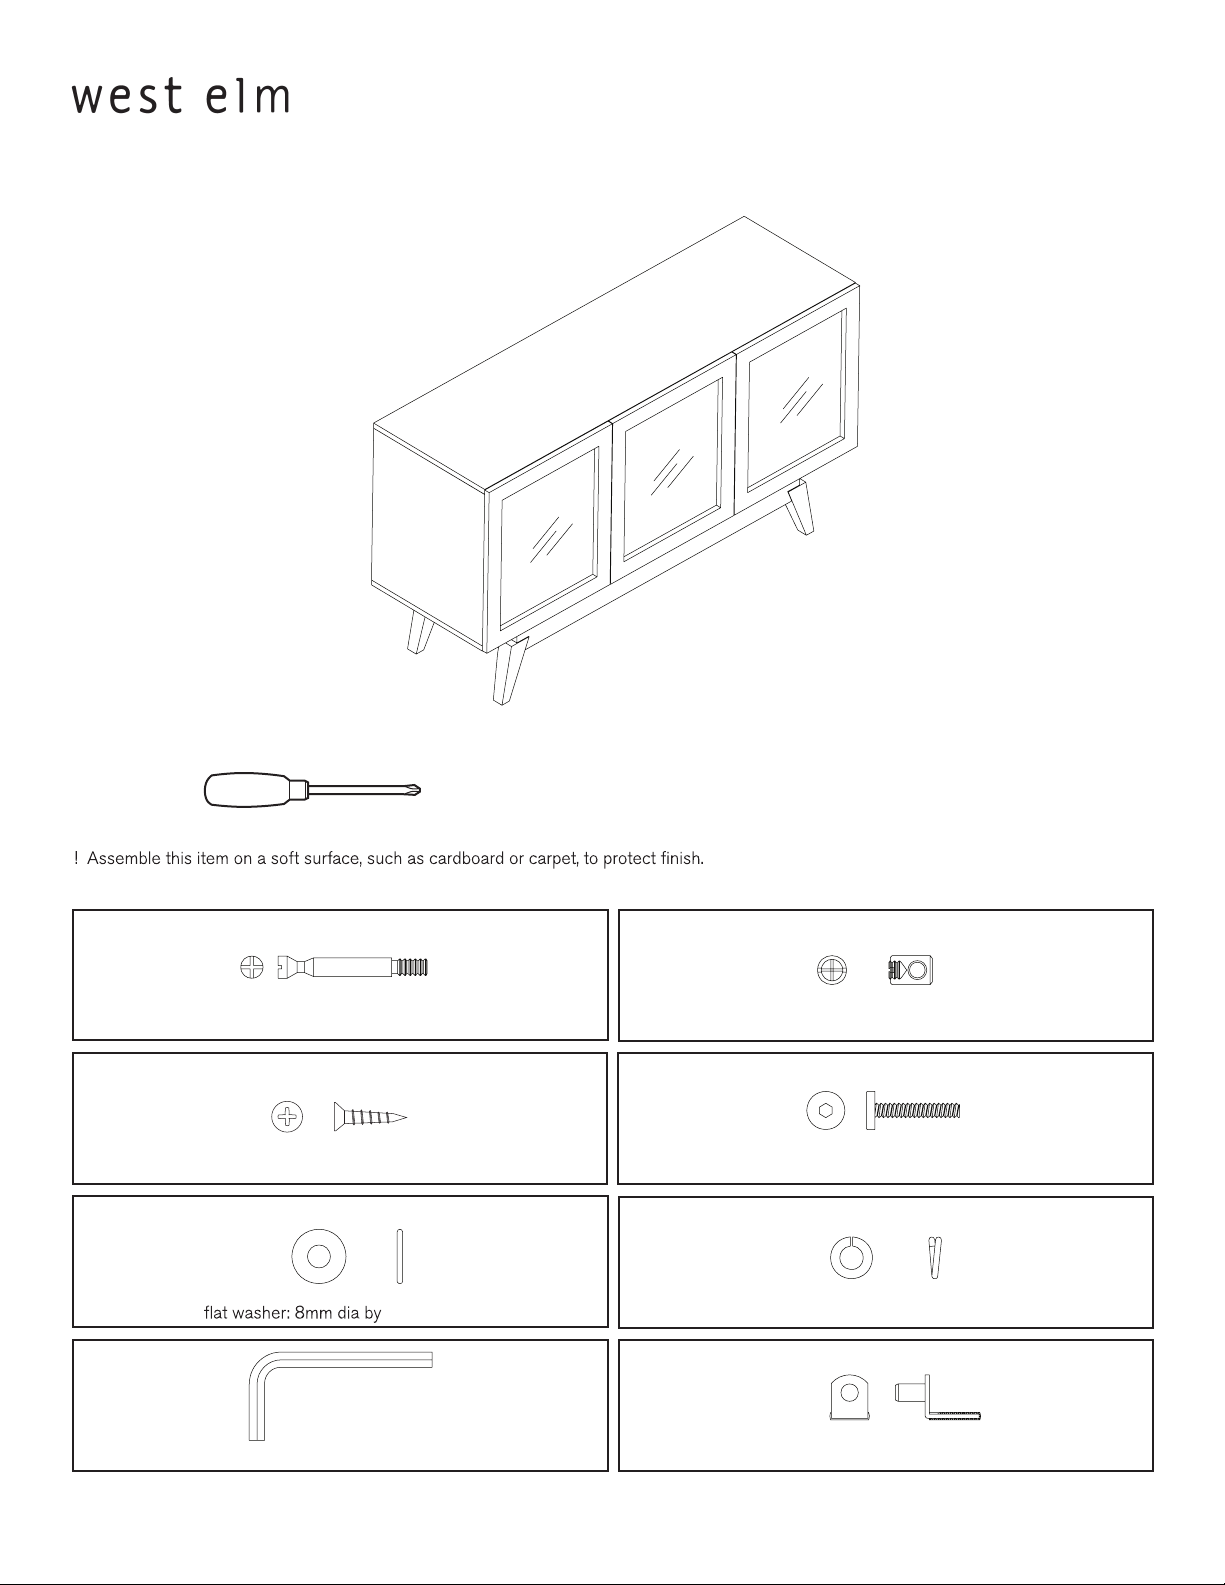
angled leg sideboard
assembly instructions
! Tools required:
! Do not throw away packaging materials until assembly is complete.
! Proper assembly of this item requires 2 people.
A B
cam bolt: M6 * 51mm 15x
C D
short screw: dia 3 * 1 9mm 32x
E F
19mm 6x
G H
cam lock: M1 5 * 14mm 1 5x
large bolt: 8mm dia by 38mm 6x
lock washer: 8mm 6x
allen key 8mm
shelf support 16x
Page 1 of 8 5767215 - 2.29.08
Page 2

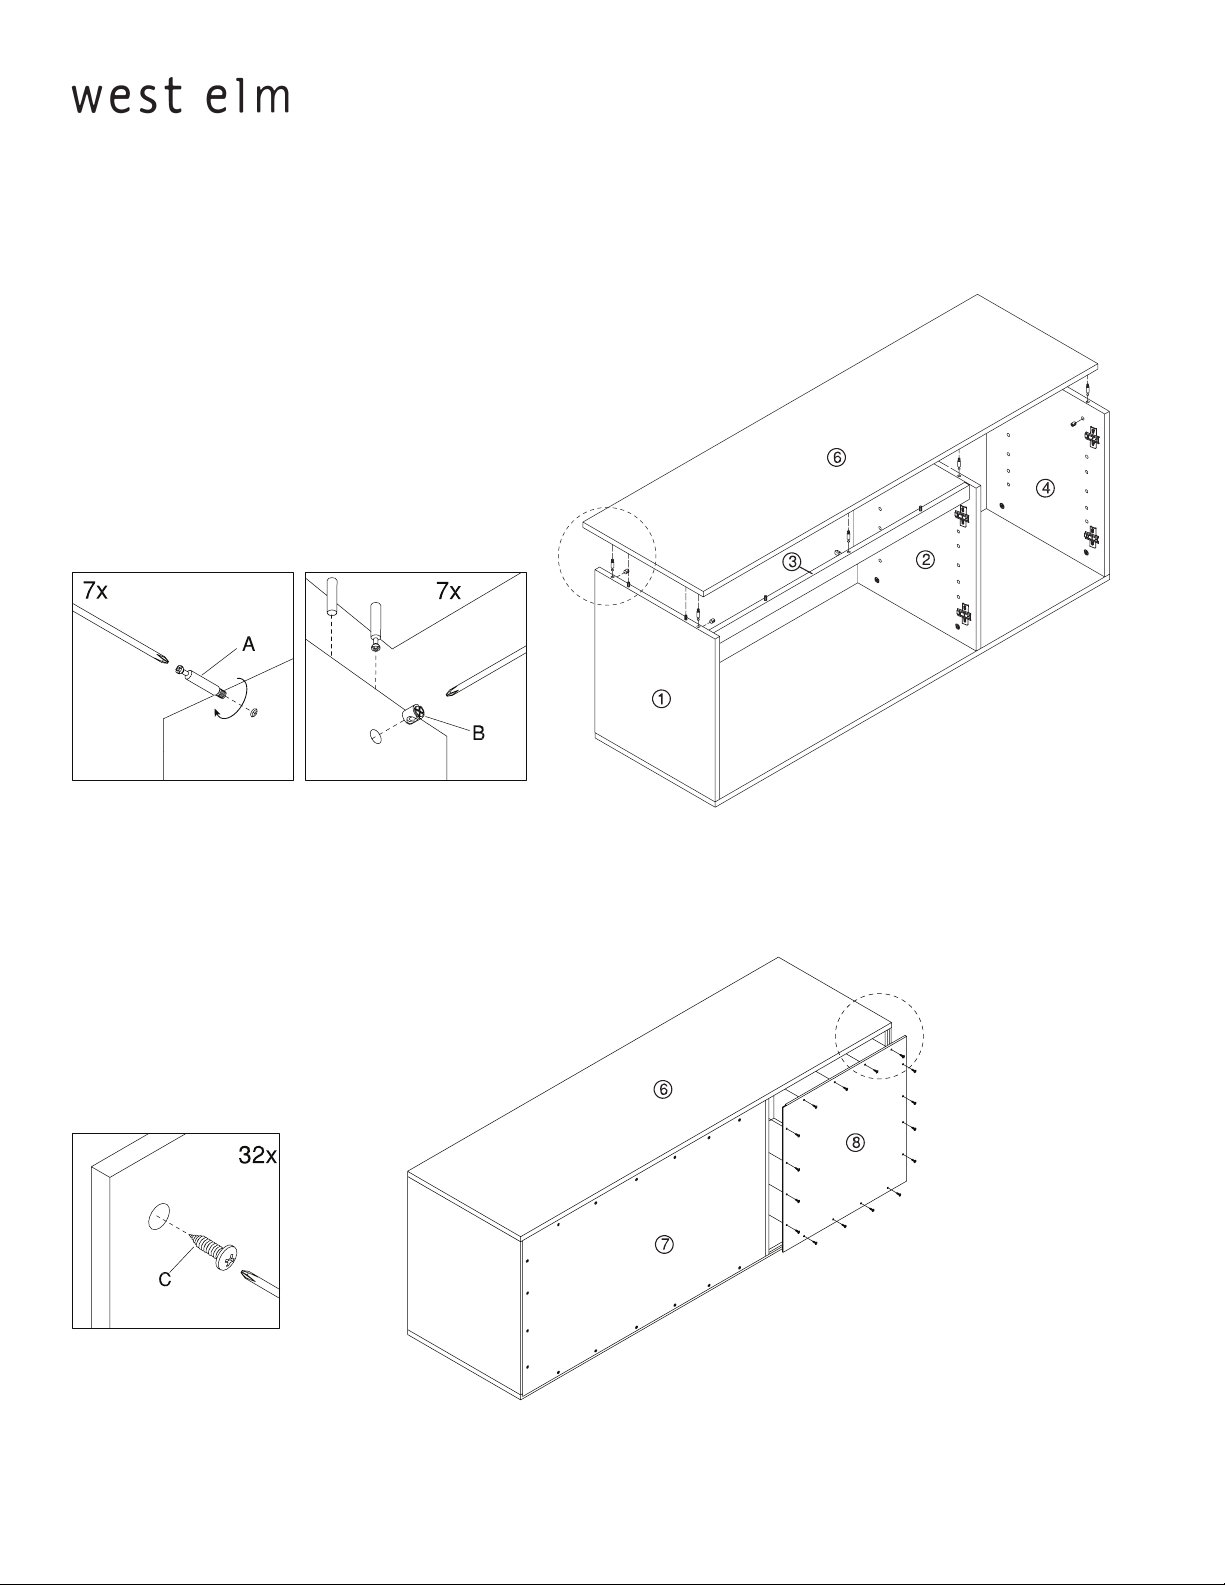
angled leg sideboard
assembly instructions
1. Insert cam bolts (A) into left end panel (1) and partition (2) as shown and tighten with a phillips screwdriver.
2. Set cam locks (B) into cross brace (be sure holes in cam locks always face toward the outside edge of panel to t into cam
bolt). Fit side panels into cross brace and tighten cam locks with a phillips screwdriver.
3. Insert cam bolts (A) into bottom panel (5) as shown and tighten with a phillips screwdriver.
4. Set cam locks (B) into end panels and partition. Fit end panels and partition into bottom panel and tighten cam locks with a
phillips screwdriver.
Page 2 of 8 5767215 - 2.29.08
Page 3
angled leg sideboard
assembly instructions
5. Insert cam bolts (A) into top panel (6) as shown and tighten with a phillips screwdriver.
6. Set cam locks (B) into end and partition. Fit end panels and partition into top panel and tighten cam locks with a phillips
screwdriver.
7. Move to back side of case. Fasten back panels (7) & (8) in place as shown using short screws (C) as shown. Tighten screws with
a phillips screwdriver.
8. When finished attaching back panels, turn case on back (two persons required) to attach legs to base.
Page 3 of 8 5767215 - 2.29.08
Page 4

allen key (G).
angled leg sideboard
assembly instructions
G
D
F
E
10. Insert shelf supports (H) at desired locations and set in shelves.
H
Page 4 of 8 5767215 - 2.29.08
Page 5

angled leg sideboard
11. Connect doors (11) (12) & (13) to cabinet panels by snapping hinges together as shown.
assembly instructions
12 . Fit together angled shelf panels as shown if desired for use.
11 13
Page 5 of 8 5767215 - 2.29.08
Page 6

13
angled leg sideboard
assembly instructions
H
Page 6 of 8 5767215 - 2.29.08
Page 7

angled leg sideboard
assembly instructions
Page 7 of 85767215 - 2.29.08
14. In order for proper tting of doors, case must be level. Adjust levelers in feet as needed by turning counterclockwise
to lower and clockwise to raise.
clockwise
counter clockwise
**case MUST be level**
Page 8

angled leg sideboard
15. Hinges are adjustable. A combination of these adjustments may be necessary to level doors.
assembly instructions
FOR SIDE adjustment (adjusting the gap between doors
and leveling doors)
1. Adjust gap by turning screw B
FOR DEPTH adjustment (adjusting how close the doors
rest against the cabinet):
1. Loosen screw A .
2. Adjust depth.
3. Re-tighten screw A .
FOR HEIGHT adjustment
1. Loosen screw C (both screws)
2. Adjust height.
3. Re-tighten screws.
TO ADJUST LEFT DOOR IN BELOW EXAMPLE:
1. Adjust top hinge by turning screw B clockwise
2. Adjust bottom hinge by turning screw B counterclockwise.
c
A
B
c
TO ADJUST RIGHT DOOR IN BELOW EXAMPLE:
1. Adjust top hinge by turning screw B counterclockwise
2. Adjust bottom hinge by turning screw B clockwise.
CARE INSTRUCTIONS
Hardware may loosen over time. Periodically check that all connections are tight.
Page 8 of 85767215 - 2.29.08
 Loading...