

Page 1
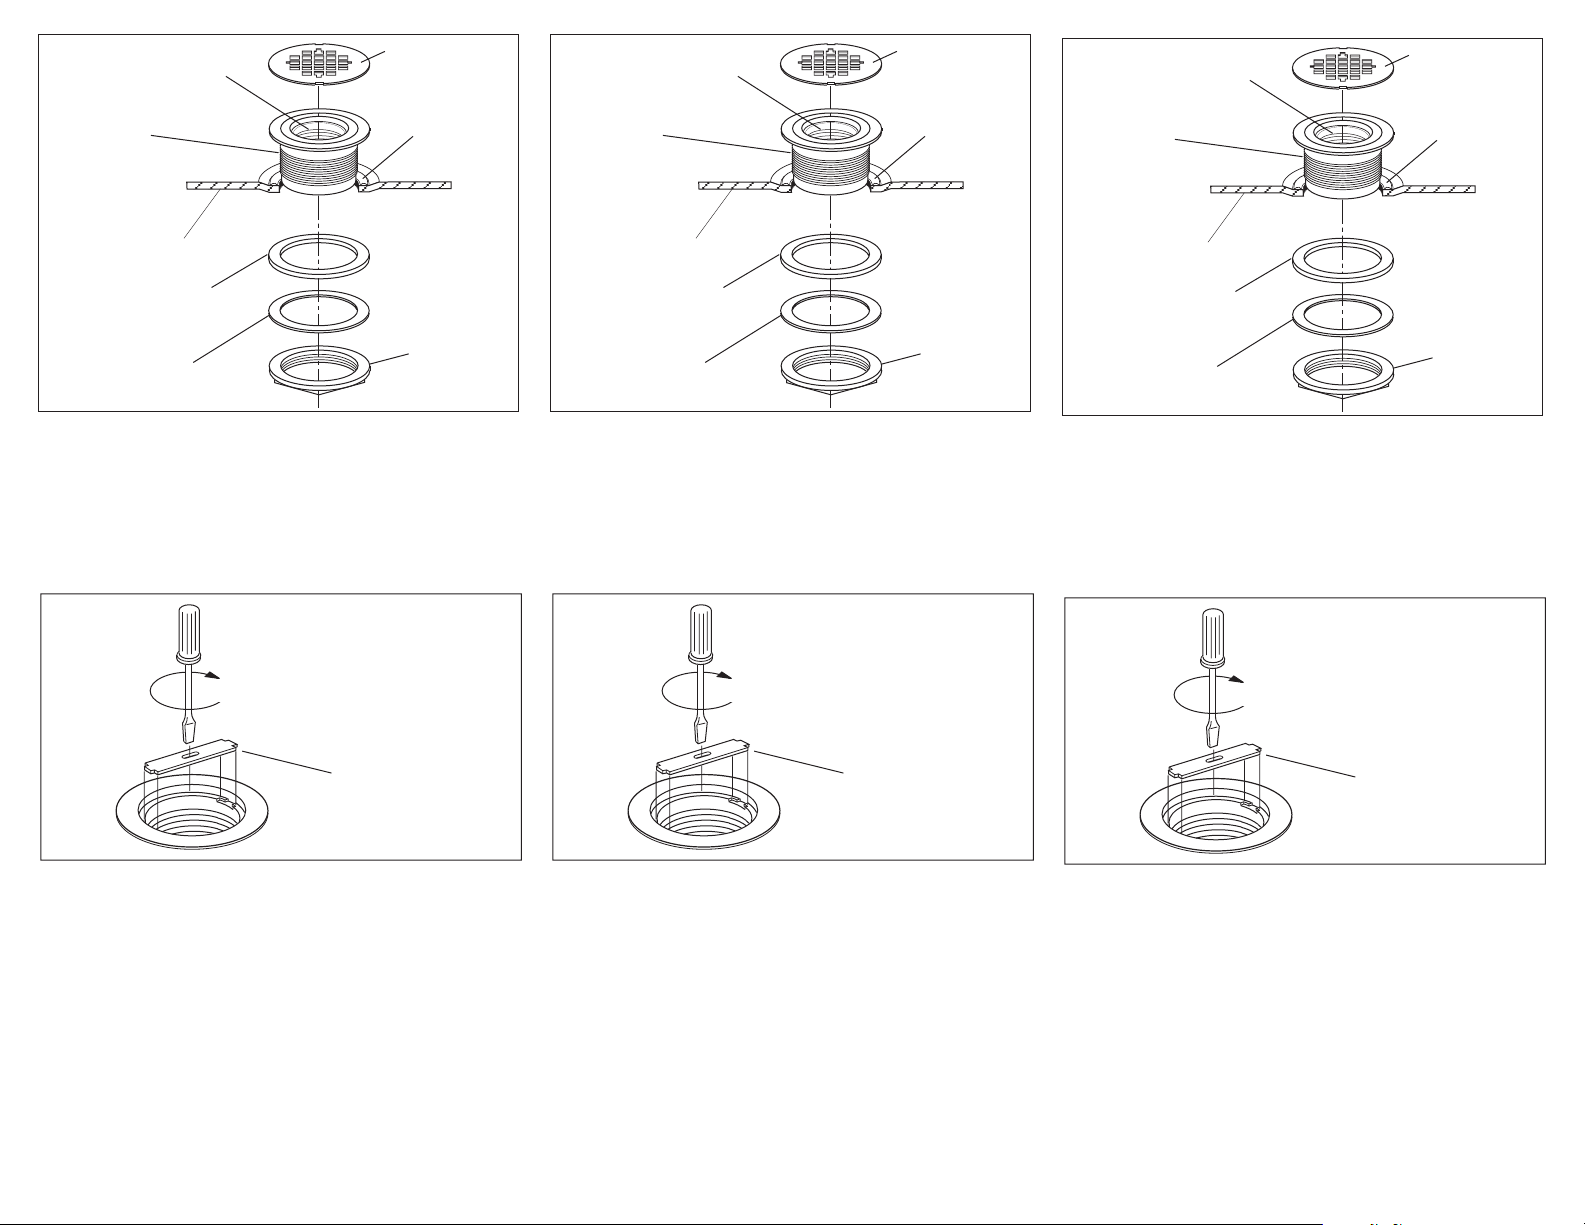
STRAINER
DRAIN
ASSEMBLY
SILICONE
SEALANT
SHOWER BASE
RUBBER WASHER
FIBER WASHER
NUT
APPLY LUBRICANT
Fine Decorative Plumbing Since 1935
WESTBRASS
STRAINER
DRAIN
ASSEMBLY
SILICONE
SEALANT
SHOWER BASE
RUBBER WASHER
FIBER WASHER
NUT
APPLY LUBRICANT
Remove the stainless steel strainer from the drain
Fine Decorative Plumbing Since 1935
WESTBRASS
STRAINER
DRAIN
ASSEMBLY
SILICONE
SEALANT
SHOWER BASE
RUBBER WASHER
FIBER WASHER
NUT
APPLY LUBRICANT
Fine Decorative Plumbing Since 1935
WESTBRASS
assembly. Disassemble the locknut and two gaskets
from the back of the drain assembly. Apply a 1/4" bead
of caulking (silicone) to the drain hole and insert the drain
assembly. Replace the rubber washer, fiber washer,
and lock nut in that order. Hand tighten the locknut.
Remove excess sealant from finished side.
Remove the stainless steel strainer from the drain
assembly. Disassemble the locknut and two gaskets
from the back of the drain assembly. Apply a 1/4" bead
of caulking (silicone) to the drain hole and insert the drain
assembly. Replace the rubber washer, fiber washer,
and lock nut in that order. Hand tighten the locknut.
Remove excess sealant from finished side.
Remove the stainless steel strainer from the drain
assembly. Disassemble the locknut and two gaskets
from the back of the drain assembly. Apply a 1/4" bead
of caulking (silicone) to the drain hole and insert the drain
assembly. Replace the rubber washer, fiber washer,
and lock nut in that order. Hand tighten the locknut.
Remove excess sealant from finished side.
TIGHTEN SEALING NUT
TOOL
(INCLUDED)
Remove the tool, locking mechanism and rubber seal
from the inside of the shower drain. Lubricate the seal
with common household liquid soap and slide it over
the 2” drain pipe. With a large screwdriver and the tool
provided, tighten the compression nut to seal the drain
pipe connection. After the drain is fully installed check
for proper drainage and inspect for leaks.
2429 E Olympic Blvd., Los Angeles, CA 90021
213-627-8441 | www.westbrass.com | [email protected]
TIGHTEN SEALING NUT
TOOL
(INCLUDED)
Remove the tool, locking mechanism and rubber seal
from the inside of the shower drain. Lubricate the seal
with common household liquid soap and slide it over
the 2” drain pipe. With a large screwdriver and the tool
provided, tighten the compression nut to seal the drain
pipe connection. After the drain is fully installed check
for proper drainage and inspect for leaks.
2429 E Olympic Blvd., Los Angeles, CA 90021
213-627-8441 | www.westbrass.com | [email protected]
TIGHTEN SEALING NUT
TOOL
(INCLUDED)
Remove the tool, locking mechanism and rubber seal
from the inside of the shower drain. Lubricate the seal
with common household liquid soap and slide it over
the 2” drain pipe. With a large screwdriver and the tool
provided, tighten the compression nut to seal the drain
pipe connection. After the drain is fully installed check
for proper drainage and inspect for leaks.
2429 E Olympic Blvd., Los Angeles, CA 90021
213-627-8441 | www.westbrass.com | [email protected]
 Loading...