

Page 1
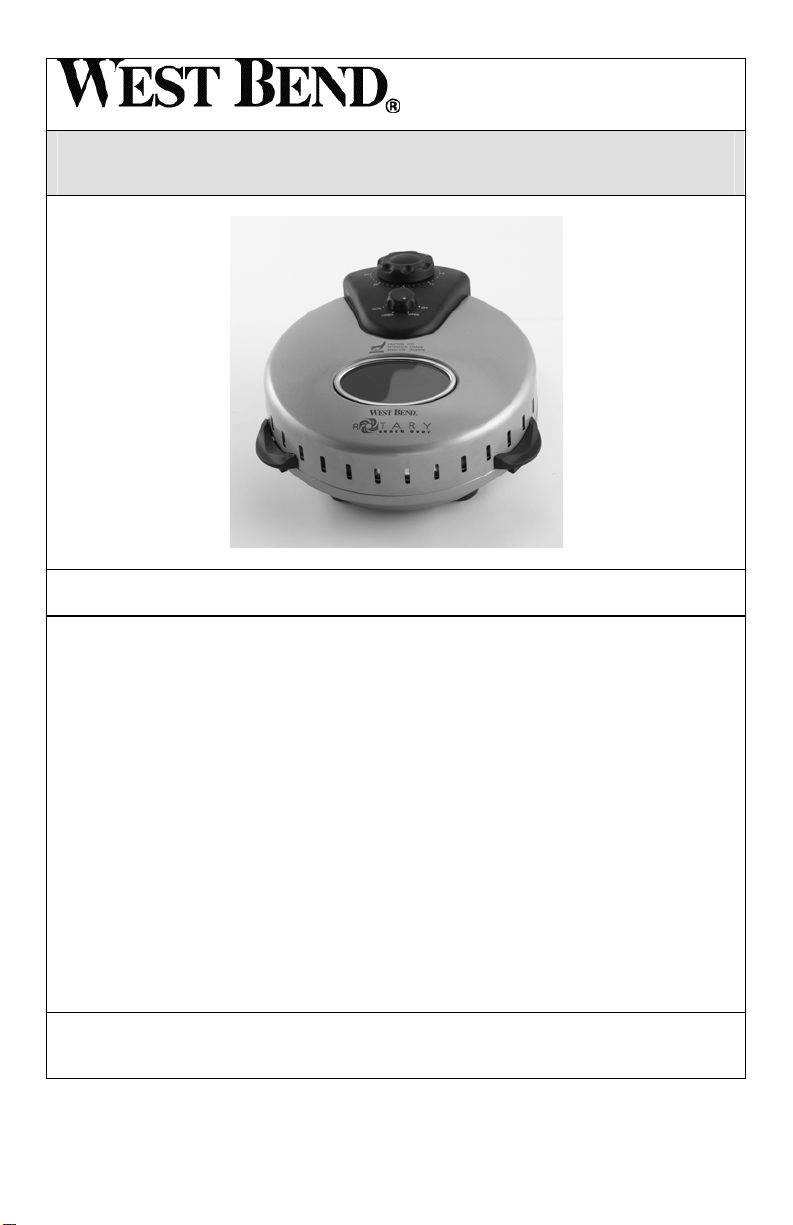
ROTARY OVEN
Instruction Manual
Register this and other Focus Electrics products through our website:
www.focuselectrics.com
Important Safeguards............................................................................................... 2
Heat Precautions...................................................................................................... 2
Electricity Precautions.............................................................................................. 3
Precautions For Use Around Children...................................................................... 4
Fire Precautions ....................................................................................................... 4
Using Your Rotary Oven ..........................................................................................5
Suggested Settings & Cooking Times...................................................................... 7
Recipes .................................................................................................................... 8
Cooking Tips ............................................................................................................9
Cleaning Your Rotary Oven .....................................................................................9
Warranty................................................................................................................. 10
SAVE THIS INSTRUCTION MANUAL FOR FUTURE REFERENCE
© 2007 West Bend, a Brand of Focus Electrics, LLC.
www.focuselectrics.com
Page 2
IMPORTANT SAFEGUARDS
To prevent personal injury or property damage, read and follow all instructions
and warnings.
When using electrical appliances, basic safety precautions should always be
followed including the following:
• Read all instructions, including these important safeguards and the care and use
instructions in this manual.
• Do not use appliance for other than intended use. This device is not intended to
heat oil or other liquids.
• The use of accessory attachments not recommended by Focus Electrics may
cause injuries.
• Do not attempt to repair this appliance yourself.
• Do not store any item on top of the appliance when in operation.
• Do not leave unit unattended while plugged into outlet.
• Do not operate when the appliance is not working properly or when it has been
damaged in any manner. For service information see warranty page.
• Use extreme caution when removing baking tray from unit when hot.
• For household use only.
To prevent burns, personal injury or property damage, read and follow all
instructions and warnings.
HEAT PRECAUTIONS
• Do not touch hot surfaces. Use handles and knobs where provided. Use hot
pads or oven mitts when handling hot surfaces.
• Do not move an appliance containing hot foods.
• Be extremely cautious of steam as you lift the cover.
• Allow unit to cool completely after use before storing.
• Do not touch heating elements as serious burns may result.
• Set baking tray on hot pad, trivet or other heat protective surface. Do not set hot
baking tray directly on the counter, table or other surface.
• Do not use this appliance on the stovetop, under the broiler, in the freezer, or in
a heated oven.
2
Page 3

To prevent electrical shock, personal injury or property damage, read and
follow all instructions and warnings.
ELECTRICITY PRECAUTIONS
• To protect against electric shock, do not immerse cord, plugs, or other electric
parts in water or other liquids.
• Do not operate any appliance with a damaged cord or plug.
• Do not operate when the appliance is not working properly or when it has been
damaged in any manner.
• Do not use this appliance outdoors.
• Do not clean with metal scouring pads. Pieces can break off of the pad and
touch electrical parts, creating a risk of electrical shock.
• Do not plug cord into wall outlet unless all controls are set to OFF position.
• Always turn control to OFF and unplug the appliance from outlet when not in use
and before cleaning. Allow unit to cool completely before putting on or taking off
parts and before cleaning.
• A short power-supply cord is provided to reduce risks resulting from becoming
entangled in or tripping over a longer cord.
• Longer detachable power-supply cords or extension cords are available and
may be used if care is exercised in their use. While use of an extension cord is
not recommended, if you must use one, the marked electrical rating of the
detachable power-supply cord or extension cord should be at least as great as
the electrical rating of the appliance. If the appliance is of the grounded type,
the extension cord should be a grounding-type 3-wire cord. The cord should be
arranged so that it will not drape over the counter top or tabletop where it can be
pulled by children or tripped over.
• This appliance has a polarized plug (one blade is wider than the other). To
reduce the risk of electric shock, this plug is intended to fit into a polarized outlet
only one way. If the plug does not fit fully into the outlet, reverse the plug. If it
still does not fit, contact a qualified electrician. Do not attempt to modify the plug
in any way.
• Do not use an outlet or extension cord if the plug fits loosely or if the outlet or
extension cord feels hot.
• Keep the cord away from hot parts of the appliance and hot surfaces during
operation.
3
Page 4
To prevent burns or other personal injuries to children, read and follow all
instructions and warnings.
• Close supervision is necessary when this appliance is used by or near children.
• Do not allow cord to hang over any edge where a child can reach it. Arrange
PRECAUTIONS FOR USE AROUND CHILDREN
cord to avoid pulling, tripping or entanglement.
To prevent fire, personal injury or property damage, read and follow all
instructions and warnings.
FIRE PRECAUTIONS
• Do not use around or near flammable materials. A fire may occur if the
appliance is covered or touching flammable material, including curtains,
draperies, walls, and the like when in operation.
• Do not leave appliance unattended when in use.
• Failure to clean baking tray may result in fire hazard.
• Oversize foods or metal utensils must not be inserted in this appliance as they
may create a fire or risk of electric shock.
• Do not cover baking tray or line the appliance with aluminum foil.
• Remove any plastic or cardboard wrapping from food before placing into
appliance.
• Unplug appliance and close cover if fire is observed.
SAVE THESE INSTRUCTIONS
4
Page 5

USING YOUR ROTARY OVEN
Venting Holes
Upper Heating
Element
Removable
Baking Pan
Timer Selection
Heating Element Power
Control Switch
(Dual – Lower – Upper
– Off)
Lower
Heating
Element
Drive Shaft
BEFORE FIRST USE
Remove all packing materials. Wash removable baking tray in warm, soapy water.
Rinse and dry. Use a soft damp cloth to wipe all packing dust from the Rotary Oven.
DO NOT IMMERSE ROTARY OVEN OR CORD IN WATER OR ANY OTHER
LIQUID.
5
Page 6

USING YOUR ROTARY OVEN
1. Place Rotary Oven on a dry, level, heat-resistant surface, away from any edge.
2. Open cover and position baking tray into Rotary
Oven aligning the recessed area in center of tray
over the rotating drive in center of base. Do NOT
operate Rotary Oven without baking tray properly
positioned on the rotating drive.
3. Remove food to be cooked from box or wrapper
and cardboard tray. Place food onto baking tray,
centering and/or spacing evenly, for best results.
Do not cover baking tray or line Rotary Oven with
aluminum foil.
4. Close cover. With timer and heat selection control at OFF position, plug cord
into a 120 volt AC electric outlet ONLY.
5. Select heat source by setting heat selection control at DUAL (upper and lower
heat at the same time), UPPER, or LOWER.
6. Set timer for desired cook time. For suggested cooking times refer to cooking
guide in this booklet rather than food-packaging recommendations, as most
foods will cook faster in the Rotary Oven than in a conventional oven.
Remember: When setting timer for less than 15 minutes, you must turn time
past the 15 minute mark and then back to the number of minutes you wish to
time. This must be done to activate timer and turn appliance on. The baking tray
will rotate as the food is cooked. Note: If tray does not rotate, turn timer and
heat selection control to “OFF”, unplug from electrical outlet and allow unit to
cool completely. DO NOT BLOCK OR INSERT ANY OBJECT INTO VENTING
HOLES AS YOU MAY CAUSE HARM TO YOURSELF OR THE APPLIANCE.
Using care not to touch heating elements, check to be sure the baking tray is
positioned correctly onto rotating drive in bottom of base, food is centered on
baking tray and food does not extend beyond the baking tray area. The Rotary
Oven does not require preheating.
7. Alert will sound; indicating selected cooking time has elapsed. Turn heat
selection control to OFF, open cover and check food for doneness. If additional
cooking time is needed, close cover, reset timer to desired time and heat
selection control to desired heat setting. To prevent over browning, check
cooking progress by looking through window in cover. If necessary the cover
can be opened to check doneness. When the cover is opened the baking tray
will stop rotating. However, as the heating elements will remain hot, foods will
continue to cook, therefore, cover should not be left open for extended periods
of time. The baking tray will begin rotating again when the cover is closed.
8. When food is done, turn timer to “OFF” if it is not already at “OFF.” Turn heat
selection control to “OFF.” Unplug unit from electrical outlet. Open cover. Using
a non-metal spatula, carefully remove food from baking tray and place onto a
serving tray, cooling rack or cutting board. DO NOT CUT PIZZA OR OTHER
FOODS ON BAKING TRAY AS SCRATCHING MAY OCCUR.
6
Page 7

SUGGESTED SETTINGS AND COOKING TIMES
HEAT
FOOD
Pizza –
-
Frozen, regular
crust
Frozen, regular
crust, extra
toppings
Frozen, self
rising
Frozen, stuffed
crust
Fresh/Deli Dual 9-11
Other Foods
Precooked
Chicken
Nuggets, frozen
Pizza Rolls Dual 7
Fish Sticks,
frozen
Buffalo Wings Dual 10
SETTING
1
Dual 10-12
Dual 10-12
Lower
Lower
Dual 7
Dual 6
APPROXIMATE
COOK TIME IN
MINUTES
8-10
6-7
HEAT
SETTING
2
Dual 8-10
Dual 11-13
APPROXIMATE
COOK TIME IN
MINUTES
Hash Brown,
patties
Garlic Bread,
frozen slices
Cocktail
Wieners
Precooked
Breakfast
Sausage
Note: Cooking times and settings are suggestions only. You may find that your
personal taste requires longer or different settings. Experiment with the Rotary Oven
until you are satisfied with the results.
Dual 10
Dual 5
Dual 5
Dual 15
7
Page 8

RECIPES
Try some of our favorite recipes using the Focus Electrics Rotary Oven that we have
included on the following pages to get you started.
NOTE: You must turn the timer past the 15-minute mark and then back to the
desired amount of time (if less than 15-minutes) to start the appliance.
During heating, some expansion/contraction sounds may be heard which is normal.
Quesadilla Appetizers
6 8-inch flour tortillas
1 lb. Ground beef
1.25 oz. Package taco seasoning
2¼ oz. Can, sliced black olives, drained
1 Cup Shredded cheddar cheese
1 Cup Shredded Monterey Jack cheese
1. Prepare meat filling following directions on taco seasoning package.
2. Spread tortilla with desired amount of meat filling. Top with black olives,
shredded cheddar and Monterey Jack cheeses.
3. Place prepared Quesadilla onto baking tray. Close cover; set heat selection knob
at Dual and timer for 3 minutes. Cook until meat is bubbly and cheese is melted.
4. Set time and heat selection knob to OFF position, unplug from electrical outlet.
Open cover. Using a spatula, carefully remove food from baking tray and place
on cutting board. Using a knife, cut each Quesadilla into 8 wedges. Place food
onto serving tray.
Mini Rueben Appetizers
Loaf, cocktail rye bread
Sauerkraut, drained
Sliced dried corned beef
Thousand Island dressing
Shredded Swiss cheese
1. Spread 1 side of each slice of rye bread with approximately 1 tablespoon
Thousand Island dressing. Top each slice with desired amount of dried corned
beef, sauerkraut and Swiss cheese.
2. Place each Reuben onto baking tray. Close cover. Set heat selection knob at
Lower and timer for 3 minutes. Set heat selection knob to Upper and set timer
for 3 minutes. Cook until heated through and nicely browned.
3. Set timer and heat selection knob to OFF, unplug from electrical outlet. Open
cover. Using a spatula, carefully remove each Reuben from baking tray and
place onto serving tray.
8
Page 9

Mini Apple Pies
Refrigerated pie crust
Apple pie filling
Powdered sugar frosting
1. With piecrust at room temperature, lay crust flat onto cutting board and cut each
crust into eighths (⅛). Place approximately 1 tablespoon apple pie filling in center
of each crust section. Fold ends and sides of pie crust over filling, sealing edges.
2. Place onto baking tray. Close cover. Set heat selection to Upper and timer for 3
minutes. Then set to Dual for 2-3 minutes of additional cooking. Cook until
heated through and nicely browned.
3. Set timer and heat selection knob to OFF, unplug from electrical outlet. Open
cover. Using a spatula, carefully remove pies from baking tray and place onto
cooling rack. Drizzle with frosting while warm. Place onto serving tray.
COOKING TIPS
1. There are some instances where over cooking a pizza will cause the rising crust
to rise so high it touches the upper heating element, causing the crust and some
of the toppings to burn. Constant monitoring when cooking is always needed,
but is especially critical on self-rising crust pizzas.
2. Suggested cooking times and heat selections are to be used as a guide only.
Experiment with cooking times and heat selections for maximum results and
your preferred doneness.
3. Rotary Oven will not operate unless timer is set. Timer must be turned past the
15 minute mark for Rotary Oven to begin cooking and then back to desired
amount of time if less than 15 minutes.
4. Some snack foods require turning for even and thorough heating.
CLEANING YOUR ROTARY OVEN
DO NOT ATTEMPT TO CLEAN ROTARY OVEN UNLESS COMPLETELY
COOLED.
1. Turn all control settings to “OFF.” Unplug unit from electrical outlet.
2. Baking tray is immersible and can be washed in warm, soapy water. Rinse and
dry thoroughly.
3. Rotary Oven and cord are not immersible. Use a soft, damp cloth to clean
interior and exterior of appliance.
• Do not remove any components from appliance except for baking tray.
• Some natural discoloration on interior of appliance will occur, which is normal.
9
Page 10

PRODUCT WARRANTY
Appliance 1 Year Limited Warranty
Focus Electrics, LLC (“Focus Electrics”) warrants this appliance from failures in the material
and workmanship for one (1) year from the date of original purchase with proof of purchase,
provided the appliance is operated and maintained in conformity with the provided Instruction
Manual. Any failed part of the appliance will be repaired or replaced without charge at Focus
Electrics’ discretion. This warranty applies to indoor household use only.
This warranty does not cover any damage, including discoloration, to any non-stick surface of
the appliance. This warranty is null and void, as determined solely by Focus Electrics if the
appliance is damaged through accident, misuse, abuse, negligence, scratching, or if the
appliance is altered in any way.
THIS WARRANTY IS IN LIEU OF ALL IMPLIED WARRANTIES, INCLUDING WARRANTIES
OF MERCHANTABILITY, FITNESS FOR A PARTICUALR PURPOSE, PERFORMANCE, OR
OTHERWISE, WHICH ARE HERBY EXCLUDED. IN NO EVENT SHALL FOCUS ELECTRICS
BE LIABLE FOR ANY DAMAGES, WHETHER DIRECT, INDIRECT, INCIDENTAL,
FORSEEABLE, CONSEQUENTIAL, OR SPECIAL, ARISING OUT OF OR IN CONNECTION
WITH THIS APPLIANCE.
If you think the appliance has failed or requires service within its warranty period, please
contact the Focus Electrics Customer Service Department at (866) 290–1851 or e-mail us at
service@focuselectrics.com. Return shipping fees are non-refundable. A receipt proving
original purchase date will be required for all warranty claims. Hand-written receipts are not
accepted. Focus Electrics is not responsible for returns lost in transit.
Valid only in USA and Canada
REPLACEMENT PARTS
Replacement parts, if available, may be ordered directly from Focus Electrics online at
www.focuselectrics.com, or you may call or e-mail the service department at the number/e-mail
address listed above, or by writing to us at:
Focus Electrics, LLC
Attn: Customer Service
P. O. Box 2780
West Bend, WI 53095
Be sure to include the catalog/model number of your appliance (located on the bottom/back of
the unit) and a description and quantity of the part you wish to order. Along with this include
your name, mailing address, Visa/MasterCard number, expiration date and the name as it
appears on the card. Checks can be made payable to Focus Electrics, LLC. Call Customer
Service to obtain purchase amount. Your state’s sales tax and a shipping/processing fee will
be added to your total charge. Please allow two (2) weeks for delivery.
This manual contains important and helpful information regarding the safe use and care of your
new Focus Electrics product. For future reference, attach dated sales receipt for warranty proof
of purchase and record the following information:
Date purchased or received as gift: _______________________________________________
Where purchased and price, if known: _____________________________________________
Item number and Date Code (shown bottom/back of product) ___________________________
L5558C 10/07 West Bend, a Brand of Focus Electrics, LLC. Printed in China
10
Page 11

FOUR ROTATIF
Manuel d’instructions
Enregistrez ce produit et d’autres produits Focus Electrics sur notre site Web:
www.focuselectrics.com
Mises en garde importantes ..................................................................................... 2
Précautions liées à la chaleur ..................................................................................2
Précautions liées à l’électricité .................................................................................3
Précautions lors d’une utilisation à proximité d’enfants............................................ 4
Précautions anti-incendie......................................................................................... 4
Mode d’emploi du four rotatif.................................................................................... 5
Réglages suggérés et durées de cuisson ................................................................7
Recettes................................................................................................................... 8
Conseils de cuisson .................................................................................................9
Nettoyage du four rotatif........................................................................................... 9
Garantie .................................................................................................................10
CONSERVEZ CE MANUEL D’INSTRUCTIONS POUR RÉFÉRENCE FUTURE
© 2007 West Bend, a Brand of Focus Electrics, LLC.
www.focuselectrics.com
Page 12

MISES EN GARDE IMPORTANTES
Pour écarter tout risque de blessure et de dégâts matériels, lisez et suivez
toutes ces instructions et tous ces avertissements.
Lorsque vous utilisez des appareils électriques, prenez toujours les précautions de
base, notamment :
• Lisez toutes les instructions, y compris ces mises en garde importantes et le mode
d’emploi et d’entretien décrit dans ce manuel.
• N’utilisez pas l’appareil pour une autre utilisation que l’utilisation indiquée. Cet
appareil ne doit pas être utilisé pour faire chauffer de l’huile ou d’autres liquides.
• L’utilisation d’accessoires non recommandés par Focus Electrics risque de causer
des blessures.
• N’essayez pas de réparer vous-même l’appareil.
• Ne placez rien sur l’appareil en cours de fonctionnement.
• Ne laissez pas l’appareil sans surveillance lorsqu’il est branché sur une
prise électrique.
• N’utilisez pas un appareil qui fonctionne mal ou qui a été endommagé d’une autre
manière. Pour des renseignements concernant les réparations, voir la page de
garantie.
• Faites extrêmement attention en retirant la plaque de cuisson chaude du four.
• Pour usage domestique uniquement.
Pour écarter tout risque de brûlure, blessure et dégâts matériels, lisez et
suivez toutes ces instructions et tous ces avertissements.
PRÉCAUTIONS LIÉES À LA CHALEUR
• Ne touchez pas les surfaces à haute température. Utilisez les poignées
rectangulaires et rondes lorsque celles-ci sont fournies. Utilisez des maniques ou
des gants de cuisine lorsque vous manipulez des surfaces à haute température.
• Ne déplacez jamais un appareil qui contient des aliments chauds.
• Faites très attention à la vapeur en soulevant le couvercle.
• Laissez complètement refroidir l’appareil après usage avant de le ranger.
• Ne touchez pas aux éléments chauffants sous peine de brûlures graves.
• Placez la plaque de cuisson sur un dessous de plat ou une autre surface de
protection. Ne placez pas la plaque de cuisson chaude directement sur le compteur,
la table ou une autre surface.
• N’utilisez pas cet appareil sur le feu de la cuisinière, sous la flamme du gril, dans le
congélateur ou dans le four.
2
Page 13

Pour écarter tout risque d’électrocution, blessure et dégâts matériels, lisez et
suivez toutes ces instructions et avertissements.
PRÉCAUTIONS LIÉES À L’ÉLECTRICITÉ
• Pour vous protéger contre tout choc électrique, n’immergez pas le cordon, les fiches
ni aucune autre pièce électrique dans l’eau ni dans tout autre liquide.La plaque de
cuisson est lavable à l’eau savonneuse chaude.
• N’utilisez pas un appareil dont le cordon ou la fiche est endommagé.
• N’utilisez pas cet appareil à l’extérieur.
• Ne nettoyez pas le grille-pain avec un tampon récurant métallique. Des morceaux
peuvent se détacher du tampon et toucher les composants électriques, présentant
un risque d’électrocution.
• Ne branchez pas le cordon sur une prise murale avant d’avoir pris la précaution
d’arrêter l’appareil.
• Éteignez et débranchez toujours l’appareil de la prise secteur lorsqu’il n’est pas
utilisé et avant de le nettoyer. Laissez complètement refroidir l’appareil avant
d’installer ou de retirer des composants et avant le nettoyage.
• Le cordon d’alimentation fourni est court pour réduire les risques qu’une personne se
prenne les pieds ou trébuche sur un cordon plus long.
• Des cordons d’alimentations plus longs détachables ou des cordons de rallonge sont
disponibles et peuvent être utilisés à condition de faire preuve de prudence lors de
leur utilisation. Bien que l’utilisation d’un cordon de rallonge ne soit pas
recommandée, si vous devez en utiliser un, la puissance nominale indiquée pour le
cordon d’alimentation détachable ou pour le cordon de rallonge devrait être au moins
aussi importante que la puissance nominale de l’appareil. Si l’appareil est de type
raccordé à la terre, le cordon de rallonge devrait être relié à la terre et composé de
trois fils. Le cordon devrait être disposé de manière à ne pas pendre depuis le plan
de travail d’où il risque d’être tiré par des enfants ou d’où quelqu’un pourrait s’y
prendre les pieds.
• Cet appareil est pourvu d’une fiche polarisée (une lame est plus large que l’autre).
Pour réduire le risque d’électrocution, cette fiche est conçue pour s’encastrer dans
une prise secteur polarisée dans un sens uniquement. Si la fiche ne s’insère pas
complètement dans la prise secteur, retournez la fiche. Si elle ne s’encastre toujours
pas, contactez un électricien qualifié. Ne tentez pas de modifier la fiche de quelque
manière que ce soit.
• N’utilisez pas une prise électrique ou une rallonge si la fiche est lâche à l’intérieur de
la prise ou si la prise ou la rallonge est chaude.
• Maintenez le cordon à l’écart des pièces de l’appareil et des surfaces à haute
température pendant l’utilisation.
3
Page 14

Pour éviter tout risque de brûlure et blessure aux enfants, lisez et suivez
toutes ces instructions et tous ces avertissements.
PRÉCAUTIONS LORS D’UNE UTILISATION AUTOUR D’ENFANTS
• Une surveillance étroite est nécessaire lorsque vous cet appareil est utilisé par ou à
proximité d’enfants.
• Ne laissez pas pendre le cordon à un endroit accessible à un enfant. Disposez le
cordon de manière à ce que personne ne puisse tirer ou trébucher dessus, ni
s’emmêler dedans.
Pour écarter tout risque de brûlure, blessure et dégâts matériels, lisez et
suivez toutes ces instructions et tous ces avertissements.
PRÉCAUTIONS LIÉES AUX INCENDIES
• N’utilisez pas l’appareil à proximité de matériaux inflammables. Un incendie peut se
produire si, en cours de fonctionnement, le appareil est couvert ou touche des
matériaux inflammables, y compris des rideaux, des doubles rideaux, des murs et des
matières similaires.
• Ne laissez pas l’appareil en cours d’utilisation sans surveillance.
• Nettoyez régulièrement la plaque de cuisson sous peine de déclencher un incendie.
• Aucun aliment de grande taille ni ustensile métallique ne doit être inséré dans cet
appareil car cela risque de provoquer un risque d’incendie ou d’électrocution.
• Ne couvrez pas la plaque de cuisson et ne tapissez pas le appareil de papier
aluminium.
• Retirez tout l’emballage plastique ou en carton des aliments avant de les placer dans
le appareil.
• Débranchez le appareil et rabattez le couvercle si un incendie se déclenche.
CONSERVEZ CES INSTRUCTIONS
4
Page 15

MODE D’EMPLOI DU FOUR ROTATIF
Bouches d’aération
Élément
chauffant
supérieur
Plaque de
cuisson
amovible
Sélecteur de minuterie
Interrupteur de
commande de
l’alimentation de
l’élément chauffant
(Dual – Lower – Upper –
Off)
Élément
chauffant
inférieur
Arbre de commande
AVANT LA PREMIÈRE UTILISATION
Retirez tous les matériaux d’emballage. Lavez la plaque de cuisson amovible dans de
l’eau savonneuse chaude. Rincez et essuyez. Utilisez un chiffon humide doux pour
éliminer la poussière des emballages du four rotatif. NE PLONGEZ PAS LE FOUR
ROTATIF OU SON CORDON DANS DE L’EAU OU UN AUTRE LIQUIDE.
5
Page 16

MODE D’EMPLOI DU FOUR ROTATIF
1. Utilisez toujours le four rotatif sur une surface plane, sèche et réfractaire, loin du bord
du plan de travail.
2. Soulevez le couvercle et positionnez la plaque de
cuisson dans le four rotatif en alignant la zone
renfoncée au centre de la plaque sur la commande
rotative au centre de la base. NE FAITES PAS
fonctionner le four rotatif sans avoir correctement
positionné la plaque de cuisson sur la
commande rotative.
3. Retirez les aliments à cuire de la boîte ou de
l’emballage et du plateau en carton. Pour obtenir les
meilleures résultats, placez les aliments sur la plaque
de cuisson, en les centrant et/ou espaçant
uniformément. Ne couvrez pas la plaque de cuisson et ne tapissez pas le four rotatif
de papier aluminium.
4. Rabattez le couvercle. Avec la minuterie et le thermostat sur OFF (ARRÊT),
branchez le cordon sur une prise 120 V (~) UNIQUEMENT.
5. Sélectionnez la source de chaleur en réglant le thermostat sur DUAL (chaleur en
haut et en bas en même temps), UPPER (en haut) ou LOWER (en bas).
6. Réglez la minuterie à la durée de cuisson recherchée. Pour les durées de cuisson
suggérées, reportez-vous au guide de cuisson dans ce livret plutôt qu’aux
recommandations des emballages, dans la mesure où la plupart des aliments cuiront
plus vite dans le four rotatif que dans un four conventionnel. Rappel : Lorsque vous
réglez la minuterie à moins de 15 minutes, vous devez tourner au-delà du repère
15 minutes, puis revenir en arrière jusqu’au nombre de minutes désiré. Cette
opération est nécessaire pour activer la minuterie et allumer l’appareil. La plaque de
cuisson tourne durant la cuisson des aliments. Remarque : Si le plateau ne tourne
pas, placez la minuterie et le thermostat sur « OFF » ARRÊT, débranchez l’appareil
de la prise électrique et laissez complètement refroidir. NE BLOQUEZ PAS LES
BOUCHES D’AÉRATION ET N’Y INSÉREZ AUCUN OBJET SOUS PEINE DE VOUS
BLESSER OU D’ENDOMMAGER L’APPAREIL. Veillez à ne pas toucher les éléments
chauffants, assurez-vous que la plaque de cuisson est correctement positionnée sur
la commande de rotation sur la base, que les aliments sont centrés sur la plaque de
cuisson sans déborder de la zone de la plaque de cuisson. Le four rotatif n’exige
aucun préchauffage.
7. Une alerte retentit pour indiquer que la durée de cuisson s’est écoulée. Placez le
thermostat sur « OFF » (ARRÊT), soulevez le couvercle et vérifiez la cuisson des
aliments. Pour prolonger la cuisson, rabattez le couvercle, réglez la minuterie à la
durée souhaitée et le thermostat au réglage désiré. Pour éviter de brûler les
aliments, vérifiez la cuisson en regardant à travers la fenêtre. Si nécessaire, vous
pourrez soulever le couvercle pour vérifier la cuisson. Une fois le couvercle soulevé,
la plaque de cuisson s’arrête de tourner. Toutefois, comme les éléments chauffants
restent chauds, les aliments continuent à cuire ; par conséquent, le couvercle ne doit
pas rester ouvert pendant des périodes prolongées. La plaque de cuisson
recommence à tourner dès que vous rabattez le couvercle.
8. Une fois les aliments cuits, « OFF » (ARRÊTEZ) la minuterie si elle n’est pas déjà
« OFF » (ARRÊTÉE). Tournez le thermostat sur OFF (ARRÊT). Débranchez l’appareil
de la prise électrique. Soulevez le couvercle. À l’aide d’une spatule non métallique,
retirez avec précaution les aliments de la plaque de cuisson et placez-les sur un plat
de service, une grille de refroidissement ou une planche à découper. NE COUPEZ
PAS LA PIZZA OU D’AUTRES ALIMENTS SUR LA PLAQUE DE CUISSON SOUS
PEINE DE LA RAYER.
6
Page 17

A
RÉGLAGES SUGGÉRÉS ET DURÉES DE CUISSON
ALIMENT
Pizza –
23 à 30,5 cm
Surgelée, pâte
d’épaisseur
standard
Surgelée, pâte
d’épaisseur
standard, garnitures
supplémentaires
Surgelée,
auto-levante
Surgelée, pâte
fourrée
Fraîche/gourmet Dual 9 à 11
Autres aliments
Pépites de poulet
précuites,
surgelées
Pizza-fingers Dual 7
Morceaux de
poisson pané,
surgelés
RÉGLAGE
THERMOSTAT
1
Dual 10 à 12
Dual 10 à 12
Lower
Lower
Dual 7
Dual 6
DURÉE DE
CUISSON
APPROXIMATIVE
EN MINUTES
8 à 10
6-7
RÉGLAGE
THERMOSTAT
2
Dual 8 à 10
Dual 11 à 13
DURÉE DE
CUISSON
PPROXIMATIVE
EN MINUTES
Ailes de poulet
à la Buffalo
Pommes de terre
rissolées, galettes
Pain à l’ail,
tranches surgelées
Saucisses à
cocktail
Saucisse fine
précuite
Dual 10
Dual 10
Dual 5
Dual 5
Dual 15
Remarque: Les durées de cuisson et réglages sont uniquement fournis à titre de
suggestion.
Vous pourrez les adapter à vos goûts personnels. Faites des essais avec
votre four rotatif jusqu’à ce que vous soyez satisfait des résultats.
7
Page 18

RECETTES
Essayez nos recettes favorites avec le four rotatif Focus Electrics qui figurent aux pages
suivantes.
REMARQUE: Vous devez tourner la minuterie au-delà du repère 15 minutes, puis la
ramener à la durée souhaitée (si la durée est inférieure à 15 minutes) pour allumer
le appareil.
Durant la chauffe, vous pourrez constater des bruits d’expansion/contraction, ce qui
est normal.
Quesadilla pour hors-d’œuvre
6 Tortillas de farine de 20 cm
1 livre Bœuf haché
35 g Paquet d’assaisonnement pour tacos
64 g Boîte, olives noires émincées, égouttées
1 tasse Fromage cheddar râpé
1 tasse Fromage Monterey Jack râpé
1. Préparez la farce à la viande en suivant les instructions du paquet d’assaisonnement
pour tacos.
2. Étalez la quantité souhaité de farce à la viande sur la tortilla. Garnissez d’olives noire
et de cheddar et de Monterey Jack râpés.
3. Placez la quesadilla préparée sur la plaque de cuisson. Rabattez le couvercle ;
tournez le thermostat sur Dual et réglez la minuterie à 3 minutes. Faites cuire jusqu’à
ce que la viande mijote et que le fromage soit râpé.
4. Arrêtez la minuterie et le thermostat, puis débranchez de la prise électrique. Soulevez
le couvercle. À l’aide d’une spatule, retirez avec précaution les aliments de la plaque
de cuisson et placez-les sur une planche à découper. Avec un couteau, coupez
chaque quesadilla en 8 triangles. Placez sur un plat de service.
Mini hors-d’œuvre Reuben
Miche de pain de seigle
Choucroute, égouttée
Bœuf salé sec en tranches
Assaisonnement à salade Thousand Island
Gruyère râpé
1. Étalez sur un côté de chaque tranche de pain de seigle 1 cuillère à soupe environ
d’assaisonnement Thousand Island. Garnissez chaque tranche de la quantité
souhaitée de bœuf salé sec, choucroute et gruyère.
2. Placez chaque Reuben sur la plaque de cuisson. Rabattez le couvercle. Tournez le
thermostat sur Lower et réglez la minuterie à 3 minutes. Tournez le thermostat sur
Upper et réglez la minuterie à 3 minutes. Faites cuire jusqu’à ce que l’ensemble soit
chaud et doré.
3. Arrêtez la minuterie et le thermostat, puis débranchez de la prise électrique.
Soulevez le couvercle. À l’aide d’une spatule, retirez avec précaution chaque
Reuben de la plaque de cuisson et placez sur un plat de service.
8
Page 19

Mini-tourte aux pommes
Pâte brisée réfrigérée
Garniture pour tarte aux pommes
Glaçage au sucre glace
1. La pâte doit être à température ambiante. Posez-la à plat sur la planche à découper
et coupez-la en 8. Placez 1 cuillère à soupe environ de garniture aux pommes au
centre de chaque bout de pâte. Repliez la pâte sur la garniture, en scellant les bords.
2. Placez sur la plaque de cuisson. Rabattez le couvercle. Tournez le thermostat sur
Upper et réglez la minuterie à 3 minutes. Ensuite, réglez le thermostat sur Dual pour
prolonger la cuisson de 2-3 minutes. Faites cuire jusqu’à ce que l’ensemble soit
chaud et doré.
3. Arrêtez la minuterie et le thermostat, puis débranchez de la prise électrique.
Soulevez le couvercle. À l’aide d’une spatule, retirez avec précaution les petites
tourtes de la plaque de cuisson et posez-les sur une grille de refroidissement.
Appliquez le glaçage sur les mini-tourtes encore chaudes. Placez sur le plat
de service.
CONSEILS DE CUISSON
1. Parfois, la cuisson excessive d’une pizza entraîne le levage de la pâte si haut qu’elle
touchera l’élément chauffant supérieur, ce qui causera la brûlure de la pâte et de la
garniture. Il est toujours judicieux de surveiller la cuisson, mais surtout celle des
pizzas à pâte auto-levante.
2. Les durées de cuisson et réglages de thermostat suggérées sont uniquement fournis
à titre de référence. Pour les meilleurs résultats en fonction de vos goûts personnels,
expérimentez avec les durées de cuisson et réglages de thermostat.
3. Le four rotatif ne fonctionnera pas sans activation préalable de la minuterie. Vous
devez tourner la minuterie au-delà du repère 15 minutes, puis la ramener à la durée
souhaitée (si la durée est inférieure à 15 minutes) pour allumer le four.
4. Certains snacks doivent être retournés pour chauffer complètement et uniformément.
NETTOYAGE DU FOUR ROTATIF
N’ESSAYEZ PAS DE NETTOYER LE FOUR ROTATIF AVANT SON
REFROIDISSEMENT COMP LET.
1. Tournez le thermostat sur « OFF » (ARRÊT). Débranchez l’appareil de la prise
électrique.
2. La plaque de cuisson est lavable à l’eau savonneuse chaude. Rincez et essuyez
bien.
3. Le four rotatif et son cordon ne doivent pas être plongés dans un liquide.
Utilisez un chiffon doux humide pour nettoyer l’intérieur et l’extérieur de l’appareil.
• Ne retirez aucun composants de l’appareil, sauf la plaque de cuisson.
• Une décoloration naturelle se produira à l’intérieur de l’appareil ceci est normal.
9
Page 20

GARANTIE DU PRODUIT
Garantie limitée d’1 an de l’appareil
Focus Electrics, LLC garantit cet appareil contre tout défaut de pièce et de main d’œuvre
pendant un (1) an à compter d el date d’achat d’origine avec un justificatif d’achat à condition
que l’appareil soit utilisé et entretenu conformément avec le Mode d’emploi de Focus Electrics.
Toute pièce défectueuse de l’appareil sera réparée ou remplacée sans frais à la discrétion de
Focus Electrics. Cette garantie s’applique en cas d’utilisation domestique en intérieur
uniquement.
La présente garantie ne couvre aucun dommage, notamment la décoloration, de toute surface
antiadhésive de l’appareil. Cette garantie est nulle et non avenue, tel que déterminé
uniquement par Focus Electrics si l’appareil est détérioré à la suite d’un accident, d’une
mauvaise utilisation, d’une utilisation abusive, d’une négligence, d’une rayure ou si l’appareil
est modifié de toute manière.
LA PRÉSENTE GARANTIE ANNULE ET REMPLACE TOUTE GARANTIE INDUITE,
NOTAMMENT LES GARANTIES DE COMMERCIALISATION, D’ADAPTATION À UN USAGE
PARTICULIER, DE PERFORMANCE, OU AUTRE QUI SONT ICI EXCLUES. EN AUCUN CAS
FOCUS ELECTRICS. NE POURRA ÊTRE TENUE POUR RESPONSABLE DE TOUT
DOMMAGE, QUE CELUI-CI SOIT DIRECT, INDIRECT, INDUIT, PRÉVISIBLE, SECONDAIRE
OU PARTICULIER, RÉSULTANT DE L’UTILISATION DE OU EN RELATION AVEC CET
APPAREIL.
Si vous pensez que cet appareil est défectueux ou nécessite des réparations pendant la durée
de sa garantie, veuillez contacter le Service clientèle de Focus Electrics au (866) 290-1851 ou
nous envoyer un e-mail à
pas remboursables. Une facture justifiant la date d’achat d’origine sera nécessaire pour toute
demande dans le cadre de la garantie. Les factures manuscrites ne sont pas acceptées. Focus
Electrics n’est pas responsable pour les retours perdus pendant le transport.
service@focuselectrics.com. Les frais de transport de retour ne sont
Valide uniquement aux USA et au Canada
PIECES DE RECHANGE
Les pièces de rechange, lorsque celles-ci sont disponibles, peuvent être commandées directement
auprès de Focus Electrics en ligne sur www.focuselectrics.com. Ou vous pouvez téléphoner ou
adresser un e-mail au service des réparations au numéro/à l’adresse e-mail ci-dessus, ou en nous
écrivant à :
Focus Electrics, LLC
Attn: Customer Service
P. O. Box 2780
West Bend, WI 53095
Assurez-vous d’indiquer le numéro de catalogue/modèle de votre appareil (situé au bas/dos de
l’appareil) et une description ainsi qu’une quantité pour la pièce que vous souhaitez commander.
Joignez à ces informations votre nom, votre adresse postale, votre numéro de carte Visa/MasterCard,
la date d’expiration et le nom du titulaire tel qu’il apparaît sur la carte. Les chèques peuvent être
libellés à l’ordre de Focus Electrics, LLC. Appelez le Service clientèle pour obtenir le montant de
l’achat. La taxe commerciale de votre état et des frais de transport/traitement seront ajoutés à votre
facturation totale. Veuillez autoriser deux (2) semaines pour la livraison.
Ce manuel contient des informations importantes et utiles concernant l’utilisation et l’entretien sans
danger de votre nouveau produit Focus Electrics. Pour une consultation ultérieure, fixez le ticket de
caisse daté pour avoir un justificatif d’achat pour la garantie et indiquez les informations ci-dessous:
Date d’achat ou de réception en cadeau : _____________________________________________
Lieu d’achat et prix, si connu : ______________________________________________________
Numéro de l’article et Code de date (indiqué au bas/dos du produit) : _______________________
L5558C 10/07 West Bend, a Brand of Focus Electrics, LLC. Printed in China
10
Page 21

HORNO GIRATORIO
Manual de instrucciones
Registre éste y otros productos de Focus Electrics en nuestro sitio:
www.focuselectrics.com en Internet
Precauciones importantes........................................................................................ 2
Precauciones de calentamiento ............................................................................... 2
Precauciones eléctricas ........................................................................................... 3
Precauciones de uso cerca de niños........................................................................ 4
Precauciones contra incendios ................................................................................ 4
Uso del horno giratorio............................................................................................. 5
Ajustes y tiempo de cocción sugeridos .................................................................... 7
Recetas.................................................................................................................... 8
Consejos de cocción ................................................................................................ 9
Limpieza del horno giratorio ..................................................................................... 9
Garantía ................................................................................................................. 10
CONSERVE ESTAS INSTRUCCIONES COMO REFERENCIA PARA EL FUTURO
© 2007 West Bend, a Brand of Focus Electrics, LLC.
www.focuselectrics.com
Page 22

PRECAUCIONES IMPORTANTES
Para evitar lesiones personales o daños materiales, lea y acate todas las
instrucciones y advertencias.
Al utilizar aparatos eléctricos, siempre deben acatarse las precauciones básicas de
seguridad incluyendo las siguientes:
• Lea todas las instrucciones, incluyendo estas precauciones importantes, así como
las instrucciones de uso y cuidado en este manual.
• No utilice el aparato para usos distintos del indicado. Este aparato no está diseñado
para calentar aceite ni otros líquidos.
• El uso de accesorios no recomendados por Focus Electrics puede causar lesiones.
• No trate de reparar este aparato usted mismo.
• No guarde ningún producto en la parte superior de este aparato cuando
esté funcionando.
• No deje el aparato desatendido cuando esté enchufado en un
tomacorriente eléctrico.
• No opere el artefacto cuando no funcione correctamente o haya sido dañado de algún modo.
Para información relativa al servicio vea la página de garantías.
• Tenga sumo cuidado al retirar la bandeja de hornear cuando la unidad esté caliente.
• Para uso doméstico solamente.
Para evitar quemaduras, lesiones personales o daños materiales, lea y acate
todas las instrucciones y advertencias.
PRECAUCIONES DE CALENTAMIENTO
• No toque las superficies calientes. Use las asas o perillas donde estén provistas. Use
almohadillas térmicas o guantes para horno al manipular superficies calientes.
• No traslade un aparato que contenga alimentos calientes.
• Tenga sumo cuidado con el vapor a levantar la tapa.
• Deje que la unidad se enfríe totalmente después de usarla y antes de guardarla.
• No toque los elementos calentadores ya que podría sufrir quemaduras graves.
• Coloque la bandeja de hornear en un tomaollas, soporte u otra superficie resistente
al calor. No coloque la bandeja de hornear caliente directamente en un mostrador,
mesa u otra superficie.
• No coloque este aparato sobre la estufa o cocina, bajo un asador, en el congelador
ni en el horno.
2
Page 23

Para evitar descargas eléctricas, lesiones personales o daños materiales, lea y
acate todas las instrucciones y advertencias.
PRECAUCIONES ELÉCTRICAS
• Para protegerse contra descargas eléctricas no sumerja el cable, enchufes, u otras
partes eléctricas en agua u otros líquidos.
• No opere ningún aparato cuyo cable de alimentación o enchufe estén dañados.
• No use este aparato a la intemperie.
• No lo limpie con esponjas metálicas. Pueden desprenderse trozos de la esponja y
tocar las piezas eléctricas causando un peligro de descarga eléctrica.
• No enchufe el cable en un tomacorriente mural a menos que los controles estén en
la posición OFF (apagado).
• Siempre gire el control a la posición OFF (apagado) y desenchufe el aparato del
tomacorriente cuando no esté en uso y antes de limpiarlo. Deje que la unidad se
enfríe totalmente antes de agregarle o quitarle piezas y antes de limpiarla.
• Se suministra un cordón eléctrico corto para reducir los riesgos que resultan de
enredarse o tropezarse con un cordón eléctrico más largo.
• Hay disponibles cordones de alimentación eléctrica desmontables más largos o
extensiones eléctricas y pueden ser utilizados si se ejerce cuidado al usarlos.
Mientras el uso de una extensión eléctrica no es recomendado, si usted debe usar
una, la capacidad eléctrica nominal marcada en el cordón desmontable de
alimentación eléctrica o la extensión eléctrica deberá ser al menos la misma que la
capacidad eléctrica nominal del artefacto electrodoméstico. Si el artefacto
electrodoméstico es del tipo conectado a tierra, la extensión eléctrica deberá ser un
cordón eléctrico de 3 hilos con conexión a tierra. El cordón eléctrico debería ser
extendido de tal manera que no pase sobre encimeras o mesas donde pueda ser
tirado por niños o tropezarse con el mismo.
• Este artefacto tiene un enchufe polarizado (una clavija es más ancha que la otra).
Para reducir el riesgo de descarga eléctrica, este enchufe está diseñado para
encajar de una sola manera en un tomacorriente polarizado. Invierta el enchufe si
éste no encaja completamente en el tomacorriente o en el cable de extensión. Si
todavía no encaja, póngase en contacto con un electricista calificado. No trate de
modificar el enchufe de manera alguna.
• No use un tomacorriente o cable de extensión si el enchufe calza flojamente,
o si el tomacorriente o el cable de extensión se calientan.
• Mantenga el cordón eléctrico alejado de las partes calientes del artefacto
electrodoméstico mientras éste esté operándose.
3
Page 24

Para prevenir quemaduras u otras lesiones en los niños, lea y acate todas las
instrucciones y advertencias.
• Se requiere de supervisión adulta cuando cualquier artefacto electrodoméstico sea
usado por o cerca de niños.
• No permita que el cable cuelgue de algún borde, donde pueda ser alcanzado por los
niños. Coloque el cable de modo que impida lesiones que resulten del halar,
tropezarse o enredarse en el mismo.
Para evitar incendios, lesiones personales o daños materiales, lea y acate
todas las instrucciones y advertencias.
PRECAUCIONES CONTRA INCENDIOS
• No use el aparato alrededor o cerca de materiales inflamables. Puede producirse un
incendio si el aparato se usa mientras está cubierto o si entra en contacto con
materiales inflamables incluyendo cortinas, tapices, paredes y materiales afines.
• Nunca deje el aparato desatendido cuando esté en uso.
• El no limpiar la bandeja de hornear puede causar peligro de incendio.
• La comida demasiado grande o los utensilios metálicos no deben insertarse en este
artefacto electrodoméstico ya que pueden causar un fuego o una descarga eléctrica.
• No cubra la bandeja de hornear ni revista el aparato con papel de aluminio.
• Retire de los alimentos las envolturas plásticas o de cartón antes de colocarlos en el
aparato.
• Desenchufe el aparato y cierre la tapa si detecta fuego.
PRECAUCIONES DE USO CERCA DE NIÑOS
CONSERVE ESTAS INSTRUCCIONES
4
Page 25

USO DEL HORNO GIRATORIO
Orificios de ventilación
Elemento
calentador
superior
Fuente
para hornear
retirable
Selección del temporizador
Elemento
calentador
inferior
Eje impulsor
Interruptor de control de
la corriente al elemento
(superior) – Off (apagado)
térmico
Dual (doble) – Lower
(inferior) – Upper
ANTES DE USAR LA UNIDAD POR PRIMERA VEZ
Retire todos los materiales de embalaje. Lave la bandeja de hornear retirable en agua
tibia con detergente. Enjuáguela y séquela. Use un paño suave y húmedo para eliminar
del horno giratorio el polvo del material de embalaje. NO SUMERJA EL HORNO
GIRATORIO NI EL CABLE EN AGUA U OTRO LÍQUIDO.
5
Page 26

USO DEL HORNO GIRATORIO
1. Siempre use el horno giratorio sobre una superficie seca, nivelada y resistente al
calor, lejos de todo borde.
2. Abra la tapa y coloque la bandeja de hornear en el
horno giratorio alineando el área embutida de la
bandeja sobre el accionador giratorio situado en el
centro de la base. NO haga funcionar el horno si la
bandeja de hornear no está correctamente colocada
en el accionador giratorio.
3. Retire el alimento que va a cocinar de su envoltura y
bandeja de cartón. Coloque el alimento en la bandeja
de hornear, centrándolo y/o espaciándolo de manera
uniforme a fin de obtener resultados óptimos. No cubra
la bandeja de hornear ni revista el horno giratorio con
papel de aluminio.
4. Cierre la tapa. Con el temporizador y el control de temperatura en la posición OFF
(apagado), enchufe la unidad SÓLO en un tomacorriente eléctrico de 120 voltios
de CA.
5. Seleccione la fuente de calor fijando el control de temperatura en DUAL (calor
superior e inferior al mismo tiempo), UPPER (superior), o LOWER (inferior).
6. Fije el temporizador en el tiempo de cocción deseado. Para hallar los tiempos de
cocción sugeridos, consulte la guía de cocción en este folleto en vez de las
recomendaciones que vienen en el envase de los alimentos, ya que la mayoría de los
alimentos se cocinan más rápidamente en el horno giratorio que en un horno
convencional. Recuerde: Cuando fije el temporizador en menos de 15 minutos, debe
girarlo más allá de la marca de 15 minutos y luego volver a la cantidad de minutos
deseados. Esto debe hacerlo para activar el temporizador y encender la unidad. La
bandeja de hornear girará a medida que el alimento se cuece. Nota: Si la bandeja no
gira, coloque el temporizador y el control de temperatura en la posición “OFF”
(apagado), desenchufe la unidad del tomacorriente y déjela que se enfríe totalmente.
NO BLOQUEE NI INTRODUZCA NINGÚN OBJETO EN LOS ORIFICIOS DE
VENTILACIÓN YA QUE PODRÍA SUFRIR LESIONES O DAÑAR EL APARATO. Tenga
sumo cuidado para no tocar los elementos calentadores; cerciórese de que la bandeja
de hornear esté correctamente situada sobre el accionador giratorio en la parte inferior
de la base, que el alimento esté centrado en la bandeja de hornear y que no se
extienda más allá del área de la misma. No es necesario precalentar el horno giratorio.
7. El tono de alerta sonará para indicar que se ha alcanzado el tiempo de cocción
seleccionado. Gire el control de temperatura a la posición OFF (apagado), abra la tapa
y revise si el alimento está cocido. Si se requiere más tiempo de cocción, cierre la tapa,
reinicie el temporizador en el tiempo deseado y fije el control de temperatura en el
ajuste correcto. Par impedir que el alimento se dore demasiado, inspeccione el
progreso de la cocción mirando por la ventana de la tapa. Si es preciso, puede abrir la
tapa para revisar la cocción. Tras abrirla, la bandeja de hornear dejará de girar. Sin
embargo, como los elementos calentadores permanecerán calientes, el alimento
continuará cociéndose; por lo tanto, no deje la puerta abierta por períodos prologados.
La bandeja de hornear comenzará a girar nuevamente tras cerrarse la tapa.
8. Una vez que el alimento esté cocido, gire el temporizador a la posición “OFF”
(apagado) si éste no ha llegado a dicha posición. Gire el control de temperatura a la
posición “OFF” (apagado). Desenchufe la unidad del tomacorriente. Abra la tapa.
Use una espátula que no sea de metal y retire cuidadosamente el alimento de la
bandeja de hornear, y colóquelo en una bandeja de servir, rejilla de enfriamiento o
tabla de cortar. NO CORTE PIZZAS NI OTROS ALIMENTOS EN LA BANDEJA DE
HORNEAR YA QUE PUEDE RAYARLA.
6
Page 27

AJUSTES Y TIEMPO DE COCCIÓN SUGERIDOS
AJUSTE DE
ALIMENTO
Pizza –9-12
pulgadas
Masa regular,
congelada
Masa regular
congelada,
ingredientes
adicionales
Congelada,
autoleudante
Congelada, masa
rellena
Fresca/no
congelada
Otros alimentos
TEMPERATURA
1
Dual 10-12
Dual 10-12
Lower
Lower
Dual 9-11
TIEMPO DE
COCCIÓN
APROXIMADO
EN MINUTOS
8-10
6-7
AJUSTE DE
TEMPERATURA
2
Dual 8-10
Dual 11-13
TIEMPO DE
COCCIÓN
APROXIMADO
EN MINUTOS
Bocaditos de
pollo precocidos,
congelados
Panecillos de
pizza
Deditos de
pescado,
congelados
Alitas de pollo
estilo a la
barbacoa
Papas doradas
Hash Brown
Rebanadas
congeladas de
pan de ajo
Salchichas
pequeñas
Salchichas
precocidas para
desayuno
Dual 7
Dual 7
Dual 6
Dual 10
Dual 10
Dual 5
Dual 5
Dual 15
Nota: Los tiempos y ajustes de cocción se proporcionan como sugerencias solamente. Es
que según su gusto, dichos tiempos y ajustes sean más largos o diferentes.
posible
Experimente con el horno giratorio hasta obtener resultados satisfactorios.
7
Page 28

RECETAS
Prepare algunas de nuestras recetas favoritas con el horno giratorio de Focus Electics
que hemos incluido en las siguientes páginas.
NOTA: Debe girar el temporizador más allá de la marca de 15 minutos y luego
volver a la cantidad de minutos deseados (si va a fijarlo en menos de 15 minutos) a
fin de encender la aparato.
Pueden notarse algunos sonidos de expansión o contracción durante el calentamiento, lo
cual es normal.
Quesadillas en trocitos
6 Tortillas de harina de 8 pulgadas
1 lb. de carne molida
1 paquete de 1.25 oz. de aderezo para tacos
1 lata de 2¼ oz. de aceitunas negras rebanadas y drenadas
1 taza de queso cheddar picado
1. Prepare el relleno de carne siguiendo las instrucciones que aparecen en el paquete
de aderezo para tacos.
2. Esparza en la tortilla la cantidad deseada de relleno de carne. Agregue las aceitunas
negras, el queso cheddar y Monterey Jack picados.
3. Coloque la quesadilla preparada en la bandeja de hornear. Cierre la tapa; coloque la
perilla de temperatura en el ajuste Dual (doble) y el temporizador en 3 minutos.
Cocine hasta que se formen burbujas en la carne y el queso se haya derretido.
4. Coloque el temporizador y la perilla de temperatura en la posición OFF (apagado) y
desenchufe la unidad del tomacorriente. Abra la tapa. Use una espátula y retire
cuidadosamente el alimento de la bandeja de hornear y colóquelo en una tabla de
cortar. Use un cuchillo y corte la quesadilla en 8 tajadas. Coloque el alimento en un
plato de servir.
Hogaza de pan centeno para cóctel
Chucrut drenado
Pecho de res seco cortado en rebanadas
Aderezo Thousand Island
Queso suizo picado
1. Esparza aproximadamente 1 cucharada de aderezo Thousand Island en cada
rebanada de pan centeno. Agregue a cada rebanada la cantidad deseada de pecho
de res seco, chucrut y queso suizo.
2. Coloque cada miniemparedado Reuben en la bandeja de hornear. Cierre la tapa.
Coloque la perilla de temperatura en el ajuste Lower (inferior) y el temporizador en 3
minutos. Coloque la perilla de temperatura en el ajuste Upper (superior) y el
temporizador en 3 minutos. Cocine hasta que los emparedados se hayan calentado
y dorado totalmente.
3. Coloque el temporizador y la perilla de temperatura en la posición OFF (apagado) y
desenchufe la unidad del tomacorriente. Abra la tapa. Use una espátula y retire
cuidadosamente cada emparedado de la bandeja de hornear y colóquelos en un
plato de servir.
1 taza de queso Monterey Jack picado
Miniemparedados Rueben
8
Page 29

Minipasteles de manzana
Masa de pastel refrigerada
Relleno para pastel de manzana
Betún de azúcar en polvo
1. Con la masa de pastel a temperatura ambiente, colóquela en forma plana en la tabla
y córtela en octavos (⅛). Agregue aproximadamente 1 cucharada de relleno para
pastel de manzana en el centro de cada sección de masa. Doble los extremos y los
lados de la masa sobre el relleno sellando los bordes.
2. Coloque los pasteles en la bandeja de hornear. Cierre la tapa. Coloque la perilla de
temperatura en el ajuste Upper (superior) y el temporizador en 3 minutos. Luego
colóquela en el ajuste Dual (doble) durante 2 a 3 minutos adicionales. Cocine hasta
que los pasteles se hayan calentado y dorado totalmente.
3. Coloque el temporizador y la perilla de temperatura en la posición OFF (apagado) y
desenchufe la unidad del tomacorriente. Abra la tapa. Use una espátula y retire
cuidadosamente los pasteles de la bandeja de hornear y colóquelos en una rejilla de
enfriamiento. Espolvoréelos con el azúcar mientras estén calientes. Colóquelos en la
bandeja de servir.
CONSEJOS DE COCCIÓN
1. A veces, cuando se cocina excesivamente una pizza, la masa sube tan alto que toca
el elemento calentador superior quemando la masa y los demás ingredientes.
Siempre se debe supervisar constantemente la cocción de los alimentos,
especialmente cuando se trata de pizzas preparadas con masa autoleudante.
2. Los tiempos y temperaturas de cocción sugeridos deben usarse sólo como guía.
Experimente con los tiempos y temperaturas de cocción hasta obtener los resultados
preferidos.
3. El horno giratorio no funcionará si el temporizador no está fijado. Se debe girar el
temporizador más allá de la marca de 15 minutos para que el horno giratorio
comience a cocer el alimento, y luego volver a la cantidad de minutos deseados si
va a fijarlo en menos de 15 minutos.
4. Algunos alimentos deben voltearse para calentarlos en forma uniforme y total.
LIMPIEZA DEL HORNO GIRATORIO
NO LIMPIE EL HORNO GIRATORIO SI NO SE HA ENFRIADO TOTALMENTE.
1. Coloque todos los ajustes de control en la posición “OFF” (apagado). Desenchufe la
unidad del tomacorriente.
2. La bandeja de hornear puede sumergirse y lavarse en agua caliente con detergente.
Enjuáguela y séquela totalmente.
3. El horno giratorio y el cable no son sumergibles. Use un paño suave y húmedo
para limpiar el interior y exterior del aparato.
• No retire ningún componente del aparato, aparte de la bandeja de hornear.
• La unidad sufrirá descoloramiento natural en su interior esto es normal.
9
Page 30

GARANTÍA DEL PRODUCTO
Garantía limitada de 1 año del artefacto electrodoméstico
Focus Electrics, LLC (“Focus Electrics”) garantiza que este aparato no presentará fallas de
material ni fabricación durante un (1) año a partir de la fecha original de compra con prueba de
dicha compra, siempre y cuando el aparato sea operado y mantenido tal como se indica en el
manual de instrucciones provisto. Toda pieza del aparato que presente fallas será reparada o
reemplazada sin costo alguno a criterio de Focus Electrics. Esta garantía rige solamente para
el uso domestico dentro de la casa.
Esta garantía no cubre ningún daño, incluyendo la decoloración, de superficie antiadherente
alguna del aparato electrodoméstico. Esta garantía es nula y sin valor, según lo determine
exclusivamente Focus Electrics si el artefacto electrodoméstico es dañado a causa de
accidente, mal uso, abuso, negligencia, rayaduras, o si el artefacto electrodoméstico es
cambiado de algún modo.
ESTA GARANTÍA REEMPLAZA A TODAS LAS DEMÁS GARANTÍAS IMPLÍCITAS,
INCLUYENDO AQUÉLLAS DE COMERCIABILIDAD, IDONEIDAD PARA UN FIN O USO EN
PARTICULAR, DESEMPEÑO, U OTROS TIPOS, LAS CUALES QUEDAN EXCLUIDAS
MEDIANTE EL PRESENTE DOCUMENTO. FOCUS ELECTRICS RECHAZA TODA
RESPONSABILIDAD POR DAÑOS, YA SEAN DIRECTOS, INDIRECTOS, INCIDENTALES,
PREVISIBLES, CONSECUENTES O ESPECIALES QUE SURJAN DE ESTE APARATO
ELECTRODOMÉSTICO O GUARDEN RELACIÓN CON EL MISMO.
Si piensa que el artefacto electrodoméstico se ha dañado o requiere de servicio dentro de su
período de garantía, por favor póngase en contacto con el Departamento de Atención al
Cliente de Focus Electrics por el (866) 290-1851 o contáctenos por correo electrónico a la
service@focuselectrics.com. Los gastos de devolución no son reembolsables. Para todas las
reclamaciones de garantía, se requerirá un recibo que demuestra la fecha de compra original.
Los recibos escritos a mano no son aceptados. Focus Electrics no se hace responsable de las
devoluciones perdidas en tránsito.
Válido sólo en EE.UU. y Canadá
REPUESTOS
Las partes de repuestos, si están disponibles, pueden pedirse directamente en línea a Focus
Electrics en
departamento de servicio al número telefónico o dirección de correo electrónico arriba
indicados, o escribiéndonos a:
Focus Electrics, LLC
Attn: Customer Service
P. O. Box 2780
West Bend, WI 53095
Cerciórese de incluir el número de catálogo/modelo del aparato electrodoméstico (situado en la
parte inferior/posterior de la unidad) así como la descripción y la cantidad de repuestos que
necesita. Junto con esta información, incluya su nombre, dirección postal, número de tarjeta
de crédito Visa o MasterCard, la fecha de vencimiento y el nombre tal como aparece en la
tarjeta. Los cheques pueden ser pagaderos a Focus Electrics, LLC. Llame al Departamento
de Atención al Cliente para obtener el monto de la compra. Se sumará al total el impuesto de
venta estatal que corresponda, más un cargo por despacho y procesamiento. La entrega tarda
dos (2) semanas.
Este manual contiene información importante y útil sobre el uso seguro y el cuidado de su nuevo producto
Focus Electrics. Para su propia referencia, archive aquí el recibo fechado que sirve de comprobante de
compra para la garantía, y anote la siguiente información:
Fecha en que compró o recibió la unidad como regalo: __________________________________________
Dónde se efectuó la compra y el precio, si lo sabe: _____________________________________________
Número y código de fecha del producto (aparece en la parte inferior/posterior de la unidad): _____________
www.focuselectrics.com, o puede llamar o enviar un correo electrónico al
L5558C 10/07 West Bend, a Brand of Focus Electrics, LLC. Printed in China
10
Page 31

NOTES-NOTAS
Page 32

 Loading...