

Wenger 6-light 36 Studio Makeup Station, 9-light 36 Studio Makeup Station, 5-light 30 Studio Makeup Station, 8-light 30 Studio Makeup Station Installation Instructions Manual
Page 1

Installation Instructions
Studio® Makeup Station
30" and 36" Models
5-light 30" Studio
Makeup Station
8-light 30" Studio
Makeup Station
6-light 36" Studio
Makeup Station
9-light 36" Studio Makeup
Station
Contents
Important User Information . . . . . . . . . . . . . . . . . . . . . . . . . . .2
General ......................................2
Manufacturer ..................................2
Intended Use ..................................2
Warranty .....................................2
Safety Precautions . . . . . . . . . . . . . . . . . . . . . . . . . . . . . . . . .3
Required Tools. . . . . . . . . . . . . . . . . . . . . . . . . . . . . . . . . . . . .3
Parts List . . . . . . . . . . . . . . . . . . . . . . . . . . . . . . . . . . . . . . . . .4
Fasteners - Not Supplied . . . . . . . . . . . . . . . . . . . . . . . . . . . .4
Note: Please read and understand these instructions before assembling.
Note: If you need additional information, contact Wenger Corporation using the information below.
Before Installation . . . . . . . . . . . . . . . . . . . . . . . . . . . . . . . . . .5
Before Starting Assembly ........................5
Lighting ......................................6
Layout the Space ..............................6
Installation . . . . . . . . . . . . . . . . . . . . . . . . . . . . . . . . . . . . . . . .8
Install Mounting Bracket .........................8
Install First Makeup Station .......................10
Install Additional Makeup Stations .................14
Complete The Installation ........................14
Attach The Mirror ..............................15
Attach The Counter .............................15
Connect The Electrical Source ....................16
Tackboard Installation ...........................16
©Wenger Corporation 2018 Printed in USA 2018-03 Part #187A200-06
Wenger Corporation, 555 Park Drive, P.O. Box 448, Owatonna, Minnesota 55060-0448
Questions? Call.....USA: (800) 4WENGER (493-6437) • Worldwide: +1(507) 455-4100 • www.wengercorp.com
Page 2

Important User Information
General
Copyright © 2018 by Wenger Corporation
All rights reserved. No part of the contents of this manual may be reproduced, copied, or transmitted
in any form or by any means including graphic, electronic, or mechanical methods or photocopying,
recording, or information storage and retrieval systems without the written permission of the publisher,
unless it is for the purchaser’s personal use.
Printed and bound in the United States of America.
The information in this manual is subject to change without notice and does not represent a commitment
on the part of Wenger Corporation. Wenger Corporation does not assume any responsibility for any
errors that may appear in this manual.
In no event will Wenger Corporation be liable for technical or editorial omissions made herein, nor for
direct, indirect, special, incidental, or consequential damages resulting from the use or defect of this
manual.
The information in this document is not intended to cover all possible conditions and situations that might
occur. The end user must exercise caution and common sense when assembling or installing Wenger
Corporation products. If any questions or problems arise, call Wenger Corporation at 1-800-887-7145.
Manufacturer
The Studio® Makeup Stations are manufactured by:
Wenger Corporation
555 Park Drive
Owatonna, MN 55060
(800) 4WENGER (493-6437) • +1 (507) 455-4100
www.wengercorp.com
Intended Use
· This product is intended for indoor use in normal ambient temperature and humidity conditions
— it must not be exposed to prolonged outside weather conditions.
· This product is intended to be installed only as described in these instructions.
Warranty
This product is guaranteed free of defects in materials and workmanship for ve full years from date
of shipment. A full warranty statement is available upon request.
2
Page 3
Safety Precautions
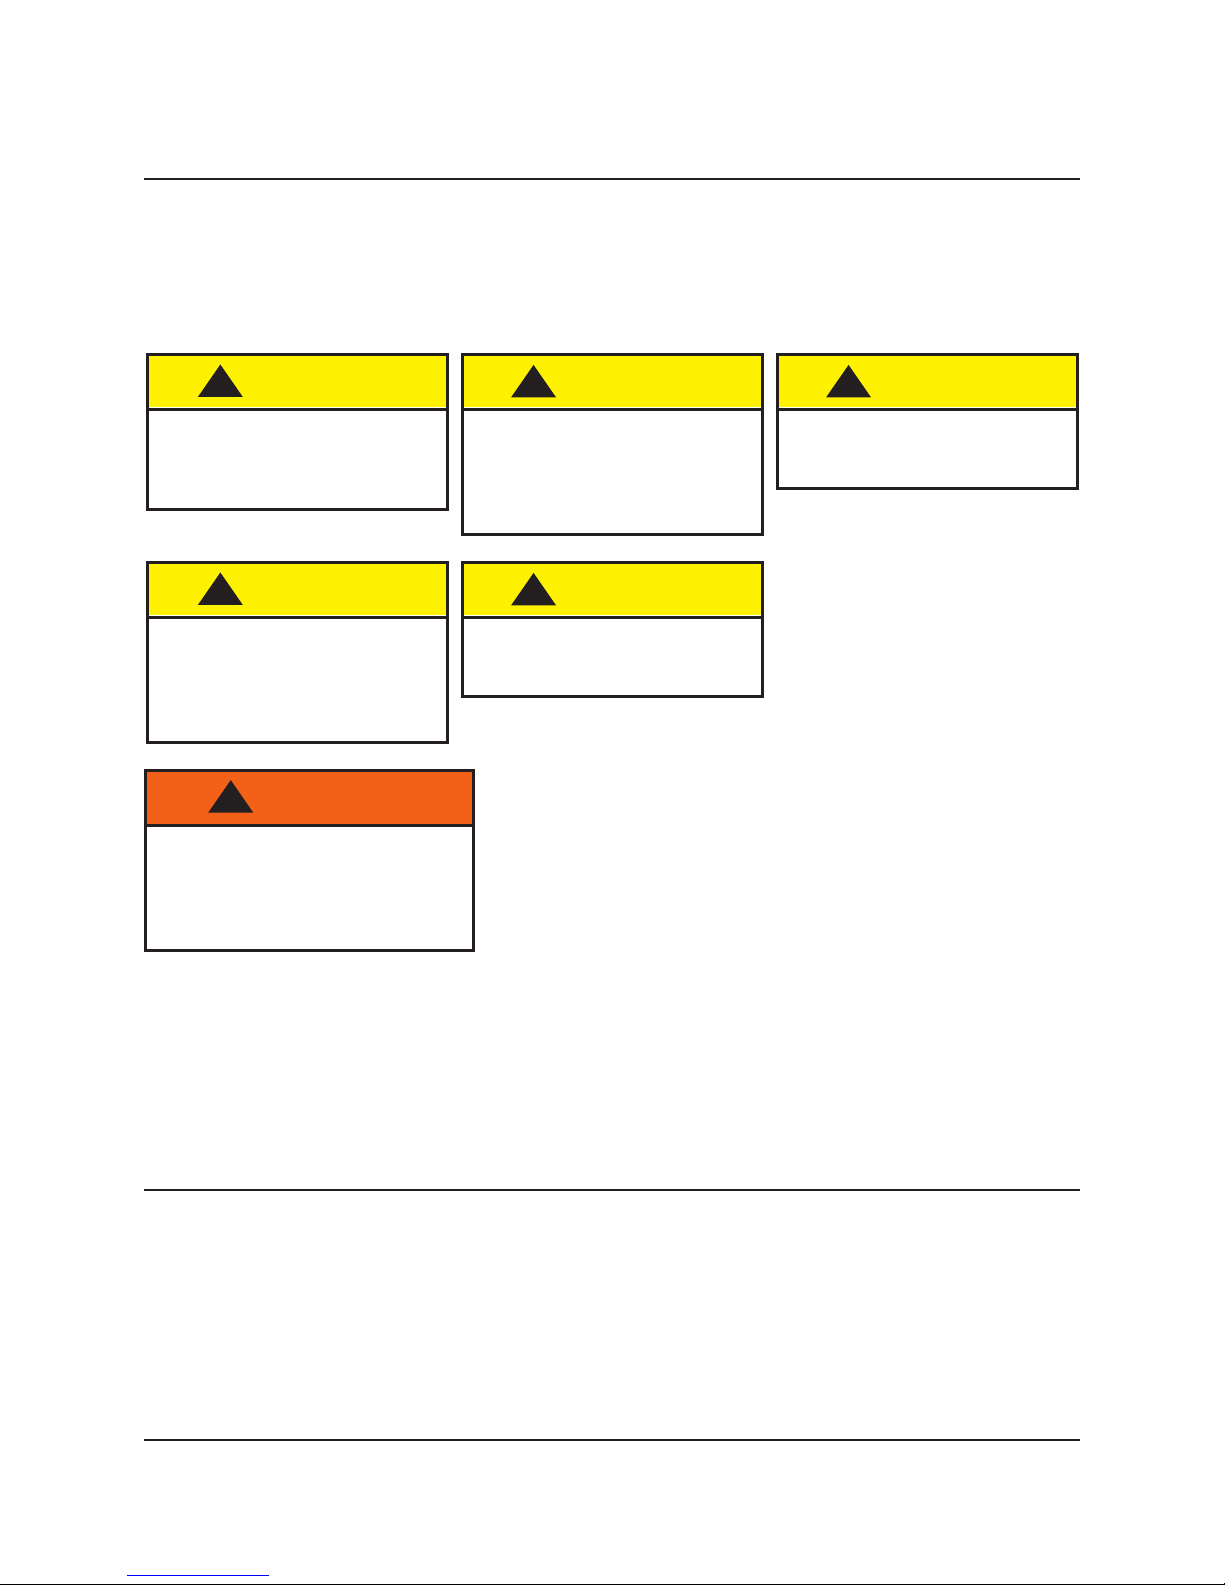
Throughout this manual you may nd cautions and warnings which are dened as follows:
• WARNING means that failure to follow the instruction may result in serious injury or death.
• CAUTION means that failure to follow the instruction may result in serious injury or damage
to property.
Read all of these safety instructions before assembling or using the Signature Choral Riser.
!
CAUTION
Make sure anyone installing
the Studio Makeup Station
has read and understands
these instructions.
!
CAUTION
Do not connect the Makeup
Station to the electrical
source until the Makeup
Station is completely
assembled.
!
WARNING
A licensed electrician must
perform the electrical installation.
The electrical source must be
permanently wired and comply
with local electrical codes.
!
CAUTION
Failure to comply with
Warnings and Cautions in
this document can result
in damage to property or
serious injury.
!
CAUTION
Never lift the Makeup Station
Assembly by the shelves or
wire cages.
!
CAUTION
To avoid damage and injury,
more than one person is
needed for installation.
Required Tools
· Drill with Phillips Insert Bit
· 3/8” Hex Nut Driver
· Phillips Screwdriver
· 9/16" Open End Wrench
· 48” Box Level
· Electronic Scanner (to locate wall studs)
· 8' Tape Rule
· 9/16” Pencil
· Bits and Drivers for Wall Anchor Hardware
(supplied by end user).
3
Page 4
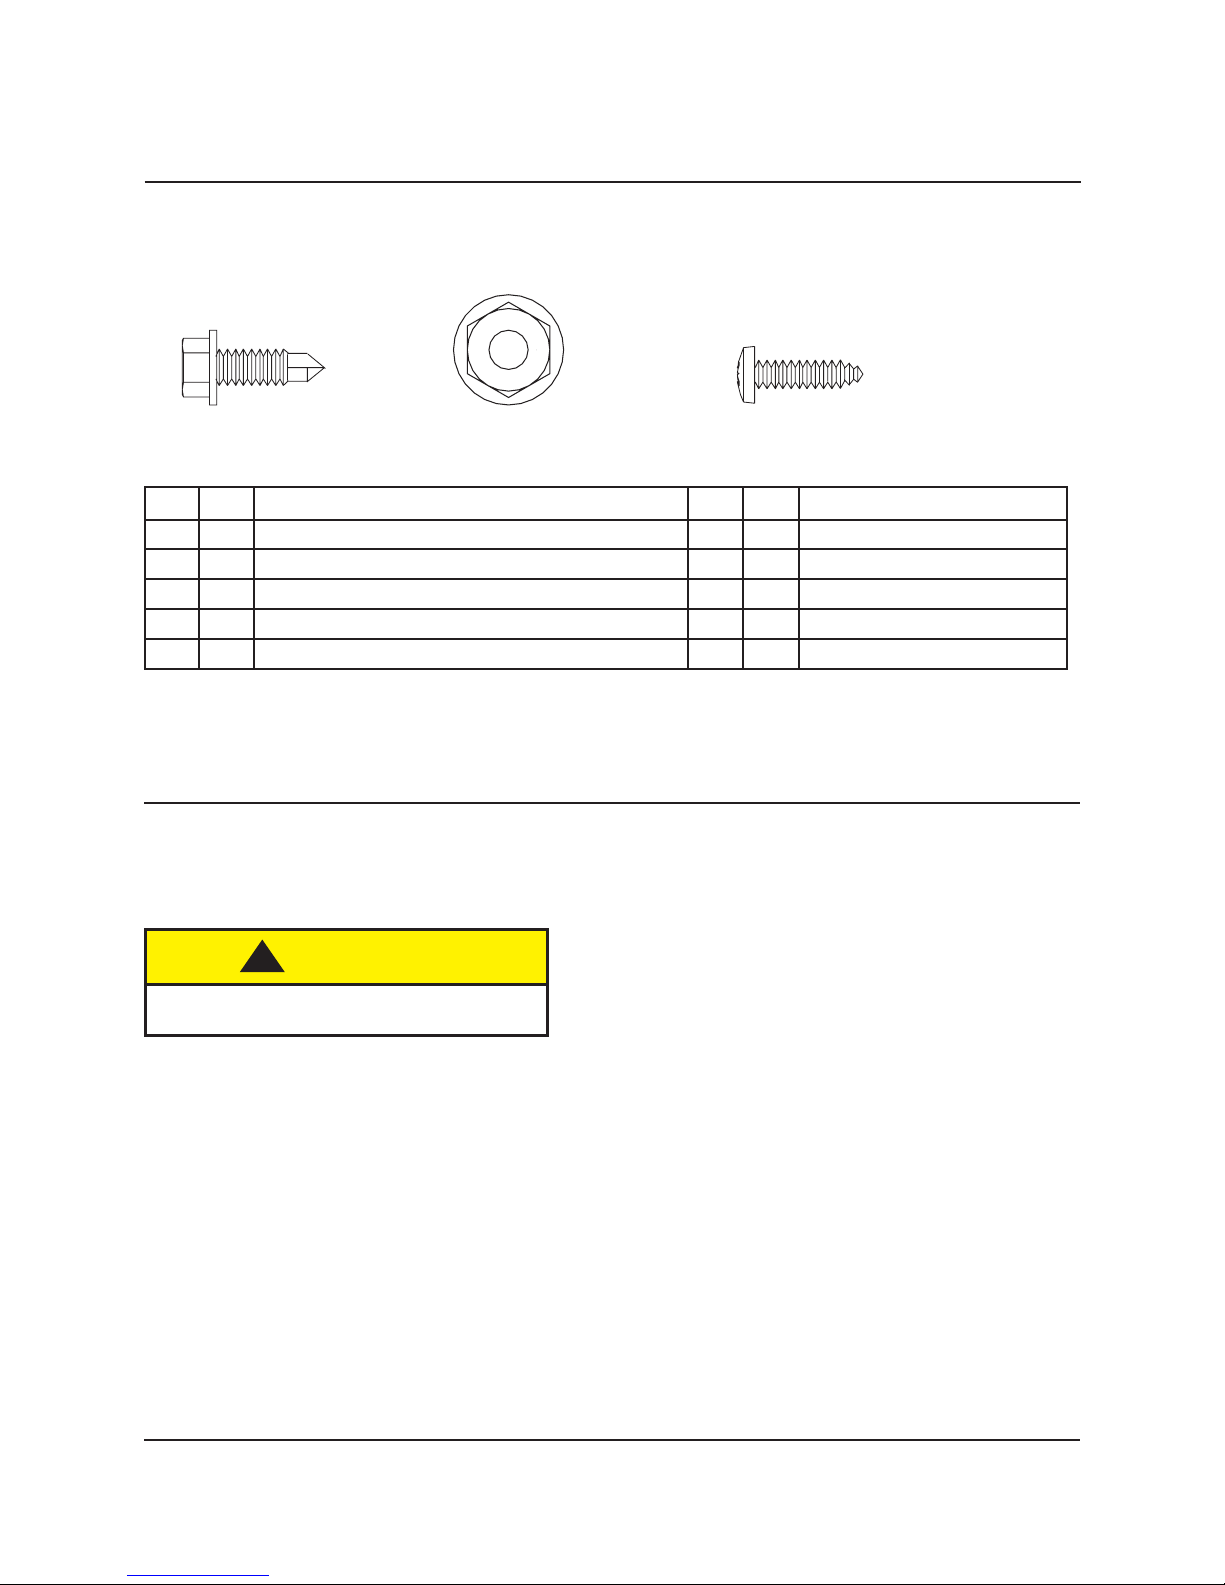
Parts List
The Makeup Station is shipped with all components in a single box, the main assembly,
a corrugated sleeve containing the Mirror, a hardware bag, the Counter under the main assembly,
the Tackboard Assembly (36" Model only) in a corrugated sleeve, and the Wall Mounting Bracket.
(1) Self-drill Screw,
1/4-14 x 3/4"
(2) Hex Flange Nut, 3/8-16
(3) Phillips Head
Sheet Metal Screw,
10 x 3/4"
Item Qty. Description Item Qty. Description
1 2* Self-drill Screw, 1/4-14 x 3/4" 6 2* Bottom Frame Clips
2 4* Hex Flange Nut, 3/8-16 7 1 Wall Mounting Bracket
3 4* Phillips Head Sheet Metal Screw, 10 x 3/4" 8 1 Counter
4 1* Installation Manual (including Wiring Diagram) 9 1** Tackboard Assembly
5 1* Owner’s Manual
* Contained in Hardware Bag
** 36" Model Only
Fasteners - Not Supplied
Because materials and construction of walls can vary, fasteners for attaching the
Mounting Bracket and to the structure are not provided.
The use of Furring Strips (not included) may also be required.
The installer must choose the appropriate fastener and follow the manufacturer’s instructions.
!
CAUTION
Inferior or improperly installed fasteners
could cause the Mounting Bracket to fall.
Wall Mounting Guidelines:
For drywalled wood stud or metal stud walls, the Mounting Bracket and Furring Strips
should be mounted on a stud, NOT on unsupported drywall.
Wood Studs: Use 1/4” lag screws or #12 sheetrock screws or larger screws that will
provide a minimum of 1-1/2” of penetration into the stud.
Steel Studs: Use 1/4” sheetmetal screws.
For poured concrete walls, Use 1/4” x 2” expanding anchor or a 3/8” x 1-3/4” concrete anchor.
Trim the stud if necessary to prevent damaging the instrument.
For concrete block walls, Use 3/8” x 1-3/4” concrete anchors or an adhesive anchor system.
4
Page 5
Before Installation
Before Starting Assembly
Before installing the Studio Makeup Station, do the following.
1. Read and understand this installation instruction completely.
2. Open all cartons and make sure each includes a Studio Makeup Station, a hardware bag,
the Wall Mounting Bracket, a Tackboard (36" Model only), a Mirror (packaged in a corrugated
sleeve) and a Counter.
Note: The Counter and carton containing the Mirror are packaged under the Makeup Station.
3. Inventory the hardware package and make sure that all required hardware is present.
4. The room where the Makeup Stations will be installed must be permanently wired with a suitable
electrical source (grounded 120VAC).
a. Each 9-light Station (lighting using 540 watts) or 8-light Station (lighting using 480 watts) can
have external appliances plugged into the duplex receptacle that can draw high current loads.
Make sure that the electrical supply is capable of supplying sucient current and has adequate
overload protection.
b. Always consult local electrical codes before starting the installation.
!
WARNING
A licensed electrician must
perform the electrical installation.
The electrical source must be
permanently wired and comply
with local electrical codes.
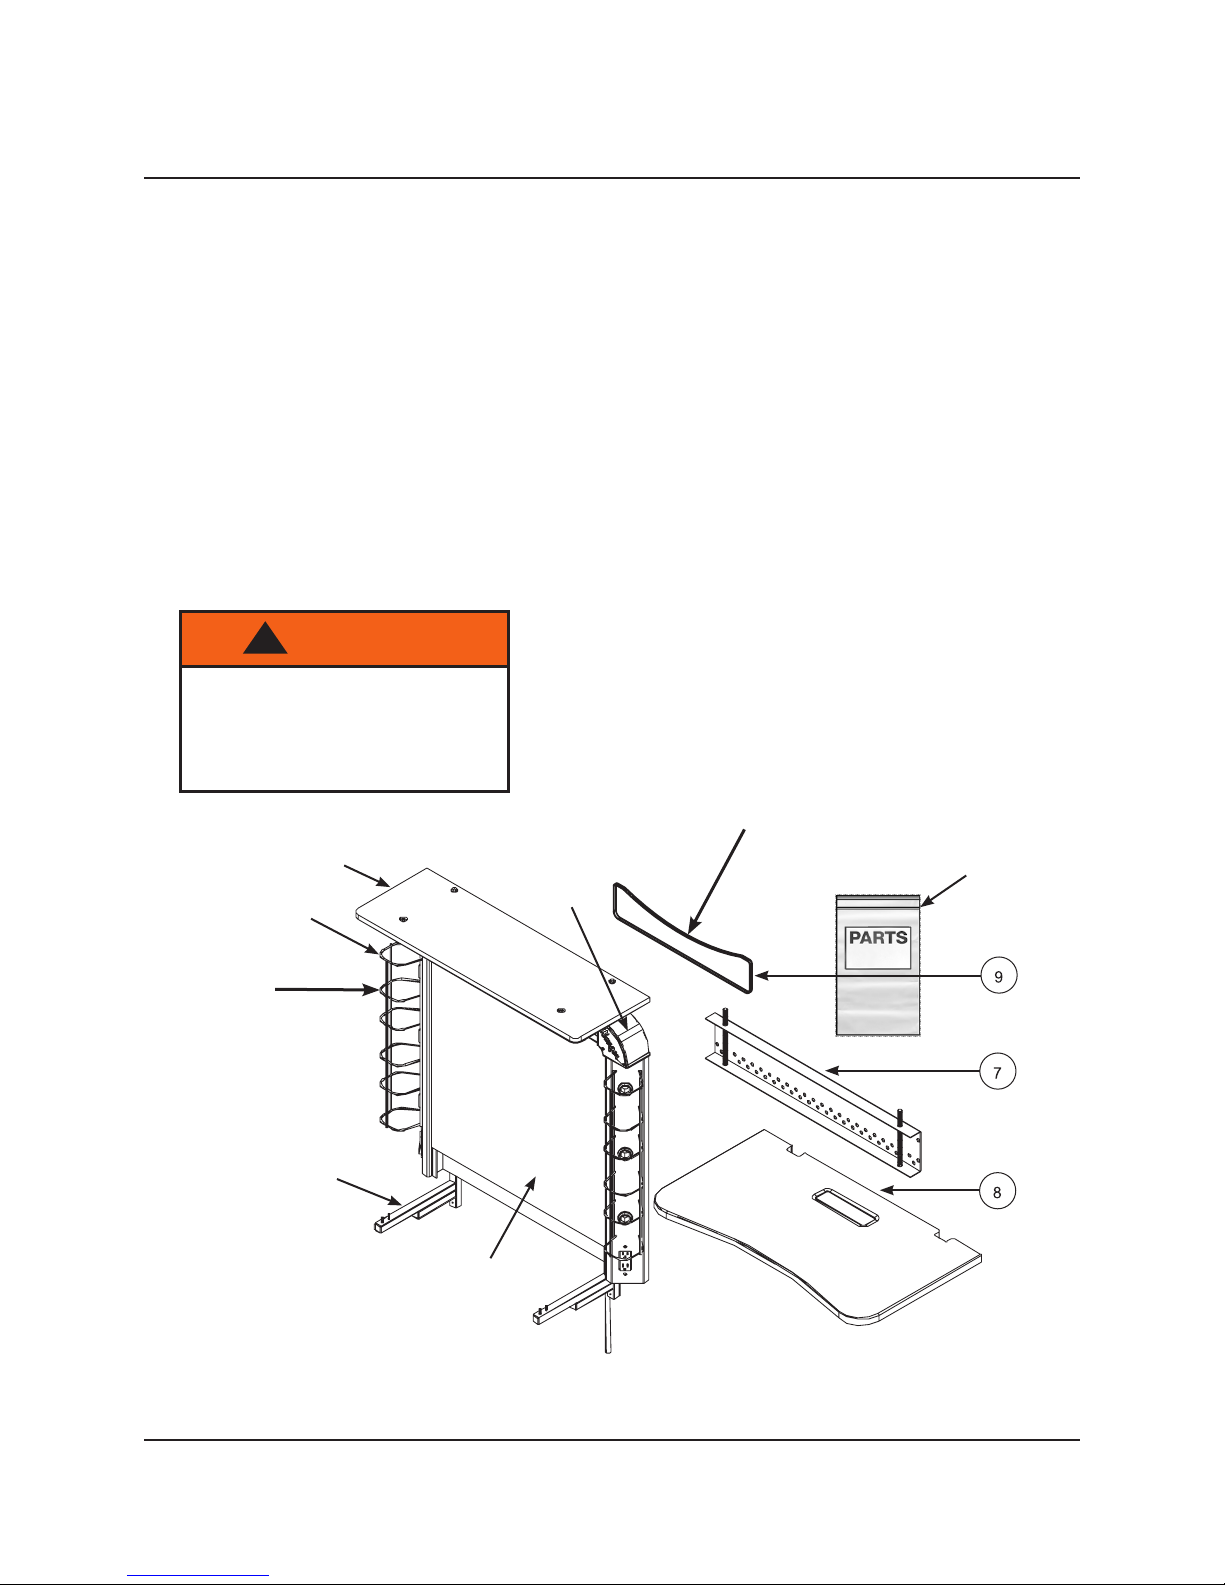
Shelf
Mirror
Surround
Wire Cage
Tackboard
only with the
36" Model
Hardware
Bag
Do not use the Wire
Cages to lift the
Makeup Station.
Steel Frame
Mirror
9-light Studio Makeup
Station Assembly
5
Page 6

Before Installation (continued)
Lighting
The Studio Makeup Station is shipped without light bulbs.
Wenger recommends the use of 40-watt or 60-watt incandescent bulbs or 15 watt full-spectrum swirl
uorescent bulbs. Ambient lighting conditions may inuence the choice of bulb type and power rating.
Layout the Space
Note: Refer to the illustration on the following page which includes equivalent metric dimensions.
1. Before starting the installation, decide where the Studio Makeup Stations will be installed.
2. If the wall is drywall or wetwall construction, determine if the studs are wood or steel.
3. Draw a vertical line on the wall that will locate the vertical centerline of the left (or right) Station.
a. Make sure that the line is vertical to the oor.
b. The centerline cannot be closer than 20-1/2” (36” Model) or 17-1/2” (30” Model) from an
obstruction on either side (such as a wall, I-beam, cabinet, etc.).
c. If more than one Studio Makeup Station is being installed, measure 30” or 36” (depending
upon the Model) from the centerline and draw another vertical line for the centerline of the
second Station.
d. Draw additional centerlines for any additional Stations that will be installed.
e. Draw a horizontal line 57-1/2” from the oor across the centerlines.
Make sure that the line is level. This line locates the top edge of the Mounting Bracket
(36” Model is 23-1/2” wide and 30” Model is 17-1/2”).
Note: Placing the top edge of the Mounting Bracket at 57-1/2” from the oor will locate the top surface
of the Counter at 29” from the oor and the top of the Shelf at 68-1/2” from the oor.
If the Counter top surface must be higher or lower, adjust the Mounting Bracket Position by moving
it upward or downward.
4. Using an electronic scanner, locate and mark each stud in the wall that will be used for the
installation with a vertical line that passes through the horizontal line that locates the top edge of the
Mounting Bracket.
Note: Sometimes the 30” Model Mounting Bracket does not cross a wall stud. If the Mounting Bracket
cannot be attached to a wall stud, refer to the special instructions for wall anchors in the section
Install the Mounting Bracket.
6
Page 7

Before Installation (continued)
Layout the Space (continued)
* 17-1/2" (445 mm) for 30" Model
** 30" (762 mm) for 30" Model
Corner
Top Surface
36"**
(914 mm)
of Shelf
20-1/2" (521 mm) Minimum Distance to a Wall*
36"**
(914 mm)
Station
Mounting
Area
Top Edge of
Mounting Bracket
36"**
(914 mm)
Centerline
of each
Station
Top of
Shelf
68-1/2"
(1740 mm)
6-light Makeup Station
9-light Makeup Station
Floor
Top Surface of Counter
36" Model Layout
29"
(737 mm)
57-1/2"
(1461 mm)
7
Page 8

Installation
Install Mounting Bracket
1. Remove the Mounting Bracket from the shipping box.
2. Locate the Hardware Bag and set it aside.
3. Align the Mounting Bracket to the wall with the top edge of the Mounting Bracket on the Horizontal
LIne and the centerline of the Mounting Bracket (user must mark the Bracket centerline with chalk)
aligned to the Station Centerline on the wall as shown below.
4. For walls with wood stud construction do as follows.
For metal stud or masonry wall construction, go to step 5.
a. Hold the Mounting Bracket in place and note the position of the studs.
Note: The mounting bracket must cross at least one stud and be attached to the wall using the
appropriate fasteners and method described in the “Fasteners - Not Suppled” section.
b. If the Mounting Bracket crosses two studs, attach the Bracket with four fasteners
(supplied by end user), two in each stud.
c. If the Mounting Bracket crosses one stud, attach the Bracket with two fasteners
(supplied by end user) to the stud and then attach the Bracket to the wall with four heavy duty
drywall anchors (consult a local hardware supplier).
Mounting Bracket Centerline
Mounting Bracket
Centerline
4b
Horizontal Line for Top Edge
of Mounting Bracket
Mark the Bracket centerline
with caulk on the top
surface of the Bracket.
3
Mounting Bracket
Position of
Studs
User Supplied
Fasteners
Position of
Studs
Station
Centerline
Mounting Bracket
Centerline
4c
User Supplied
Fasteners
Bracket crosses two studs.
Position of Stud
Bracket crosses one stud.
8
Page 9

Installation (continued)
Install Mounting Bracket (continued)
5. For walls with metal stud construction do as follows.
a. Hold the Mounting Bracket in place and note the position of the studs.
Note: the mounting bracket must cross at least one stud.
b. If the Mounting Bracket crosses two studs, attach the Bracket with four fasteners
(supplied by end user), two in each stud.
c. If the Mounting Bracket crosses one stud, attach the Bracket with two fasteners
(supplied by end user) to the stud and then attach four heavy duty drywall anchors
(consult a local hardware supplier) to the wall.
6. For masonry walls, use at least two 1/4” masonry anchors that are appropriate for the wall
construction (consult a hardware supplier).
7. Repeat this procedure for all Station Mounting Brackets.
Note: Install all Mounting Brackets before hanging any Studio Stations.
5b
User Supplied
Fasteners
5c
User Supplied
Fasteners
Position of Stud
Bracket crosses one stud.
Position of
Studs
Bracket crosses two studs.
9
Page 10

Installation (continued)
Install First Makeup Station
1. Remove the four Flange Nuts, 3/8-16, from the hardware bag.
2. Screw (clockwise) a Flange Nut, 3/8-16, onto each each of the two Mounting Bracket Studs
with the Flanges facing upward as shown below. Position the Flange Nuts so that the ange
of the nut is one-half inch from the top edge of the Mounting Bracket.
Flange facing upward and 1/2"
from the top of the Mounting
Flange Nut,
3/8-16
Mounting
Bracket Stud
Bracket.
Mounting Bracket
Stud
Flange Nut, 3/8-16
Mounting Bracket
1/2"
Mounting Bracket
Note: When installing two or more Makeup Stations, always rst install a 6-light or 5-light unit
on the left end. Add additional 6-light or 5-light units to the right and nish the row with a 9-light
or 8-light unit on the right end.
3. Find the shipping container marked 6-light unit or 5-light unit.
a. With two people working together, place the shipping
container onto a at surface near the installation wall.
b. Remove the cover and fold the sides down.
!
CAUTION
Cover
At least two people are
necessary to lift or move the
Studio Makeup Station.
Counter Bottom Surface
The Counter and the Mirror Carton are
shipped under the Makeup Station.
Shipping Container Sides
6-light or 5-light
Makeup Station
10
Page 11

Installation (continued)
Install First Makeup Station (continued)
6. With two people working together, tilt the Makeup Station into an upright position.
a. Only handle the Makeup Station by grasping the Steel Frame — do not lift or handle the
Makeup Station by grasping the Light Cages or the Shelf.
Note: Always start a row with a 6-light unit or a 5-light unit on the left end. Add additional 6-light or
5-light units to the right and nish the row with a 9-light unit or 8-light unit on the right end.
Never lift the Makeup Station
by grasping the Makeup
Never lift the Makeup Station
by grasping the Makeup
!
Station Shelf
Station Wire Cages
Wire Cage
Makeup Station
Frame
CAUTION
Never lift the Makeup Station
Assembly by the shelves or
wire cages.
!
CAUTION
At least two people are
necessary to lift or move the
Studio Makeup Station.
Always lift by grasping
the Makeup Station Frame
Always install the 6-light
Makeup Station rst and
on the left side.
6-light or 5-light Makeup Station
9-light or 8-light Makeup Station
11
Page 12

Installation (continued)
Install First Makeup Station (continued)
7. Attach the 6-light or 5-light Makeup Station to the left-hand Mounting Bracket as follows.
a. With two people working together, grasp the Makeup Station Frame and lift the Station upward.
b. Place the Frame onto the Mounting Bracket Studs by engaging the Studs with the
Frame Upper Bracket Slots. Allow the Makeup Station to rest on the two Flange Nuts
on the Mounting Bracket Studs.
c. Screw a Flange Nut with the Flange facing downward onto the top of each Mounting Bracket
Stud by hand. Leave the Flange Nut loose for later adjustment.
Note: If the Mounting Bracket Studs do not align to the Frame Upper Bracket Slots, loosen the
screws that attach the Mounting Bracket to the wall. Then, after placing the Frame onto the
Mounting Bracket Studs, tighten the screws that attach the Mounting Bracket to the wall.
Mounting
Bracket Stud
6-light or 5-light
Mounting
Bracket
Makeup Station
Frame Upper
Bracket
7a-b
Frame Upper
Bracket Slot
Front View
!
CAUTION
Avoid pinching ngers
between the Station and
the wall or bracket when
engaging the mounting
bracket studs.
Mounting
Bracket
Rear View (from Wall)
Flange Nut,
3/8-16
Flange Nut,
3/8-16
7c
Rear View (from Wall)
12
Page 13

Installation (continued)
Install First Makeup Station (continued)
8. Level the Makeup Station as follows.
a. Place a 48” Box Level across the two Counter Mounting Brackets.
b. To move the left side upward, use a 9/16” open end wrench and turn the Left Lower Flange
Nut counterclockwise and the Right Lower Flange Nut clockwise. Turning each nut one-half
turn will lift the left edge 1/16”.
Note: Always turn one nut clockwise and one nut counterclockwise the same amount to keep the
Makeup Station in the same relative position. This is important when leveling a group of Makeup
Stations.
c. To lower the left side, turn the Left Lower Flange Nut clockwise and the Right Lower Flange
Nut counterclockwise.
d. When the Counter Mounting Brackets are level, tighten the two Upper Flange Nuts with a
9/16” open end wrench.
Upper
Flange Nut
Counter
Mounting Brackets
Mounting
Bracket
Box Level
Left Lower
Flange Nut
Mounting
Bracket
Right Lower
Flange Nut
13
Page 14

Installation (continued)
Install Additional Makeup Stations
Note: Always start a row with a 6-light or 5-light unit on the left end. Add additional 6-light units
to the right and nish the row with a 9-light unit or a 8-light unit on the right end.
1. Find a shipping container with the next required unit.
a. With two people working together, place the shipping container onto a at surface near the
installation wall.
b. Remove the cover and fold the sides down.
2. Place the Makeup Station onto the Mounting Bracket next to the 9-light or 8-light Makeup Station.
3. Level the Makeup Station making sure that the Counter Mounting Brackets are even and tighten t
he Upper Flange Nuts.
4. Install any additional Makeup Stations in the same way.
Complete the Installation
1. Fasten the bottom of the Makeup Station Frame to the wall with Bottom Frame Clips as follows.
a. Hold a Bottom Frame Clip against the Frame and mark the lower hole location for the Wall
Anchor with a pencil as shown below.
b. Install a medium duty wall anchor (supplied by the end user — consult a local hardware
supplier) at the mark on the wall.
c. Attach a Bottom Frame Clip to the Frame with a #14 Self-drilling Screw (from the hardware bag)
and fasten the Clip to the wall with the wall anchor screw.
2. Continue installing the Bottom Frame Clips
to all of the Makeup Stations.
Makeup Station
Frame
Bottom
Frame Clip
Bottom
Frame Clip
1a
Pencil
Make the wall anchor
location here
1b
Install a medium duty wall
anchor on the mark
1c
Attach the Bottom Frame Clip with a #14 Selfdrilling Screw and a wall anchor screw.
#14 Self-drilling Screw
14
Page 15

Installation (continued)
Attach the Mirror
1. Remove the Mirror from the shipping carton and inspect the
Mirror for damage.
2. With two people working together, place the Mirror against the
Frame about an inch from the top with Mirror Flange at the bottom.
3. Slide the Mirror upward until the Mirror Flange contacts the
Frame and the top clips engage the Frame.
4. With one person holding the Mirror in place,
attach the two Pan Head Screws
Shelf
Bottom Surface
(included with the Mirror in the sleeve) that
hold the Mirror to the Frame.
!
CAUTION
Tighten the screws only
enough to be snug.
Over tightening can strip the
threads in the Frame.
Attach the Counter
1. Assemble the Counter to the Makeup Station.
a. Remove the Counter from the carton and locate the four
Pan Head Screws in the Hardware Bag.
Note: If there is a strap or tape attaching the exible conduit to the
Counter Support Bracket, remove the strap or tape before placing
the Counter onto the Counter Support Brackets.
b. Place the Counter onto the Counter Support Brackets and
slide it into place.
c. It may be necessary to lift the curved edge of the Counter
slightly upward to t it into the space in the Frame.
d. Attach the bottom of the Counter to the Counter
Support Brackets with four Pan Head Screws.
Counter
Support Brackets
Slide the Mirror upward
until the top clips engage
the ange on the Frame.
Mirror
Pan Head
Screw
Pan Head
Screw
!
CAUTION
Tighten the screws only
enough to be snug.
Over tightening can strip the
threads in the Counter.
2. For drywalled wood stud or metal stud walls where a Makeup Station
only crosses one stud, a Furring Strip no smaller than 1” x 4” (not included)
must be attached ush against the bottom of the Counter.
Note: The Furring Strip must cross at least one stud and be attached to the wall using the appropriate
fasteners and method described in the “Fasteners - Not Suppled” section.
a. Attach the Furring Strip to the stud with a minimum of two fasteners (supplied by end user).
b. Also attach the Furring Strip to the wall, with a minimum of four heavy duty drywall anchors
(consult a local hardware supplier).
Furring Strip
(one stud only)
Pan Head
Screws
15
Page 16

Installation (continued)
Connect the Electrical Source
!
WARNING
A licensed electrician must perform the electrical installation.
The electrical source must be permanently wired and comply with local
electrical codes.
To reduce the risk of burns, re, electric shock or injury to persons,
observe the following:
• Never connect the electrical source until all of the Makeup Stations
are completely assembled with Mirrors and Counters in place.
• Never connect the Makeup Stations to an inadequate electrical circuit.
• Always have an electrical engineer design or review the circuits
to be sure that they comply with electrical codes and anticipated use.
• Never modify the wiring inside the Makeup Stations.
• Never allow anyone to use the Makeup Stations until all electrical work
is complete and light bulbs are installed.
Notes to the Electrician:
1. The Studio Makeup Station has separate conductors for the lights and the receptacle
(see illustration below). The wiring plan for the room may include separate circuits for
lights and receptacles.
2. From N.E.C. Article 520.73 (2002): All lights and any receptacles adjacent to the mirror(s)
and above the dressing table counter(s) installed in dressing rooms shall be controlled by wall
switches installed in the dressing room(s). Each switch controlling receptacles adjacent to the
mirror(s) and above the dressing table counter(s) shall be provided with a pilot light located
outside the dressing room, adjacent to the door to indicate when the receptacles are energized.
Other outlets installed in the dressing room shall not be required to be switched.
3. If the wiring plan for the room does not comply with the above code requirement,
check with the electrical engineer or local code ocial before proceeding.
4. Never sit or stand on the counter or use it for holding tools while connecting the Makeup Station
to the electrical source.
Black, 120 VAC
Green, Ground
Tackboard Installation
Refer to the Studio Makeup Station Owner’s Manual for Tackboard installation instructions.
Conduit
White, Neutral
16
 Loading...