

Page 1
MODEL 73015
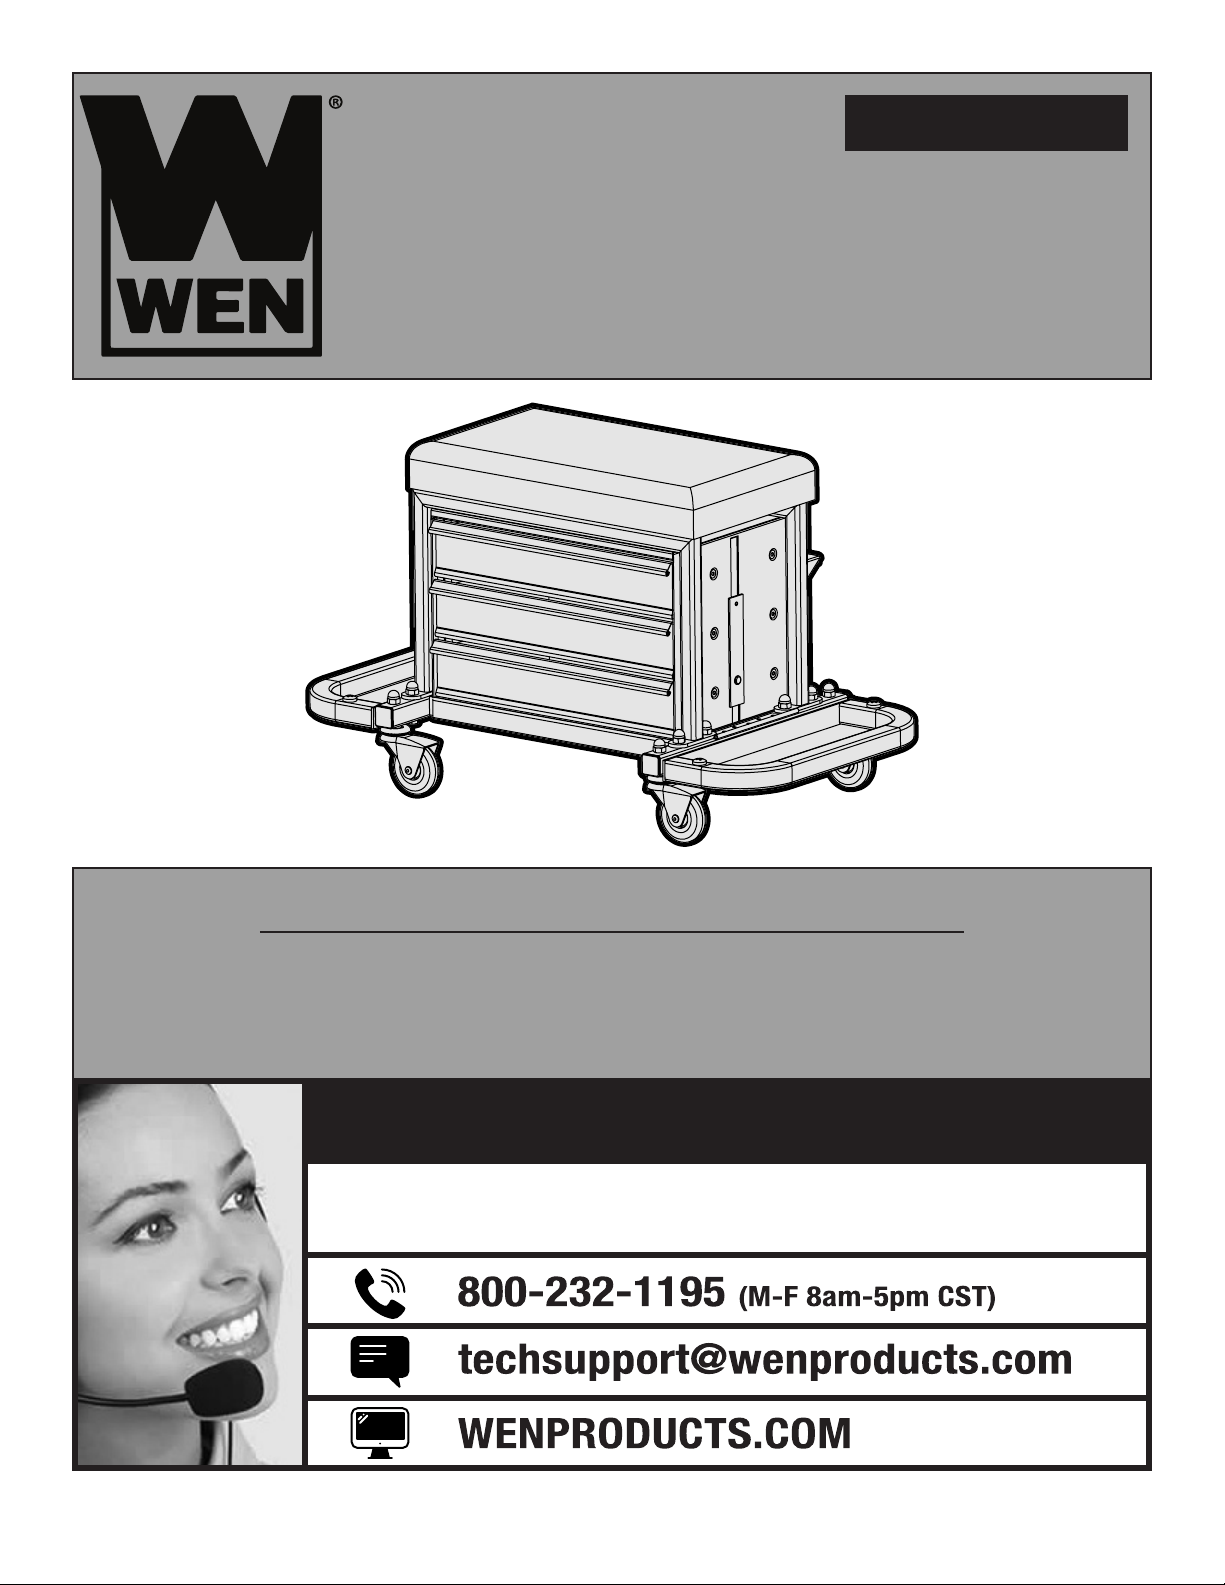
GARAGE GLIDER
For replacement parts visit
WENPRODUCTS.COM
IMPORTANT:
Your new tool has been engineered and manufactured to WEN’s highest standards for dependability, ease
of operation, and operator safety. When properly cared for, this product will supply you years of rugged,
trouble-free performance. Pay close attention to the rules for safe operation, warnings, and cautions.
If you use your tool properly and for its intended purpose, you will enjoy years of safe, reliable service.
NEED HELP? CONTACT US!
Have product questions? Need technical support?
Please feel free to contact us at:
NOTICE: Please refer to wenproducts.com for the most up-to-date instruction manual.
Page 2
TABLE OF CONTENTS
Specifications .................................................................................. 2
Introduction .................................................................................... 3
General Safety Rules ....................................................................... 4
Know Your Garage Glider ................................................................ 6
Assembly ........................................................................................ 7
Exploded View & Parts List ............................................................. 9
Warranty Statement ....................................................................... 10
SPECIFICATIONS
Model Number 73015
Maximum Capacity 350 lbs. evenly distributed
Drawer Capacity 22 lbs
Side Tool Tray Capacity 11 lbs
Total Dimensions 16.5 x 27 x 16 inches
Weight 27.2 lbs
2
Page 3

INTRODUCTION
Thanks for purchasing the WEN Garage Glider. We know you are excited to put your item to work,
but first, please take a moment to read through the manual. Safe operation of this item requires that
you read and understand this operator’s manual and all the labels affixed to the tool. This manual
provides information regarding potential safety concerns, as well as helpful assembly and operating
instructions for your item.
SAFETY ALERT SYMBOL: Indicates danger, warning, or caution. The safety symbols and the
explanations with them deserve your careful attention and understanding. Always follow the safety
precautions to reduce the risk of fire, electric shock and personal injury. However, please note that
For replacement parts visit
these instructions and warnings are not substitutes for proper accident prevention measures.
WENPRODUCTS.COM
NOTE: The following safety information is not meant to cover all possible conditions and situations
that may occur. WEN reserves the right to change this product and specifications at any time without
prior notice.
Keep this manual available to all users during the entire life of the tool and review it frequently
to maximize safety for both yourself and others.
XXX
3
Page 4

GENERAL SAFETY RULES
Safety is a combination of common sense, staying alert and knowing how your item works.
SAVE THESE SAFETY INSTRUCTIONS.
WARNING: Read and understand all warnings, cautions and operating instructions before
using this item. Failure to follow all instructions listed below may result in personal injury and tool
damage. These safety rules cannot address every possible scenario you may encounter, so please
use common sense and caution when using the item.
WORK AREA SAFETY
1. Keep work area clean and well lit. Cluttered or dark areas invite accidents. Do not work on floor
surfaces that are slippery.
2. Only use on a flat surface capable of supporting the item with its maximum capacity load. It is
easy to lose control if attempting to pull a load on a sloping or uneven surface.
3. Do not allow children to play, stand, or climb on this item. It is not intended for carrying people or
animals.
PERSONAL SAFETY
1. Read and become familiar with this entire instruction manual. Learn the item’s applications, limitations, and possible hazards.
2. Stay alert, watch what you are doing and use common sense when using the item. Do not use the
item while you are tired or under the influence of drugs, alcohol or medication. A moment of inattention while operating using the item may result in serious personal injury.
3. Use personal protective equipment. Always wear eye protection. Protective equipment such as a
dust mask, non-skid safety shoes and hearing protection used for appropriate conditions will reduce
the risk of personal injury.
4. Dress properly. Do not wear loose clothing or jewelry. Keep your hair and clothing away from moving parts. Loose clothes, jewelry or long hair can be caught in moving parts.
5. Do not exceed the product’s maximum load capacity. Always keep weight evenly distributed.
6. Do not overreach. Keep proper footing and balance at all times.
4
Page 5

GENERAL SAFETY RULES
Safety is a combination of common sense, staying alert and knowing how your item works.
SAVE THESE SAFETY INSTRUCTIONS.
WARNING: Read and understand all warnings, cautions and operating instructions before
using this item. Failure to follow all instructions listed below may result in personal injury and tool
damage. These safety rules cannot address every possible scenario you may encounter, so please
use common sense and caution when using the item.
ITEM USE AND CARE
1. Use the right product for the job. There are certain applications for which this item was designed.
Do not modify it and do not use it for a purpose for which it was not intended.
2. Check for damaged parts. Before using any product, any part that appears damaged should be
carefully checked to determine that it will operate properly and perform its intended function. Check
for any broken or damaged parts and any other conditions that may affect its operation. Replace or
repair damaged or worn parts immediately.
3. Store idle equipment out of the reach of children and do not allow persons unfamiliar with the item
or these instructions to use the item. Store the item in a safe and clean location.
4. Maintain items. Check for misalignment or binding of moving parts, breakage of parts and any
other condition that may affect the item’s operation. If damaged, have the item repaired before use.
Many accidents are caused by poorly maintained items.
5. Always check hardware and assembled parts after assembling. All connections should be tight.
SERVICE
Have your item serviced by a qualified repair person using only identical replacement parts. This will
ensure that the safety of the item is maintained. Using any other parts will void the warranty.
5
Page 6

KNOW YOUR GARAGE GLIDER
UNPACKING
With the help of a friend or trustworthy foe, carefully remove the garage glider from the packaging. Do
not discard the packaging until all of the parts below are accounted for. If any part is damaged or missing, please contact our customer service at (800) 232-1195, M-F 8-5 CST or email us at techsupport@
wenproducts.com.
TOOL PURPOSE
Easily move around your shop and store your tools in the garage glider rolling tool chest. Refer to the
diagram below to become familiarized with the parts and features of your garage glider.
Seat Cushion
Tool Holder
Tool Drawers
Located on Back
Casters
INCLUDED ACCESSORIES
A. 35mm M8 Bolt (4)
B. 40mm M8 Bolt (4)
C. M8 Round-Head (12)
D. Washer (12)
Magnetic Side Tray
A B C D
6
Page 7

ASSEMBLY
WARNING: Do not the item until it is fully assembled according to the instructions. Failure to
follow the safety instructions may result in serious personal injury.
ATTACH THE CASTERS
1. Gather both side trays (Fig. 1 - 3) and all four casters (Fig. 1 - 2).
2. Align the casters with the outermost holes on the
side trays.
3. Fasten with a washer, and a round-head nut (Fig. 1
- 1) using a 14mm wrench (not included) to tighten it.
Repeat with all four casters.
ATTACH THE SIDE TRAYS
1. Place the tool chest upside down, so that the seat
cushion is on the floor.
2. Align the outer holes on the side tray assembly (Fig.
2 - 1) with the outer holes on the tool chest (Fig. 2 -
2).
3. Fasten the side tray assembly to the tool chest using a 35mm M8 bolt, a washer, and a round-head nut.
Repeat on all four outer corners.
Fig. 1
1
3
2
Fig. 2
Note: Your garage glider comes with eight M8 bolts,
four of them are 35mm long and four of them are
40mm long. Be sure to use the shorter (35mm) bolts
for this step.
4. Tighten all four nuts with a 14mm wrench (not
included).
ATTACH THE SUPPORT BARS
1. Align the support bars (Fig. 3 - 1) with the inner
holes (Fig. 3 - 2) on the tool chest assembly.
2. Fasten the support bars to the tool chest assembly
using a 40mm M8 bolt, a washer, and a round-head
nut. Repeat on all four inner slots.
3. Tighten all four nuts with a 14mm wrench (not
included).
1
1
2
2
1
1
2
Fig. 3
2
7
Page 8
ASSEMBLY
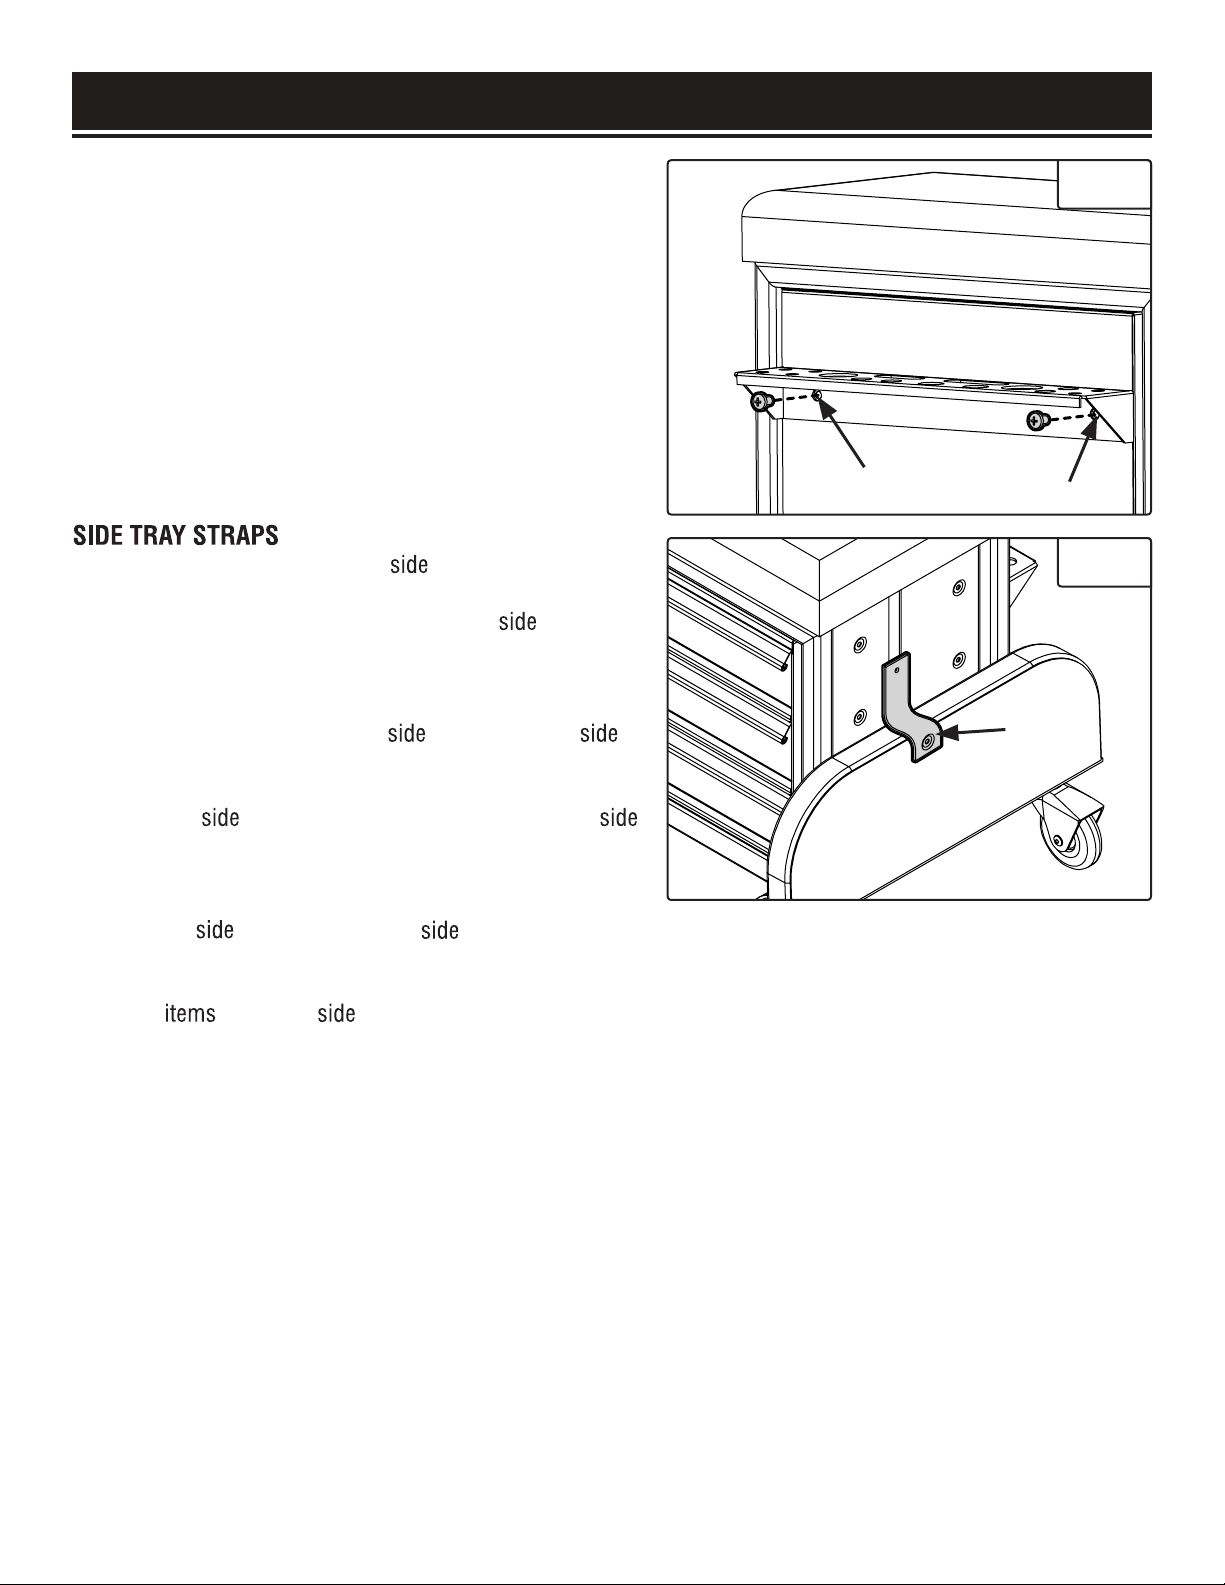
ATTACH THE TOOL HOLDER
1. Flip the garage glider upright, so its sitting on its
wheels.
2. Align the holes on the tool holder (Fig. 4 - 1) with
the holes on the rear of the tool chest.
Note: The flat part of the tool holder should be on the
top.
3. Fasten with two M6 bolts. Use a Phillips-head
screwdriver (not included) to tighten.
SIDE TRAY STRAPS
TOOL TRAY STRAPS
There are two pre-assembled tool tray straps (Fig.
5 - 1) located on the short sides of the garage glider.
These straps can be used to fold up the tool trays
when not in use.
To fold up:
1. Remove all items from the tool tray. Fold the tool
tray up.
side
side
side side
Fig. 4
1
1
Fig. 5
1
2. Snap the tool tray strap onto the bottom of the tool
tray.
To unfold:
1. Hold the tool tray, unsnap the tool tray strap. Slowly lower the tray.
2. Place tools onto the tool tray, do not exceed 11
pounds evenly distributed.
side side
side
items
side
side
8
Page 9

EXPLODED VIEW & PARTS LIST
EXPLODED VIEW & PARTS LIST
No. Part No. Description Qty.
1 73015-001 Seat Cushion 1
2 73015-002 Body Frame 2
3 73015-003 Magnetic Tray 2
4 73015-004 Tool Tray Frame 2
5 73015-005 Bolts M6x10 2
6 73015-006 Tool Holder 1
7 73015-007 Bolt M6x30 8
8 73015-008 Plastic Cap 4
9 73015-009 2.5" PVC Caster 4
No. Part No. Description Qty.
10 73015-010 Bolt M8x40 4
11 73015-011 Round-Head Nut M8 12
12 73015-012 Washer 12
13 73015-013 Body with 3 Drawers 1
15 73015-015 Bolt M8x16 4
16 73015-016 Washer 4
17 73015-017 Bolt M8x35 4
18 73015-018 Support Bar 2
19 73015-019 Strap 2
9
Page 10

WARRANTY STATEMENT
WEN Products is committed to building tools that are dependable for years. Our warranties are consistent
with this commitment and our dedication to quality.
LIMITED WARRANTY OF WEN CONSUMER POWER TOOLS PRODUCTS FOR HOME USE
GREAT LAKES TECHNOLOGIES, LLC (“Seller”) warrants to the original purchaser only, that all WEN consumer power tools will be free from defects in material or workmanship for a period of two (2) years from
date of purchase. Ninety days for all WEN products if the tool is used for professional or commercial use.
SELLER’S SOLE OBLIGATION AND YOUR EXCLUSIVE REMEDY under this Limited Warranty and, to the
extent permitted by law, any warranty or condition implied by law, shall be the repair or replacement of
parts, without charge, which are defective in material or workmanship and which have not been misused,
carelessly handled, or misrepaired by persons other than Seller or Authorized Service Center. To make
a claim under this Limited Warranty, you must make sure to keep a copy of your proof of purchase that
clearly defines the Date of Purchase (month and year) and the Place of Purchase. Place of purchase must
be a direct vendor of Great Lakes Technologies, LLC. Third party vendors such as garage sales, pawn
shops, resale shops, or any other secondhand merchant void the warranty included with this product.
Contact [email protected] or 1-800-232-1195 to make arrangements for repairs and transportation.
When returning a product for warranty service, the shipping charges must be prepaid by the purchaser.
The product must be shipped in its original container (or an equivalent), properly packed to withstand
the hazards of shipment. The product must be fully insured with a copy of the warranty card and/or the
proof of purchase enclosed. There must also be a description of the problem in order to help our repairs
department diagnose and fix the issue. Repairs will be made and the product will be returned and shipped
back to the purchaser at no charge.
THIS LIMITED WARRANTY DOES NOT APPLY TO ACCESSORY ITEMS THAT WEAR OUT FROM REGULAR
USAGE OVER TIME INCLUDING BELTS, BRUSHES, BLADES, ETC. ANY IMPLIED WARRANTIES SHALL
BE LIMITED IN DURATION TO TWO (2) YEARS FROM DATE OF PURCHASE. SOME STATES IN THE U.S.,
SOME CANADIAN PROVINCES DO NOT ALLOW LIMITATIONS ON HOW LONG AN IMPLIED WARRANTY
LASTS, SO THE ABOVE LIMITATION MAY NOT APPLY TO YOU.
IN NO EVENT SHALL SELLER BE LIABLE FOR ANY INCIDENTAL OR CONSEQUENTIAL DAMAGES (INCLUDING BUT NOT LIMITED TO LIABILITY FOR LOSS OF PROFITS) ARISING FROM THE SALE OR USE
OF THIS PRODUCT. SOME STATES IN THE U.S. AND SOME CANADIAN PROVINCES DO NOT ALLOW THE
EXCLUSION OR LIMITATION OF INCIDENTAL OR CONSEQUENTIAL DAMAGES, SO THE ABOVE LIMITATION OR EXCLUSION MAY NOT APPLY TO YOU.
THIS LIMITED WARRANTY GIVES YOU SPECIFIC LEGAL RIGHTS, AND YOU MAY ALSO HAVE OTHER
RIGHTS WHICH VARY FROM STATE TO STATE IN THE U.S., PROVINCE TO PROVINCE IN CANADA AND
FROM COUNTRY TO COUNTRY.
THIS LIMITED WARRANTY APPLIES ONLY TO PORTABLE ELECTRIC TOOLS, BENCH POWER TOOLS,
OUTDOOR POWER EQUIPMENT AND PNEUMATIC TOOLS SOLD WITHIN THE UNITED STATES OF AMERICA, CANADA AND THE COMMONWEALTH OF PUERTO RICO. FOR WARRANTY COVERAGE WITHIN
OTHER COUNTRIES, CONTACT THE WEN CUSTOMER SUPPORT LINE.
10
Page 11

NOTES
11
Page 12

THANKS FOR
REMEMBERING
 Loading...