


*** USER’S MANUAL ***
FCC ID : QUJLOGICLOUDDOCK

The Federal Communication Commission Statement
This equipment has been tested and found to comply with the limits for a Class B Digital Device, pursuant to
Part 15 of the FCC rules. These limits are designed to provide reasonable protection against harmful
interference in a residential installation. T
his equipment generates, uses and can radiate radio frequency
energy and, if not installed and used in accordance with the instruction, may cause harmful interference to
in a particular
installation. If this equipment does cause harmful interference to radio or television reception, which can be
determined by turning the equipment off and on, the user is encouraged to try to correct the interference
Connect the equipment into an outlet on a circuit different from that to which the receiver is
Use only shielded cables to connect I/O devices to this equipment. You are cautioned that change or
ur authority to
THIS DEVICE COMPLIES WITH PART 15 OF FCC RULES. OPERATION IS SUBJECT TO THE
1 This device may not cause harmful interference and
The antenna used for this transmitter must not be collocated or operation in conjunction
radio communication. However, there is no guarantee that interference will not occur
by one of more of the following measures: -
- Reorient or relocate the receiving antenna.
- Increase the separation between the equipment and receiver.
-
connected.
- Consult the dealer or an experienced Radio/TV technician for help.
modifications not expressly approved by the party responsible for compliance could void yo
operate the equipment.
FOLLOWING TWO CONDITIONS:
2 This device must accept any interference received, including interference that may cause undesired
operation.
with any other antenna or transmitter.
Notice : The changes or modifications not expressly approved by the party responsible
for compliance could void the user’s authority to operate the equipment.
IMPORTANT NOTE: To comply with the FCC RF exposure compliance requirements, no change
to the antenna or the device is permitted. Any change to the antenna or the device could result
in the device exceeding the RF exposure requirements and void user’s authority to operate
the device.

User Manual
For
Android
Rev. 0.9
Version 0.9 Sep. 2012
© Initio 2012. All right reserved. Copying prohibited
This document is confidential
1
Section 1 Installation
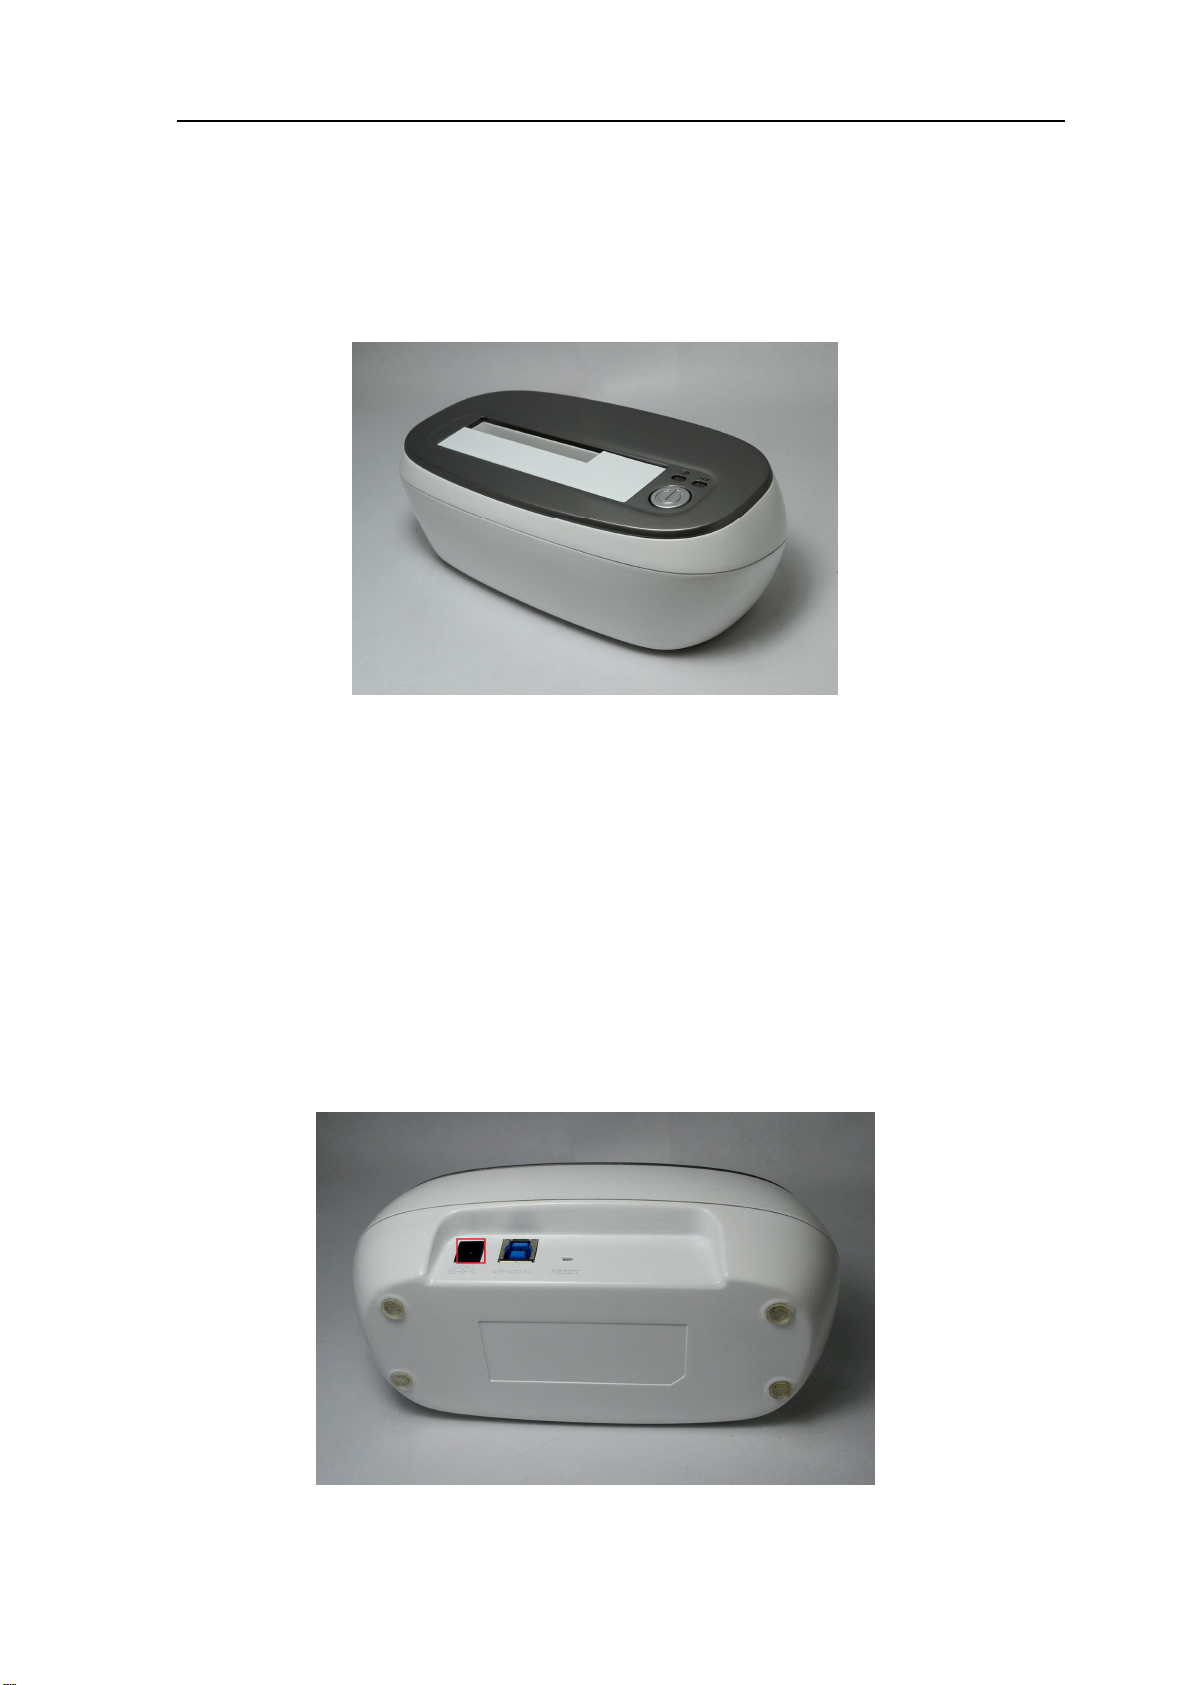
When you open the box, you will see the dockign as following Pic 1-1. It is the full
product picture
Pic. 1-1. Out looking
To install the product, you need to check the following part:
1. Power adaptor hole
2. Hard Disk SATA interface
3. Power on button
4. HDD access LED
5. WiFi access LED
Product Install Step:
Step 1. Plug in power adaptor into the hole, as the following Pict 1-2 Red rectangle
part
Pic 1-2 Power adaptor hole
Version 0.9 Sep. 2012
© Initio 2012. All right reserved. Copying prohibited
This document is confidential
2
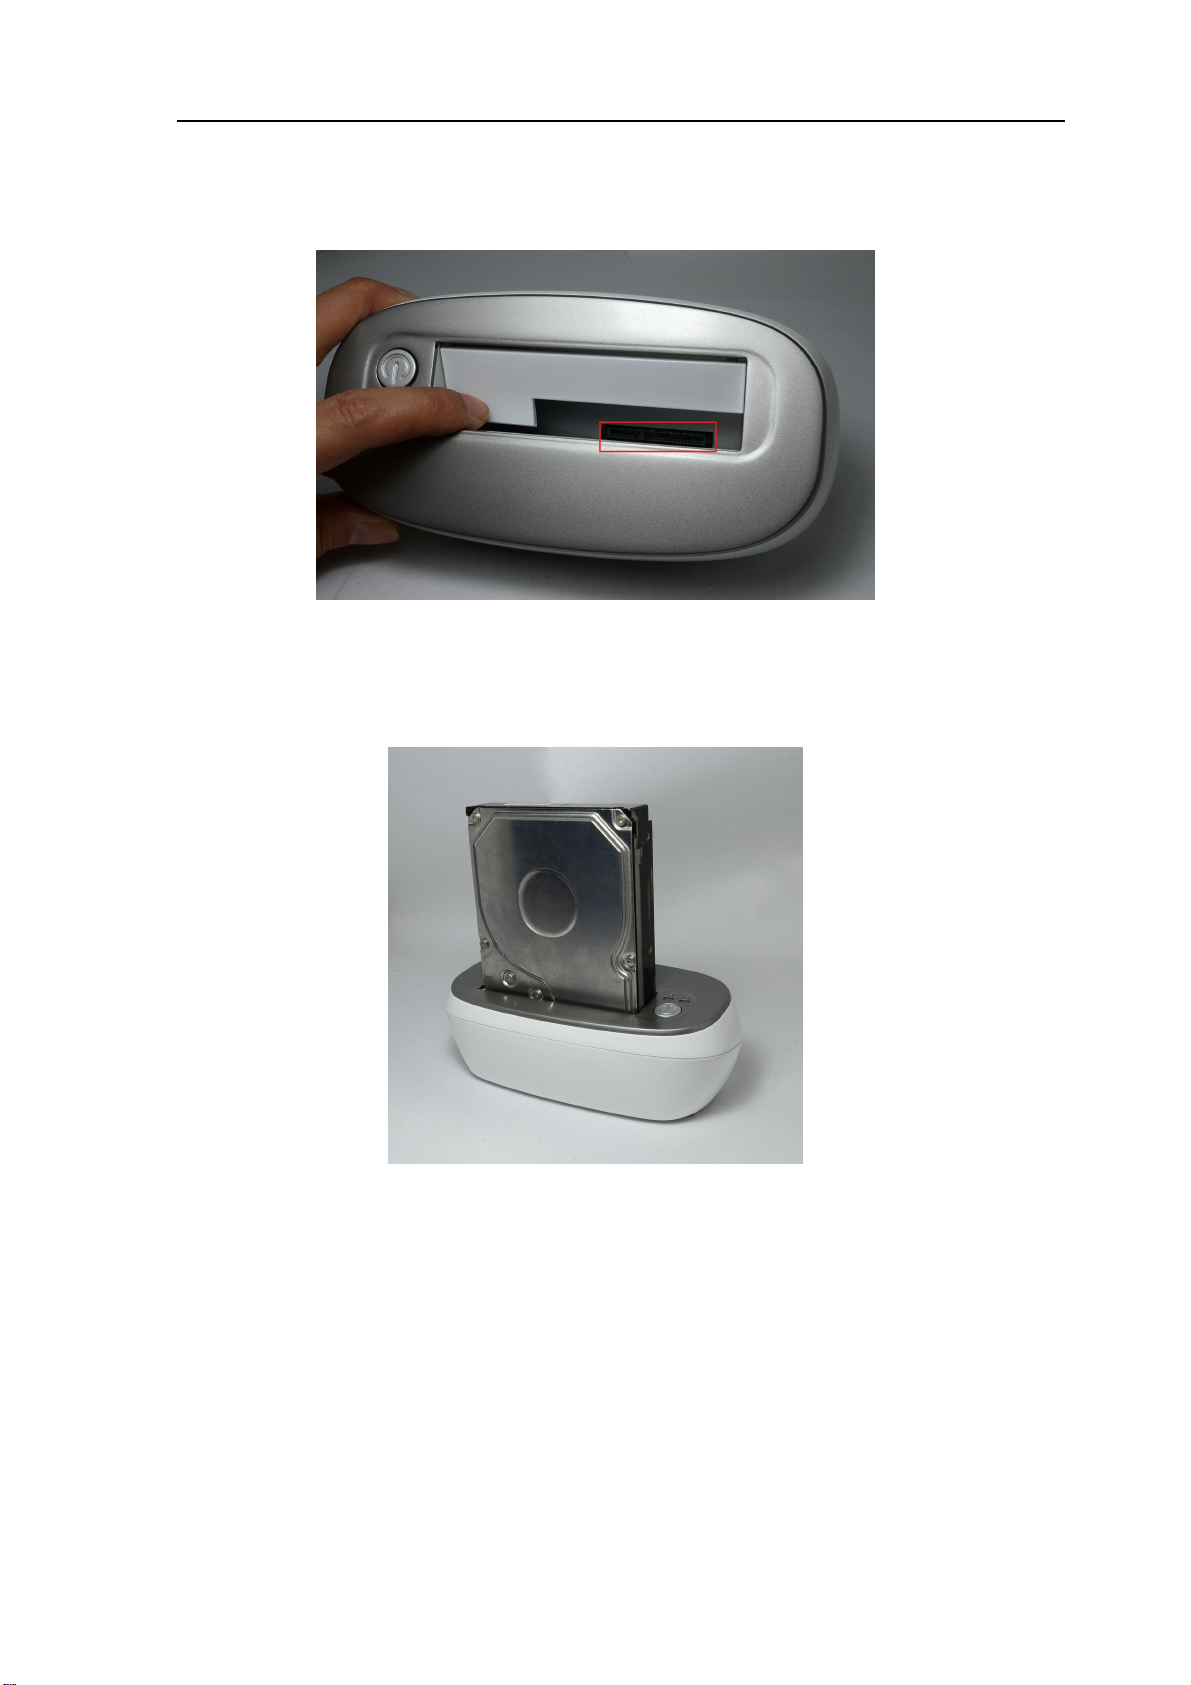
Step 2. Plug HDD, please, check the follwong Pic 1-3, Let SATA HDD connect
with SATA connector.
Pic 1-3 SATA Connector
Taking 3.5' HDD as an example, you can see the following Pic 1-4,
Pic 1-4 Plug 3.5' HDD
Step 3 Turn-on,
To power on the system, user only push the power-on button, as the following
Pic 1-5.
Version 0.9 Sep. 2012
© Initio 2012. All right reserved. Copying prohibited
This document is confidential
3
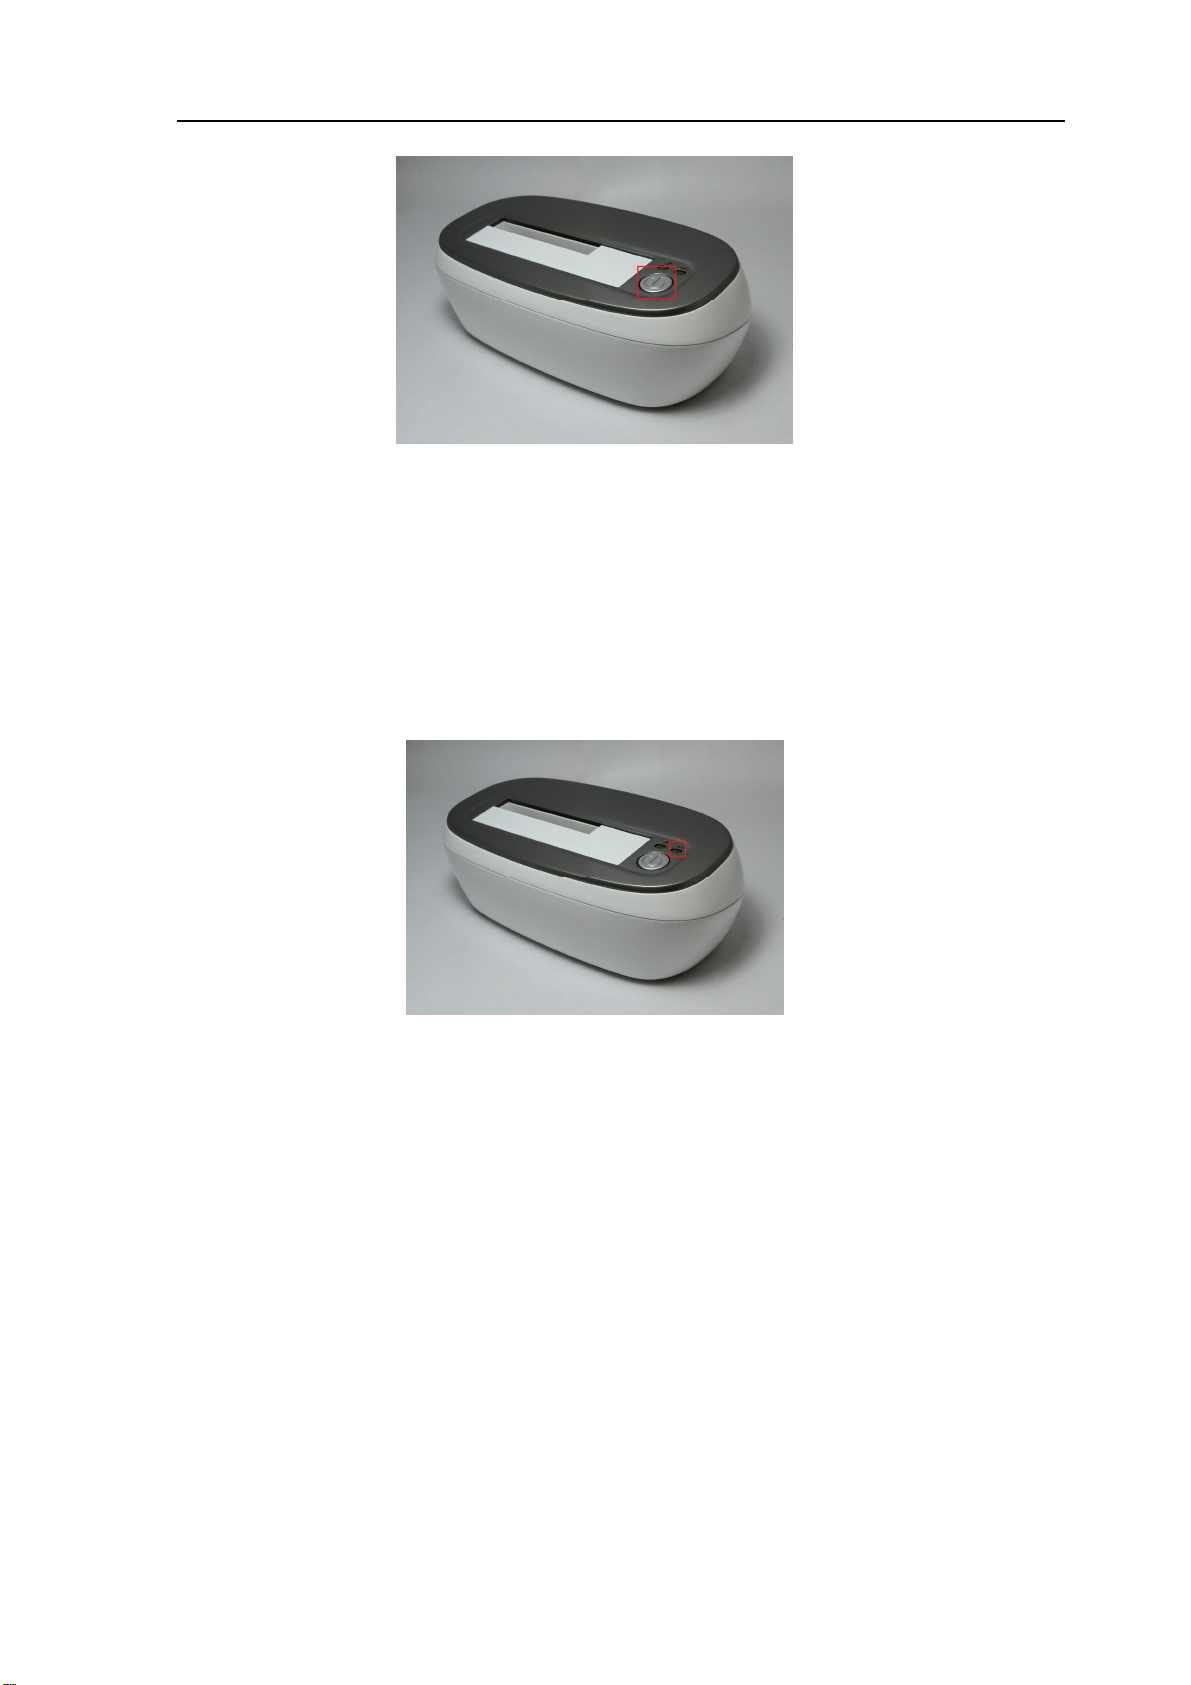
Pic 1-5 Power-on button
Step 4, Waiting ready.
There are 2 LED function in the system, the one is hard-disk access LED and the
other is WiFi LED, their function as following:
A. hard disk LED: as Pic 1-6
On : Power on and hard disk is pluged.
Twinkling :Hard disk is accessing
Pic 1-6 Hard disk LED
B. WiFi LED, as Pic 1-7
On : WiFi function enable
Twinkling : WiFi is accessing.
Version 0.9 Sep. 2012
© Initio 2012. All right reserved. Copying prohibited
This document is confidential
4

Pic 1-7 WiFi LED
Section 2 Getting Start - Download WiFi Huber App
1. Download App from Google play
Firstly, you need to down load App from Google Play, as the following Pic 2-1.
Pic 2-1. Google play for download App
Version 0.9 Sep. 2012
© Initio 2012. All right reserved. Copying prohibited
This document is confidential
5

You can use the Keyword WiFiHuber, to search the WiFiHuber App, then
download & install it.
Section 3 Connect WiFi
The major step to connect WiFi Huber, is similar as general AP router, you can
search SSID form smart handheld device's setup App. The operation step is as
following:
Select the Setup App icon to enable setup App, as the following Pic 3-1
Version 0.9 Sep. 2012
© Initio 2012. All right reserved. Copying prohibited
This document is confidential
6

Pict 3-1 Setting up page
3. Choose the WiFi & Internet item, as Pic 3-2
Version 0.9 Sep. 2012
© Initio 2012. All right reserved. Copying prohibited
This document is confidential
7

Pic 3-2 WiFi and Internet
Select Wi-Fi setup item, you need to enable Wi-Fi function and then to select SSID,
WiFiHuber.
When you choose the SSID, take "WiFiHuber" as an example, you will see the
negotiation process, your smart handheld device will get IP address from
"WiFiHuber" device, then it will see the connected status, if it is successful. Reference
Pic 3-3
Version 0.9 Sep. 2012
© Initio 2012. All right reserved. Copying prohibited
This document is confidential
8

Pic. 3-3 Select SSID
Version 0.9 Sep. 2012
© Initio 2012. All right reserved. Copying prohibited
This document is confidential
9

Section 4 Enable App
If you had successfully installed the App, then you will see the WiFiHuber App
ICON as following:
Pic 4-1 App Icon of WiFiHuber
Touch the App, then you can enable the WiFiHuber.
Welcome to WiFi Huber, if you enable the App, then you will see the main frame as Pic 4-2
Pic 4-2 Storage's Main frame
Version 0.9 Sep. 2012
© Initio 2012. All right reserved. Copying prohibited
This document is confidential
10

In Green rectangle box, you will see the storage device's label in upper side, and
you also can fine the 5 function pages as following:
: It is a WiFiHuber storage icon, when you select the function page,
then you can operate the file/directory. If you touch the
1. Directory: You can enter the directory and we can display the contain.
2. File: if the file's contain is supported, for example, general JPG photo file, then
you can get the picture on the screen.
Pic 4-3 Directory operation mode
: It is a handheld device local file operation function page. When you
apply the function, you will see the file/direct with your device.
Version 0.9 Sep. 2012
© Initio 2012. All right reserved. Copying prohibited
This document is confidential
11

The WiFiHuber provide friendly function, the general popular file sorting function.
It can automatically sort the WiFi storage, including, Audio, Video and Photo. User,
he or she can get those service by the following function page.
: User can get all of the supported audio file format file stored within
WiFi Storage when she or he touch the ICON, as in following Pic 4-4.
Pic 4-4 Music operation mode
As the Pic 4-4, if you can select the file, the you can play the music as the
Version 0.9 Sep. 2012
© Initio 2012. All right reserved. Copying prohibited
This document is confidential
12

following Pic 4-5.
Pic 4-5 Audio playing.
: We also support sorted photo function, when you touch the Photo
Icon, you can get the all supported photo file as Pic 4-6.
Version 0.9 Sep. 2012
© Initio 2012. All right reserved. Copying prohibited
This document is confidential
13

Pic 4-6 Photo operation mode.
You can touch the file, then you can get the photo as following:
Version 0.9 Sep. 2012
© Initio 2012. All right reserved. Copying prohibited
This document is confidential
14

Pic 4-7 Display Photo.
: For Video sorted file function, when you touch the Video function
Icon, user can get all of supported video files with WiFi Storage, as Pic 4-8.
Version 0.9 Sep. 2012
© Initio 2012. All right reserved. Copying prohibited
This document is confidential
15

Pic. 4-8 Video Operation mode
Again, when you touch the file, you can start playing the video.
Pic. 4-9. Playing a video
Version 0.9 Sep. 2012
© Initio 2012. All right reserved. Copying prohibited
This document is confidential
16
 Loading...