

1
Quick Set Up Guide
Shenzhen Weistek Co., Ltd
Add.: RM2301, Shenzhen Overseas Chinese High-Tech Venture Park, Shenzhen, P. R. China
Email: contact@weistek.net Website: www.weistek.net
Quick Set Up Guide
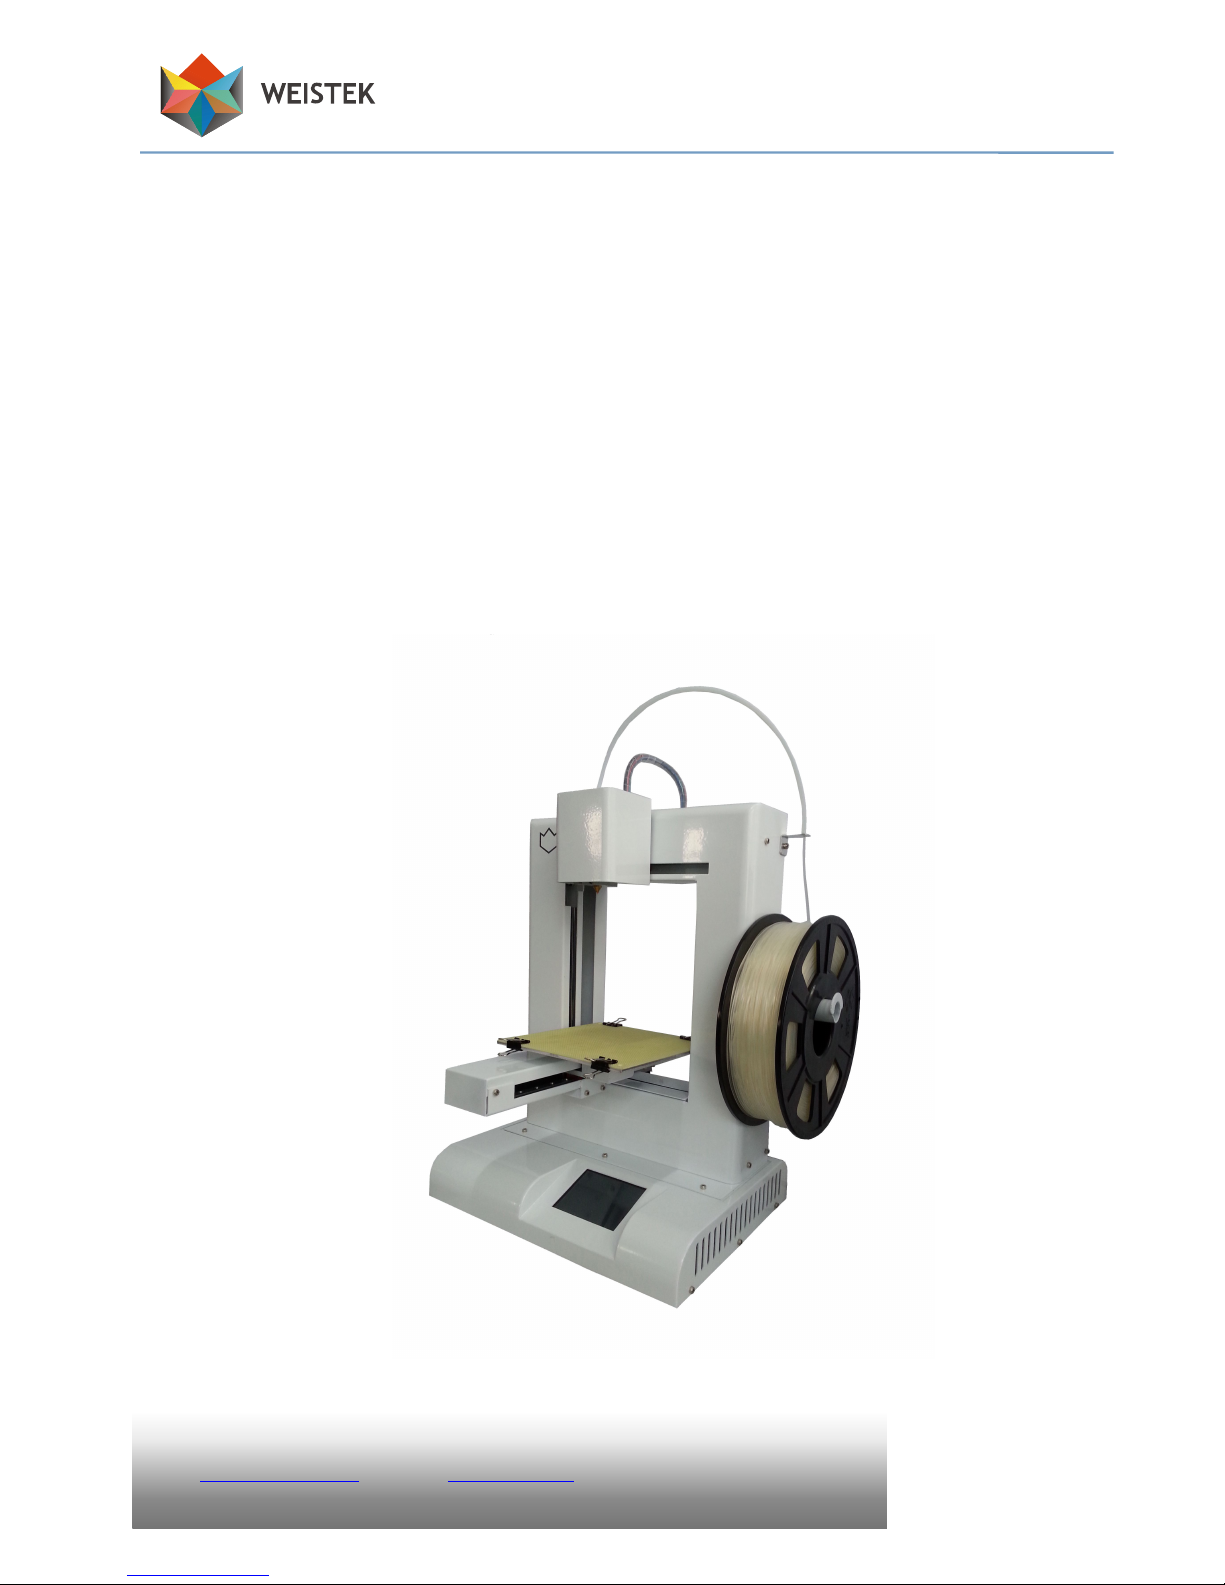
IdeaWerk 3D Printer

2
Quick Set Up Guide
Shenzhen Weistek Co., Ltd
Add.: RM2301, Shenzhen Overseas Chinese High-Tech Venture Park, Shenzhen, P. R. China
Email: contact@weistek.net Website: www.weistek.net
Take out the machine after opening the box. In total 5 parts:
1
Extruder part
2
Main frame part
3
Spool holder
4
Y-axis part
5
Main base part
Picture 1.1
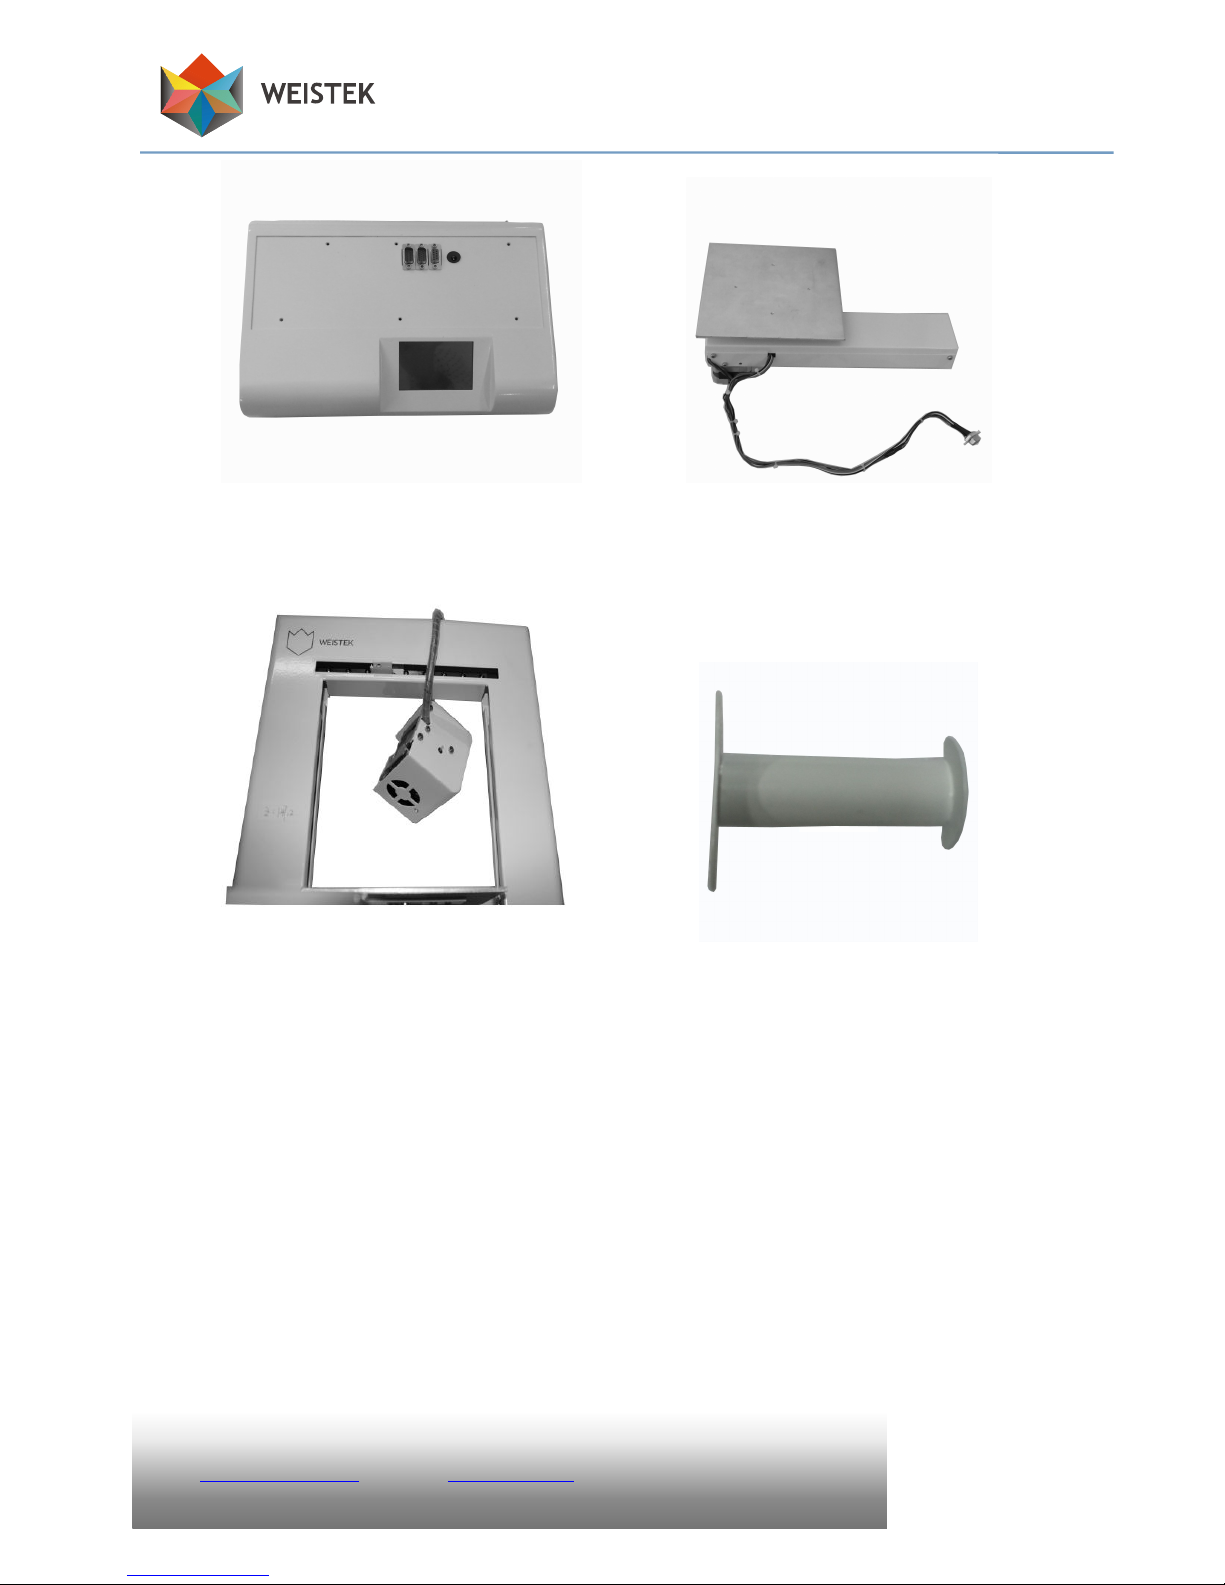
Y-axis part
Main frame part
Extruder part
Base part
Spool holder
3
Quick Set Up Guide
Shenzhen Weistek Co., Ltd
Add.: RM2301, Shenzhen Overseas Chinese High-Tech Venture Park, Shenzhen, P. R. China
Email: contact@weistek.net Website: www.weistek.net
Main base part Y-axis part
Picture 1.2 Picture 1.3
Main frame and extruder part Spool holder
Picture 1.4 Picture 1.5
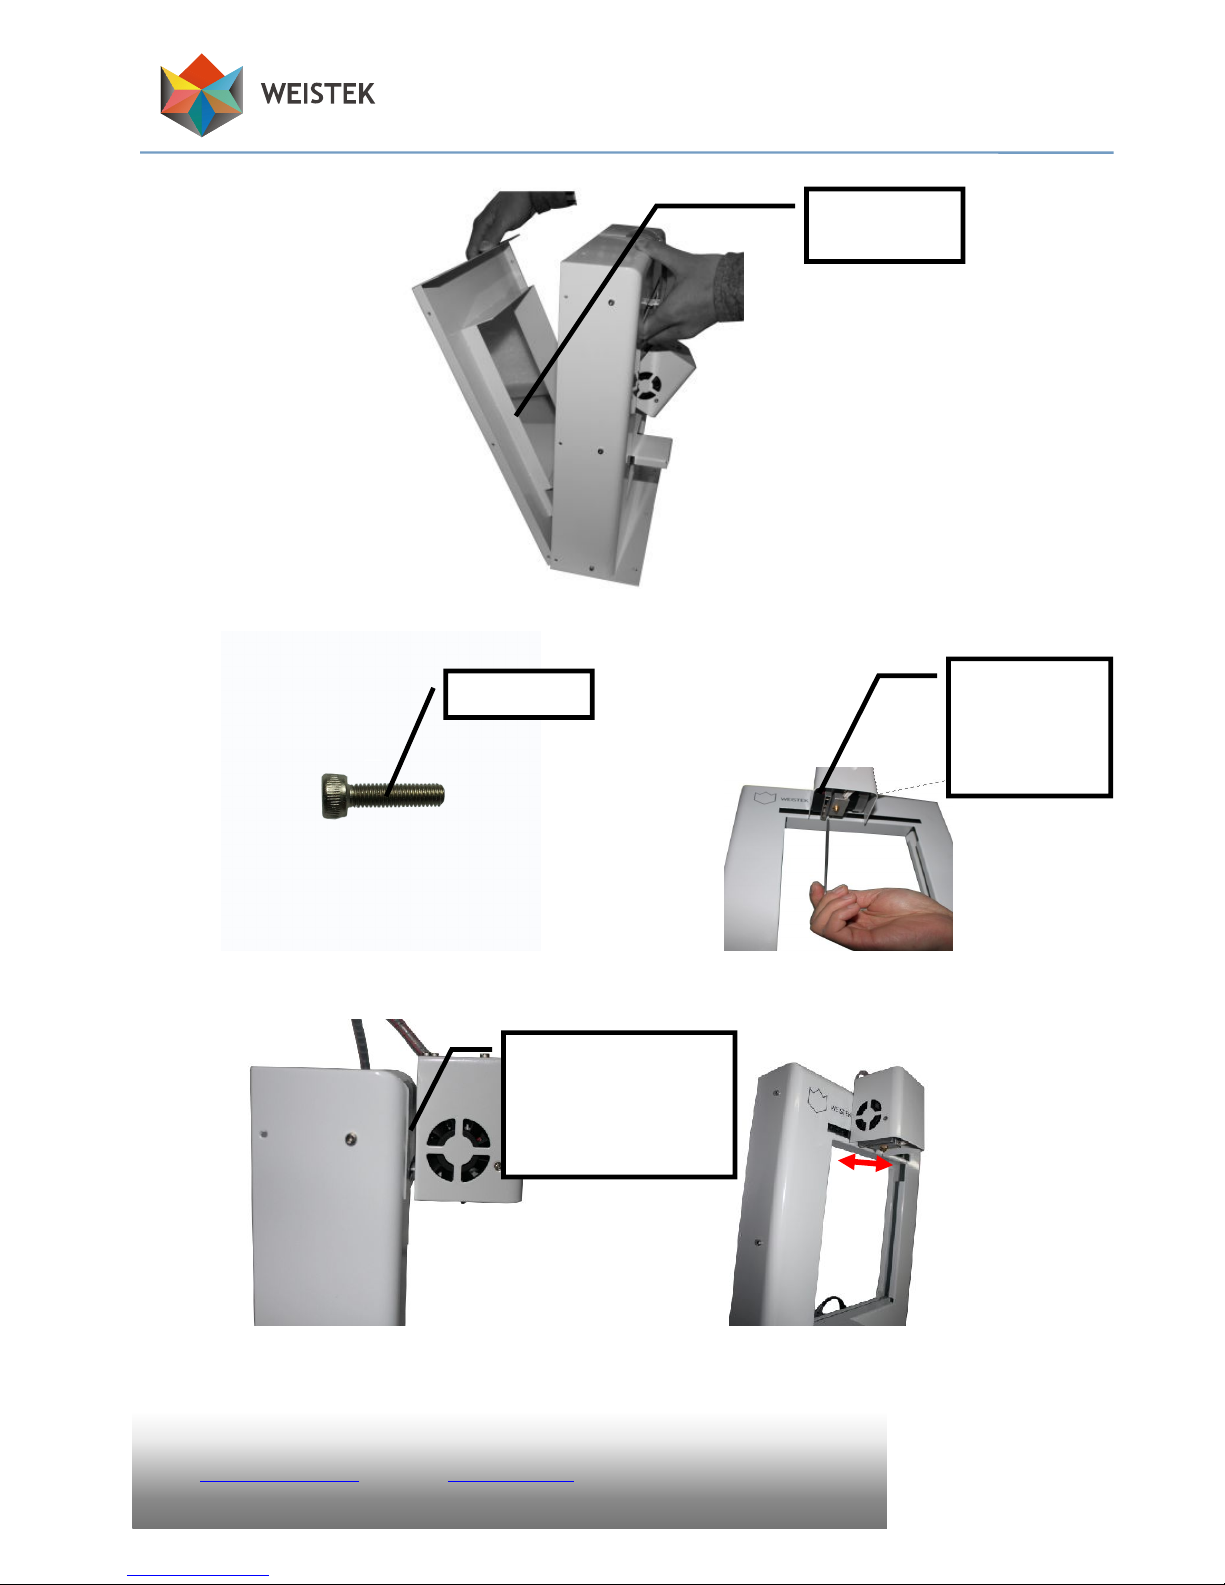
I. Assemble steps:
(1) Take out main frame and extruder part, and fix the extruder part in
the main frame part through a M3*12 screw by Allen wrench. Please
note distance between extruder and main frame part should be
same from top to bottom.
4
Quick Set Up Guide
Shenzhen Weistek Co., Ltd
Add.: RM2301, Shenzhen Overseas Chinese High-Tech Venture Park, Shenzhen, P. R. China
Email: contact@weistek.net Website: www.weistek.net
Picture 2.1
Picture 2.2 Picture 2.3
Picture 2.4 Picture 2.5
Screw M3x12
Maintain uniform
clearance between the
two parts to ensure a
good printing accuracy
Push extruder
part to confirm
if it moves
smoothly
Remove the
back cover
5
Quick Set Up Guide
Shenzhen Weistek Co., Ltd
Add.: RM2301, Shenzhen Overseas Chinese High-Tech Venture Park, Shenzhen, P. R. China
Email: contact@weistek.net Website: www.weistek.net
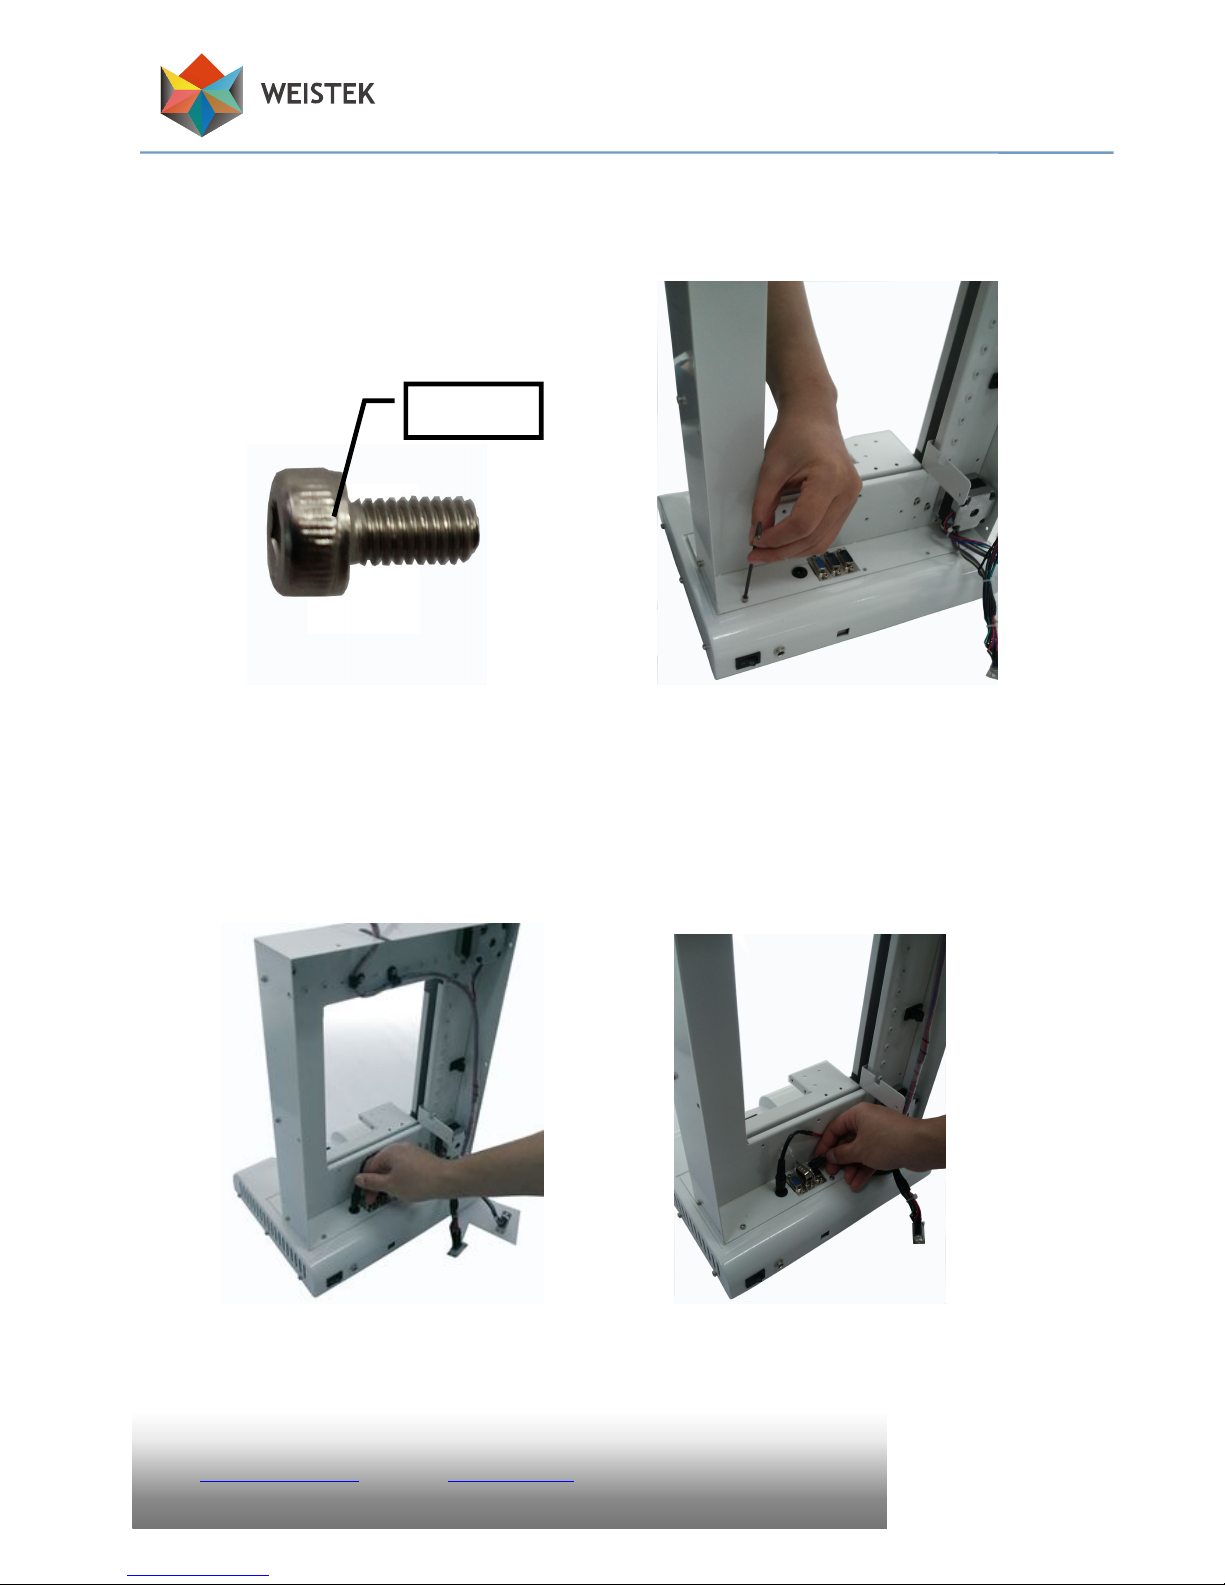
(2) Assemble motor base and main frame by 6 M3x6 screws (each 3
screws on front and back) and fasten with M3 Allen wrench.
Picture 2.6 Picture 2.7
(3) Connect eater cables in picture 2.8, DB 15-pin socket connector in
picture 2.9.
Picture 2.8 Picture 2.9
Screw M3x6

6
Quick Set Up Guide
Shenzhen Weistek Co., Ltd
Add.: RM2301, Shenzhen Overseas Chinese High-Tech Venture Park, Shenzhen, P. R. China
Email: contact@weistek.net Website: www.weistek.net
(4) DB 9-pin socket connector in picture 3.0 and picture 3.1.
Picture 3.0 Picture 3.1
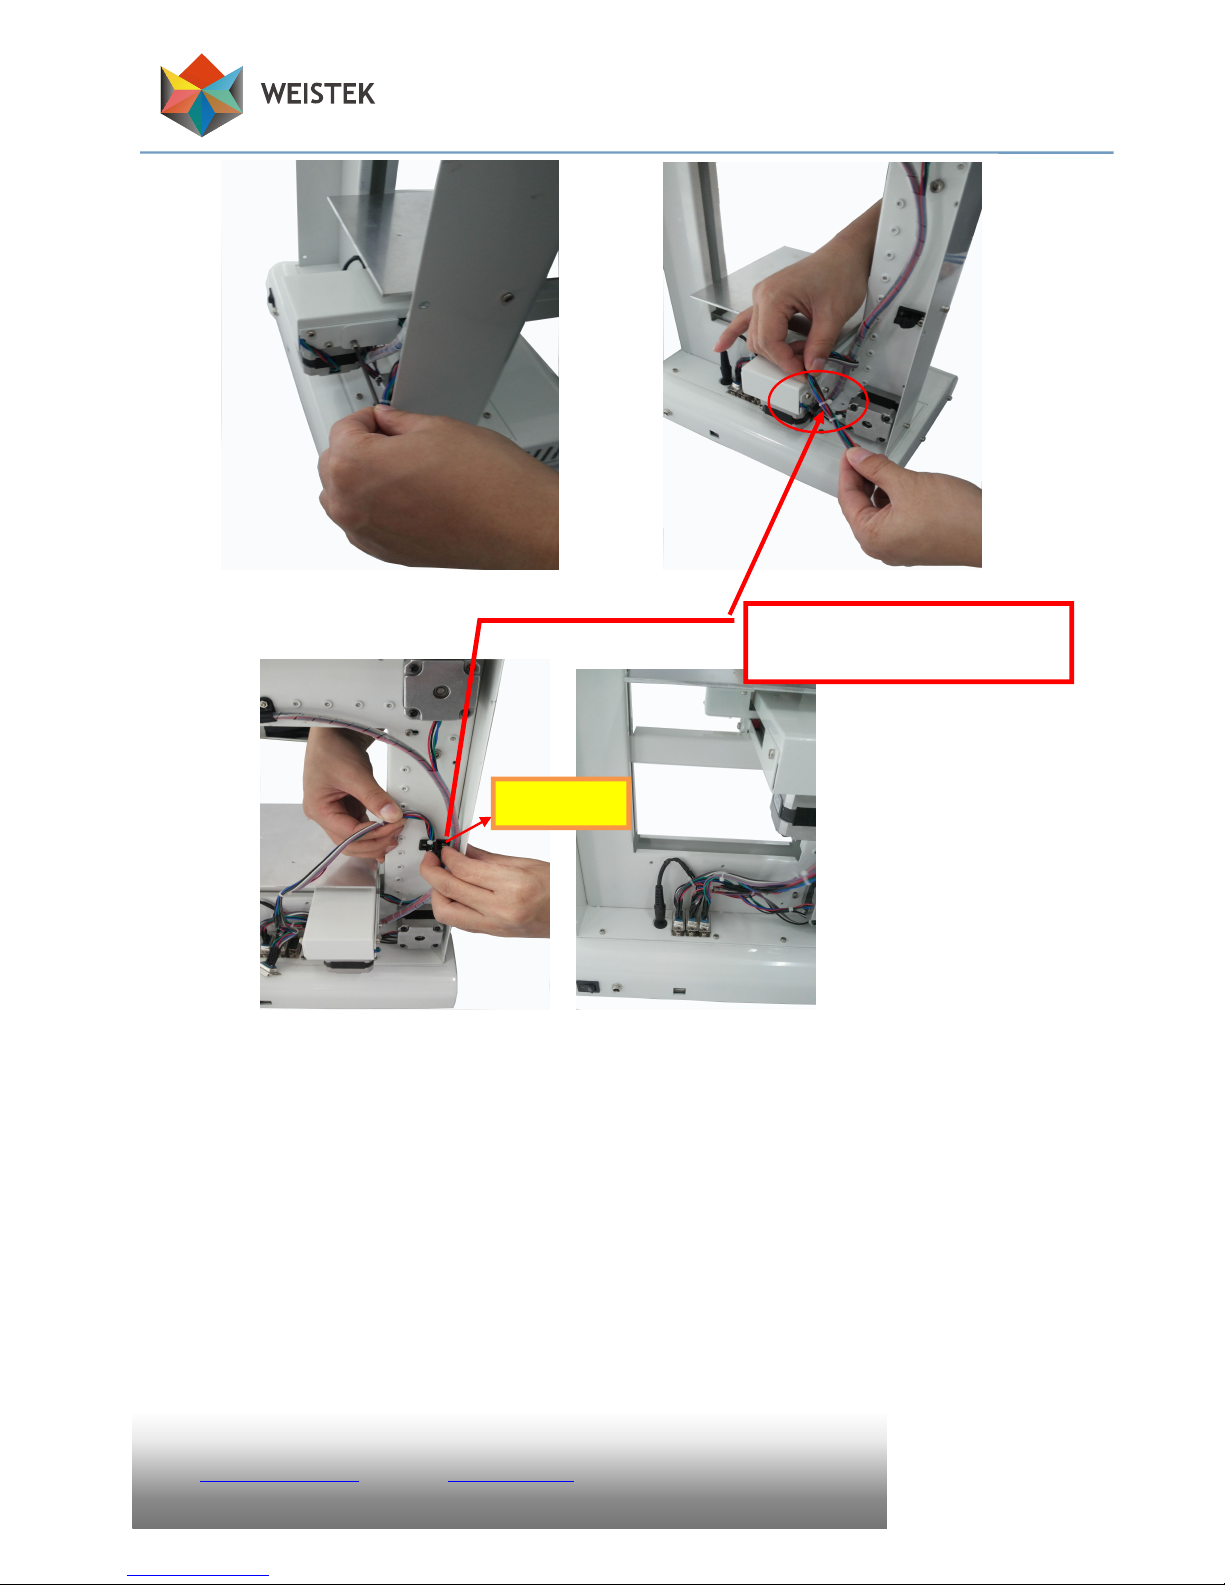
(5) Fix Y-axis in main frame. First, fasten 2 M3x6 side screws, then 2
M6x6 bottom screws, 1 M3x6 side screw at last. After finishing
Y-axis assembly, connector cables should be stuck in the stick-type
wiring holder and also just in between two nylon cable ties in case
of movement caused by loosening.
Picture 3.2 Picture 3.3
7
Quick Set Up Guide
Shenzhen Weistek Co., Ltd
Add.: RM2301, Shenzhen Overseas Chinese High-Tech Venture Park, Shenzhen, P. R. China
Email: contact@weistek.net Website: www.weistek.net
Picture 3.4 Picture 3.5
Picture 3.6 Picture 3.7
(6) Recover the back cover, be careful not to press or stuck the cables.
Then fasten 7 M3x6 screws, among which 2 on the top, 3 on one
side and 2 on the other side.
The part between two nylon cable
ties is design to be clamped
The clamp

8
Quick Set Up Guide
Shenzhen Weistek Co., Ltd
Add.: RM2301, Shenzhen Overseas Chinese High-Tech Venture Park, Shenzhen, P. R. China
Email: contact@weistek.net Website: www.weistek.net
Picture 3.8 Picture 3.9
Picture 4.0

9
Quick Set Up Guide
Shenzhen Weistek Co., Ltd
Add.: RM2301, Shenzhen Overseas Chinese High-Tech Venture Park, Shenzhen, P. R. China
Email: contact@weistek.net Website: www.weistek.net
(7) Assemble the spool holder on the side with 2 M3x6 screws.
Picture 4.1
(8)Assemble the filament passing-through assistant. (Attention the
direction.)
Picture 4.2

10
Quick Set Up Guide
Shenzhen Weistek Co., Ltd
Add.: RM2301, Shenzhen Overseas Chinese High-Tech Venture Park, Shenzhen, P. R. China
Email: contact@weistek.net Website: www.weistek.net
(9)Connect the motor cable on Y axis.
Picture 4.3
(10) Set the build bed, fix it with 4 clips.
Picture 4.4
Note: the long tail of the clips
should be parallel to Y-axis

11
Quick Set Up Guide
Shenzhen Weistek Co., Ltd
Add.: RM2301, Shenzhen Overseas Chinese High-Tech Venture Park, Shenzhen, P. R. China
Email: contact@weistek.net Website: www.weistek.net
(11)Place the filament spool and feed the filament with the Teflon
filament guide.
Picture 4.5
II. Acknowledgements
Thanks for using IdeaWerk 3D printer.
For after sale service please contact with your retailer.
 Loading...