

Page 1
WE-EF LEUCHTEN
Installation and Maintenance
Instructions
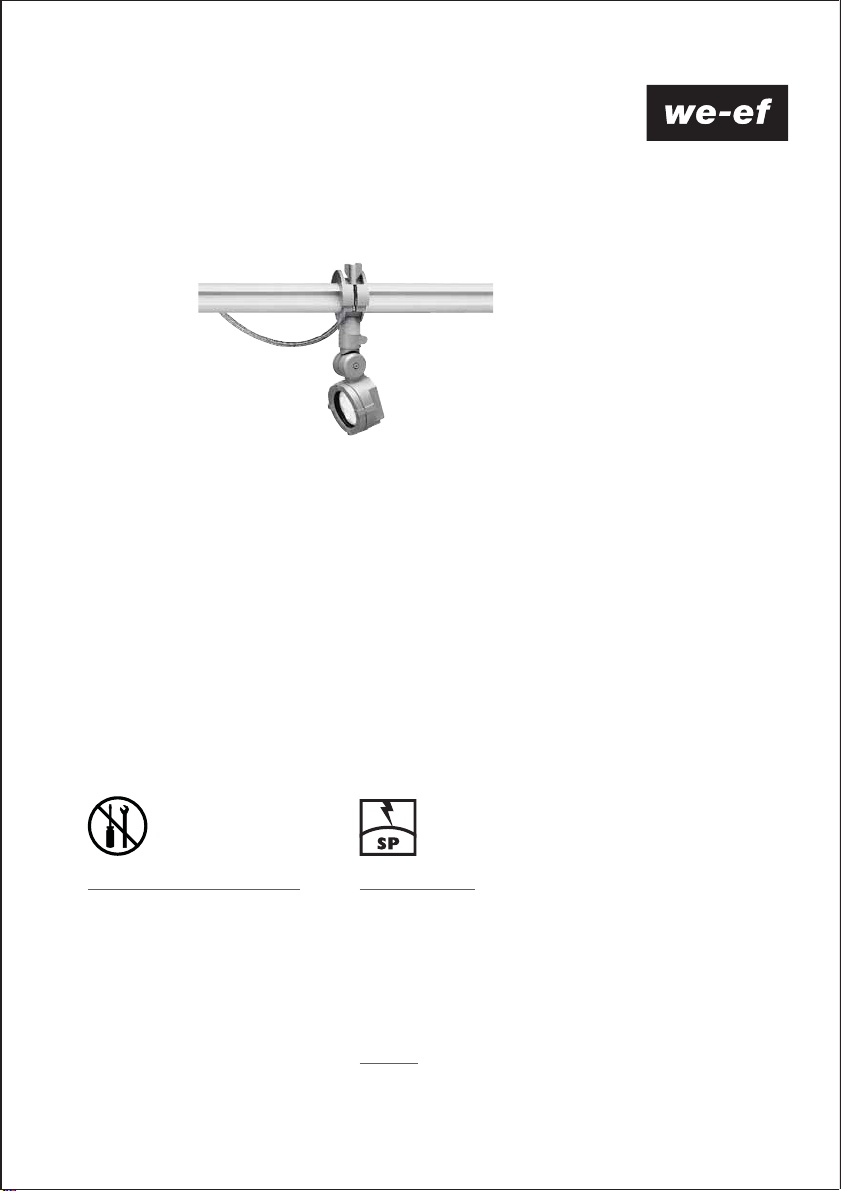
RAIL66 Projector
RAIL66 version
FLC121 #7 LED
FLC131 #7 LED
FLC141 #7 LED
Space frame version
FLC121 #7 LED
FLC131 #7 LED
FLC141 #7 LED
Do not open during installation
This product is factory-sealed.
Refer to the instructions contained in this
document for details.
Surge Protection
This product features built-in surge protection circuitry in compliance with
applicable standards.
For comprehensive protection of a luminaire installation against lightning and
electrical surges, it is essential to cover mains supply and data input lines at
the distribution board level, by using respective primary (Type 1) and secondary
(Type 2) surge arrestors in compliance with EN61643-11/IEC61643-1.
Warning
Ensure that all required surge protection measures are in place and activated
prior to luminaire installation. Also, disconnect luminaires before operating
high-power devices such as, for example, electrical arc welders.
Page 2
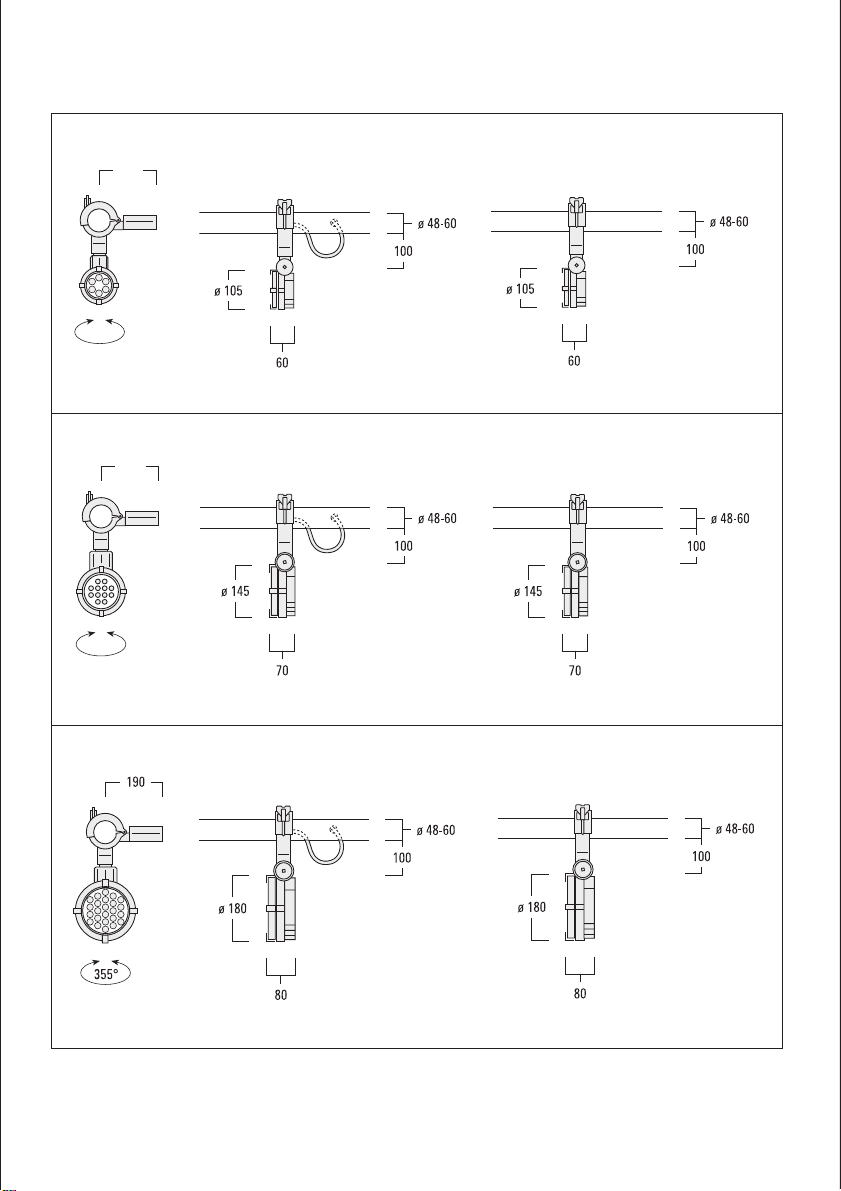
RAIL66 Projector
FLC121
165
355°
FLC131
355°
FLC141
190
RAIL66 version
RAIL66 version
Space frame version
Space frame version
IP66, IK07, Class I, ta = 40°C
RAIL66 version
Space frame version
1
Page 3

Light Source
LED
Maintenance
Apart from cleaning the product’s exterior surfaces, no special maintenance work is required.
Do not use high-pressure cleaners.
In case of component failure due to abnormal circumstances or at end of life, replacement must be carried out
by a suitably qualiƂed and trained professional.
Warning: Do not open luminaire while mains supply is switched on.
2
Page 4

Installation
The product must be installed and maintained by a
suitably qualiƂed person in compliance with the latest
applicable regulations and relevant legislation.
Claims based on defects attributable to improper
installation, application, operation and/or any modi-
Ƃcation carried out by the purchaser or third parties,
and the consequences thereof, are excluded.
Attention: The housing A containing the LED light
source is factory-sealed and does not need to be
opened during installation.
Installation Procedure
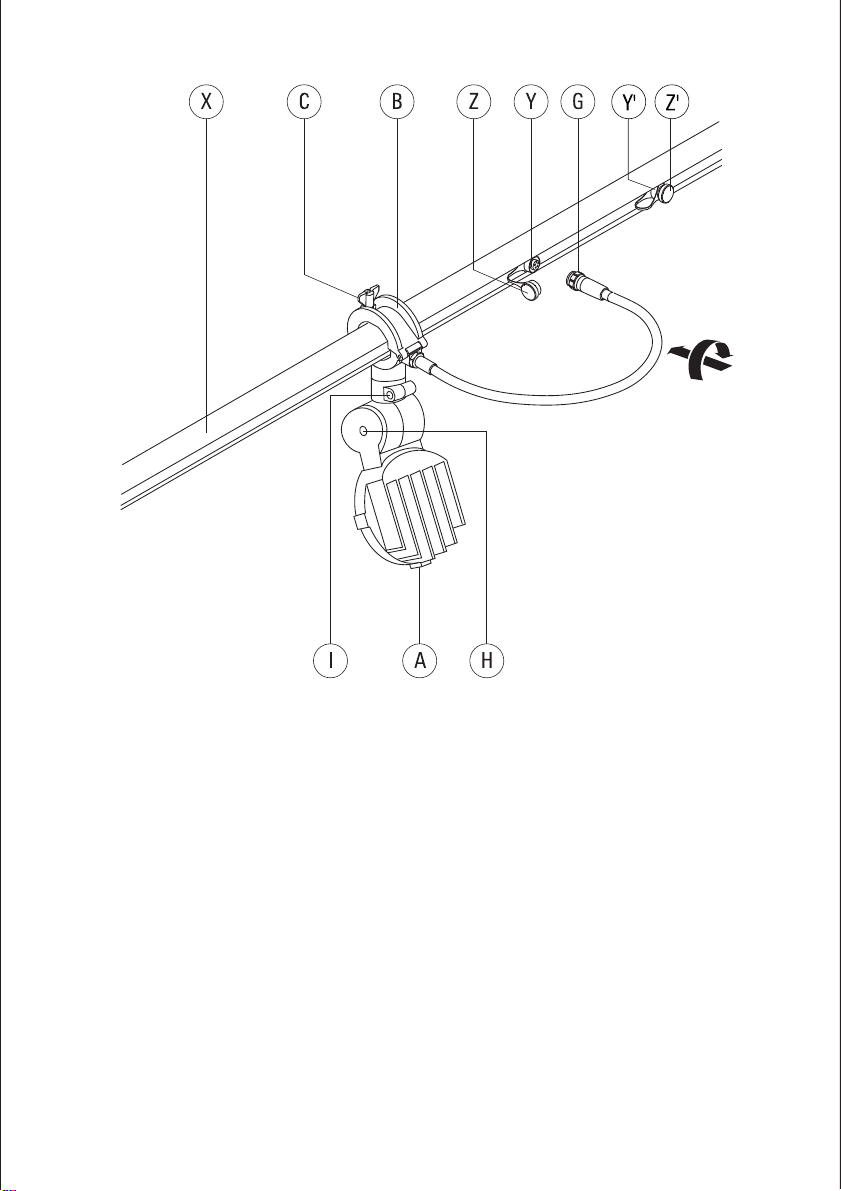
Installation – RAIL66 version
Prior to installing the luminaire, mount and connect
the selected RAIL66 mounting system in accordance
with relevant installation instructions
1) Switch off mains electrical supply.
2) Check that rating shown on luminaire label conforms
with mains electrical supply.
3) Determine desired position of luminaire A on rail X,
dependent on aiming requirements and proximity
to a suitable mains outlet Y.
4) Attach clamp B to rail X. Tighten wingnut C.
5) Remove protective cover Z from mains outlet Y.
Insert in-line connector G and tighten.
Attention: On any mains outlet Y’ that is not used,
protective cover Z’ must remain Ƃrmly secured.
Check and ensure proper Ƃt and tightness.
6) Loosen screws H and I slightly. Aim luminaire in
desired direction, retighten screws H and I.
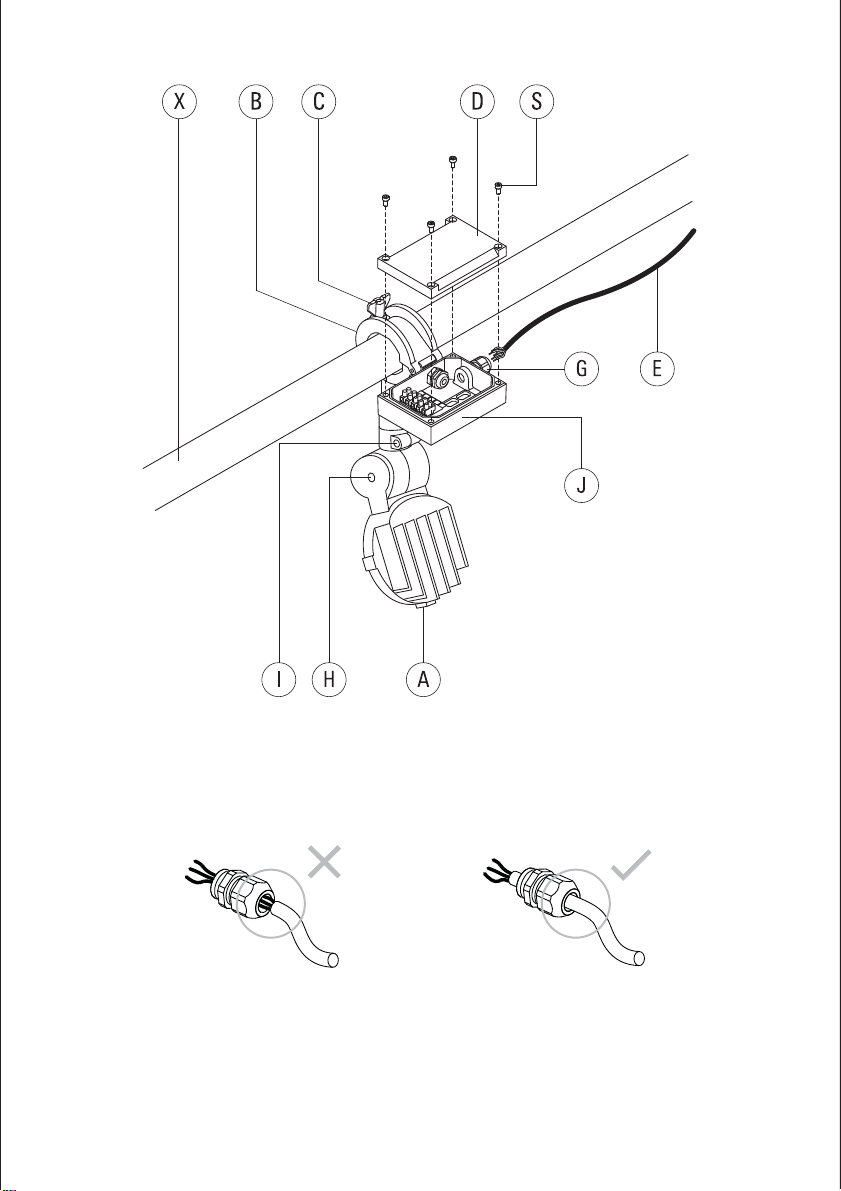
Installation – Space frame version
Suitable for space frame diameter 48-60 mm.
1) Switch off mains electrical supply.
2) Determine desired position of luminaire A on space
frame X, dependent on aiming requirements.
3) Attach clamp B to space frame X. Tighten
wingnut C.
4) Detach gear box cover D by loosening screws S.
5) Check that rating shown on luminaire label conforms
with mains electrical supply.
6) Feed mains supply cable E through cable gland G
(Fig. I).
7) Connect mains supply cable
E leads to respective
terminals in terminal connector K:
a) ON/OFF (L = Phase, N = Neutral,
= Earthing)
b) 1-10 V/DALI (L = Phase, N = Neutral,
= Earthing, DA/DA = DALI control line,
D–/D+ = 1-10 V control line).
8) Reposition gear box cover D and secure in position
by retighten screws S.
9) Loosen screws H and I slightly. Aim luminaire in
desired direction, retighten screws H and I.
3
Page 5
RAIL66 version
4
Page 6
Space frame version
Fig. I. Feed mains supply cable through cable gland
5
Page 7

www.we-ef.com
WE-EF LEUCHTEN
Germany
Tel +49 5194 909 0
Fax +49 5194 909 299
WE-EF LUMIERE
France
Tel +33 4 74 99 14 44
Fax +33 4 74 99 14 40
WE-EF HELVETICA
Switzerland
Tel +41 22 752 49 94
Fax +41 22 752 49 74
WE-EF LIGHTING
United Kingdom
Tel +44 844 880 5346
Fax +44 844 880 5347
WE-EF LIGHTING
Thailand
Tel +66 2 738 9610
Fax +66 2 175 2174
info.asiapaciƂ[email protected]
WE-EF LIGHTING
Australia
Tel +61 3 8587 0444
Fax +61 3 8587 0499
WE-EF LIGHTING
United States of America
Tel +1 724 742 0030
Fax +1 724 742 0035
TO9209W0717 © WE-EF 2017
Technical speciƂcations are
subject to change.
 Loading...