

Page 1
Wood Pellet Grill
OWNER’S MANUAL
EX4
EX6
A MAJOR CAUSE OF FIRES IS FAILURE TO
MAINTAIN REQUIRED CLEARANCES (AIR SPACES)
TO COMBUSTIBLE MATERIALS. IT IS OF UTMOST
IMPORTANCE THAT THIS PRODUCT BE INSTALLED ONLY
IN ACCORDANCE WITH THESE INSTRUCTIONS.
51779
US
06/06/20
Page 2
SAFETY
READ ALL INSTRUCTIONS BEFORE INSTALLING
AND USING THE APPLIANCE. This Owner’s
Guide contains important product dangers,
warnings, and cautions. Please read this entire
manual before assembly and use of this pellet
fuel-burning appliance. Failure to follow these
instructions could result in property damage,
bodily injury or even death. Contact local building
or fire ocials about restrictions and installation
inspection requirements in your area. For
assembly instructions, refer to the Assembly
Guide. SAVE THESE INSTRUCTIONS.
Visit weber.com, select your country of origin,
and register your grill today.
DANGER, WARNING, and CAUTION statements
are used throughout this manual to emphasize
critical and important information. The
statements are defined as:
m DANGER!: Indicates a hazardous situation
which, if not avoided, will result in death or
serious injury.
m WARNING!: Indicates a hazardous situation
which, if not avoided, could result in death or
serious injury.
m CAUTION!: Indicates a hazardous situation
which, if not avoided, could result in minor or
moderate injury.
m DANGER! Keep flammable vapors and liquids
away from the grill. Never use gasoline,
gasoline-type lantern fuel, kerosene, charcoal
lighter fluid, or similar liquids to start or
’freshen up’ a fire in this appliance. Keep all
such liquids well away from the appliance
when in use.
m WARNING! For outdoor use only. The
installation of the pellet grill shall be located
so flue gases including smoke will not
communicate or enter any building. Consult
with the local fire or building codes for
additional requirements.
m WARNING! Creosote – Formation and need for
removal. When wood pellets are burned slowly,
they produce tar and other organic vapors
that combine with expelled moisture to form
creosote. When ignited, this creosote makes an
extremely hot fire.
m WARNING! The ash and grease system and
cookbox should be inspected before each cook
to determine when grease and/or creosote
buildup has occurred. When grease or creosote
has accumulated, it should be removed to
reduce the risk of fire.
m WARNING! Disposal of ashes - Always wait
for the grill to completely cool after proper
shutdown. Do not dispose of any grease or ash
until they are fully cooled.
m WARNING! Use only WEBER SMOKEFIRE ALL
NATURAL HARDWOOD PELLETS in this grill. Do
not use pellet fuel labeled as having additives.
m WARNING! Remove pots and pans while the
operating appliance is unattended, to reduce
the risk of fire.
m CAUTION! Do not use accessories not specified
for use with this appliance.
m WARNING! Follow these guidelines to prevent
carbon monoxide, a colorless, odorless gas
from poisoning you, your family or others.
• Know the symptoms of carbon monoxide
poisoning: headache, dizziness, weakness,
nausea, vomiting, sleepiness, and confusion.
Carbon monoxide reduces the blood’s ability
to carry oxygen. Low blood oxygen levels can
result in loss of consciousness and death.
• See a doctor if you or others develop cold or flu
like symptoms while cooking or in the vicinity
of this appliance. Carbon monoxide poisoning,
which can easily be mistaken for a cold or flu, is
often detected too late.
• Alcohol consumption and drug use increase the
eects of carbon monoxide poisoning.
m WARNING! Carbon monoxide is especially toxic
to mother and child during pregnancy, infants,
the elderly, smokers, and people with blood or
circulatory system problems, such as anemia,
or heart disease.
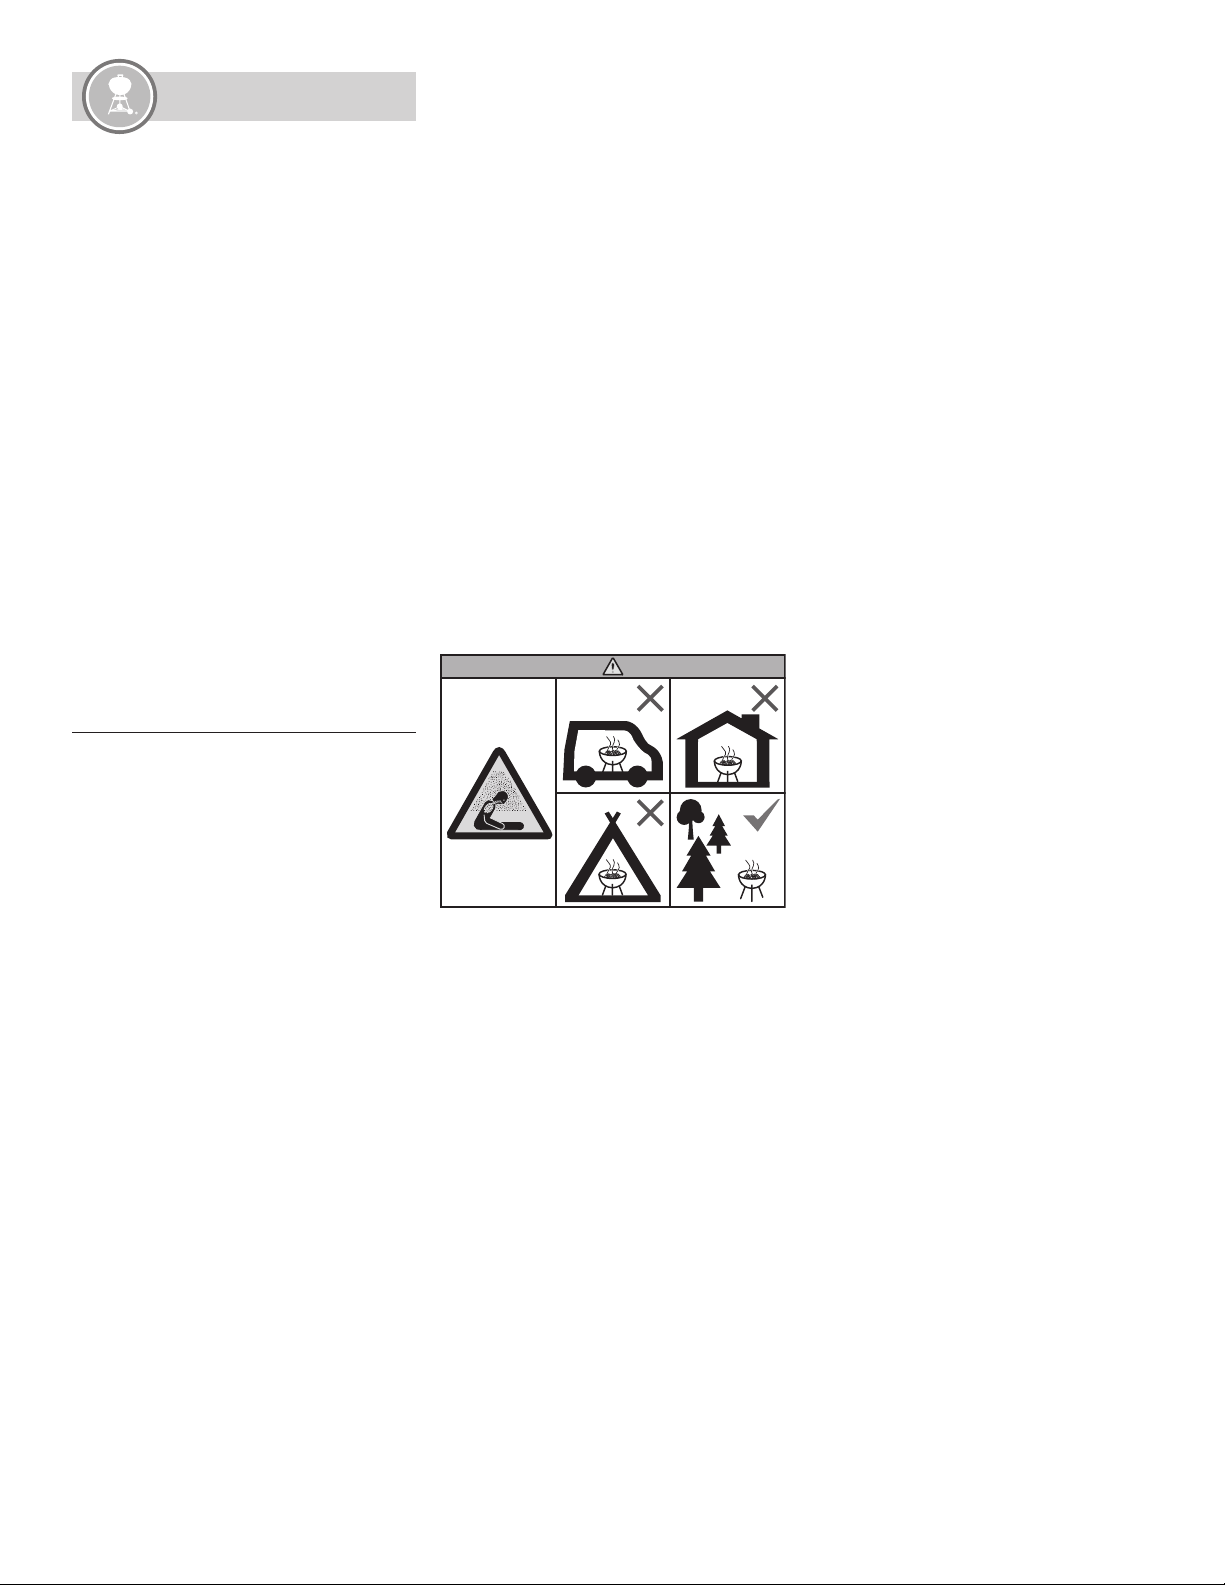
m WARNING! Do not use the grill in a confined
and/or habitable space e.g. houses, tents,
caravans, motor homes, boats. Danger of
carbon monoxide poisoning fatality.
Only applicable to customers in
Mexico:
m WARNING! This equipment is not intended
for use by persons (including children) whose
physical, sensory or mental capacities are
impaired or reduced, or who lack experience
and knowledge, unless such individuals receive
supervision or training on the operation of the
equipment by a person responsible for their
security.
m WARNING! Children should be supervised to
ensure that they do not use this equipment as
a toy.
DANGERS
m DANGER! Do not use indoors! This grill is
designed for outdoor use in a well-ventilated
area and is not intended for and should never
be used as a heater. If used indoors, toxic
fumes will accumulate and cause serious
bodily injury or death.
m DANGER! This grill is not intended for
commercial use and is designed for outdoor
household use only.
m DANGER! Do not use this grill in a garage,
building, breezeway, tent, lanai, screened in
porch, or any other enclosed area.
m DANGER! Never perform maintenance on this
grill while it is plugged into a power source.
Always unplug the grill before servicing.
m DANGER! Hazardous voltage is present within
the grill and can shock, burn or cause death.
Always unplug the grill from the power source
before servicing or cleaning.
WARNINGS
m WARNING! Do not use this grill unless all
parts are in place. This grill must be properly
assembled according to the assembly
instructions. Improper assembly may be
dangerous.
m WARNING! Never operate this grill without the
ash and grease system in place. Always use a
drip pan to collect grease within the drawer.
m WARNING! Never remove the ash and grease
system while operating the grill.
m WARNING! Do not use charcoal briquettes,
liquid fuel or lava rock with this grill.
m WARNING! Do not use this grill under any
overhead combustible construction including
ceilings and overhangs.
m WARNING! The use of alcohol, prescription,
or non-prescription drugs may impair the
consumer’s ability to properly assemble or
safely operate the grill.
m WARNING! Exercise caution when operating
your grill. It will be hot during preheating,
cooking or cleaning, and should never be left
unattended or moved while in use.
m WARNING! Keep children and pets away.
m WARNING! This grill is not intended to be
installed in or on recreational vehicles and/or
boats.
m WARNING! Do not use this grill within 2
feet (61cm) of any combustible material.
Combustible materials include, but are not
limited to, wood or treated wood decks, patios,
porches, vinyl siding, and patio doors.
m WARNING! Keep the grill on a secure, level
surface at all times, clear of combustible
materials.
m WARNING! Do not use the grill in high winds.
m WARNING! Do not wear clothing with loose
flowing sleeves while lighting or operating the
grill.
m WARNING! Never touch the cooking grates,
burn pot, glow plug, ash and grease system, or
grill to see if they are hot.
m WARNING! When finished cooking, use the
main menu or push and hold the dial to run the
shutdown procedure and extinguish any fuel.
m WARNING! Use heat-resistant barbecue mitts
or gloves while cooking and handling lid,
warming rack, thermometer, or temperature
probes.
m WARNING! Maximum side table load is 40
pounds. Do not lean on or overload the side
table.
m WARNING! Do not move, cover or store the
grill until all fuel is extinguished and the grill is
completely cool.
2
Page 3

m WARNING! Do not use water to control flare
ups or to extinguish fuel.
m WARNING! Use this grill only as described in
this manual. Misuse may cause fire, electric
shock or injury.
m WARNING! This appliance should only be
connected to a grounded outlet. Do not use
plug adapters. If an extension cord is needed,
only use a 14-gauge cable with a grounded
plug, suitable for use with outdoor appliances.
The maximum length for the extension cord
is 13 feet (4 meters). Keep the extension cord
as short as possible. Examine the extension
cord before use and replace if damaged. To
minimize the risk of property damage and/
or personal injury, do not use an extension
power-supply cable unless it conforms to the
specifications listed in this manual.
m WARNING! Inspect the power cord and plug
regularly for any signs of damage. Do not
operate appliance with damaged cord or plug.
m WARNING! Do not operate the unit if the
electrical outlet is damaged.
m WARNING! Always unplug the grill by pulling
from the plug. Do not pull from the cord.
m WARNING! Do not use the grill within 10 feet
(3m) of any body of water, such as a pool or
pond.
m WARNING! Keep the power cord and extension
cord away from any heated surfaces or water
and arranged so as not to cause a tripping
hazard. Use the power cord management strap
to avoid these hazards.
m WARNING! The food temperature probes are
very sharp and can become hot when in use.
Use care when handling the probes to avoid the
risk of injury.
m WARNING! Do not allow the hopper to empty
during operation of this grill.
m WARNING! The power cord supplied with your
grill has a three-prong (grounding) plug for
your protection against electrical shock hazard
and should be plugged directly into a grounded
three-prong outlet. Do not cut, remove or
modify the plug in any way.
m WARNING! WEBER recommends that you
regularly check the burn pot, auger and
cookbox for any obstructions that might
block and prevent proper air flow. See the
RECOMMENDED CLEANING section for more
details.
m WARNING! If the grill is stored outside during
periods of non-use, rain or high humidity,
the wood pellets should be inspected within
the hopper to ensure they are dry. Hardwood
pellets, when wet or exposed to high humidity,
can expand, break apart and clog or obstruct
the auger feeding system.
m WARNING! If using the WEBER CONNECT app
to monitor the operation of the grill, make sure
that all safety precautions otherwise applicable
to the operation of the grill have been observed
prior to using the grill. Someone familiar with
the operation of the grill must be in close
proximity of the grill in order to address any
emergencies that could arise. Do not leave the
grill unattended.
m WARNING! To decrease the chance of a grease
fire, be sure the ash and grease system, heat
diuser, and all FLAVORIZER bars are all
properly installed.
CAUTIONS
m CAUTION! Make sure all electrical connections
are kept dry and o of the ground.
m CAUTION! Observe all local laws and
regulations when using this appliance.
m CAUTION! When connecting this appliance to a
power supply, ensure that the supply voltage
corresponds with the voltage rating marked on
the appliance label.
m CAUTION! Always unplug the grill from the
outlet when not in use and before cleaning.
Allow the grill to cool before performing
maintenance.
m CAUTION! Use extreme caution when removing
the ash and grease system and disposing of
hot grease or ashes.
m CAUTION! Always store WEBER SMOKEFIRE
ALL NATURAL HARDWOOD PELLETS in a
dry place located away from heat-producing
appliances and moisture.
CALIFORNIA PROPOSITION 65
m WARNING! This product can expose you to
chemicals including wood dust, which is known
to the State of California to cause cancer. For
more information go to www.P65Warnings.
ca.gov.
m WARNING! This product can expose you to
chemicals including combustion by-products
(including soot and carbon monoxide), which
are known to the state of California to cause
cancer and birth defects or other reproductive
harm. For more information go to www.
P65Warnings.ca.gov.
m WARNING! This product can expose you to
chemicals including nickel, which is known
to the state of California to cause cancer. For
more information go to www.P65Warnings.
ca.gov.
• 110 -127
• 50/60 Hz
• 85 W
• 2402.0 - 2480.0 MHz
Table of Contents
2 Safety
4 Warranty
5 Cooking System
6 Special Features
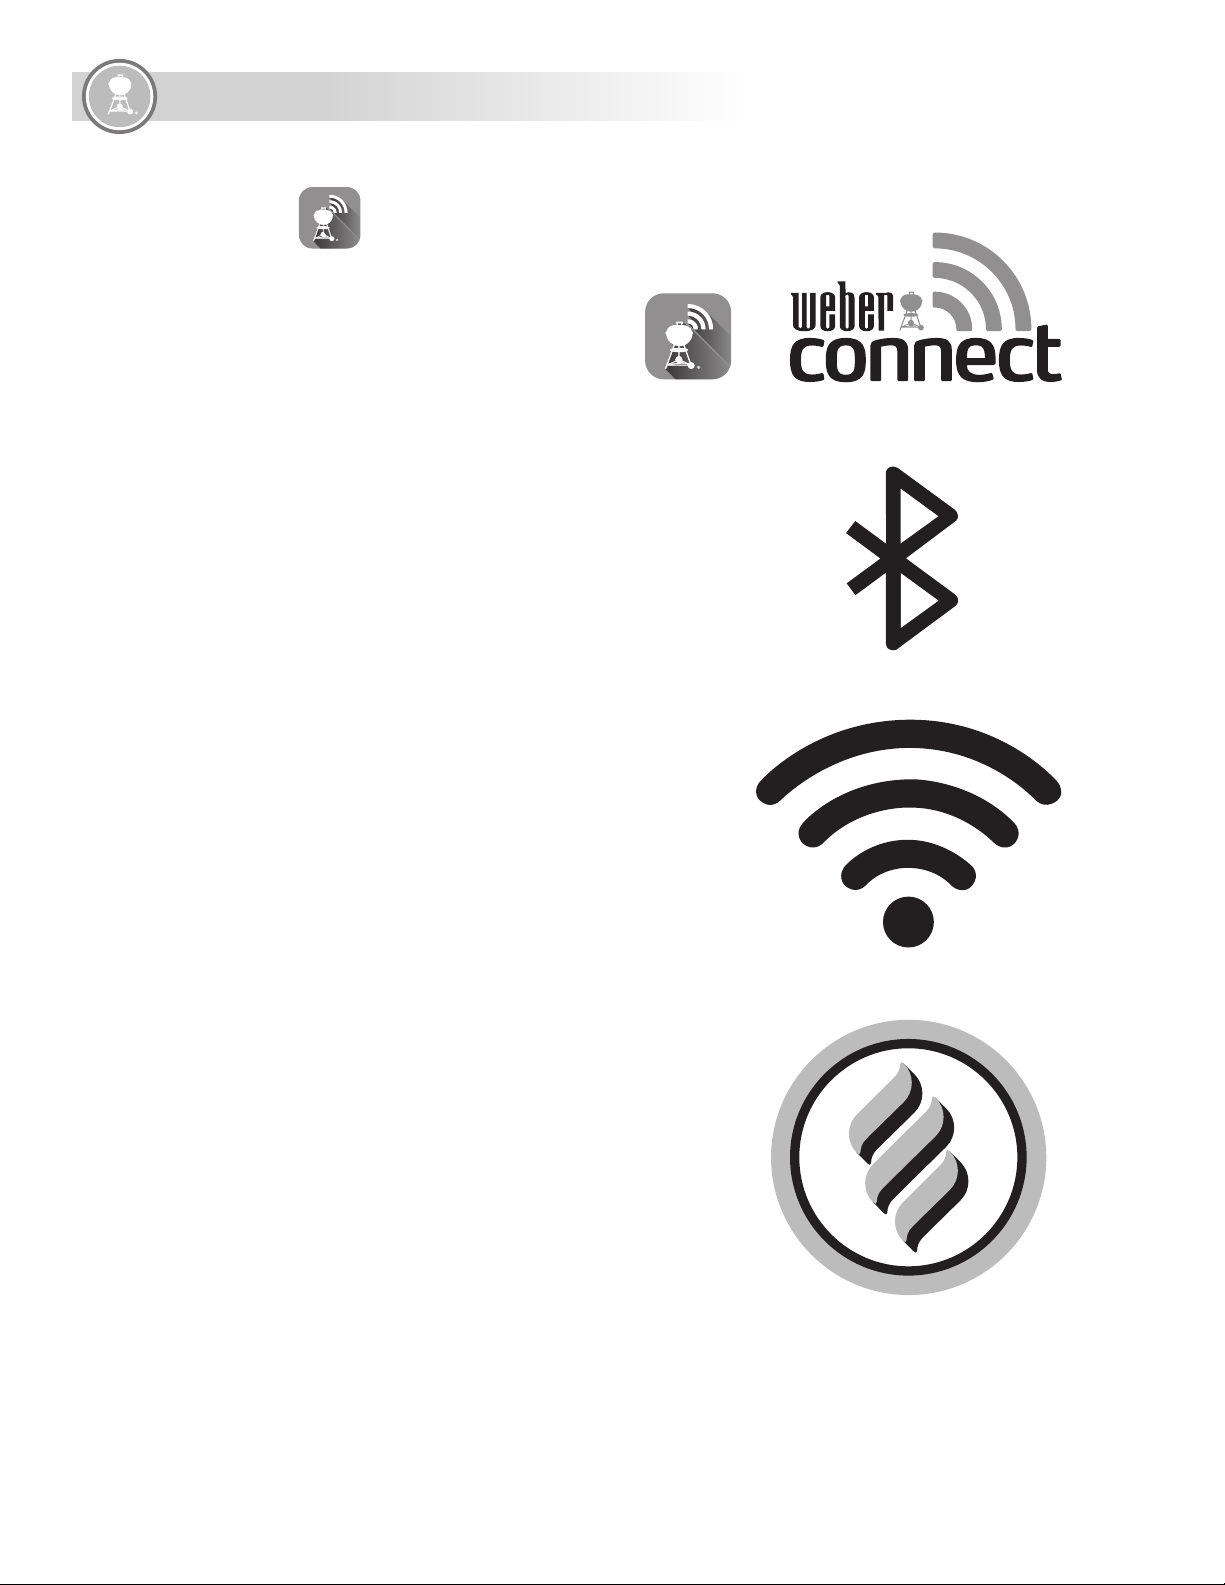
WEBER CONNECT Controller
8 Before Igniting
Choose a Proper Location to Cook
Preparing Grill for First Time Startup
Meal to Meal Maintenance Every Time
You Cook
WEBER CONNECT App
Connecting Your Grill to Bluetooth® or
Wi-Fi Network
11 Grill Operation
First Time Startup Procedure
Every Time You Cook
Cooking With Temperature Probes
Shutting Down Your Grill
Changing Pellets / Purging Hopper
Grilling Methods
Explore Your Settings
15 Controller Settings
Dashboard
Main Menu
Setting Up a Probed Cook
Probed Cook Settings
Cook Programs
Timers
Regulatory Information
17 Troubleshooting
32 Maintenance
33 Grillmaster Tips
34 Replacement Parts
Page 4

WARRANTY
Welcome to Weber
WEBER is proud to have you with us as you explore all of your future grilling experiences. We
pride ourselves on two things; making grills that last and providing quality customer service
care for a lifetime. Our commitment to excellence and quality is unmatched and we stand by our
products with a world class warranty. Feel confident in your decision to buy a WEBER and enjoy
your journey to grilling happiness.
Warranty
Thank you for purchasing a Weber product.
Weber-Stephen Products LLC, 1415 S. Roselle
Road, Palatine, Illinois 60067 pride ourselves on
delivering a safe, durable, and reliable product.
This is Weber’s Voluntary Warranty provided to
you at no extra charge. It contains the information
you will need to have your Weber product repaired
or replaced in the unlikely event of a failure or
defect.
Pursuant to applicable laws, the Owner has
several rights in case the product is defective.
Those rights include supplementary performance
or replacement, abatement of the purchasing
price, and compensation. These and other
statutory rights remain unaected by this
Warranty provision. In fact, this Warranty
grants additional rights to the Owner that are
independent from statutory Warranty provisions.
WEBER’s Voluntary Warranty
Weber warrants, to the purchaser of the Weber
product (or in the case of a gift (of a new grill)
or promotional situation, the person for whom
it was purchased as a gift or promotional item)
(“Owner”), that the Weber product is free from
defects in material and workmanship for the
periods of time set forth in the chart below,
from the date of purchase when assembled and
operated in accordance with the accompanying
Owner’s Manual, normal wear and tear excluded.
(Note: If you lose or misplace your Weber Owner’s
Manual, a replacement is available online at www.
weber.com) Weber agrees within the framework
of this Warranty to repair or replace the part
that is defective in material or workmanship
subject to the limitations, and exclusions
listed below. TO THE EXTENT ALLOWABLE
BY APPLICABLE LAW, THIS WARRANTY IS
EXTENDED ONLY TO THE ORIGINAL PURCHASER
AND IS NOT TRANSFERABLE TO SUBSEQUENT
OWNERS, EXCEPT IN THE CASE OF GIFTS AND
PROMOTIONAL ITEMS AS NOTED ABOVE.
PRODUCT WARRANTY PERIODS
Cook box and all components not covered below:
5 years
Electrical components:
3 years
Cooking grates, pellet slide, burn pot, heat bae,
pellet grate, controller bezel:
3 years
Weber stands by its products and is happy
to provide you with the Warranty described
for material defects in the grill or its relevant
components, normal wear and tear excepted.
•‘Normal wear and tear’ includes cosmetic and
other immaterial deterioration that may come
with ownership of your grill over time, such as
surface rust, dents / scratches, etc.
However, Weber will honor this Warranty for the
grill or its relevant components where damage or
dysfunction results from a material defect.
•‘Material defect’ includes rust through or burn
through of certain parts, or other damage or
failure inhibiting your ability to safely / properly
use your grill.
Owner’s Responsibilities Under this
Warranty / Exclusion of Warranty
To ensure trouble-free Warranty coverage, it is
important (but not required) that you register your
Weber product online at www.weber.com. Please
also retain your original sales receipt and/or
invoice. Registering your Weber product confirms
your warranty coverage, will expedite any Warranty claims you may need to make, and provides
a direct link between you and Weber in case we
need to contact you. If you have not had time
to register your grill before calling for Warranty
service, please have the following information
available when you do call:
Name – Address – Phone Number – Email – Serial
Number – Purchase Date – Purchase Dealer –
Model – Color – Primary Issue
This Warranty only applies if the Owner takes
reasonable care of the Weber product by following
all assembly instructions, usage instructions,
and preventative maintenance as outlined in the
accompanying Owner’s Manual, unless the Owner
can prove that the defect or failure is independent
of non-compliance with the above mentioned
obligations. If you live in a coastal area, or have
your product located near a pool, maintenance
includes regular washing and rinsing of the
exterior surfaces as outlined in the accompanying
Owner’s Manual.
This WARRANTY lapses if there are damages,
deteriorations, discolorations, and/or rust for
which Weber is not responsible caused by:
• Abuse, misuse, alteration, modification,
misapplication, vandalism, neglect, improper
assembly or installation, and failure to properly
perform normal and routine maintenance;
• Insects (such as spiders) and rodents (such as
squirrels).
• Exposure to salt air and/or chlorine sources
such as swimming pools and hot tubs/spas;
• Severe weather conditions such as hail,
hurricanes, earthquakes, tsunamis or surges,
tornadoes or severe storms.
• Acid rain and other environmental factors
The use and/or installation of parts on your Weber
product that are not genuine Weber parts will void
this Warranty, and any damages that result hereby
are not covered by this Warranty.
Weber Stephen Mexico may only claim exemption
from honoring the warranty in the following cases:
a) When the product has been used outside
normal operating conditions.
b) When the product has not been used
in accordance with the accompanying
instructions for use.
c) When the product has been altered or
repaired by persons not authorized to do
so by the relevant domestic manufacturer,
importer or retailer.
Warranty Processing
If you believe that you have a part which is
covered by this Warranty, please contact Weber
Customer Service using the contact information
on our website (www.weber.com) Weber will, upon
investigation, repair or replace (at its option) a
defective part that is covered by this Warranty.
In the event that repair or replacement are not
possible, Weber may choose (at its option) to
replace the grill in question with a new grill of
equal or greater value. Weber may ask you to
return parts for inspection, shipping charges to be
pre-paid by Owner.
When you contact Customer Service, please have
the following information available:
Name – Address – Phone Number – Email – Serial
Number – Purchase Date – Purchase Dealer –
Model – Color – Primary Issue
4
Page 5
COOKING SYSTEM
Disclaimers
APART FROM THE WARRANTY AND DISCLAIMERS
AS DESCRIBED IN THIS WARRANTY STATEMENT,
THERE ARE EXPLICITLY NO FURTHER WARRANTY
OR VOLUNTARY DECLARATIONS OF LIABILITY
GIVEN HERE WHICH GO BEYOND THE STATUTORY
LIABILITY APPLYING TO WEBER. THE PRESENT
WARRANTY STATEMENT ALSO DOES NOT
LIMIT OR EXCLUDE SITUATIONS OR CLAIMS
WHERE WEBER HAS MANDATORY LIABILITY AS
PRESCRIBED BY STATUTE.
NO WARRANTIES SHALL APPLY AFTER THE
PERIODS OF THIS WARRANTY STATED ABOVE.
NO OTHER WARRANTIES GIVEN BY ANY PERSON,
INCLUDING A DEALER OR RETAILER, WITH
RESPECT TO ANY PRODUCT (SUCH AS ANY
“EXTENDED WARRANTIES”), SHALL BIND WEBER.
THE EXCLUSIVE REMEDY OF THIS WARRANTY
IS REPAIR OR REPLACEMENT OF THE PART OR
PRODUCT.
IN NO EVENT UNDER THIS VOLUNTARY
WARRANTY SHALL RECOVERY OF ANY KIND BE
GREATER THAN THE AMOUNT OF THE PURCHASE
PRICE OF THE WEBER PRODUCT SOLD.
YOU ASSUME THE RISK AND LIABILITY FOR
LOSS, DAMAGE, OR INJURY TO YOU AND YOUR
PROPERTY AND/OR TO OTHERS AND THEIR
PROPERTY ARISING OUT OF THE MISUSE OR
ABUSE OF THE PRODUCT OR FAILURE TO
FOLLOW INSTRUCTIONS PROVIDED BY WEBER IN
THE ACCOMPANYING OWNER’S MANUAL.
PARTS AND ACCESSORIES REPLACED UNDER
THIS WARRANTY ARE WARRANTED ONLY FOR
THE BALANCE OF THE ABOVE MENTIONED
WARRANTY PERIODS.
THIS WARRANTY APPLIES TO PRIVATE SINGLE
FAMILY HOME OR APARTMENT USE ONLY AND
DOES NOT APPLY TO WEBER GRILLS USED IN
COMMERCIAL, COMMUNAL OR MULTI-UNIT
SETTINGS SUCH AS RESTAURANTS, HOTELS,
RESORTS, OR RENTAL PROPERTIES.
WEBER MAY FROM TIME TO TIME CHANGE THE
DESIGN OF ITS PRODUCTS. NOTHING CONTAINED
IN THIS WARRANTY SHALL BE CONSTRUED
AS OBLIGATING WEBER TO INCORPORATE
SUCH DESIGN CHANGES INTO PREVIOUSLY
MANUFACTURED PRODUCTS, NOR SHALL SUCH
CHANGES BE CONSTRUED AS AN ADMISSION
THAT PREVIOUS DESIGNS WERE DEFECTIVE.
Weber-Stephen Products LLC
Customer Service Center
1415 S. Roselle Road
Palatine, IL 60067
U.S.A.
For replacement parts, call:
1-800-446-1071
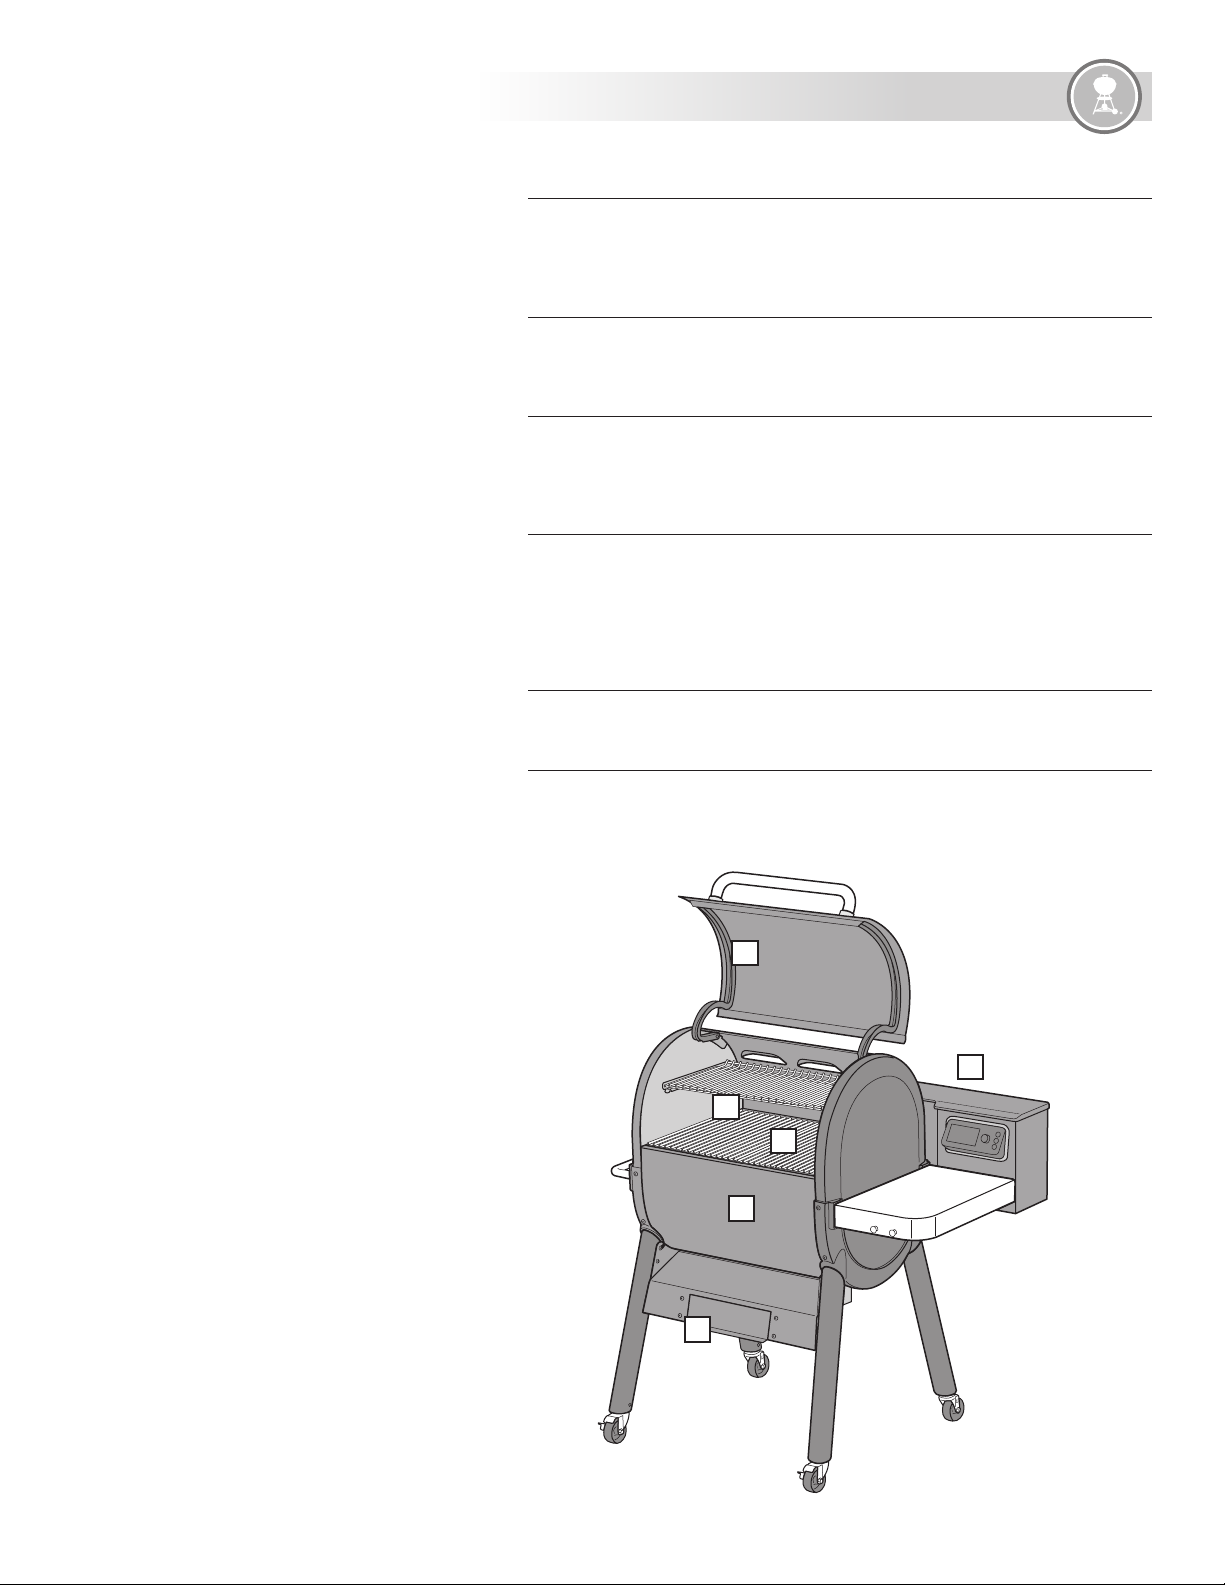
A Porcelain Enameled Lid and Cookbox
Built to outlast the competition, SMOKEFIRE’s shine goes far beyond looks. The
exclusive WEBER Porcelain-Enameled finish withstands the elements and helps
prevent rusting and cracking over time.
B Large Hopper
The large capacity hopper holds an entire 20 pound bag of pellets, and then some perfect size for all day smoking.
C Responsive Incline Drive Engine
This DC powered engine was built to heat hotter and faster than most pellet grills
in order to reach a 200º-600°F (93º-315°C) temperature range. This gives you the
versatility to sear steaks, smoke BBQ ribs, bake pizza, and everything in between.
D Easy-Clean Ash and Grease System
With superior ash and grease removal, the ash and grease are channeled into an
external, contained drawer for a quick and easy cleanup. This means not having to
look at all that nasty grease in a bucket hanging from the side of your beautiful new
pellet grill. This unique system also prevents ash from blowing up into the cookbox
and onto your food.
E Large Grilling Area
Two large levels of cooking space will hold enough food to feed everyone at the party.
F Glow Plug Ignition
The glow plug provides ignition for the fuel in your pellet grill, similar to a heating
element in a electric oven.
A
B
E
1
2
3
C
F
D
4
weber.com
5
Page 6

SPECIAL FEATURES
A WEBER CONNECT Controller
The WEBER CONNECT controller (A) gives you complete control over how your
WEBER SMOKEFIRE grill operates. Use the controller to start up your grill, select
temperature settings, monitor your cook, and more. Explore more options within
the main menu of the controller.
B Integrated Wi-Fi and Bluetooth®
Using your smartphone, login to the WEBER CONNECT app (B) to get the latest
software and connect to your grill. The WEBER CONNECT app tells you when it’s
time to flip, rest, and serve directly from your smartphone. The remote grilling
access feature gives you the freedom to walk away, monitor, and even adjust the
heat from the palm of your hand.
C FLAVORIZER Bars and Heat Diffuser
The FLAVORIZER bars and heat diuser (C) direct heat to every inch of the cooking
grate so that your entire meal cooks evenly, with no worry of hot or cold spots.
While grilling at high heat, drippings are also caught and sizzle, creating an
amazing boost of flavor.
D Ambient and Food Temperature Probes
In order to remotely monitor your grill temperature and internal food
temperatures, your SMOKEFIRE grill comes with an attached ambient temperature
probe and a food temperature probe (D) that will directly connect and interact with
the controller (the controller can hold up to 4 separate food temperature probes
sold separately).
A
1
2
3
4
B
C
E Large Side Table with Tool Hooks
Use the side table (E) to keep platters, seasonings, and tools within arm’s reach, or
use it as a workspace for prep. The tool hooks are also a great place to hang your
grilling tools for when you need them.
F Accessories
Add on to your SMOKEFIRE grill to customize your grilling experience. Visit
www.weber.com to find all of your favorite WEBER accessories.
D
E
6
Page 7
SPECIAL FEATURES
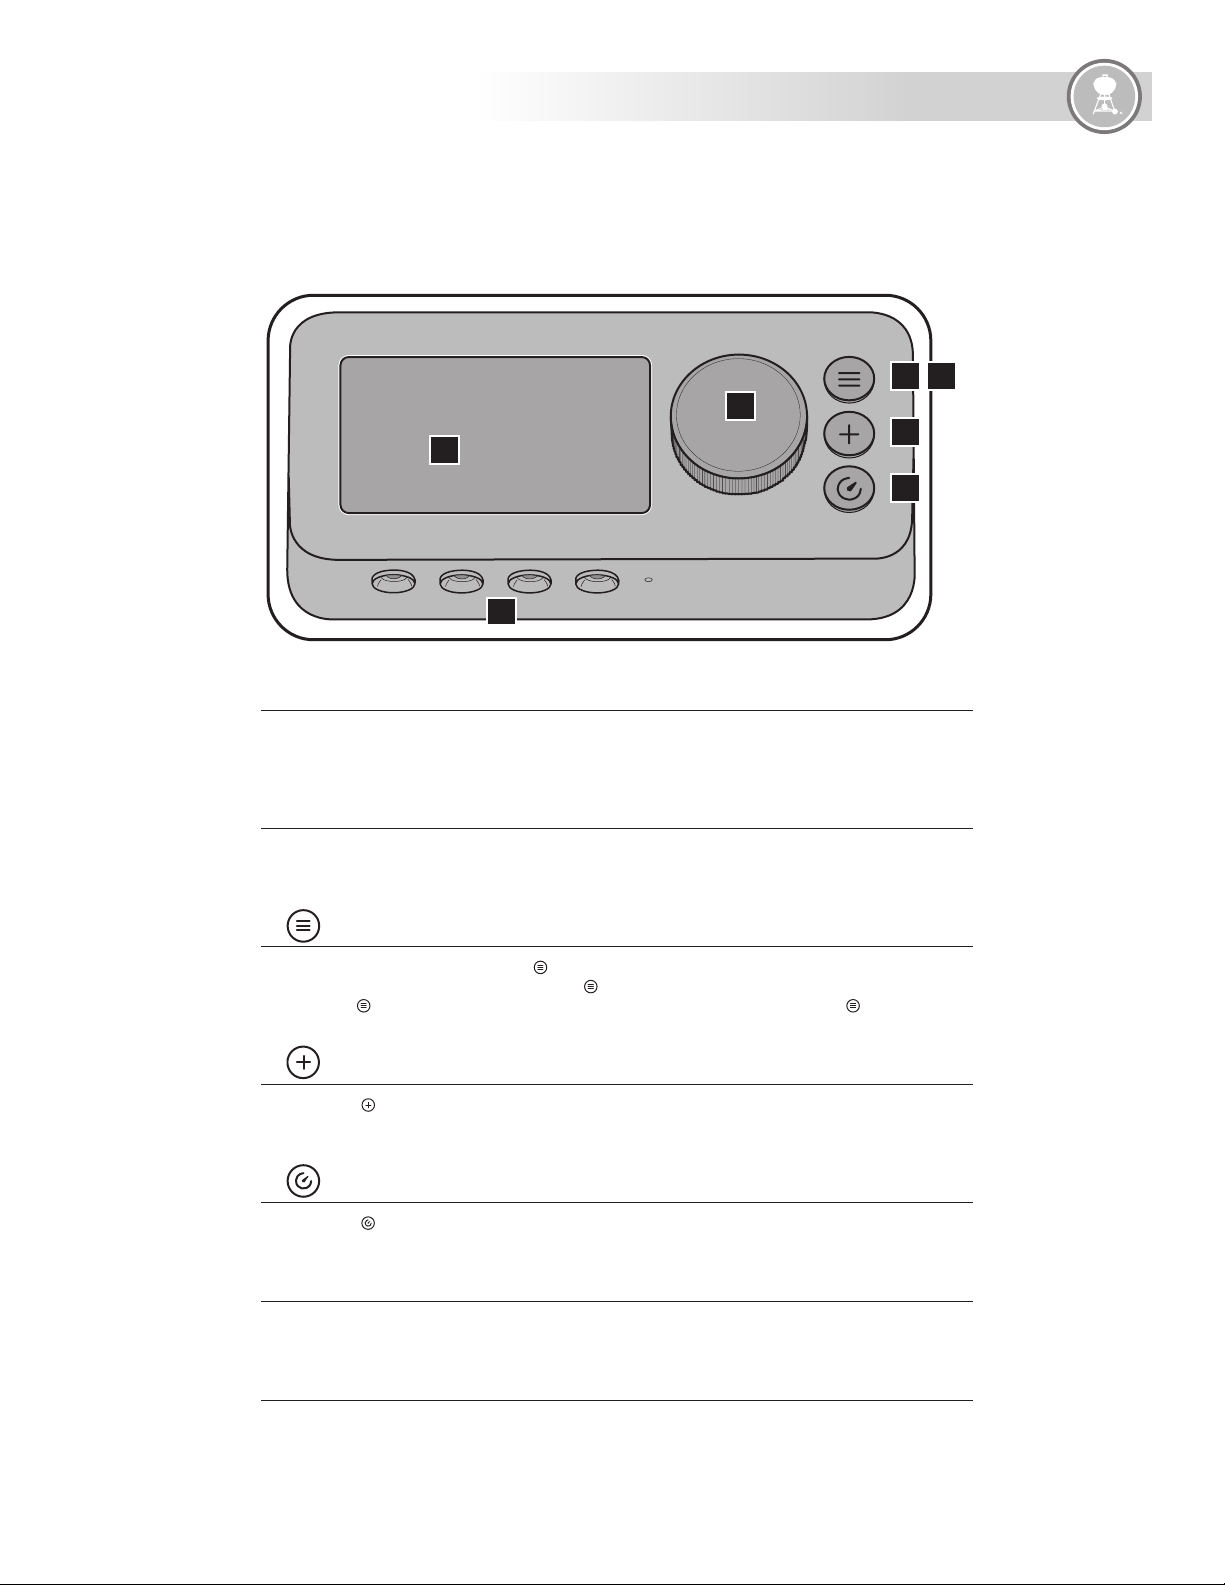
WEBER CONNECT CONTROLLER
C
G
B
A
1234
F
D
E
A Dashboard
The LCD display dashboard on your controller is where you can visually check temperatures,
receive notifications, view connectivity status, explore menu options, and check the status of your
cook.
B Selection Dial
Turn the selection dial to adjust grill temperature, navigate through the dashboard, select menu
options, and more. Push the dial to confirm a selection. Push and hold the dial to initiate the
shutdown procedure.
C Main Menu / Back
From the dashboard, pressing the button takes you to the main menu. As you navigate through
menu options using the dial, pressing the button again will take you one step back. Press and
hold the button to return to the dashboard. From the main menu, pushing the button takes
you back to the dashboard.
D Cook Program
Push the button to engage with WEBER cook programs such as fish, poultry, red meat,
vegetables, and more. Download the WEBER CONNECT app using your smartphone to follow the
programed grilling steps displayed on the controller and on your app.
E Timer
Push the button to start a new timer. Use the dial to increase or decrease the desired amount of
time. Push the dial to select and start your timer.
F Food Temperature Probes
Your new WEBER SMOKEFIRE grill can handle up to four separate food temperature probes (one
probe included) to gain superior control over your grill for perfect results every time.
G SMOKEBOOST
A flavor mode that adds an extra kick of smoky, wood fired taste to your food for low and slow
cooks.
NOTE: Download the WEBER CONNECT app to get the latest grill software and controller features.
weber.com
7
Page 8
BEFORE IGNITING
1
2
3
4
Choose A Proper Location To Cook
In order to ensure a safe and enjoyable grilling experience, it is important to
remember these rules when choosing a location for your WEBER SMOKEFIRE:
• Do not use indoors! This grill is designed for outdoor use in a well-ventilated
area and is not intended for and should never be used as a heater. If used
indoors, toxic fumes will accumulate and cause serious bodily injury or
death.
• Do not use in a garage, building, breezeway, tent, or any other enclosed area.
• Do not use this grill within 2 feet (70 cm) of any combustible material.
Combustible materials include, but are not limited to, wood or treated wood
decks, patios, and porches.
• Keep the cooking area clear of flammable vapor and liquids, such as
gasoline, alcohol, etc.
• Do not use this grill under any overhead combustible construction including
ceilings, overhangs, a lanai or screened in porch.
• Do not use the grill within 10 feet (3.05 m) of any body of water, such as a
pool or pond.
• Do not use the grill in a confined and/or habitable space e.g. houses, tents,
caravans, motor homes, boats. Danger of carbon monoxide poisoning fatality.
• Always store WEBER SMOKEFIRE ALL NATURAL HARDWOOD PELLETS in a
dry place located away from heat-producing appliances and moisture.
B
C
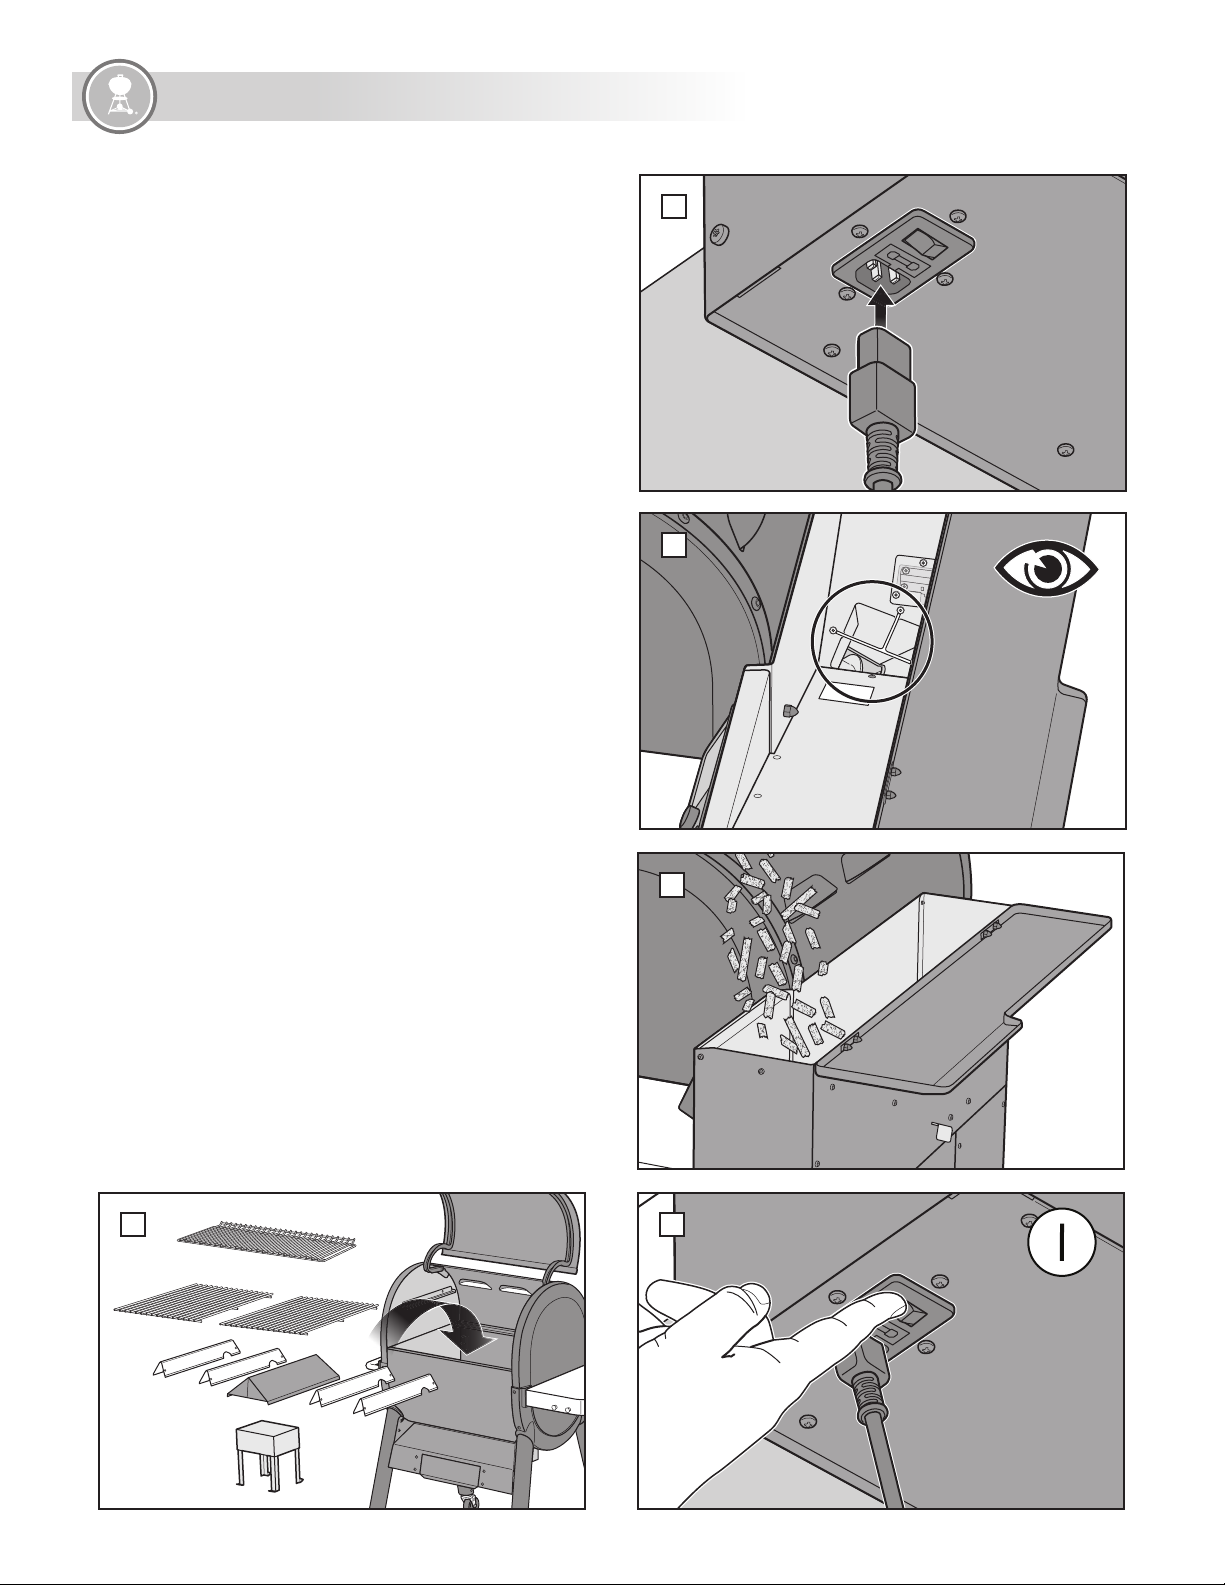
Preparing Grill For First Time Startup
Before the first startup of your WEBER SMOKEFIRE grill, there are some
necessary steps to be followed:
1. Remove all packaging materials from the grill.
2. Open the grill lid and make sure the heat bae, heat diuser,
FLAVORIZER bars and cooking grates are properly installed inside the
cookbox (A).
3. Plug the power cord into the bottom of the hopper before plugging it
into a grounded electrical outlet. With the power supply switch in the o
position, plug your grill into a grounded outlet (B).
4. Open the hopper lid and check the bottom inside of the hopper to ensure
there are no foreign objects obstructing the auger and that the hopper
finger safety guard is in place. (C).
NOTE: Make sure the hopper slide door is closed before filling the hopper with
pellets.
5. Fill the hopper with your choice of WEBER SMOKEFIRE ALL NATURAL
HARDWOOD PELLETS (D). Close the hopper lid when filled.
6. Turn the power supply switch, located on the bottom of the hopper, to the
ON position (E).
A
D
E
8
Page 9

1
2
3
4
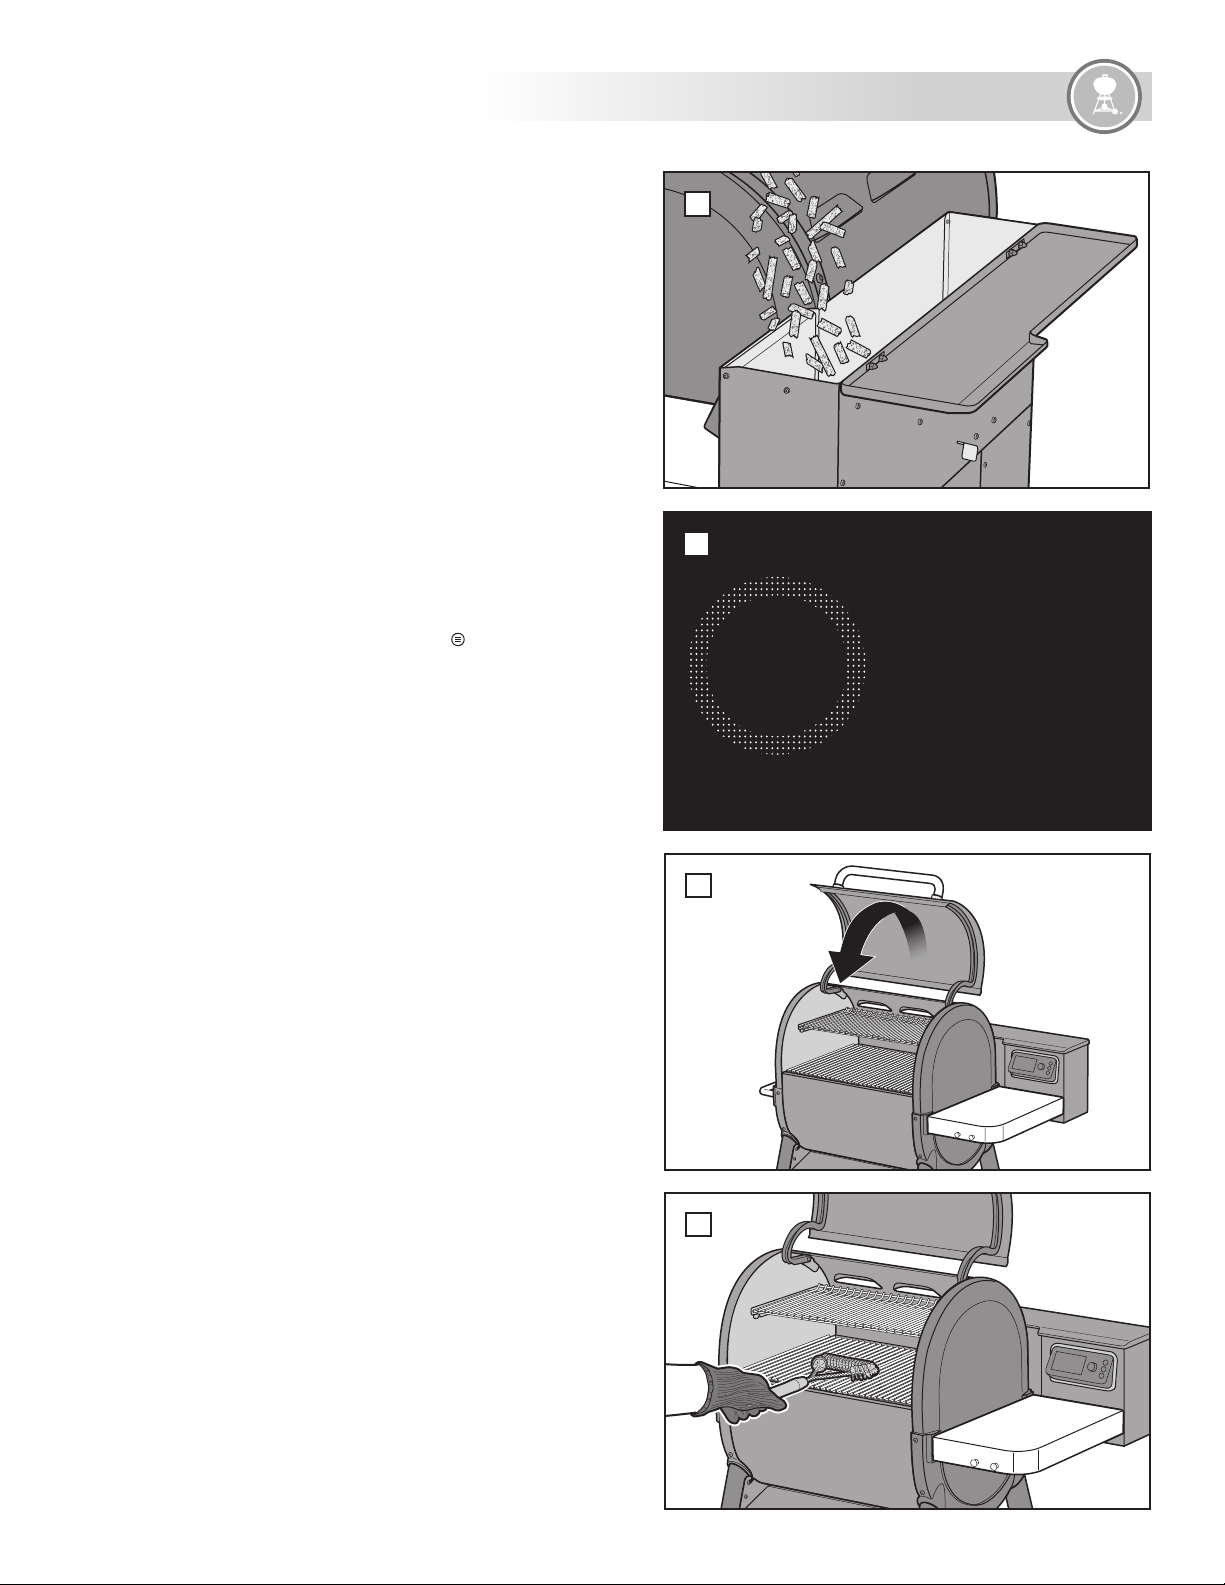
Meal to Meal Maintenance Every Time You Cook
To ensure that your WEBER SMOKEFIRE grill operates safely and smoothly
every time you start it up, here are some steps to follow before you start
grilling:
1. Visually check the cookbox and clean the ash and grease system drawer
before every cook (A). If the disposable drip pan has grease in it, discard
it and replace with a new one.
NOTE: ALWAYS USE A DISPOSABLE DRIP PAN INSIDE THE ASH AND GREASE
SYSTEM DRAWER.
WARNING: DO NOT REMOVE THE ASH AND GREASE SYSTEM DRAWER WHILE
OPERATING THE GRILL, OR IF STILL HOT AFTER SHUTDOWN. Frequently replace
the disposable drip pan before igniting the grill to reduce the risk of a grease fire.
2. Make sure the hopper is filled with your choice of WEBER SMOKEFIRE
ALL NATURAL HARDWOOD PELLETS (B).
3. Check that the power cord is connected to the bottom of the hopper
before plugging it into an electrical outlet (C).
m WARNING! Keep the power cord and extension cord away from any heated
surfaces or water and arranged so as not to cause a tripping hazard. Use
the power cord management strap to avoid these hazards (D).
4. Turn the power supply switch, located on the bottom of the hopper, to the
on position (E).
BEFORE IGNITING
B
C
A
D
E
weber.com
9
Page 10
BEFORE IGNITING
WEBER CONNECT App
First things first.
Download the WEBER CONNECT app.
To fully activate and update your new WEBER CONNECT controller, it is
important to first download the WEBER CONNECT app.
Download, connect and register to receive:
• Flip and Serve Notifications
• Food Readiness Countdowns
• Custom Food Doneness Alerts
• Step-by-step Grilling Assistance
Connecting Your Grill To Bluetooth® or Wi-Fi Network
To connect your WEBER SMOKEFIRE grill via Bluetooth® or your local Wi-Fi
network, follow these steps:
NOTE: WEBER recommends that your smartphone be running the latest version of
its operating system before attempting to connect your grill to Bluetooth® or your
Wi-Fi network.
1. Turn on the grill’s power supply switch located under the hopper.
2. Verify that your smartphone is connected to Bluetooth® or your local
Wi-Fi network.
3. From your smartphone, download the WEBER CONNECT app from
the App Store on Apple smartphones, or the Play Store on Android
smartphones.
4. Open the WEBER CONNECT app and follow the in-app instructions for
connecting to your SMOKEFIRE grill.
NOTE: In order to successfully connect your smartphone to your grill via a local
Wi-Fi network, first make sure your grill is paired via Bluetooth® and that your
grill is within range of your Wi-Fi router. If your attempts to connect have been
unsuccessful, try moving the grill within range of the Wi-Fi router or adding a
signal extender for a stronger signal. Be sure to locate the grill at least 2 feet
away from any combustible materials and flammable liquids.
Remote Temperature Control
Whether prepping dessert from the kitchen or relaxing in the sun, you can now
adjust the temperature of SMOKEFIRE from wherever you are.
Remote Barbecue Shut Down
Whether setting the table, or way too comfortable on the couch, you can now
shut down SMOKEFIRE from wherever you are.
®
SMOKEBOOST
A flavor mode that adds an extra kick of smoky, wood fired taste to your
food for low & slow cooks. Use at the start of a low & slow cook with food
such as brisket, pork shoulder, poultry, and fish that will be smoked at low
temps. When activated, it cools and adjusts to a temperature range between
165º-200ºF (74º-93ºC), dependent on ambient condition.
10
Page 11
First Time Startup Procedure
Once all of the setup steps have been followed in the previous section,
BEFORE IGNITING, you can now initiate the startup procedure to preheat your
SMOKEFIRE grill for the first time.
NOTE: If this is the very first time starting your SMOKEFIRE grill, WEBER
recommends that you season your grill on the high temperature setting
(600°F/315ºC) for at least 30 to 40 minutes with the grill lid closed.
Please follow these steps the very first time you ignite your grill:
1. Make sure the hopper is filled with your choice of WEBER SMOKEFIRE
ALL NATURAL HARDWOOD PELLETS (A).
2. Open the grill lid.
3. Using the dial on the controller, choose the highest temperature available
(600°F/315ºC), and push the dial to select it (B).
NOTE: Do not push and hold the dial as it will begin the shutdown procedure.
4. Once smoke becomes visible, close the grill lid and let the grill run for at
least 30 to 40 minutes to season your grill (C).
5. When the grill has been seasoned, open the grill lid and clean the
cooking grates using a grill brush or wood scraper (D).
6. With the grill lid open, push and hold the dial to shutdown your grill.
Alternatively, you can push the main menu button
on the controller, scroll through the main menu and push to select
“Shutdown”.
7. Once your grill has completed a proper shut down and completely cooled,
power o the grill and unplug from the power source.
WARNING: ALWAYS MAKE SURE THE GRILL IS COMPLETELY COOLED
AND UNPLUGGED FROM A POWER SOURCE BEFORE PERFORMING ANY
MAINTENANCE OR CLEANING.
8. Remove internal grill components and clean your cookbox by pushing
the ash into the ash and grease system drawer with the provided WEBER
scraper. Follow the “RECOMMENDED CLEANING” section at the rear of this
Owner’s Guide for additional tips.
9. Now that your grill is cleaned and all internal grill components are
properly reinstalled, you can start cooking, connect food temperature
probes, start a timer, or select a cook program, all from the controller.
. Using the dial
GRILL OPERATION
A
B
Turn dial to set grill
--
C
temperature, push to
confirm.
Every Time You Cook
Once all of the setup steps have been followed in the previous section, BEFORE
LIGHTING, you can now initiate the startup procedure to preheat your grill.
Please follow these steps every time you operate your SMOKEFIRE grill:
1. Make sure the hopper is filled with your choice of WEBER SMOKEFIRE
ALL NATURAL HARDWOOD PELLETS (A).
2. Clean any ash or grease from the ash and grease system drawer.
3. Open the grill lid.
4. Using the dial on the controller, select your desired temperature and
push the dial to select it (B).
NOTE: Do not push and hold the dial as it will begin the shutdown procedure.
5. Once smoke becomes visible, close the grill lid and let the grill preheat to
the selected temperature (C).
6. When the grill has been preheated, open the grill lid and clean the
cooking grates using a grill brush or wood scraper (D).
NOTE: WEBER recommends always cooking with the grill lid closed and letting
your grill preheat before cleaning your cooking grates.
7. Start grilling! You can now connect food temperature probes, start a
timer, or select a cook program all from the controller.
1
2
3
4
D
1
2
3
4
weber.com
11
Page 12

GRILL OPERATION
1
2
3
4
Cooking with Temperature Probes
Use the included food temperature probe to gain complete control of your
WEBER SMOKEFIRE for the perfect food, every time.
WARNING: Handling the food temperature probes without hand protection will
result in severe burns. Always wear heat protective barbecue mitts or gloves
when handling temperature probes.
Please follow these steps for using food temperature probes:
1. Once the grill has been preheated, open the grill lid and clean the cooking
grates using a grill brush or wood scraper (A), then place your food on
the grates.
2. Plug the food temperature probe(s) into the bottom of the controller
and, using heat resistant barbecue mitts or gloves, route the probe(s)
between the grill lid and the top of the cookbox (B).
3. Insert food temperature probe(s) into the center of the thickest part of
your food (C).
4. Close the grill lid.
NOTE: Be sure to route food temperature probe wires through the channel in the
grill lid to avoid damaging them.
5. From the dashboard on the controller display, select the corresponding
tile to set a desired food temperature or select a cook program for each
food temperature probe (D). Simply turn the dial left or right to navigate
through menu options until the desired settings are displayed, then push
the dial to select. On the controller display, and when connected to the
WEBER CONNECT app, you will receive a notification when your food has
reached the set temperature(s).
A
1
2
3
4
B
C
D
375˚
76°
Probe 1
F
550°
79°
Probe 2
12
Page 13

1
2
3
4
Shutting Down Your Grill
When your cook has ended, your WEBER SMOKEFIRE must be properly
powered down to clear the auger and burn pot of any remaining pellets and
ashes. This helps your grill be ready to go the next time you want to start it up.
Please follow these steps to properly shut down your WEBER SMOKEFIRE:
1. When your food is cooked to your desired internal temperature, using
heat resistant barbecue mitts or gloves, open the grill lid, remove and
unplug any food temperature probes from the food and cookbox, and
remove all food o of the cooking grates (A).
WARNING: Food temperature probes, grill handles and grill surfaces will be hot.
Always use heat resistant barbecue mitts or gloves before handling, cleaning,
moving, or storing the grill or its parts.
NOTE: For food temperature probe cleaning instructions, see the MAINTENANCE
section later in this manual.
2. With the grill lid open, push and hold the dial to shutdown your grill
(B). Alternatively, you can push the main menu button
dial on the controller, scroll through the main menu and push to select
“Shutdown”.
CAUTION: Always engage the shutdown procedure with the grill lid open to
properly shutdown your grill when finished cooking. Frequently interrupted cook
cycles could cause component failure.
3. Your SMOKEFIRE grill will run through a series of steps in order to
properly and safely shutdown your grill. Once the shutdown procedure
is complete and the grill has cooled, power o your grill (C) and unplug
from the power source.
4. Close the grill lid (D).
. Using the
GRILL OPERATION
A
B
1
2
3
4
C
D
1
2
3
4
weber.com
13
Page 14

GRILL OPERATION
Changing Pellets/Purging Hopper
There may be times when you want to change the WEBER SMOKEFIRE ALL
NATURAL HARDWOOD PELLET flavor for your next grilling session, or purge
the hopper for a thorough cleaning or maintenance.
1. From the rear of your SMOKEFIRE grill, set a large container underneath
the middle of the hopper (A).
2. Pull the hopper slide door located on the rear of the hopper to release
the pellets into the container below (B).
WARNING: Before filling your hopper with WEBER SMOKEFIRE ALL NATURAL
HARDWOOD PELLETS, visually inspect the hopper finger safety guard to ensure
it is in place and not damaged (C). If damaged, immediately contact the Customer
Service Representative in your area using the contact information on our website
for a replacement.
We recommend using WEBER SMOKEFIRE ALL NATURAL HARDWOOD
PELLETS with your SMOKEFIRE grill. For best results, store your pellets in an
air tight container to prevent moisture from impacting pellet performance.
Always check the condition of your pellets before grilling. The best way to
judge the freshness of pellets is to break one in half. Pellets should break
with a snap, not crumble in your hand. Pellets that crumble in your hand may
impact the performance of your grill.
Grilling Methods
Your WEBER SMOKEFIRE is capable of many dierent cooking methods
such as grilling, searing, smoking, baking, braising, and roasting. Part of the
excitement of pellet grilling is that you get to enjoy all of your favorite recipes
infused with real hardwood flavor. This element of flavor can elevate your
average meal and make it something extraordinary.
NOTE: When grilling or smoking over a longer period of time, WEBER encourages
the use of our large WEBER foil pans between the FLAVORIZER bars and cook
grates to catch drippings and grease for easier clean up.
A
B
Explore Your Settings
There are many more features to be explored on the controller and the WEBER
CONNECT app. From programmable timers to cook programs, there are more
reasons to love your WEBER SMOKEFIRE grill. Explore and experiment with all
of the possibilities.
C
14
Page 15

NOTE: Download the WEBER CONNECT app to get the latest grill software and
controller features.
CONTROLLER SETTINGS
Dashboard
The dashboard shows all of the current grill info on the controller display.
Here you will find your current and target grill temperature, device
connectivity status, and separate tiles that can be setup to display guided
cook programs, timers and food temperature probe information.
F
375˚
550°
76°
Probe 1
Setting Up A Probed Cook
Once you plug a food temperature probe into any of the four available
ports on the controller, turn and push the dial to select the tile that
corresponds with the probe number you want to set options for.
F
375˚
550°
Main Menu
Push the main menu button to navigate through all of the available
settings on the controller. Simply turn the dial and then push it to select
your options.
Menu
Home
Temperature 350°F
SMOKEBOOST O
Language English
Probed Cook Settings
Once a food temperature probe is selected from the dashboard, you have
the option to select a cook program or simply set a temperature alarm to
notify you when your food has reached the desired temperature.
Probe 1
Add Program
76°
Probe 1
79°
Probe 2
SMOKEBOOST
Add an extra kick of smoky, wood fired taste by selecting SMOKEBOOST
on the controller’s main menu. SMOKEBOOST is a flavor mode to use
at the start of a low & slow cook. When activated, it cools and adjusts
to a temperature range between 165º-200º F (74º- 93º C), dependent on
ambient condition.
Menu
Home
Temperature 350°F
SMOKEBOOST O
Language English
Set Temperature Alert
Temperature 75°F
SMOKEBOOST
O
On
weber.com
15
Page 16

CONTROLLER SETTINGS
Cook Programs
If selecting a guided cook program, push the button. Turn and press
the dial to select the type of food that you will be cooking. Recently used
cook programs will be saved within your controller for quick access to
frequently cooked foods.
After selecting your cook program, you can adjust the desired food settings
to your personal preference.
NOTE: Some foods will only allow you to select one temperature doneness
choice in order to ensure safe food temperatures when the food has
completed cooking.
Once all of your desired settings have been chosen, turn and press the dial
to select the “Start Cooking” option.
NOTE: When using a guided cook program, you will receive timely tips and
notifications throughout your grilling experience to help guide you to perfectly
cooked food, every time.
Programs
Beef Tenderloin
Chicken Breast
Chicken Wings
Baked Potato
Timers
Press the button to add a new timer(s). Turn the dial and press it to
select the amount of time desired. From the dashboard or through the
main menu, you can select your active timer to adjust the amount of time
left or stop it.
New Timer
0:00
Beef Tenderloin
Start Cooking 10-12m
Doneness Medium
Thickness 1”
Probe
Regulatory Information
To access regulatory information, press the main menu button. Turn and
press the dial to select “Regulatory”.
Menu
Language English
Get the App
About
16
0 5 10 15 20
Regulatory
Page 17

TROUBLESHOOTING
NOTE: Download the WEBER CONNECT app to get the latest grill software and controller
features.
The controller uses advanced technology capable of troubleshooting your SMOKEFIRE grill.
If a problem is detected with your grill, your controller will display and send an error code to
notify you of the error before automatically beginning the necessary procedure. Refer to this
troubleshooting section and follow the “SOLUTION“ column associated with the error code
displayed, along with the following instructions to remedy and clear errors.
Error Code Cause Solution
E1 Auger Jam Auger jam has been detected. The grill will attempt to clear the auger jam.
1. The grill will automatically run the shutdown procedure if the grill is still hot. Open
the grill lid and wait until the grill has completed the shutdown procedure and
completely cooled.
CAUTION: Do not unplug the grill or power it o during the shutdown procedure.
2. Once the shutdown procedure is complete, power o the grill and unplug from
power source.
3. Remove the cooking grates, FLAVORIZER bars, heat diuser, and heat bae from the
Auger Jam Cleared
or
Auger Jam Cannot Be Cleared
cookbox.
4. Clean the cookbox and burn pot of any ash or debris using a grill brush or scraper to
direct it into the ash and grease system.
CAUTION: Allow time for the ash and debris to fully extinguish before cleaning the grill.
5. Reinstall the heat bae, heat diuser, FLAVORIZER bars and cooking grates inside
the cookbox.
6. Remove and clean any ash or grease from inside the ash and grease system. Once
cleaned, reinstall the drawer. Replace disposable drip pans as needed.
7. Plug the grill into the power source and power on the grill to begin your cook.
If the grill is unable to clear the auger jam, please refer to the following instructions on
how to manually clear the auger.
E2 Fan Error
E3 Grill Flame is Out
The grill will automatically run the shutdown procedure if the grill is still hot. Open the
grill lid and wait until the grill has completed the shutdown procedure and completely
cooled.
CAUTION: Do not unplug the grill or power it o during the shutdown procedure.
See the following instructions on how to check the fan’s electrical connection. If the fan is
not operating after securing fan connection, contact the Customer Service Representative
in your area using the contact information on our website for fan replacement.
1. The grill will automatically run the shutdown procedure if the grill is still hot. Open
the grill lid and wait until the grill has completed the shutdown procedure and
completely cooled.
CAUTION: Do not unplug the grill or power it o during the shutdown procedure.
See the following instructions on the Grill Flame Out procedure. If your grill is still
unable to stay ignited after completing the procedure, contact the Customer Service
Representative in your area using the contact information on our website for further
troubleshooting assistance.
weber.com
17
Page 18

TROUBLESHOOTING
Error Code Cause Solution
1. The grill will automatically run the shutdown procedure if the grill is still hot. Open
the grill lid and wait until the grill has completed the shutdown procedure and
completely cooled.
E4 Communication Failure
E5 Grill is too Hot
CAUTION: Do not unplug the grill or power it o during the shutdown procedure.
2. Once the shutdown procedure is complete, power o the grill and unplug from
power source.
3. Wait one minute, then plug the grill back into the power source and power on the
grill to begin your cook.
1. The grill will automatically run the shutdown procedure if the grill is still hot. Keep
the grill lid closed and wait until the grill has completed the shutdown procedure
and completely cooled.
CAUTION: Do not unplug the grill or power it o during the shutdown procedure.
2. Once the shutdown procedure is complete, power o the grill and unplug from
power source.
3. Open the grill lid and remove the cooking grates, FLAVORIZER bars, heat diuser,
and heat bae from the cookbox.
4. Clean the cookbox and burn pot of any ash or debris using a grill brush or scraper to
direct it into the ash and grease system.
CAUTION: Allow time for the ash and debris to fully extinguish before cleaning the grill.
5. Reinstall the heat bae, heat diuser, FLAVORIZER bars and cooking grates inside
the cookbox.
6. Remove and clean any ash or grease from inside the ash and grease system. Once
cleaned, reinstall the drawer. Replace disposable drip pans as needed.
7. Plug the grill into the power source and power on the grill to begin your cook.
E6 Start Up Failure
1. The grill will automatically run the shutdown procedure if the grill is still hot. Open
the grill lid and wait until the grill has completed the shutdown procedure and
completely cooled.
CAUTION: Do not unplug the grill or power it o during the shutdown procedure.
2. Once the shutdown procedure is complete, power o the grill and unplug from
power source.
3. Open the grill lid and remove the cooking grates, FLAVORIZER bars, heat diuser,
and heat bae from the cookbox.
4. Clean the cookbox and burn pot of any ash or debris using a grill brush or scraper to
direct it into the ash and grease system.
CAUTION: Allow time for the ash and debris to fully extinguish before cleaning the grill.
5. Remove and clean any ash or grease from inside the ash and grease system. Once
cleaned, reinstall the drawer. Replace disposable drip pans as needed.
6. Plug the grill into the power source and power on the grill.
7. Turn and push the dial on the controller to select 400°F as your grill temperature.
8. As the grill starts to preheat, visually inspect the glow plug at the bottom of the
cookbox.
WARNING: Do not touch the glow plug to check if it is hot. If the glow plug is operating
correctly, it will start to glow in color as it heats.
If the glow plug is operating correctly:
9. Reinstall the heat bae, heat diuser, FLAVORIZER bars and cooking grates inside
the cookbox.
If the glow plug is not operating correctly:
• The grill will remain cool and will not ignite. Shutdown the grill by pressing and holding
the dial on the controller. Contact the Customer Service Representative in your area
using the contact information on our website for glow plug replacement.
18
Page 19

TROUBLESHOOTING
Error Code Cause Solution
The grill will automatically run the shutdown procedure if the grill is still hot. Open the
grill lid and wait until the grill has completed the shutdown procedure and completely
cooled.
E7 Motor Failure
E8 Thermocouple Error
E9 Low Fuel Detection Error
CAUTION: Do not unplug the grill or power it o during the shutdown procedure.
See the following instructions on how to check the motor’s electrical connection. If the
motor is not operating after securing the motor connection, contact the Customer Service
Representative in your area using the contact information on our website for motor
replacement.
The grill will automatically run the shutdown procedure if the grill is still hot. Open the
grill lid and wait until the grill has completed the shutdown procedure and completely
cooled.
CAUTION: Do not unplug the grill or power it o during the shutdown procedure.
Contact the Customer Service Representative in your area using the contact information
on our website to replace the thermocouple.
The grill will automatically run the shutdown procedure if the grill is still hot. Open the
grill lid and wait until the grill has completed the shutdown procedure and completely
cooled.
CAUTION: Do not unplug the grill or power it o during the shutdown procedure.
See the following instructions on how to clean the low fuel sensor window. If the low
fuel sensor is not operating properly after cleaning, contact the Customer Service
Representative in your area using the contact information on our website for low fuel
sensor replacement.
CALL
CUSTOMER
SERVICE
If you are still experiencing any
problems, contact the CustomerService
Representative in your area using
the contact information on
weber.com.
REPLACEMENT
PARTS
To obtain replacement parts,
contact the local retailer
in your area or log onto
weber.com.
weber.com
19
Page 20

TROUBLESHOOTING
1
2
3
4
E1 Auger Jam
Clearing an Auger Jam
To clear the E1 error code from the controller, please follow these steps:
1. When the grill has completed the shutdown procedure and
completely cooled, power o the grill and unplug from power source.
2. Remove the cooking grates, FLAVORIZER bars, heat diuser, and heat
bae from the cookbox. (A).
3. From the rear of your SMOKEFIRE grill, place a large bucket or
container underneath the middle of the hopper (B).
4. Pull the hopper slide door located on the rear of the hopper to
release the pellets into the container below (C).
5. From the rear of your SMOKEFIRE grill, remove the rear access panel
by removing four screws (D).
6. Disconnect wire connection from the motor by pinching the clip and
pulling the quick disconnect plug. (E).
A
B
C
D
E
20
Page 21

7. Remove the auger/motor assembly by first removing two screws and
washers from the mounting bracket (F). Carefully slide and twist the
auger/motor assembly out and away from the grill (G).
NOTE: Visually note the orientation of the motor when installed on the grill.
8. Clean the auger tube and auger/motor assembly to remove any pellets
and debris that may have been jamming the auger.
9. Before reinstalling the auger/motor assembly back into the auger tube,
verify that the shear pin is still intact (H). Both sides of the pin should be
fully engaged and visible. The auger should not pull away from the motor.
If the shear pin is broken, it should be replaced before reassembling.
Contact a WEBER Customer Service Representative in your area using
the contact information on our website for a replacement.
10. Reinstall the auger/motor assembly by sliding the auger through the
auger tube and fastening the assembly with two screws and washers (I).
CAUTION: Make sure the auger/motor assembly is in the correct orientation when
reinstalling into the auger tube. See illustration (J).
11. Connect the motor’s electrical connection. Make sure the connector is
securely joined to the motor (K).
F
TROUBLESHOOTING
H
I
J
G
K
weber.com
21
Page 22

TROUBLESHOOTING
1
2
3
4
Continued...
12. Reinstall the rear access panel (L).
13. Push the hopper slide door closed (M).
14. Open the hopper lid and fill the hopper with your choice of WEBER
SMOKEFIRE ALL NATURAL HARDWOOD PELLETS (N).
15. Reinstall the heat bae, heat diuser, FLAVORIZER bars and cooking
grates inside the cookbox. (O).
16. Plug in, power on the grill, and begin a cook to allow the controller to run
diagnostics. If the E1 error code still remains on the controller, contact
the Customer Service Representative in your area using the contact
information on our website.
L
M
N
O
22
Page 23

E2 Fan Error
Checking Fan Electrical Connection
To clear the E2 error code from the controller, please follow these steps:
1. When the grill has completed the shutdown procedure and
completely cooled, power o the grill and unplug from power source
(A).
2. From the rear of your SMOKEFIRE grill, remove the rear access panel
by removing four screws (B).
3. Check the electrical connection to the fan (C). Make sure the
connector is securely joined to the fan’s connection point.
4. Reinstall the rear access panel (D).
5. Plug in, power on the grill, and begin a cook to allow the controller to
run diagnostics.
6. If the E2 error code still remains on the controller, contact the
Customer Service Representative in your area using the contact
information on our website for fan replacement.
TROUBLESHOOTING
A
B
C
D
weber.com
23
Page 24

TROUBLESHOOTING
1
2
3
4
1
2
3
4
1
2
3
4
E3 Grill Flame is Out
Grill Flame Out Procedure
To clear the E3 error code from the controller, please follow these steps:
1. The grill will automatically run the shutdown procedure if the grill is
still hot. Open the grill lid and wait until the grill has completed the
shutdown procedure and completely cooled.
CAUTION: Do not unplug the grill or power it o during the shutdown
procedure.
2. Once the shutdown procedure is complete, power o the grill and
unplug from power source (A).
3. Open the grill lid and remove the cooking grates, FLAVORIZER bars,
heat diuser, and heat bae from the cookbox (B).
4. Clean the cookbox and burn pot of any ash or debris using a grill
brush or scraper to direct it into the ash and grease system (C).
CAUTION: Allow time for the ash and debris to fully extinguish before cleaning
the grill.
5. Reinstall the heat bae, heat diuser, FLAVORIZER bars and cooking
grates inside the cookbox (D).
6. Remove and clean any ash or grease from inside the ash and grease
system. Once cleaned, reinstall the drawer (E). Replace disposable
drip pans as needed.
7. Plug the grill into the power source and power on the grill to begin
your cook.
C
D
A
E
B
24
Page 25

TROUBLESHOOTING
E7 Motor Failure
Checking Motor Electrical Connection
To clear the E7 error code from the controller, please follow these steps:
1. When the grill has completed the shutdown procedure and
completely cooled, power o the grill and unplug from power source
(A).
2. From the rear of your SMOKEFIRE grill, remove the rear access panel
by removing four screws (B).
3. Check the electrical connection on the motor (C). Make sure the
connector is securely joined to the motor.
4. Reinstall the rear access panel (D).
5. Plug in, power on the grill, and begin a cook to allow the controller to
run diagnostics.
6. If the E7 error code still remains on the controller, contact the
Customer Service Representative in your area using the contact
information on our website for motor replacement.
A
B
C
D
weber.com
25
Page 26

TROUBLESHOOTING
E9 Low Fuel Detection Error
Cleaning Fuel Sensor Window
To clear the E9 error code from the controller, please follow these steps:
1. When the grill has completed the shutdown procedure and
completely cooled, from the rear of your SMOKEFIRE grill, set a large
bucket or container underneath the middle of the hopper (A).
2. Pull the hopper slide door located on the rear of the hopper to
release the pellets into the container below (B).
3. Using a dry cloth or paper towel, wipe the low fuel sensor window
until cleaned (C).
4. Push the hopper slide door closed (D), and refill the hopper with your
choice of WEBER SMOKEFIRE ALL NATURAL HARDWOOD PELLETS.
5. Power on the grill and begin a cook to allow the controller to run
diagnostics.
6. If the E9 error code still remains on the controller, Contact the
Customer Service Representative in your area using the contact
information on our website for low fuel sensor replacement.
A
B
C
1
2
3
4
D
26
Page 27

TROUBLESHOOTING
NOTE: Download the WEBER CONNECT app to get the latest grill software and controller
features.
The controller will display and send notifications to inform you of certain grill operations
and preventative maintenance cautions. Refer to this troubleshooting section and follow
the “Sequence / Actions” column associated with the notification displayed along with the
following instructions.
Notification Sequence / Actions
Low Fuel Refill the hopper with WEBER SMOKEFIRE ALL NATURAL HARDWOOD PELLETS.
Cook Complete
Improper Shutdown
Replace Glow Plug
Your cook has ended. You now have the option to continue to cook at the same grill
temperature, change the grill temperature, or shutdown the grill.
The grill was improperly shutdown.
1. The grill will automatically run the shutdown procedure if the grill is still hot. Open
the grill lid and wait until the grill has completed the shutdown procedure and
completely cooled.
CAUTION: Do not unplug the grill or power it o during the shutdown procedure.
2. Once the shutdown procedure is complete, power o the grill and unplug from
power source.
3. Remove the cooking grates, FLAVORIZER bars, heat diuser, and heat bae from the
cookbox.
4. Clean the cookbox and burn pot of any ash or debris using a grill brush or scraper to
direct it into the ash and grease system.
CAUTION: Allow time for the ash and debris to fully extinguish before cleaning the grill.
5. Remove and clean any ash or grease from inside the ash and grease system. Once
cleaned, reinstall the drawer. Replace disposable drip pans as needed.
6. Reinstall the heat bae, heat diuser, FLAVORIZER bars and cooking grates inside
the cookbox.
7. Plug in, power on the grill, and begin a cook to allow the controller to run
diagnostics.
Glow plug is about to reach the end of its life. Do you want to replace it?
If YES:
1. Open the grill lid and shutdown the grill by pushing and holding the dial or using
the main menu. Wait until the grill has completed the shutdown procedure and
completely cooled.
CAUTION: Do not unplug the grill or power it o during the shutdown procedure.
2. Contact a Customer Service Representative in your area using the contact
information on our website to replace the glow plug.
3. See the following instructions on replacing the glow plug.
4. When the glow plug has been replaced, confirm replacement within the main menu
settings of the controller.
If NO:
You can continue to operate your grill. Glow plug replacement notification will remain on
list of outstanding error codes and notifications until it has been replaced and confirmed.
Shutdown Started
Shutdown Sequence:
1. Burning o excess fuel
2. Preventing burn-back
3. Clearing auger
4. Cleaning burn pot of ash
5. Cooling grill for storage
6. Shutdown Complete
weber.com
27
Page 28

TROUBLESHOOTING
1
2
3
4
Replacing the Glow Plug
Contact WEBER Customer Service at weber.com for a replacement glow
plug. To replace the glow plug, please follow these steps:
1. Open the grill lid and shutdown the grill by pushing and holding the
dial or using the main menu. Wait until the grill has completed the
shutdown procedure and completely cooled.
CAUTION: Do not unplug the grill or turn it o during the shutdown procedure.
2. Once the grill has completed the shutdown procedure, power o the
grill (A) and unplug from power source.
3. Open the grill lid and remove the cooking grates, FLAVORIZER bars,
heat diuser, and heat bae from the cookbox. (B).
4. From the rear of your SMOKEFIRE grill, remove the rear access panel
by removing four screws (C).
5. Unplug the glow plug assembly wire by pinching and pulling the
quick disconnect plug (D).
6. Carefully remove the glow plug assembly by removing the bracket
screw that holds it in place and sliding the assembly out from the
grill (E).
7. Remove the glow plug from the glow plug assembly by pulling it out
and away (F).
8. Install the replacement glow plug into the glow plug assembly by
firmly pushing it into the socket (G).
9. Carefully reinstall the glow plug assembly straight through the back
of the grill, and secure it in place by tightening the bracket screw (H).
NOTE: Be sure that the tip of the glow plug has been properly installed by
visually inspecting the glow plug at the bottom of the burn pot inside the
cookbox. The tip of the glow plug must be inserted through the pellet grate for
proper operation (I).
10. Reconnect the glow plug assembly wire connector (J).
11. Reinstall the rear access panel (K).
12. Reinstall the heat bae, heat diuser, FLAVORIZER bars and cooking
grates inside the cookbox. (L).
13. Plug the power cord into the grill located underneath the hopper,
then plug the grill into a power source.
14. Power on the grill and confirm replacement of the glow plug within
the main menu settings of the controller.
A
B
C
28
D
Page 29

TROUBLESHOOTING
1
2
3
4
E
F
I
J
G
H
K
L
weber.com
29
Page 30

TROUBLESHOOTING
Symptom Cause / Actions
If the grill will not power on:
1. Check that the power cord is securely plugged into the grill and into a power source.
2. If your grill is using a GFCI outlet, reset the device.
Grill will not power on
Inside of grill lid appears to have peeling
paint
3. If the grill will still not power on after you have completed the above checks, it is
likely that the fuse has blown. See the following instructions on how to replace the
grill’s fuse.
4. If the grill will not power on after all steps have been followed, contact the Customer
Service Representative in your area using the contact information on our website.
The flakes you see are accumulated cooking vapors that have turned into carbon. This
happens over time after repeated use of your grill. This is not a defect.
Using a grill brush or the included grill scraper, gentley scrub and clean the carbon flakes
o of the lid and cookbox. Wipe clean with a soft cloth or paper towel.
30
CALL
CUSTOMER
SERVICE
If you are still experiencing any
problems, contact the CustomerService
Representative in your area using
the contact information on
weber.com.
REPLACEMENT
PARTS
To obtain replacement parts,
contact the local retailer
in your area or log onto
weber.com.
Page 31

Fuse Replacement
If your SMOKEFIRE grill is non-responsive even after securing all electrical
connections, it is possible that the grill’s fuse has blown. The grill’s power
supply utilizes a 5 Amp, 120 Volt Cartridge Fuse. This simple and inexpensive
part can be easily replaced with the following instructions:
CAUTION: Only use the properly sized and rated fuse when replacing. Failure to do
so will void your warranty. The correct fuse is:
1.6A, 250V
1. Make sure that the grill is completely cool, then power o and unplug the
grill from the power source (A).
2. The fuse is installed inside the fuse holder located on the underside of
the hopper. Use a flathead screwdriver to gently pry open the fuse holder
and remove the fuse (B).
NOTE: WEBER recommends replacing the fuse if there is suspicion of failure.
3. Install a new fuse into the fuse holder and reinstall the fuse holder into
the power module (C).
CAUTION: Make sure the fuse holder is fully installed and closed before operating
your grill.
4. Plug in, power on the grill, and begin a cook to allow the controller to run
diagnostics.
TROUBLESHOOTING
A
B
C
weber.com
31
Page 32

MAINTENANCE
Recommended Cleaning
In order to keep your WEBER SMOKEFIRE grill running smoothly for
years of barbecuing and smoking, WEBER recommends a thorough
cleaning of the grill after 20 hours of cooking or after every 12 cooks.
Additional cleaning may be required after the completion of low &
slow cooks, before beginning a high temperature cook, to remove fatty
deposits not burned o at low temperatures.
WARNING: ALWAYS MAKE SURE THE GRILL IS COMPLETELY COOLED
AND UNPLUGGED FROM A POWER SOURCE BEFORE PERFORMING ANY
MAINTENANCE OR CLEANING.
CAUTION: NEVER SPRAY THE GRILL WITH A STEADY WATER STREAM
SUCH AS FROM A GARDEN HOSE OR POWER WASHER. ELECTRONIC
COMPONENTS COULD BECOME DAMAGED.
CAUTION: WEBER recommends the use of barbecue mitts or rubberized
gloves to protect your hands while cleaning your grill.
Please follow these steps for cleaning your grill:
1. Once your grill has completed a proper shut down and completely
cooled, power o the grill and unplug from the power source.
2. Open the grill lid and brush or scrape the lid clean with a grill
brush or the included scraper.
3. While in place, brush or scrape the cooking grates clean, then
remove them from the cookbox and set aside.
4. While the FLAVORIZER bars and heat diuser are in place, brush
or scrape them clean, then remove them from the cookbox and
set aside.
5. Hold the heat bae steady with one hand and brush or scrape
clean with a grill brush or scraper with the other hand. Then
remove from the cookbox and set aside.
6. Brush or scrape the interior of the cookbox with a grill brush or
scraper. Direct all of the grease and debris towards the vents in
the bottom of the cookbox, and into the disposable drip pan.
7. Using the included scraper or a soft bristle brush, clean out the
burn pot, pushing any remaining ash or debris through the pellet
grate at the bottom of the burn pot.
8. Remove the ash and grease system drawer to clean out ash and
replace the disposable drip pan. In addition, clean the inside of
the ash and grease system housing to prevent a buildup of ash
that could stop the drawer from fully closing. Once the drawer
and housing have been cleaned, reinstall the drawer.
WARNING: DO NOT REMOVE THE ASH AND GREASE SYSTEM DRAWER
WHILE OPERATING THE GRILL, OR IF STILL HOT AFTER SHUTDOWN.
Frequently replace the disposable drip pan before igniting the grill to
reduce the risk of a grease fire.
9. Reinstall the heat bae, heat diuser, FLAVORIZER bars and
cooking grates inside the cookbox.
Annual Engine Cleaning
Every 12 months, your SmokeFire grill should have a thorough engine
cleaning performed in order to ensure proper grill operation.
WARNING: ALWAYS MAKE SURE THE GRILL IS COMPLETELY COOLED
AND UNPLUGGED FROM A POWER SOURCE BEFORE PERFORMING ANY
MAINTENANCE OR CLEANING.
CAUTION: NEVER SPRAY THE GRILL WITH A STEADY WATER STREAM
SUCH AS FROM A GARDEN HOSE OR POWER WASHER. ELECTRONIC
COMPONENTS COULD BECOME DAMAGED.
CAUTION: WEBER recommends the use of barbecue mitts or rubberized
gloves to protect your hands while cleaning your grill.
Please follow these steps for cleaning your SmokeFire engine:
1. Once your grill has completed a proper shut down and completely
cooled, power o the grill and unplug from the power source.
2. Remove the rear access panel located at the rear of the grill.
3. Unplug the glow plug electrical connection, remove the glow plug
assembly, and set it aside.
4. Open the grill lid and remove the cooking grates, FLAVORIZER
bars, and heat bae from the cookbox.
5. Remove the 2 screws that secure the pellet slide to the top of the
burn pot, and remove the pellet slide from the cookbox.
6. Remove the burn pot and pellet grate from the cookbox.
7. Using the included scraper or a soft bristle brush, clean the burn
pot area by brushing or scraping any ash or debris down the vent
into the ash and grease managment system.
NOTE: Be sure to thoroughly clean any built up ash and debris that may
have occurred during grill operation.
8. Reinstall the pellet grate, burn pot, and pellet slide. Be sure to
reinstall the two screws that secure the pellet slide to the top of
the burn pot.
9. Reinstall the glow plug assembly through the rear of the grill.
NOTE: Visually inspect that the tip of the glow plug is installed properly
through the pellet grate located at the bottom of the cookbox. If it is not
through the pellet grate, you must remove the glow plug assembly again
to adjust and reinstall it.
10. Reconnect the glow plug assembly electical connection.
11. Reinstall the rear access panel located at the rear of the grill by
securing four screws.
12. Reinstall the heat bae, FLAVORIZER bars, and cooking grates
inside the cookbox.
Cleaning the Exterior of the Grill
The outside of your grill may include stainless steel, porcelain
enameled, and plastic surfaces. WEBER recommends the following
methods based on the surface type.
Cleaning Stainless Steel Surfaces
Clean stainless steel using a non-toxic, non-abrasive stainless steel
cleaner or polish designed for use on outdoor products and grills.
Use a soft, lint-free cloth to clean in the direction of the grain of the
stainless steel. Do not use paper towels.
CAUTION: Do not risk scratching your stainless steel with abrasive pastes.
Pastes do not clean or polish. They will change the color of the metal by
removing the top chromium oxide film coating.
Cleaning Painted, Porcelain-Enameled Surfaces
and Plastic Components
Clean painted, porcelain-enameled and plastic components with warm
soapy water and a soft, lint-free cloth. After wiping down the surfaces,
lightly rinse and dry thoroughly.
Cleaning the Outside of Grills that are in Unique
Environments
If your grill is subject to a particularly harsh environment, you will
want to clean the outside more often. Acid rain, pool chemicals, and
salt water can cause surface rusting to appear. Wipe down the outside
of your grill with warm soapy water. Follow up with a light rinse and
thorough drying. Additionally, you may want to apply a non-abrasive
stainless steel cleaner weekly to prevent surface rust. Use only as
directed.
32
Page 33

GRILLMASTER TIPS
Cleaning the Temperature Probes
Your included temperature probes should be cleaned after every use to
ensure safe cooking practices. However, the temperature probes should
never be submerged in any type of liquid because it could damage them.
WEBER recommends gently wiping the temperature probes clean with
warm soapy water and a soft cloth or paper towel.
Wear Gloves
Always wear heat-resistant barbecue mitts or gloves when using your WEBER
SMOKEFIRE grill. Vents, handles, ash and grease system, and cookbox will
all get hot during the grilling process and can cause severe burns. Be sure to
keep your hands and forearms protected.
Preheat Your Grill
Preheating your grill with the lid closed prepares the cooking grates and
internal cookbox temperature for grilling. The heat loosens any bits and pieces
of food hanging onto the cooking grates, making it easy to clean them o
with a grill brush or wood scraper. Preheating your grill also gets the cooking
grates hot enough to sear properly and also helps prevent food from sticking
to them.
CAUTION: When using a stainless steel bristle grill brush, be sure to check for
loose bristles. Replace the brush if any loose bristles are found on cooking grate
or brush.
Put A Lid On It
It is important to remember to always cook with your grill lid closed. This will
keep your internal cookbox temperature where you want it to be and throughly
cook your food.
Mix It Up
There are many varieties of WEBER SMOKEFIRE ALL NATURAL HARDWOOD
PELLETS like Hickory, Apple, Cherry, and more. You can experiment by mixing
dierent flavors of pellets. Explore the possibilities.
m WARNING! Always unplug the grill from a power source and
wait for the grill to completely cool before performing any
maintenance or cleaning.
m WARNING! Never spray the grill with a steady water stream
such as from a garden hose or power washer. Electronic
components could become damaged.
m WARNING! Over time, the development of rough surfaces can
form on the heat bae, FLAVORIZER bars, heat diuser, and
cooking grates. Wearing protective gloves is recommended
when handling these parts.
m WARNING! Do not clean the heat bae, FLAVORIZER bars, heat
diuser, or cooking grates in a sink, dishwasher, or self-cleaning
oven.
m WARNING! Do not place any grill parts onto the side table as
they may scratch the stainless steel.
m WARNING! Do not use any of the following to clean your grill:
• Abrasive stainless steel polishes or pastes
• Cleaners that contain acid, mineral spirits or xylene
• Oven cleaner
• Abrasive cleansers or pads
Cook Time and Temperature
If you are grilling in a colder climate or in windy conditions, the cooking
times could be longer. These conditions will lower the grill’s temperature, so
always monitor your grill and use food temperature probes to ensure safe
food temperatures. Remember to keep the grill lid closed as much as possible
during cooking so the heat and smoke do not escape.
weber.com
33
Page 34

Use only genuine WEBER replacement
REPLACEMENT PARTS
parts for any repair or replacement.
Visit weber.com
SmokeFire - EX4 - US 040320
1
2
3
4
24
10
11
12
13
14
15
16
5
25
26
6
27
7
8
9
28
29
30
31
32
33
1
2
3
4
34
35
36
37
38
39
40
41
42
43
44
34
17
18
19
20
21
22
23
45
46
47
48
49
50
51
52
23
21
53
54
Page 35

Use only genuine WEBER replacement
parts for any repair or replacement.
REPLACEMENT PARTS
Visit weber.com
SmokeFire - EX6 - US 040320
1
2
3
4
24
10
11
12
13
14
15
16
5
25
26
6
7
8
9
27
28
29
30
31
32
33
1
1
2
2
3
3
4
4
34
35
36
37
38
39
40
41
42
43
44
45
46
17
18
19
20
21
22
23
21
23
weber.com
47
48
49
50
51
52
53
54
35
Page 36

FCC Compliance: This equipment has been tested and found to comply with the limits for a Class B
digital device, pursuant to part 15 of the FCC rules. These limits are designed to provide reasonable
protection against harmful interference in a residential installation. This equipment generates,
uses and can radiate radio frequency energy and, if not installed and used in accordance with
the instructions, may cause harmful interference to radio communications. However, there is no
guarantee that interference will not occur in a particular installation. If this equipment does cause
harmful interference to radio or television reception, which can be determined by turning the
equipment o and on, the user is encouraged to try to correct the interference by one or more of
the following measures: (1) Reorient or relocate the receiving antenna. (2) Increase the separation
between the equipment and receiver. (3) Connect the equipment into an outlet on a circuit dierent
from that to which the receiver is connected. (4) Consult the manufacturer, dealer or an experienced
radio/TV technician for help. Changes or modifications not expressly approved by Weber could void
the user’s authority to operate this device.
FCC Radio Frequency (RF) Exposure: This equipment complies with FCC and ISED Canada radiation
exposure limits set forth for an uncontrolled environment. The user should avoid prolonged exposure
within 20cm of the antenna, which may exceed the FCC or RSS-102 radio frequency exposure limits.
IC Compliance: This device contains license-exempt transmitter(s)/receiver(s) that comply with
Innovation, Science and Economic Development Canada’s license-exempt RSS(s). Operation is subject
to the following two conditions: (1) This device may not cause interference; and (2) This device must
accept any interference, including interference that may cause undesired operation of the device.
IFETEL Compliance: Operation of this unit is subject to the following two conditions: (1) this unit or
device may not cause harmful interference, and (2) this unit or device must accept any interference,
including interference that may cause undesired operation.
ULC/ORD-C2728 2013
UL2728A 2019
EN 1860-1:2017
EN 55014-1:2017
EN 55014-2:2015
Apple and the Apple logo are trademarks of Apple Inc., registered in the U.S. and other countries.
AppStore is a service mark of Apple Inc. Android is a trademark of Google LLC. Google Play and the
Google Play logo are trademarks of Google LLC.
The Bluetooth® word mark and logos are registered trademarks owned by Bluetooth SIG, Inc. and
any use of such marks by Weber-Stephen Products LLC is under license. Other trademarks and trade
names are those of their respective owners.
© 2020 Designed and engineered by Weber-Stephen Products LLC,
1415 S. Roselle Road, Palatine, Illinois 60067 USA.
WEBER-STEPHEN PRODUCTS LLC
www.weber.com
© 2020 Designed and engineered by Weber-Stephen Products LLC,
1415 S. Roselle Road, Palatine, Illinois 60067 USA.
 Loading...