

Page 1

Workshop Manual—HL30/38/65/95/125 Model Air Heaters
1
WORKSHOP MANUAL
For Webasto Heater Models
HL30
HL38
HL65
HL95
HL125
Including sections on Operating
Principles, Common Installation
Problems and Faultfinding
Uncontrolled Copy—for reference purposes only
Visit www.butlertechnik.com for more technical information and downloads.
www.butlertechnik.com
Page 2

Workshop Manual—HL30/38/65/95/125 Model Air Heaters
2
Page Number
1. Introduction
3
2. Operating Principles
Semi-Automatic Control 4
Fully-Automatic Control 5
Larger Heaters—Differences from HL30 5
Fuel Pump & Fuel Supply 6
Ventilation 6
Glowplug Circuit 6
Thermostatic Operation 6
Exhaust Arrangement 6
3. Service Procedures HL30/38
A. Removing the Heater 7
B. External Components 7/8
C. Opening the Heater 8
D. Splitting motor and heat exchanger 8
E. Heat Exchanger 9
F. Atomiser Assembly 9
G. Fuel Pump 10
H. Motor 11
I. Reassembly 11/12
J. Testing 12
A. Removing the Heater 13
B. External Components 13
C. Opening the Heater 13
D. Splitting motor and heat exchanger 13
E. Heat Exchanger 13
F. Atomiser Assembly 14
G. Fuel Pump 14
H. Motor 15
I. Reassembly 15
J. Testing 16
HL125 16
5. Common Installation
Problems
Ducting 17
Fuel 17
Wiring and Electrics 18
Exhaust System 18
6. Fault Finding
19
4. Service Procedures
HL65/95/125
CONTENTS
Visit www.butlertechnik.com for more technical information and downloads.
www.butlertechnik.com
Page 3

Workshop Manual—HL30/38/65/95/125 Model Air Heaters
3
1. Introduction
The HL series of Webasto Air Heaters were manufactured from the 1960’s and as a result formed a
large proportion of Webasto Heating Installations within the UK at that time. The heaters were solidly
designed using well proven technology, and as such have a reputation for rugged reliability and serviceability. Many of them have lasted in excess of 20 years or more.
Since the mid 1980’s, a new generation of heaters has appeared from Webasto, using new burner
technology and much simpler design. These heaters made the HL30 obsolete and offer many ad-
vantages over older designs.
This manual is intended as a guide for those who have had no experience of the older series heaters,
and should be read as a whole before any service work is undertaken.
Visit www.butlertechnik.com for more technical information and downloads.
www.butlertechnik.com
Page 4

Workshop Manual—HL30/38/65/95/125 Model Air Heaters
4
2. Operating Principles
The principle of operation for all heaters is similar. Figures 1, 2 and 3 refer to model HL30, minor
differences with other models are discussed separately.
When the heater is turned on, power is switched to the glowplug (2). This pre-heats the combustion
chamber in it’s vicinity.
After 2-3 minutes pre-heat, power is switched to the main heater motor (78) and simultaneously the
fuel solenoid (10). Since the fuel pump is driven directly by the motor, fuel is now pumped through
the open solenoid, into the fuel pump and injected into the fuel delivery pipe (E, fig 3). From here it is
passed into the rotating atomiser (66) and sprayed past the glowplug into the combustion chamber
(40). Simultaneously, the combustion air fan (64) draws air through the combustion downpipe (20)
and blows it into the combustion chamber to be mixed with the fuel.
This mixture is ignited by the glowplug, and hot exhaust gases pass through the heat exchanger (40)
to be exhausted through the downpipe (22). Simultaneously, the fresh air fan (30) blows air over the
hot heat exchanger and this is discharged as hot heating air into the ductwork. It is to be noted that
combustion (primary) air and fresh (secondary) air cannot mix, and that heating air is therefore free
from fumes.
As combustion becomes established, the temperature inside the heat exchanger rises until the heat
detection thermostat (HD thermostat) (4) contacts close. The glowplug now de-energises and
combustion is self-sustaining and stable.
When the heater is turned off, the solenoid is de-energised and closed, interrupting the fuel supply.
Combustion ceases and the heater cools to the point where the HD thermostat contacts open,
shutting the heater down. The blower motor is energised until this happens.
Semi-Automatic Control (SA Control)
Before approximately 1980, most heaters were supplied with SA Control. Under this system, all
timing sequences are carried out using a clockwork timer switch (12, figs 4 & 5). Closing of the HD
thermostat contacts energises a relay (14, figs 4 & 5) and the green light glows. This circuit also
bypasses switch circuits so that the heater remains running when the switch knob reaches the fuel
heat position. If the HD contacts do not close the heater cuts off at this point. With the heater
running, reduced heat can be selected. In this case, current is switched through different motor
windings.
Overheat protection is provided by a mechanical cut out (7, fig 1 and 5 , figs 4 & 5) which interrupts
the feed to the relay coil so that the heater stops dead. After some minutes, the cut-out should reset
itself.
HL65, HL95 and HL125 SA heaters all use 5 and 7 way Hella caravan type plugs and sockets to
connect heaters to wiring components. Early HL30 SA heaters use the same system, although from
about 1977 onwards a 7 way plastic junction box was used (fig 5). With the exception of this box, SA
wiring components are interchangeable for the entire range.
Visit www.butlertechnik.com for more technical information and downloads.
www.butlertechnik.com
Page 5

Workshop Manual—HL30/38/65/95/125 Model Air Heaters
5
2. Operating Principles (ctd)
Fully Automatic Control (FA Control)
FA Heaters first appeared in about 1980 in the UK and for some years there was an FA/SA option.
After two or three years, however, fitting of FA heaters become almost universal.
Under this system, timing and switching is carried out by an electronic control box (11, fig 6). This
box and wiring system is common to all HL FA heaters. Closing the HD contacts results in the
instantaneous de-energising of the glowplug, unlike SA systems where it continues until the time
cycle is completed. Failure to ignite first time results in the start cycle resetting itself after about 3.5
minutes. Thus FA systems will attempt two automatic starts, after which the switch must be reset if
combustion is not established.
Overheat protection is by means of an overheat fuse (9a fig 1, 5 fig 6). Continuity through this fails
when air temperature around it reaches 100°C and this interrupts power to the fuel solenoid, which
closes. The heater therefore shuts down in the normal way. If the heater started first time and
subsequently overheats, the control box will automatically repeat start when the heater stops. It will
obviously not re-ignite however. Overheat fuses are not repairable.
Most of the later HL125 FA heaters still used the red mechanical overheat thermostat, but this is
wired using the third contact so that if it overheats, an electrical in-line fuse (2 amps) blows, cutting
power to the solenoid. This fuse is usually to be found taped to the overheat thermostat leads.
It is not possible to have reduced heat with FA control.
Larger Heaters—Differences from HL30
Solenoid valves, HD thermostats and OH thermostats for all heaters were identical until the HL6511
and HL9511 were introduced in about 1983. At this time, all external wiring components were redesigned, made smaller, and incorporated beneath a single black external cover. The HL30
remained unchanged. The main modifications were as follows (see fig 7).
1. The solenoid valve was reduced in size and mounted internally as part of the fuel pump (77, fig
8).
2. The electric clutch was replaced with 2 plastic dogs (60, fig 8). See below under “ventilation”.
3. The HD thermostat was reduced in size (6, fig 7) and mounted beneath the cover.
4. The overheat protection system was reduced to a small thermo switch with normally open
contacts. In the overheat conditions these contacts close, shorting and blowing a 2A fuse (7 &
8, fig 7) in line with the solenoid valve, shutting the heater down in the normal way.
Visit www.butlertechnik.com for more technical information and downloads.
www.butlertechnik.com
Page 6

Workshop Manual—HL30/38/65/95/125 Model Air Heaters
6
2. Operating Principles (ctd)
Fuel Pump and Fuel Supply
The basic principle of a motor driving an internal piston pump is the same in all heaters. HL30
pumps are however different from those of larger heaters. Any HL30 pump is interchangeable with
any other HL30 pump, even if they are superficially different. Check however that the pump piston
diameter (3.3 mm) is the same. This number is stamped on the pump casing.
All HL65, HL95 and HL125 fuel pumps are physically the same, the only difference being pump
piston diameter, but the above should be noted. Full technical details of all fuel pumps and solenoid
values are given in figs 9 & 10.
Ventilation
Ventilation is an option on all heaters, both SA and FA. On the HL30/38 the motor is energised, and
this also turns the fuel pump although the fuel solenoid remains closed. On larger heaters with
higher pump revolutions a clutch was introduced using a rubber cone and brass cup. This
disengages the pump and motor during ventilation, reducing pump wear. On early HL65 heaters, this
clutch was operated by a mechanical lever, but this was later changed to an electromagnetic clutch
(49/50/51, fig 11—refer to notes above).
Glowplug Circuit
All heaters have the same glowplug and glowplug circuit. The plug is designed to operate at
between 4 and 4.5v. A dropper resistor is therefore required to drop from mains voltage. 12v
droppers have a single element, 24v have a double element. Both types of resistor have a sliding
clamp enabling glowplug voltage adjustment.
Thermostatic Operation
It is not possible to fit a room thermostat for operation on any of the SA heaters. This is only possible
on a FA system, which is wired as shown in fig 6. If the room thermostat is wired as shown,
switching terminals 13 and 14, only one start cycle will be attempted on thermostatic re-start. It, as
can very often be the case, the heater does not start first time, it will therefore not attempt a second
start. Thus the heater will cease operating at a time when it is supposed to be maintaining a constant
temperature.
One solution to this is to bridge terminals 13, 14 and wire the room thermostat in series with the on/
off switch. It will then in effect become a second on/off switch and repeat start will be available if
required.
Exhaust Arrangement
For vehicle applications the majority of heaters are supplied with a downward exhaust, designed to
discharge directly through a floor. A limited length of exhaust ducting can be fitted to this (see p 18).
For marine use, upward exhaust heaters are generally supplied, usually fitting a sealed balanced flue
system.
Visit www.butlertechnik.com for more technical information and downloads.
www.butlertechnik.com
Page 7

Workshop Manual—HL30/38/65/95/125 Model Air Heaters
7
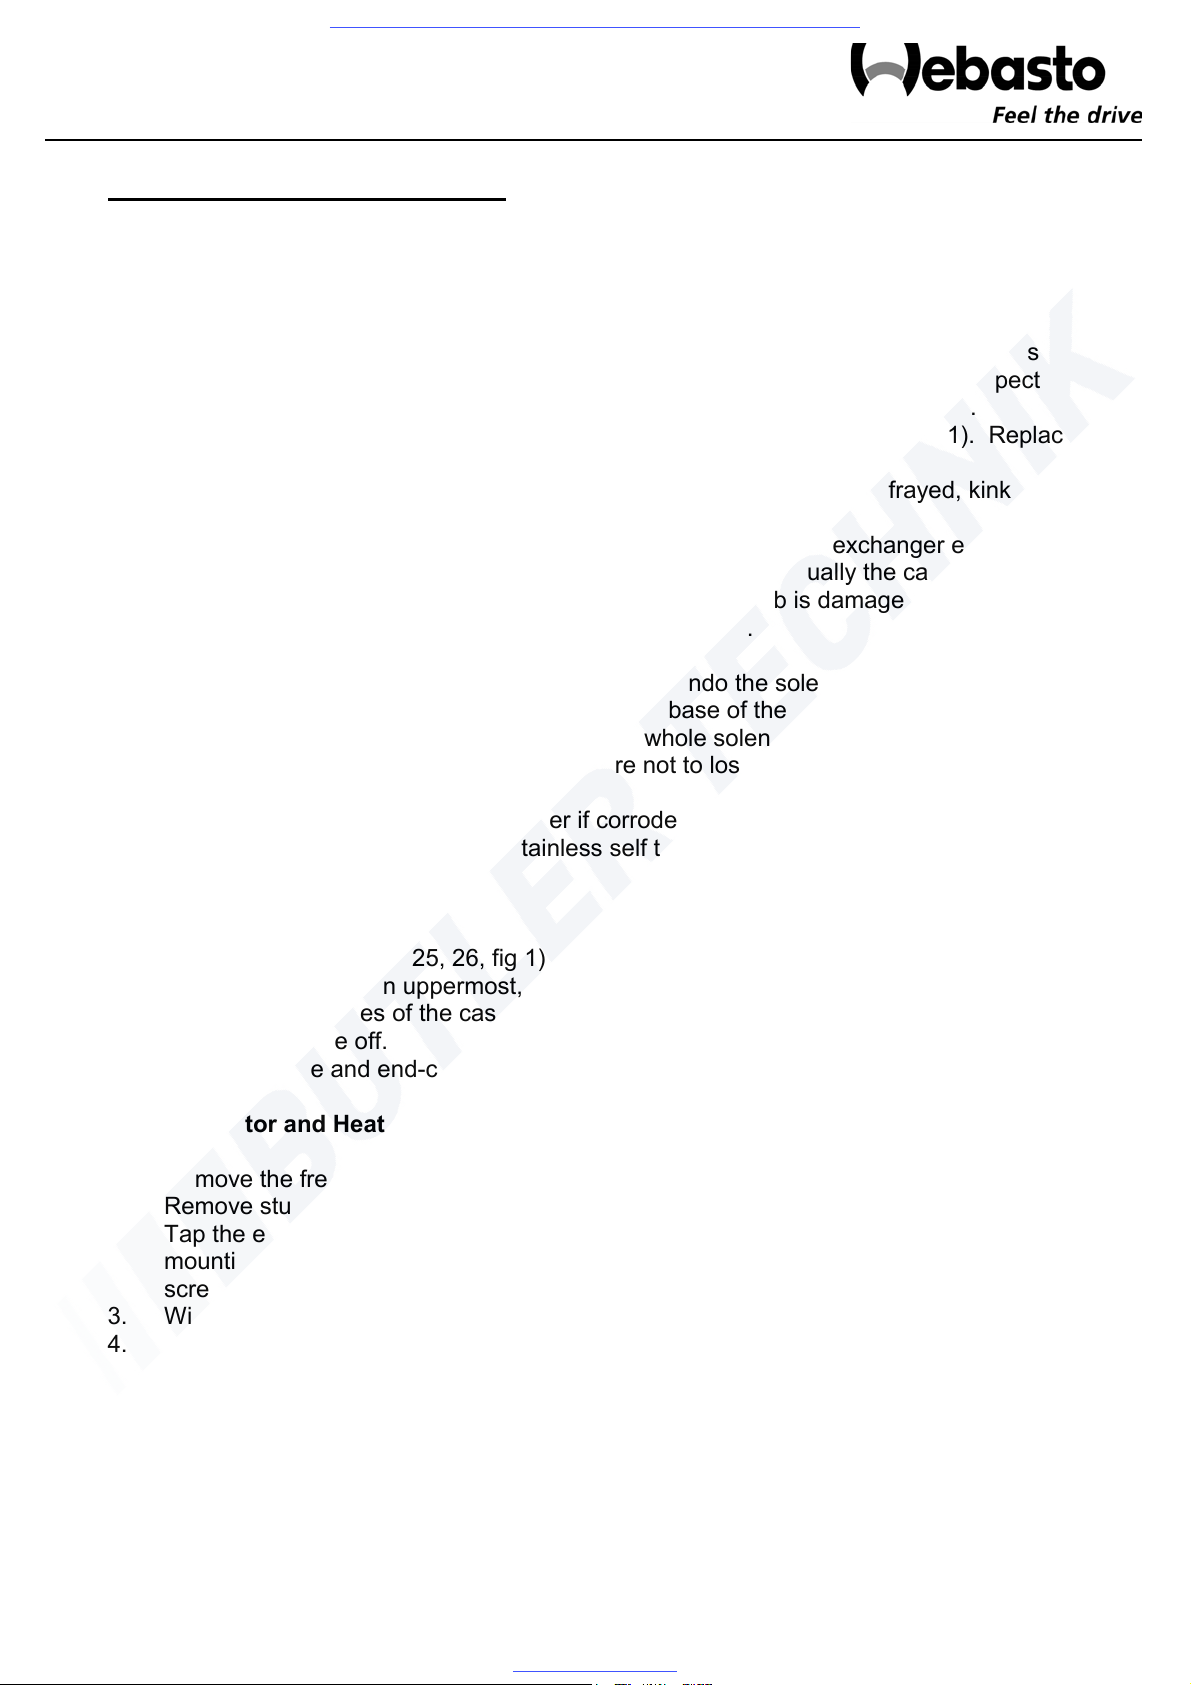
3. Service Procedures—HL30/38
This section is intended to give a step by step guide to servicing these heaters. It is recommended
that the section on operating principles should be read prior to commencing any work since this gives
an understanding to the role of the various components. It should be remembered that many heater
faults and problems are due to bad or faulty installations. A more comprehensive discussion of these
problems is given on p. 17.
In general, Webasto heaters have a recommended service interval of about 1000 running hours.
This generally corresponds to 2 seasons work, although exceptionally one year in the case of
applications such as buses and minibuses which are constantly in use. It follows, therefore, that any
heater 2+ years should be overhauled, not merely repaired. This practice is therefore recommended.
Workshop Conditions
You will require the following:
Clean Rags—particularly important for fuel pumps
Degreasant e.g. Jizer, paraffin
Fine abrasive paper e.g. crocus paper NOT emery
Grease—Shell ALVANIA 3 because of it’s heatproof properties
Jointing Compound e.g. Stag
Benches should be clean and swept clear at regular intervals during overhauling procedures. Grit in
motor bearings or pump plates can cause considerable damage. It is recommended that individual
components be overhauled as heaters are stripped down, not as they are built up. Again, this
minimises the amount of dirt present. It is recommended that one complete gasket set be used for
each heater serviced.
A. Removing Heater
1. Disconnect the wiring harness. In the case of a plastic junction box note the positions of
cables beforehand.
2. Disconnect the fuel line from the solenoid valve (12, fig 1) having first turned off the fuel
tap, if fitted.
3. Remove the mounting straps. If these are too corroded, cut through the bolts with a
hacksaw and replace them later.
4. Disconnect ducting and exhaust, if fitted.
5. Remove Heater.
B. External Components
1. Remove the wiring harness.
2. Remove the glowplug (1, fig 2). Replace this if the coil is distorted or there is excessive
carbon build-up
3. Remove the HD thermostat (4, fig 1), replace if bent or damaged.
4. Remove the OH thermostat (if fitted). To test this, hold the end of the probe in a pair of
pliers and twist the body of the thermostat anti-clockwise. You should hear the contacts
click open after about 1/8th of a turn. This distance can be reset by slacking the screws
Visit www.butlertechnik.com for more technical information and downloads.
www.butlertechnik.com
Page 8
Workshop Manual—HL30/38/65/95/125 Model Air Heaters
8
3. Service Procedures—HL30/38 (ctd)
B. External Components (ctd)
4. in the base and resetting the body accordingly. Note that the contacts should reset
themselves when the probe is released. If they do not, replace the thermostat. As
a final check, undo the top securing screw and lift off the red plastic cover. Inspect
the blue wires underneath, if they are in good order reassemble and replace.
5. If the heater has FA control, check continuity through the OH fuse (9a, fig 1). Replace
if necessary.
6. Examine the external fuel hose, particularly the braiding. Replace if frayed, kinked or
corroded.
7. Examine the exhaust and combustion air downpipes, and heat exchanger exhaust stub.
Replace them if they are badly corroded—note that this is usually the case in heaters
with more than 2 years service. If the heat exchanger stub is damaged or badly
corroded the entire heat exchanger should be replaced.
8. Remove the solenoid valve (12, fig 1).
9. Hold the flat mounting of the valve in a vice and undo the solenoid pole-piece and
coil (10, fig 1). Examine the rubber seal on the base of the armature. If this is pitted,
grooved or in any way damaged, replace the whole solenoid armature.
10. Remove the fuel hose (14, fig 1), taking care not to lose the copper end-washer into the
heater.
11. Remove all screws, replace them later if corroded. It is recommended that case screws
be replaced with No 8 pan head stainless self tappers.
C. Opening the Heater
1. Remove the end caps (25, 26, fig 1) by pushing them off with a screwdriver.
2. Upend the heater, fan uppermost, with the exhaust stubs pointing away from you.
Grasp the two edges of the case (27, fig 1) and pull outward and towards you—the
case should slide off.
3. Clean the case and end-cones with degreasant.
D. Splitting Motor and Heat Exchanger
1. Remove the fresh air fan (30, fig 2), clean with degreasant or replace if damaged.
Remove studs (31, fig 2).
2. Tap the end cover (33, fig 2) off the motor case (36, fig 2). Usually, the motor
mounting plate (34, fig 2) sticks to the cover and should be dislodged with a
screwdriver.
3. Withdraw the complete motor/pump assembly and put to one side.
4. Prise apart the motor case (36, fig 2) and heat exchanger (40, fig 2). Clean and
degrease the motor case, replacing the gasket (35, fig 2).
5. Replace the sealing string on the end of the motor case, cementing it in place
with jointing compound.
Visit www.butlertechnik.com for more technical information and downloads.
www.butlertechnik.com
Page 9

Workshop Manual—HL30/38/65/95/125 Model Air Heaters
9
3. Service Procedures—HL30/38 (ctd)
E. Heat Exchanger
1. De-carbon. This is best achieved with either a pressure washer, or hot soapy water
and vigorous shaking. It is not sufficient merely to poke about inside with a screwdriver.
Note that excessive carbon deposits should not occur—see p. 18.
2. Examine the heat exchanger carefully, particularly the welds between the inner and
outer jacket and the exhaust stub. The complete assembly should be replaced if there are
any signs of perforations since these will allow fumes into the heating air. It is pointless
trying to weld any holes since they will only re-appear somewhere else.
3. Examine the backwall (41, fig 2). If the fins are corroded or flaking, it should be replaced.
In any case it should be removed and re-sealed in position. To do this, place a small
extractor inside with the lugs facing outwards so that they locate inside the inner flange of
the backwall. Hold the heat exchanger suspended by the extractor and tap the brackets
(A, fig 2) with a small hammer. The backwall should slide out, but if excessive force is
required, then the backwall is obviously well sealed and should be left alone.
4. If the backwall is extracted or replaced, smear jointing component around the outer face,
position correctly (line up the glowplug hole with the appropriate hole in the heat
exchanger) and tap home so that the top of the backwall is flush with the top of the heat
exchanger. Re-check the alignment of holes, if necessary by inserting a glowplug.
F. Atomiser Assembly
1. Return to the motor/pump assembly. Hold the combustion air fan (64, fig 3) firmly and
undo the retaining nut (61, fig 3).
2. Remove the nut, washer (62, fig 3), atomiser cup and fan. Examine these components for
flaking and corrosion, clean or replace as necessary.
3. Remove the atomiser (66, fig 3) and round washers (65, fig 3). Note that these washers
are included in the gasket set and should be replaced routinely. The atomiser is one
of the most important parts of the heater and a number of installation faults can be
detected by examining it;
Blocked Atomiser Pipes
are caused by continual running at low voltage (see p.18).
Missing Pipes are caused by overheating, which melts the brazing holding the pipes on
(see p.17).
4. Examine the inside of the atomiser. Build up of a deposit indicates dirt in the fuel.
Thoroughly clean the atomiser and pipes. If a pipe is missing, replace the whole
atomiser.
5. Remove the back plate (69, fig 3) by removing the two holding screws.
6. Examine the two plates—if they are loose, replace the washers (70, fig 3) which are
included in the gasket set. These should be tapped home into the recesses in plate 69
and plate 75 tapped into position.
7. Remove the roll—pin above the motor shaft washers, but first note the distance between
the atomiser pipes and dished washer (fig 12). Remove all washers.
8. Undo the two pump retaining screws (A, fig 3) and slide the pump off the motor shaft.
Visit www.butlertechnik.com for more technical information and downloads.
www.butlertechnik.com
Page 10

Workshop Manual—HL30/38/65/95/125 Model Air Heaters
10
3. Service Procedures—HL30/38 (ctd)
G. Fuel Pump
There are three types of fuel pump (fig 13), all superficially different, but procedures are
basically the same for them all.
1. Remove the inspection plate (b, fig 3) and clean it. It is recommended that this plate
being aluminium is inscribed with the date of the service for future reference.
2. If a separate bubble separator is fitted, push it out from behind, using a suitable drift.
Clean it, check that all pipes are clear, and replace the “o” rings. Sediment in the
bubble separator is an indication of dirty fuel. Later fuel pumps (fig 13c) have a single
pipe embedded in the pump casting. Check that this is not loose. If it is, thoroughly
clean and re-araldite it back into position.
3. Replace the bubble separator, ensuring that the inner flat is adjacent to the pump
casting hole. Tap it home with a suitable drift, taking care not to bend or damage
the pipes.
4. Remove the screws (1 fig 13b—nuts in pump type A). Remove the pump top cover,
clean inside.
5. Remove the pump spring which should always be replaced.
6. Remove the pump outer gasket and pump piston assembly. It is essential that this
assembly and the plate on which it sits are in good order, and the following checks should
be done: i) Push the piston fully down, place a thumb over the hole in the assembly body,
and pull the piston completely out. You should hear a healthy “plop” as the
piston is withdrawn. If you don’t, replace it.
ii) Examine the pump plate for wear. In particular, examine the area between the
fuel inlet and outlet holes. If this is scored, the pump plate must be replaced.
iii) Hold the end of the eccentric pump shaft and rock it to-and-fro. If any play
at all is detected, the pump shaft bush and oil seal should be replaced.
If at this stage all the above checks are in order, then the pump may be reassembled. Be
sure to add some fresh grease and replace pump outer gasket and spring. If any of the
above checks reveal wear, proceed as follows:
7. Remove the pump shaft circlip.
8. Remove the pump drive wheel and retaining woodruff key (roll pin in early heaters).
Examine the wheel for wear and replace if necessary.
9. Push the pump shaft out and examine it for wear. If there is any noticeable step where
the shaft meets the bush, replace both.
10. Place a No. 8 screw into the bush, and using this as a drift, knock out the bush with
a punch. Insert the new bush in the same way. Note that the bush always wears more
than the shaft, and once it has been replaced the shaft can be inserted to check for wear.
Any play at this stage must be due to shaft wear, which should therefore be replaced.
11. Using a suitable drift, knock out the pump plate oil seal and insert the new one, ensuring
that it is replaced in the correct orientation.
12. Replace the pump inner gasket.
13. The pump can now be reassembled. When the shaft and drive wheel are assembled,
replace the pump piston assembly and turn the wheel by hand to ensure freedom of
movement. A little light machine oil should be placed in the bush before replacing the
shaft. Ensure that the new spring locates correctly in the pump cap recess. The
access chamber should be half-filled with grease.
Visit www.butlertechnik.com for more technical information and downloads.
www.butlertechnik.com
Page 11

Workshop Manual—HL30/38/65/95/125 Model Air Heaters
11
3. Service Procedures—HL30/38 (ctd)
H. Motor
1. Clean the commutator with crocus paper. Run the motor with an appropriate
electrical supply. If the motor sounds smooth, and is rotating at greater than 5000 rpm,
replace it with no further work, provided that the brushes are not significantly worn.
If the motor is noisy, or revs are low, proceed as follows:-
2. Remove the rubber gasket (77, fig 3) replace it from the gasket set.
3. Knock out the pump worm roll pin, then slide the pump worm of the shaft. An extractor
may be necessary for this.
4. Remove the fan adaptor clip (29, fig 2) and draw the adaptor off with a suitable extractor.
5. Remove the motor mount (34, fig 2).
6. Remove motor brushes and caps (79, 80, fig 3). Examine and replace the brushes if
less than 10mm remains. Note that earlier HL30 heaters had smaller brushes than
later models.
7. Undo the motor screws (fig 3, D). These are held together by castle headed nuts and will
require a screwdriver with the centre of the blade filed out. In later heaters, they are
conventional screws, but be careful not to lose the nuts on the other end as the motor
comes apart.
8. Pull the front motor plate off, clean with degreasant. Note the sequence of spring and
packing washers in the bearing recess.
9. Withdraw the motor armature and clean it. Commutator grooves can be cleaned out with
a wooden toothpick. Nothing harder is acceptable since it will damage the copper.
10. Replace the bearings, ensuring that they are the correct way round and spacers are
correctly placed. Pack the bearings with grease.
11. Badly grooved commutators can be re-cut using a lathe, but this is a difficult job and
requires much precision. It is better to leave them grooved than try to re-cut them with
the wrong equipment.
12. Re-assemble the motor, and run it for at least 20 minutes. Periodically check the speed
with a tacho or strobe, gently tapping the shaft one way then the other. This will ensure
sufficient end-float on the bearings to allow smooth running.
13. Repeatedly polish the commutator with crocus paper while the motor is running.
14. Do not refit a motor with a shaft speed of less than 4000 rpm since the heater will not run
correctly. A motor should sound and run smoothly once it has been overhauled. New
brushes will also take some time to bed in, and again the commutator should be cleaned
frequently during this time.
I. Re-Assembly
Re-assemble the heater in the reverse order to stripping, but note the following points:-
1. Ensure that the gap between the dished washer on the motor shaft and the bubble
separator pipe is about 1mm (fig 12). This can be adjusted by fitting washers of
different thickness. It is important that this gap is correct.
2. Ensure that the distance between the atomiser pipes and the atomiser cup is 1-2mm.
If these pipes are splayed out too far they can be tapped gently together.
Visit www.butlertechnik.com for more technical information and downloads.
www.butlertechnik.com
Page 12

Workshop Manual—HL30/38/65/95/125 Model Air Heaters
12
3. Service Procedures—HL30/38 (ctd)
I. Re-Assembly (ctd)
3. Push the motor case into the heat exchanger and align the exhaust stub and combustion
air downpipe correctly before refitting the motor.
4. When refitting the pump/motor assembly, run them beforehand as an assembled unit.
Check the free movement of all rotating parts.
5. Ensure that the pump inlet pipe locates with the hole in the motor case. Do not
overtighten this fuel line—it is very easy to split the pump casting.
6. Do not overtighten the motor securing bolts (31, fig 2). Spin the motor when these
are tightened. If the atomiser pipes catch on the heat exchanger backwall, add an
additional gasket (35, fig 2) to give them slightly more clearance.
7. Ensure that the case fits correctly, and that the glowplug and HD thermostat holes
are not covered.
8. Ensure a clearance of at least 2mm between the fresh air fan and the case end hood.
J. Testing
It is advisable, if possible, to test the heater before replacing it back in the installation.
Having done this, you can be sure that any problems are therefore due to the installation, not the
heater. The following points are important:
1. The heater pump should be capable of lifting fuel 1 metre vertically through 5/16” fuel pipe.
If it does not, and the fuel stops in the pipe, then there is still a pump problem.
2. The HD thermostat can only really be tested on a test rig.
3. There is inevitably a considerable amount of smoke produced when first fired up. This is
due to water and degreasant which must first clear itself before smooth combustion can be
established.
Visit www.butlertechnik.com for more technical information and downloads.
www.butlertechnik.com
Page 13

Workshop Manual—HL30/38/65/95/125 Model Air Heaters
13
4. Service Procedures—HL65/95/125
The HL65 and 95 heaters are basically similar. The only differences are in the size of exhaust and
heat exchanger, and the pump piston diameter. For the purpose of this manual they will be treated
the same. Differences between older and newer designs will be discussed separately, as will the
HL125.
A. Removing Heater
Proceed as for HL30, but remember that there is no external fuel solenoid on later designs.
B. External Components
Repeat checks as for the HL30. Note however that the fuel inlet pipe is solid, not flexible
as in the HL30. Newer heaters with black covers are slightly different. Care must be
taken when removing the OH thermo-switch, which should only be finger tight. If it does
not unscrew easily however, you will be forced to use pliers and may well break it. The
HD thermostat is smaller than the older type, and is also easily damaged. In particular the
micro-switch can become unstuck from its holder. Check this by gently pulling on its
wires—if it moves then the while unit should be replaced.
Ensure that all external components are removed, and be careful to note the position of
wires and connections before dismantling.
C. Opening the Heater
Proceed as for the HL30.
D. Splitting Motor and Heat Exchanger
1. Remove the locating screws (60, fig 11), prise the pump/motor assembly from the
heat exchanger.
2. Undo two screws (A, fig 11). Remove the clutch cover (48, fig 11).
3. Undo the philips screws (46, fig 11) holding the pump body to the motor. Prise the
two units apart, having noted the correct hole alignment.
E. Heat Exchanger
Proceed as for the HL30. The backwalls of larger heaters are usually very difficult to
remove, and there is little point in attempting this without the recommended special tool.
For the correct positioning of the backwall, see fig 16. If in doubt, and if the condition of
the heat exchanger seems reasonable, leave well alone. Badly carboned heat
exchangers are often very difficult to clean out, and may need soaking for some time if a
pressure washer is not available.
Visit www.butlertechnik.com for more technical information and downloads.
www.butlertechnik.com
Page 14

Workshop Manual—HL30/38/65/95/125 Model Air Heaters
14
4. Service Procedures—HL65/95/125 (Ctd)
F. Atomiser Assembly
This is completely different to the HL30, so proceed as follows;
1. Unscrew the combustion air downpipe (20, fig 7).
2. Remove the clutch cone (49, fig 11), clean, and rough the inside edge with coarse
emery so that it grips the rubber motor cone.
3. Remove the clutch coil, having noted the position of the wires.
4. Place the flat of the pump shaft in a soft-jawed vice and tighten. Unscrew the anti-
radiation disc, and remove.
5. Bend the fuel pump feed pipe (57, fig 11) away from the atomiser cup and remove
the cup. Examine disc and cup for corrosion and replace if necessary. Heavy coke-
like deposit in this area indicates prolonged running at low voltages.
6. Undo the 4 screws (53, fig 11) holding the pump casing back-plate and remove.
7. Undo the banjo nut holding the swan-neck to the pump, being careful not to lose the
2 copper washers.
8. The pump should now slide backwards out of the pump housing, leaving the
combustion air fan in place. If it does not slide freely, use an appropriate extractor.
9. Clean the entire pump housing with degreasant, examine the combustion air fan for
damage of flaking, and replace if necessary.
G. Fuel Pump
The following procedure should be followed for both new and old types of pump. For newer pumps
fitted with a solenoid, unscrew the solenoid, clean the gauze, replace the ’O’ rings, and refit.
1. Remove the roll-pin (E, fig 14) and washer beneath.
2. Remove the screws and cover plate (C,D, fid 14).
3. Remove the large internal circlip now exposed, and the aluminium plate beneath it.
4. Remove circlip A, fig 14. Tap the shaft through the pump with a soft mallet. The
front bearing, which will remain on the shaft after extraction, can now be replaced if
worn or ‘gritty’, or packed with grease if not. The rear bearing, which has remained
in the housing, should now be driven out with a drift, replaced or packed with grease
as necessary. Note that the bearings of new and old type pumps are of different
sizes. It is important to have these bearings correctly positioned when the pump is
reassembled. If the pump is not free, the clutch will slip and the heater will
malfunction.
5. Remove the inspection plate (B, fig 14).
6. Remove the pump plate screws and pump plate. Note the position of the pump
spring, which should be replaced together with the pump gasket.
7. Apply the same tests to these pump components as for the HL30.
8. The pump shaft bush can be replaced in the same way as the HL30. The only
difference is that the pump drive wheel is held in with a roll pin, and a new shaft
should be drilled to accept this. It is possible to use HL30 pump shaft bushes in
larger heaters, but they should be turned down to the correct length on a lathe.
9. The pump should now be reassembled and tested for free movement. If it appears
stiff, a gentle tap one way and then the other on the main shaft will often free the
bearings sufficiently to permit free movement. Be careful however that the circlips
are not dislodged.
Visit www.butlertechnik.com for more technical information and downloads.
www.butlertechnik.com
Page 15

Workshop Manual—HL30/38/65/95/125 Model Air Heaters
15
4. Service Procedures—HL65/95/125 (ctd)
H. Motor
Run the motor on the appropriate voltage. If it runs smoothly and there is not excessive wear
on the brushes, polishing the commutator with crocus paper will suffice. To change the bearings of
an old type motor (fig 11), proceed as follows;
1. Undo nut (14, fig 11), remove locking washer and fan. Remove the guard (43, fig 11).
2. Undo the motor securing screws (44, fig 11), and remove the motor.
3. Remove the fan– securing roll pin.
4. Remove the clutch rubber cone roll pin. Remove the clutch cone.
5. Remove the brushes, examine for wear and replace if necessary.
6. Remove the 4 screws of the end housing and withdraw the armature. Note the sequence
of spacer and spring washers.
7. Replace the bearings or repack with grease as necessary.
8. Reassemble and test. A minimum speed of 3500 rpm is acceptable. Remember to
thoroughly clean the clutch cone and rough it with emery.
For new type motors (57, fig 8) the procedure is similar. The motor is held together by two
castle headed bolts. Provided that a note is made of the exact alignment of motor ends and the
case, reassembly is straightforward. Usually, if these motors run smoothly there is little point in
opening them up.
I. Re-Assembly
Reassemble the heater in the reverse order to stripping, but note the following points;
1. Ensure that the combustion air fan is correctly positioned on the pump shaft roll pin (fig 14,
E).
2. Ensure that the swan neck fuel delivery pipe is correctly positioned with respect to the
atomiser cup (fig 15), and that it does not catch against the sides.
3. Test the complete pump/motor assembly before attachment to the heat exchanger to
ensure free movement throughout. In particular, hold the atomiser cup and rotate the
main fan. It should require considerable force to overcome the clutch. If this movement is
easy, then the clutch should be re-cleaned.
4. To assemble the case, a rope loop twisted with a screwdriver will draw together the edges
sufficiently for screws to be inserted.
Visit www.butlertechnik.com for more technical information and downloads.
www.butlertechnik.com
Page 16

Workshop Manual—HL30/38/65/95/125 Model Air Heaters
16
4. Service Procedures—HL65/95/125 (ctd)
J. Testing
As for HL30
HL125
The basic differences between the HL95 and 125 are as follows;
1. The fresh air fan is mounted on the other end of the motor and has the clutch
immediately below it.
2. There is an extra baffle (90, fig 17) attached to the pump housing, and the atomiser
cup and anti– radiation disc lie outside of this (93, 95, fig 17)
The pump, motor and heat exchanger can be treated in a very similar way to the HL65/95,
but particular attention must be made to the positioning of washers, especially on the fresh
air fan and atomiser assemblies.
Visit www.butlertechnik.com for more technical information and downloads.
www.butlertechnik.com
Page 17

Workshop Manual—HL30/38/65/95/125 Model Air Heaters
Visit www.butlertechnik.com for more technical information and downloads.
www.butlertechnik.com
5. Common Installation Problems
It is frequently found that installation problems manifest themselves as unreliable heaters. This
section is intended to give some idea of the common pitfalls.
Ducting
Restricted inlet and outlet grills can cause severe overheating. This usually shows as a brown
discolouration of the heater paintwork, and in severe cases excessive bearing wear and atomiser
damage. In general terms, the total amount of freeway must be an area equivalent
to twice the cross-sectional area of the ducting. This applies to both the inlet and outlet ducts,
in other words, the total freeway area for both combined is 4 times the ducting cross sectional
area. Ducting area is given by πr squared, where π = 3.14, and r is the internal radius of the
ducting. It is sometimes found that large holes are provided for heating air to escape, only
to be severely restricted in aperture by chrome grilles or restrictive meshes. Many installations
particularly some mobile libraries, will often benefit from removing these grilles altogether.
Sharp ducting bends will also restrict airflow, particularly bends in excess of 90°. Fabricated
T-pieces are unacceptable in any installation, and should be replaced. Occasionally, the
nature of the ducting itself can cause problems. Coarse internal corrugations will markedly
restrict airflow, and so ducting should have as smooth a bore as possible.
There are two ways of measuring ducting restriction. The first is to insert a digital temperature probe
into the hot air ducting 6” from the heater, and measure the temperature rise as the heater runs.
Clearly if the airflow is restricted, heat will build up in the heater and the temperature will rise. After
about 15 minutes, the hot air temperature should have stabilised, and should not exceed about
140°C. If it does, then there is a restriction somewhere.
A more accurate way is to measure the pressure drop across the heater with a manometer. A small
pipe is inserted into inlet and outlet ducts, and the heater run on ventilation (heating would cause the
air to expand and give faulty readings). Total pressure drop across the heater should not exceed
0.6” water gauge. A drop greater than this is indicative that either the fan is trying to push air against
a restriction, so causing a positive outlet pressure, or alternatively trying to suck air against an inlet
restriction, so causing a negative inlet pressure. Either way, restrictions should be located and
removed.
Ducting problems will also impair heating performance, and often a common sense approach to
problems of this nature will produce results.
Fuel
All heaters are designed to use 5/16” (7mm) bore fuel line, and all pumps should lift fuel a maximum
of 1 metre, or pull horizontally a maximum of 2 metres. An in-line filter should be gravity fed since
heaters will not pull fuel through them. If fuel lines exceed these distances then a supplementary
hardi pump should be fitted as near to the tank as possible. Any such pump should be arranged to
push fuel through a filter, not pull. The pump should be wired in parallel with the solenoid valve so
that it will only pump when this is open.
In general, it is always good practice to give the heater its own separate fuel supply, preferably
through its own separate standpipe. Teeing into engine fuel lines or filters is not to be recommended.
17
Page 18

Workshop Manual—HL30/38/65/95/125 Model Air Heaters
Visit www.butlertechnik.com for more technical information and downloads.
www.butlertechnik.com
5. Common Installation Problems (ctd)
Wiring and Electrics
Wiring problems account for a large proportion of heater failures. Corrosion is a particular problem,
especially when wiring components are exposed. Tags on control box cables and junctions in Hella
sockets are particularly vulnerable. Many fuseholders seem to develop tired contacts after a few
years. These then become corroded and resistive. Such faults can often be difficult to spot since
voltage only drops off when a load is put on the fuses, so there appears to be a good voltage with
the heater turned off.
Mains cables can be too small, resulting in voltage drop when starting and running. This can be a
particular problem in vehicles with SA heaters where switchgear is at one end and the heater is at the
other. In general, mains cable cross sectional areas are given with the wiring diagrams. Note that
cable sizes should be increased for long cable runs. Any voltage drop on starting of more than 1 volt
is not acceptable, and mains cable size should be increased.
Low voltage manifests itself in two ways. Bad starting can be due to low glowplug voltage, and to a
certain extent this can be compensated by adjusting the glowplug dropper resistor slide and
increasing the glowplug voltage to 4.5v. Low voltage while running produces carbonning, particularly
of the atomiser pipes. In bad cases, the heater will not keep running, particularly on reduced heat.
Battery capacity is also important, particularly where vehicles may be stood for some time without
engine charging. In general, a fully charged battery will only deliver half of its capacity before voltage
drops to an unacceptable level. So a 100 amp/hour battery will only have about 50 amp/hours
available for the heater, and this does not take into account other appliances e.g. lights, which may
be run from the same battery.
As an example, an HL65 uses 90 Watts = 90÷12 = 7.5 amps on a 12v system.
A single 100 Ah battery will therefore run this heater for 50÷7.5 = 6.6 hours. (Assuming that it is fully
charged in the first place).
Usually, the best system is to have separate batteries for the heater and vehicle with a split charge
system. Battery capacity of about 120 Ah will generally be adequate for most requirements for an
HL30, and 200 Ah for larger heaters, although this may need to be tailored to individual
requirements.
Exhaust System
In general, any pipe placed on an exhaust stub will, to a certain extent, restrict the exit of exhaust
gasses and cause carbonning. As a general rule, 1/2 metre of exhaust on an HL30 and 1 metre on
larger heaters is a recommended maximum, but even this will cause some build up of deposit. An
exhaust break was developed for use with larger heater exhausts, but was of limited success. It is
preferable to arrange a heater installation so that long exhaust lengths are avoided, and with the
HL30 and HL65, discharge directly through the floor using only the exhaust downpipe and
recommended exhaust shield. This is not possible in all installations, however.
18
Page 19

Workshop Manual—HL30/38/65/95/125 Model Air Heaters
Visit www.butlertechnik.com for more technical information and downloads.
www.butlertechnik.com
6. Faultfinding
This section is intended to give some guide to common problems and their solutions. It is not
intended as a comprehensive guide.
Problem
Possibilities
with a short fuel line and jerry cab, bypassing the installation fuel line.
if the heater now runs well, either fit a supplementary pump or clean
out the fuel line.
2. Blocked CA downpipe. On a boat this could be due to water, on a vehicle
usually mud.
3. Glowplug voltage too low. Check and adjust if necessary.
4. Low voltage at heater. Check this at the solenoid terminals and remedy if too
low. Run the engine whilst starting.
5. Glowplug circuit faulty—check fuseholder.
6. Atomiser blocked. Examine the exhaust pipe. If it is excessively black and
sooty, this is highly likely.
7. Mains cables too small resulting in excessive voltage drop during start up.
If the heater is some years old, there really is no easy remedy and a full overhaul
is recommended.
Problem
Possibilities
2. Faulty OH Thermostat on SA heaters.
3. Faulty relay circuit or relay. This can be checked on SA heaters by
bridging the HD thermostat leads while the heater is in the start cycle—
the green light should glow and the heater stays on. If it does not stay
on, the relay is faulty.
4. Control box faulty on FA heaters.
Problem
Possibilities
2. Fluff build up blocking outlet pipes or grilles.
3. Restricted inlets/outlets.
4. Faulty OH thermostat on SA heaters.
5. Too many sharp ducting bends.
6. Heater sited in too hot an environment (e.g. engine room).
Problem
Possibilities
2. If running hot, dirt preventing solenoid valve closing, or worn seal on
solenoid armature.
Problem
Possibilities
afterwards.
2. If this continues after 10 minutes of running, the heat exchanger backwall
needs to be resealed.
Heater appears to be attempting to fire, but cuts out.
1. Fuel starvation. Is the heater trying to lift fuel too far? Run the heater
Heater ignites and runs perfectly, but cuts out at the end of the start cycle.
1. Faulty HD Thermostat.
Heater repeatedly overheats or blows overheat fuses.
1. Crushed ducting.
Heater continues to run after being turned off.
1. If running cold, faulty HD thermostat.
Heater smokes and drips fuel from fuel drain.
1. Bad starting. Fuel built up during false starts will drain away for some time
19
Page 20

Workshop Manual—HL30/38/65/95/125 Model Air Heaters
Visit www.butlertechnik.com for more technical information and downloads.
www.butlertechnik.com
Figure 1—HL3003
20
Page 21

Workshop Manual—HL30/38/65/95/125 Model Air Heaters
Visit www.butlertechnik.com for more technical information and downloads.
www.butlertechnik.com
Figure 2—HL3003
21
Page 22

Workshop Manual—HL30/38/65/95/125 Model Air Heaters
Visit www.butlertechnik.com for more technical information and downloads.
www.butlertechnik.com
Figure 3—HL3003
22
Page 23

Workshop Manual—HL30/38/65/95/125 Model Air Heaters
Visit www.butlertechnik.com for more technical information and downloads.
www.butlertechnik.com
Figure 4
Figure 5
23
Page 24

Workshop Manual—HL30/38/65/95/125 Model Air Heaters
Visit www.butlertechnik.com for more technical information and downloads.
www.butlertechnik.com
Figure 6
24
Page 25

Workshop Manual—HL30/38/65/95/125 Model Air Heaters
Visit www.butlertechnik.com for more technical information and downloads.
www.butlertechnik.com
Figure 7—HL6511
25
Page 26

Workshop Manual—HL30/38/65/95/125 Model Air Heaters
Visit www.butlertechnik.com for more technical information and downloads.
www.butlertechnik.com
Figure 8—HL6511
26
Page 27

Workshop Manual—HL30/38/65/95/125 Model Air Heaters
Visit www.butlertechnik.com for more technical information and downloads.
www.butlertechnik.com
Figure 9
27
Page 28

Workshop Manual—HL30/38/65/95/125 Model Air Heaters
Visit www.butlertechnik.com for more technical information and downloads.
www.butlertechnik.com
Figure 10
28
Page 29

Workshop Manual—HL30/38/65/95/125 Model Air Heaters
Visit www.butlertechnik.com for more technical information and downloads.
www.butlertechnik.com
Figure 11—HL9503.32
29
Page 30

Workshop Manual—HL30/38/65/95/125 Model Air Heaters
Visit www.butlertechnik.com for more technical information and downloads.
www.butlertechnik.com
Figure 12
Figure 13
30
Page 31

Workshop Manual—HL30/38/65/95/125 Model Air Heaters
Visit www.butlertechnik.com for more technical information and downloads.
www.butlertechnik.com
Figure 14
31
Page 32

Workshop Manual—HL30/38/65/95/125 Model Air Heaters
Visit www.butlertechnik.com for more technical information and downloads.
www.butlertechnik.com
Figure 15
Figure 16
32
Page 33

Workshop Manual—HL30/38/65/95/125 Model Air Heaters
Visit www.butlertechnik.com for more technical information and downloads.
www.butlertechnik.com
Figure 17—HL12503
33
Page 34

Workshop Manual—HL30/38/65/95/125 Model Air Heaters
Visit www.butlertechnik.com for more technical information and downloads.
www.butlertechnik.com
Figure 18
34
 Loading...