

WeatherTech No-Drill MudFlap User Manual
MudFlap
Installation Instructions
Thank you for purchasing the WeatherTech® No-Drill MudFlap. Please read this installation guide to
thoroughly familiarize yourself with the steps to install the MudFlap on your vehicle. When properly installed,
the WeatherTech® No-Drill MudFlap will provide you with years of protection.
WARNING!
Allen Wrench
Plastic
Rivets
Hardware Included
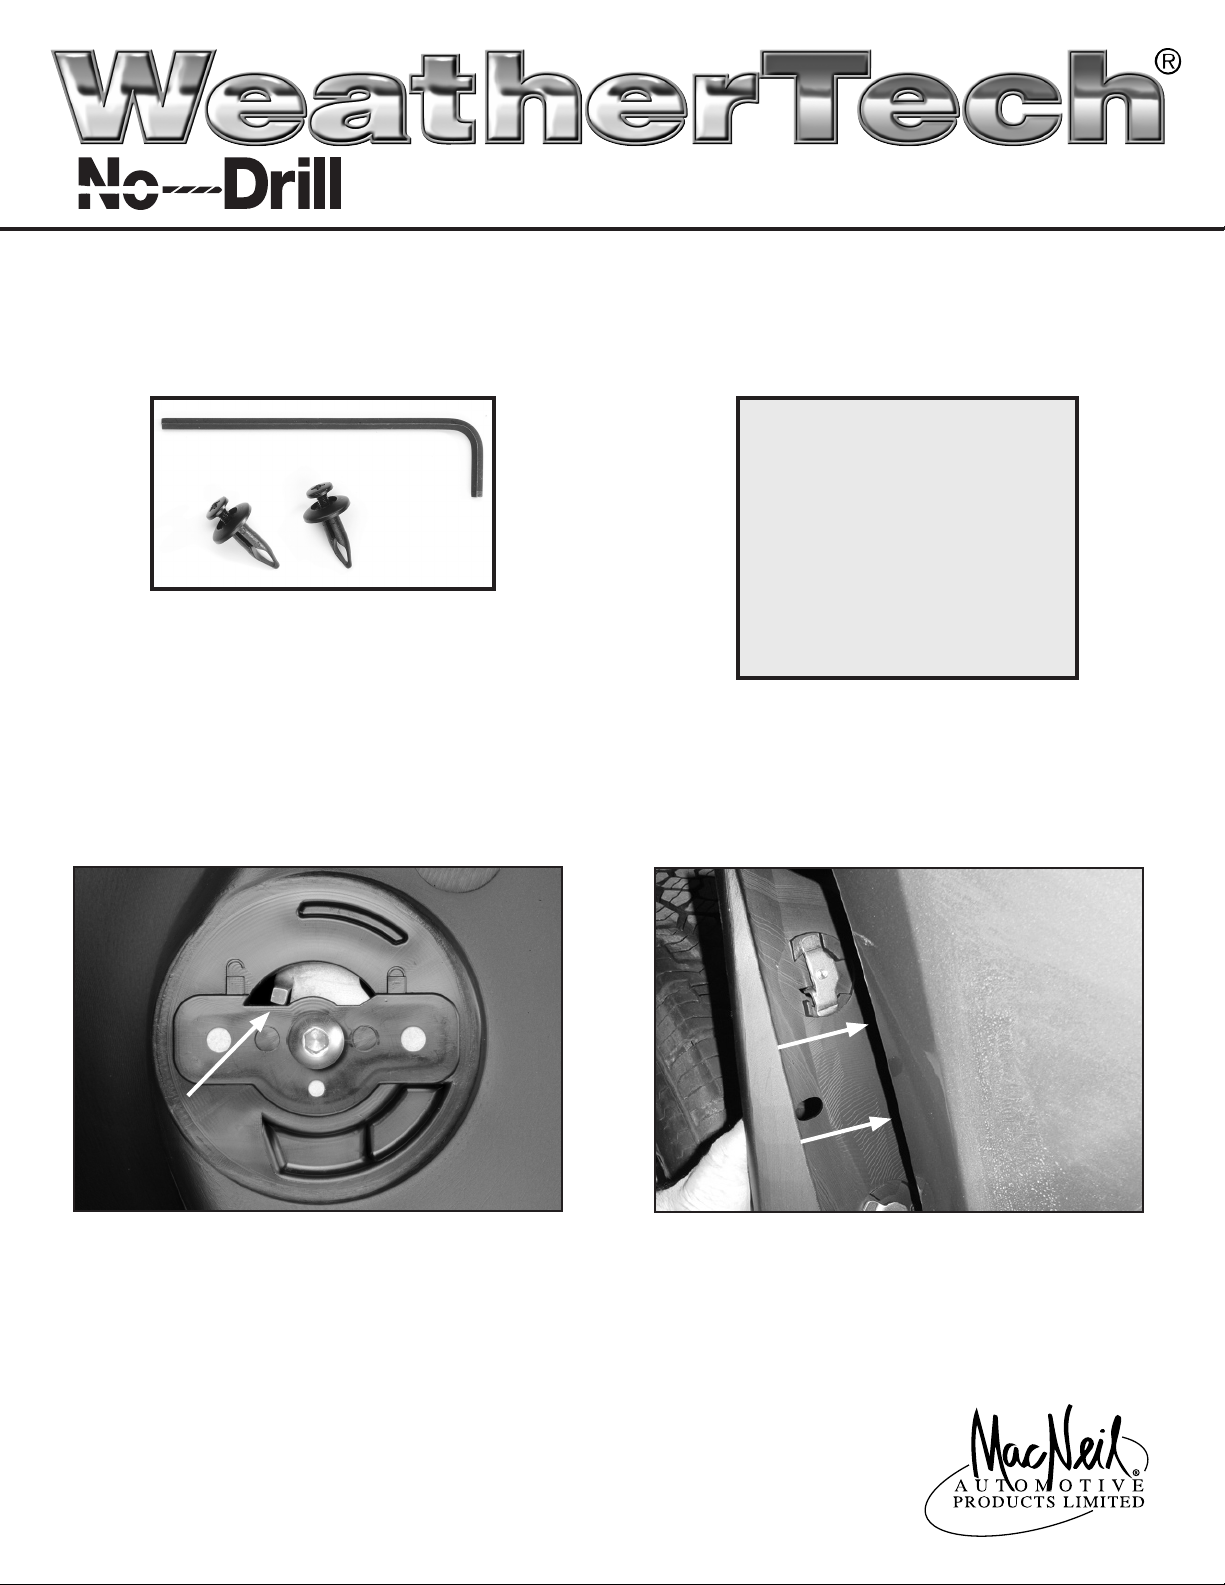
Your MudFlap kit includes an Allen Wrench
and the plastic push rivets pictured here.
The MudFlap is designed to
fit vehicles with standard size
wheels and tires. Installation
of mud flaps on vehicles with
aftermarket wheels or oversize
tires may interfere with the
MudFlap and will void the
warranty and may damage the
MudFlap or the vehicle.
Start by thoroughly washing your vehicle. Take
care to remove all dirt, debris, and stains from
each fender in the areas corresponding to where
1
1
the MudFlaps will be installed.
3
3
Unlocked Position
Identify the driver's side MudFlap by locating the
“LH” mark located centrally in the recessed
cavity on the tire side of the MudFlap. Ensure that the
QuickTurn™ fasteners are in the fully unlocked position using the Allen wrench provided.
Begin driver's side MudFlap installation by
parking the vehicle on level ground. Begin with
2
2
4
4
Position the smooth surfaced portion of the MudFlap so
that it contours firmly against the fender as shown.
IMPORTANT - Ensure that the QuickTurn™ fasteners
remains in the fully unlocked position during this step.
the left side.
Unlocked Position
MF013
Questions? Call customer service @ 630.769.1500
Monday thru Friday, 9 a.m. to 5 p.m. Central Time.
2
5
5
1
Locked Position
Locked Position
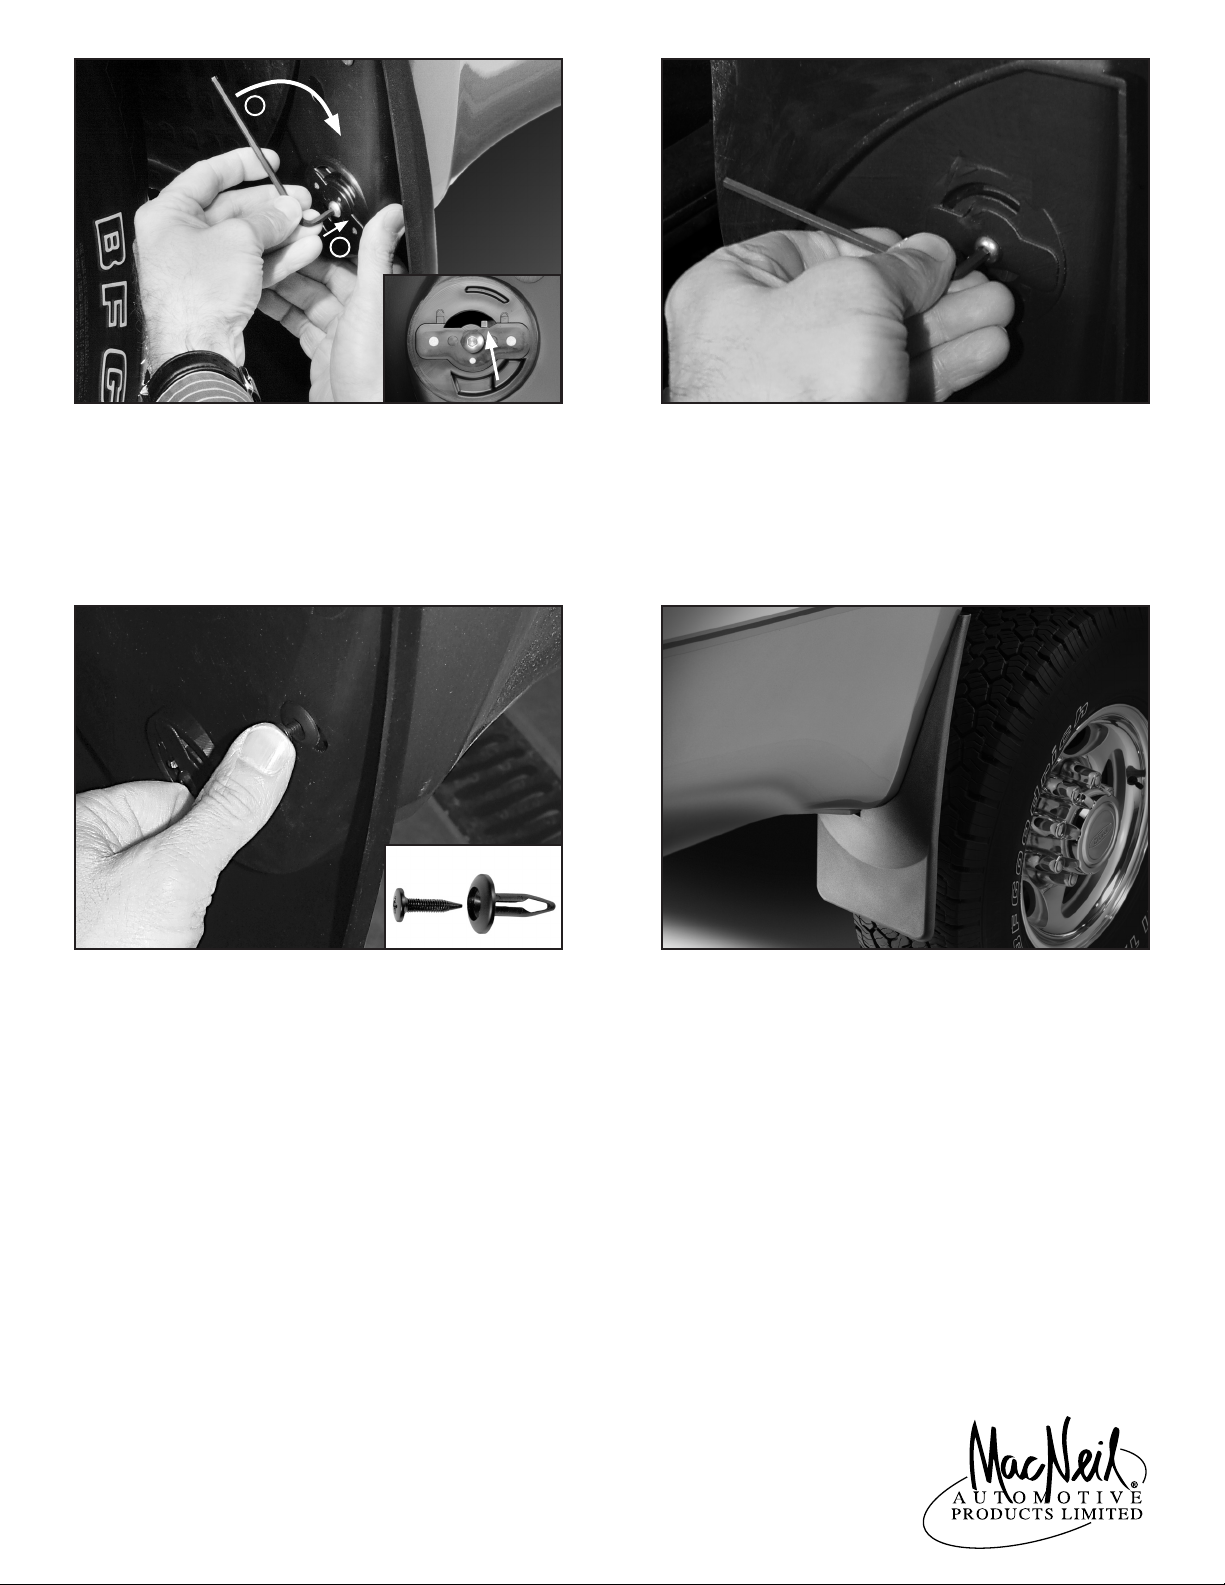
First ensure that the QuickTurn™ fasteners are positioned properly by pressing in the direction indicated
by arrow 1. Then, hand tighten the bottom QuickTurn™
fastener (arrow 2). Verify that this QuickTurn™ fastener
is in the fully locked position.
6
6
Repeat this process with the top QuickTurn™ fastener.
7
7
Pin Base
Prepare the plastic rivet for installation by removing
the pin from the base. Insert the base fully into the
top hole of the MudFlap and through the existing hole
in the vehicle. Insert the pin into the base and press
firmly to secure the rivet.
Begin passenger side installation by
parking the vehicle on a level surface.
9
9
Repeat steps 3-7.
8
8
Congratulations!
Your new WeatherTech® No-Drill MudFlaps
have been installed!
MF013
Your WeatherTech® No-Drill MudFlap carries a
Lifetime Warranty against defects in materials and
workmanship when installed correctly.
Questions? Call customer service @ 630.769.1500
Monday thru Friday, 9 a.m. to 5 p.m. Central Time.
 Loading...