

Page 1
Replacing Bulkhead Window Panels for
PARTS LIST
Replacement window panel
2
Mounting screws
12
TOOLS REQUIRED
Installation may require all or some of these items:
Power Drill
3
/16” drill bit
1/8” hex driver bit or wrench -OR-
T25 star driver or bit
Hand or powered bit driver (optional)
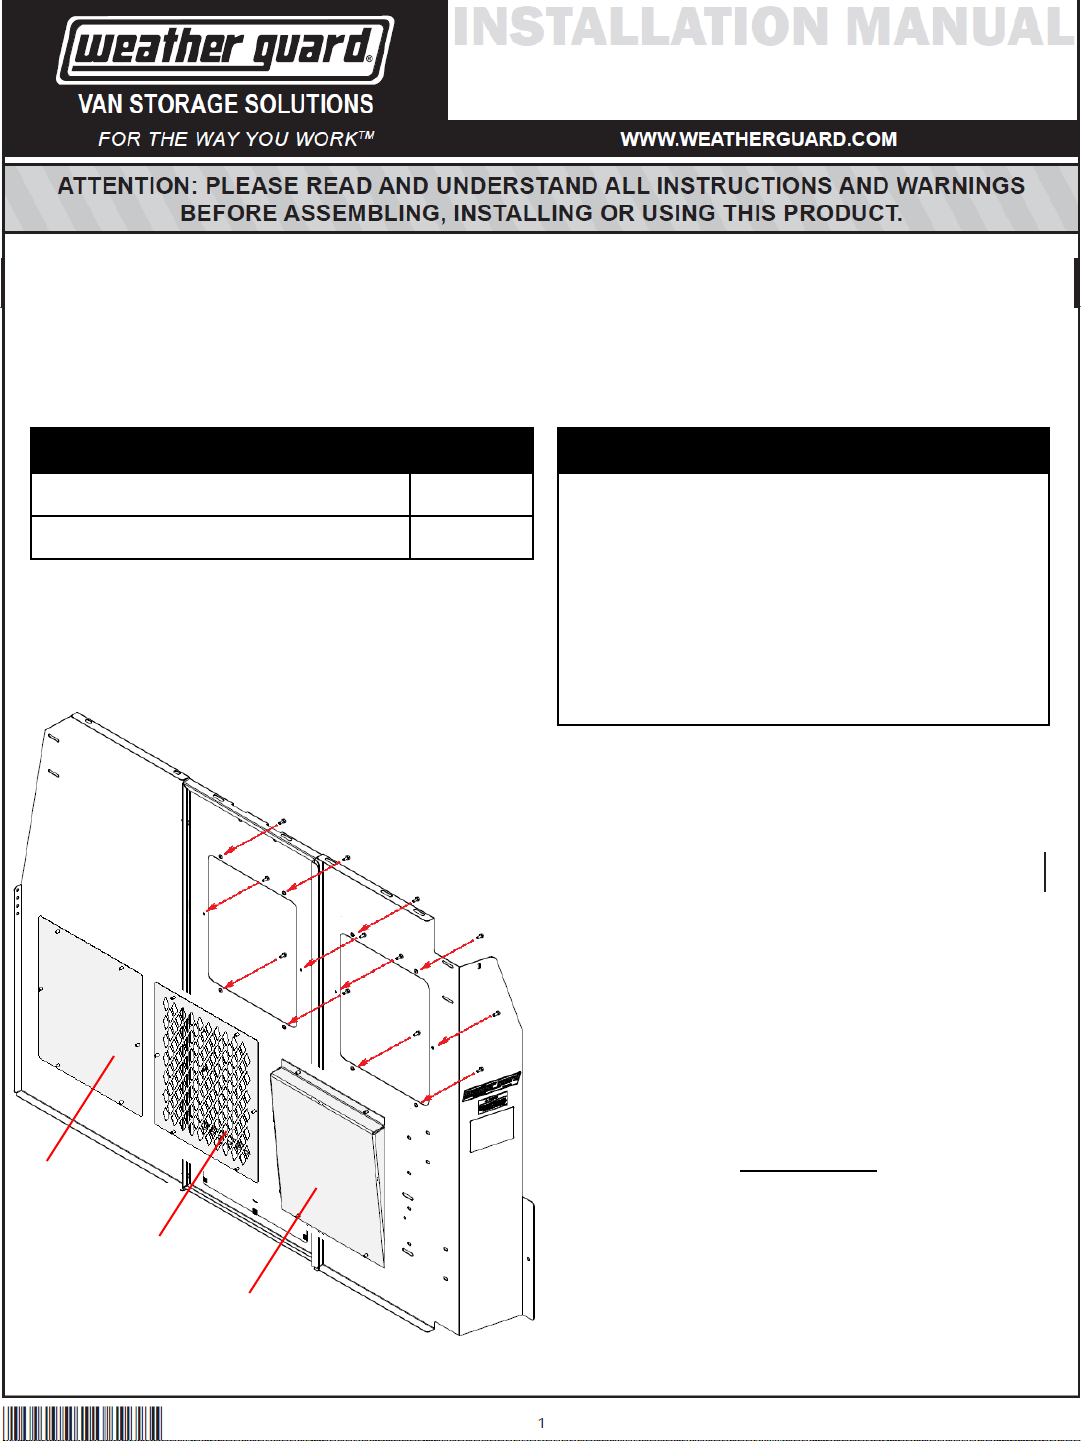
96101-3-01, 96121-3-01 or 96201-3-01 Bulkheads
• These instructions cover replacement of window panels for WEATHER GUARD®model
96101-3-01, 96121-3-01 or 96201-3-01 Bulkheads.
• Installation will be faster if all tools and parts required to change the window panels are readily
available and close to the installer.
• Always use personal protection equipment when installing WEATHER GUARD® van products
and especially when power tools are used.
ATTACH MOUNTING
SCREWS FROM
PASSENGER
COMPARTMENT
Solid Panel:
96903-3-01
Mesh Panel:
96902-3-01
Replacement
Window
70215
STEP 1: Remove existing windows from the
bulkhead panels.
Some windows may be riveted to the
bulkhead panels. In this case, carefully drill
out the rivets with a 3/16” drill bit.
STEP 2: Working from the cargo-side of the
bulkhead, place the new window, vent, or
solid panel over the opening in the
bulkhead.
STEP 3: Working from the passenger side of the
bulkhead, insert the mounting screws
through the bulkhead and engage with the
threaded nuts pressed into the new
window, vent, or solid panel.
IMPORTANT:
DO NOT MOUNT REPLACEMENT PANEL WITH
SCREWS FACING INTO THE PASSENGER
COMPARTMENT.
STEP 4: Tighten all mounting screws on the panel.
Part No. 24-0321 REV. B ECN 5315 05/13
Page 2

Part No. 24-0321 REV. B ECN 5315 05/13
 Loading...