

Page 1
ACCESSORY SHELF DOOR
INSTALLATION MANUAL
ATTENTION: PLEASE READ AND UNDERSTAND ALL INSTRUCTIONS AND WARNINGS BEFORE ASSEMBLING, INSTALLING OR USING THIS PRODUCT.
WARNING – NOTICE –
These instructions are to be followed using the parts and fasteners
supplied for proper installation. Any modifications or improper
installation of this product will create a hazardous condition that
can cause property damage, serious personal injury or death.
Approximate Assembly and Installation Time:
20 min. (.3 hours) depending on van equipment
installation experience.
B
Any modification or unintended use of this product shall immediately
void all manufacturers warranties. Manufacturer disclaims all liability
for injuries to persons or property resulting from any modification
to, or unintended use of this product.
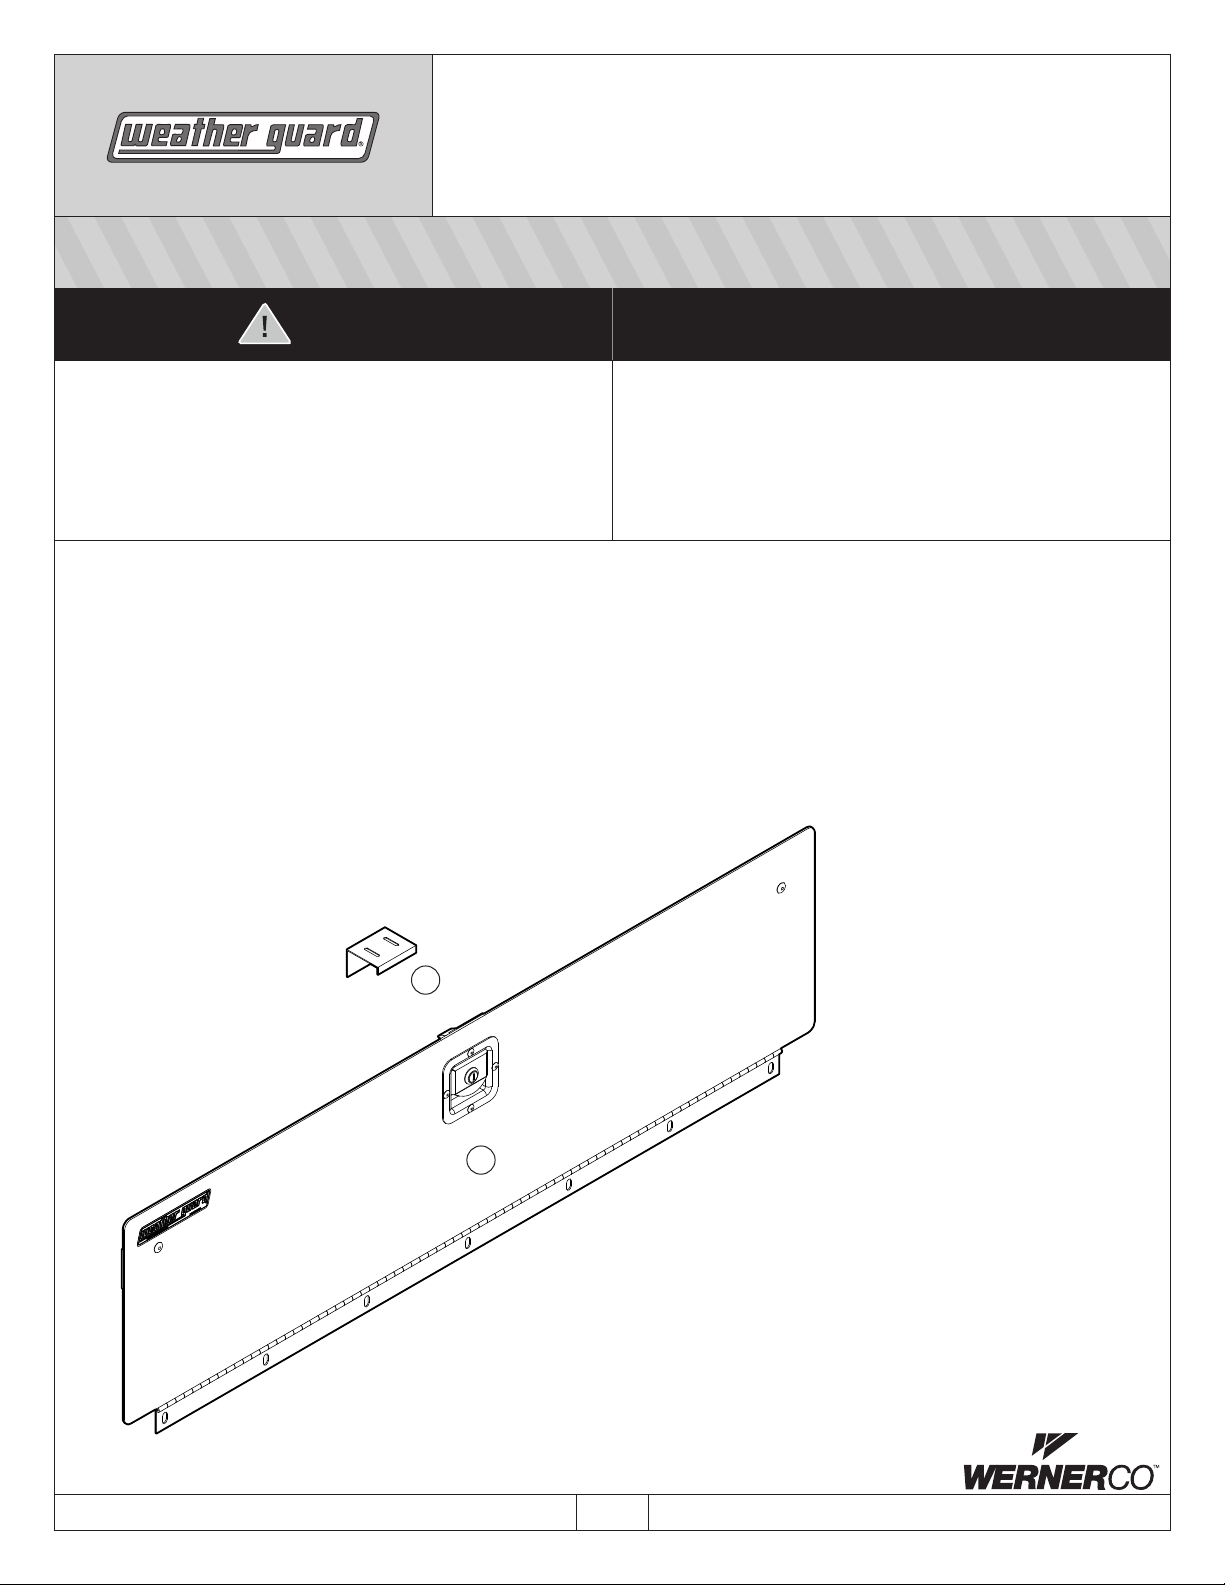
PARTS
Item Qty. Description
A 1
B 1
TOOLS REQUIRED
• Ruler
•
Open End Wrenches: (2) 7/16"
Door Assembly
Latch Plate
1 Bolt Kit #32-0168
A
PAGE 1IF YOU HAVE ANY QUESTI ONS, PLEASE CONTACT U S TOLL-FREE AT 1.800.4 56.7865
Part No. 24-0241 REV. B ECN 5305 04/13
Page 2

BOLT KIT #32-0168 NOTE: Depending on your application you may end up with extra hardware after installation is complete.
Qty. Product
15 1/4-20 x 5/8" Hex Head Bolts
Qty. Product
15 1/4-20 Nylon Lock Nuts
KNAACK LLC LIMITED WARRANTY
This LIMITED WARRANTY is made by Knaack LLC, 420 E. Terra Cotta Ave., Crystal Lake, Illinois to the original retail purchaser of KNAACK®
Products.
KNAACK LLC WARRANTS THAT KNAACK PRODUCTS WILL BE FREE FROM DEFECTS IN MATERIAL AND WORKMANSHIP FOR A PERIOD
OF THREE (3) YEARS FROM DATE OF PURCHASE BY THE ORIGINAL RETAIL PURCHASER.
If, before the expiration of the Warranty period, purchaser discovers that the KNAACK Product fails to fulfill the Warranty, purchaser shall contact
Knaack LLC to make arrangements for an inspection of the product. If Knaack LLC determines a defect exists, Knaack LLC shall, at its option and
expense, repair or replace any defective part. All Warranty repairs shall be made by an authorized KNAACK Product dealer or Knaack LLC
approved service company.
This Warranty shall not apply if the KNAACK Product has been subjected to misuse, abnormal service or handling, improper maintenance, or
alterations made by anyone other than a KNAACK Product dealer or a Knaack LLC approved service company.
THE WARRANTY PRINTED ABOVE IS THE ONLY WARRANTY APPLICABLE TO THIS PURCHASE. ALL OTHER WARRANTIES, EXPRESS OR
IMPLIED, INCLUDING BUT NOT LIMITED TO THE IMPLIED WARRANTIES OF MERCHANTABILITY AND FITNESS FOR A PARTICULAR PURPOSE
ARE HEREBY DISCLAIMED.
KNAACK LLC SHALL NOT BE LIABLE FOR ANY INCIDENTAL OR CONSEQUENTIAL DAMAGES ARISING OUT OF ANY BREACH OF THIS
WARRANTY. NOR SHALL THE DAMAGES EXCEED THE RETURN AMOUNT OF THE PURCHASE PRICE PAID BY THE ORIGINAL
PURCHASER.
This Warranty is in lieu of all Warranties express or implied. The terms of this Warranty shall not be modified by any party, their successors or assigns.
This Warranty gives you specific legal rights, and you may also have other rights which vary from state to state.
1 Determine Shelf Door Assembly loaction
on Shelf Unit. Shelves need to be spaced
seven (7) End Panel holes apart (bolt to
bolt) for the door to fit correctly.
Place Door Assembly against the opening
between shelves and fasten hinge to the
row of shelf holes using one (1) 1/4-20 x
5/8" Hex Head Bolts and 1/4-20 Nylon
Lock Nuts
the Shelf Door Assembly will determine the
number of fasteners used.
per hole in hinge. The length of
PAGE 2IF YOU HAVE ANY QUESTI ONS, PLEASE CONTACT U S TOLL-FREE AT 1.800.4 56.7865
Part No. 24-0241 REV. B ECN 5305 04/13
Page 3

2 DOOR ASSEMBLY INSTALL OPTIONS.
Standard Van Shelf Installation
(with bends up).
Fasten
the Latch Plate to the bottom of the shelf 1/2" in from
the front of the shelf using two (2) 1/4-20 x 5/8" Hex Head
Bolts and 1/4-20 Nylon Lock Nuts. Close the Door. If the door
doesn't latch, or is too loose when latched, adjust the latch
plate in or out until the Door latches properly.
Flat Shelf and Welded Shelf Installation
(with bends down).
If installing the Door on a Flat Shelf or Welded Shelf with the shelf
flanges facing down, it will be necessary to mount the Latch Plate
with the long bend facing front. Fasten the Latch Plate to the bottom
of the shelf 1/2" in from the front of the shelf using two (2) 1/4-20 x
5/8" Hex Head Bolts and 1/4-20 Nylon Lock Nuts. Close the Door. If
the door doesn't latch, or is too loose when latched, adjust the latch
plate in or out until the Door latches properly.
1/2"
Latch Plate
installed with
short leg to the
front of the unit
1/2" front of shelf to
front of
Latch Plate
installed with
long leg to the
front of the unit
Latch Plate
1/2"
Count four holes up from hinge and attach
cables from door panel to the inside of the
End Panel flange using two (2) 1/4-20 x
5/8" Hex Head Bolts and 1/4-20 Nylon Lock
Nuts. This will create a 90º angle when
door is down.
INSTALLATION IS NOW COMPLETE.
WEATHER GUARD® products are protected by one or more of the following trademarks: U.S. 842268, 1661625, 1663369, 2228051, 2362167; Canada - 282725; U.K. - 1400720; N.Z. - 296049; Aus.- 761964
PAGE 3IF YOU HAVE ANY QUESTI ONS, PLEASE CONTACT U S TOLL-FREE AT 1.800.4 56.7865
Part No. 24-0241 REV. B ECN 5305 04/13
 Loading...