

Page 1
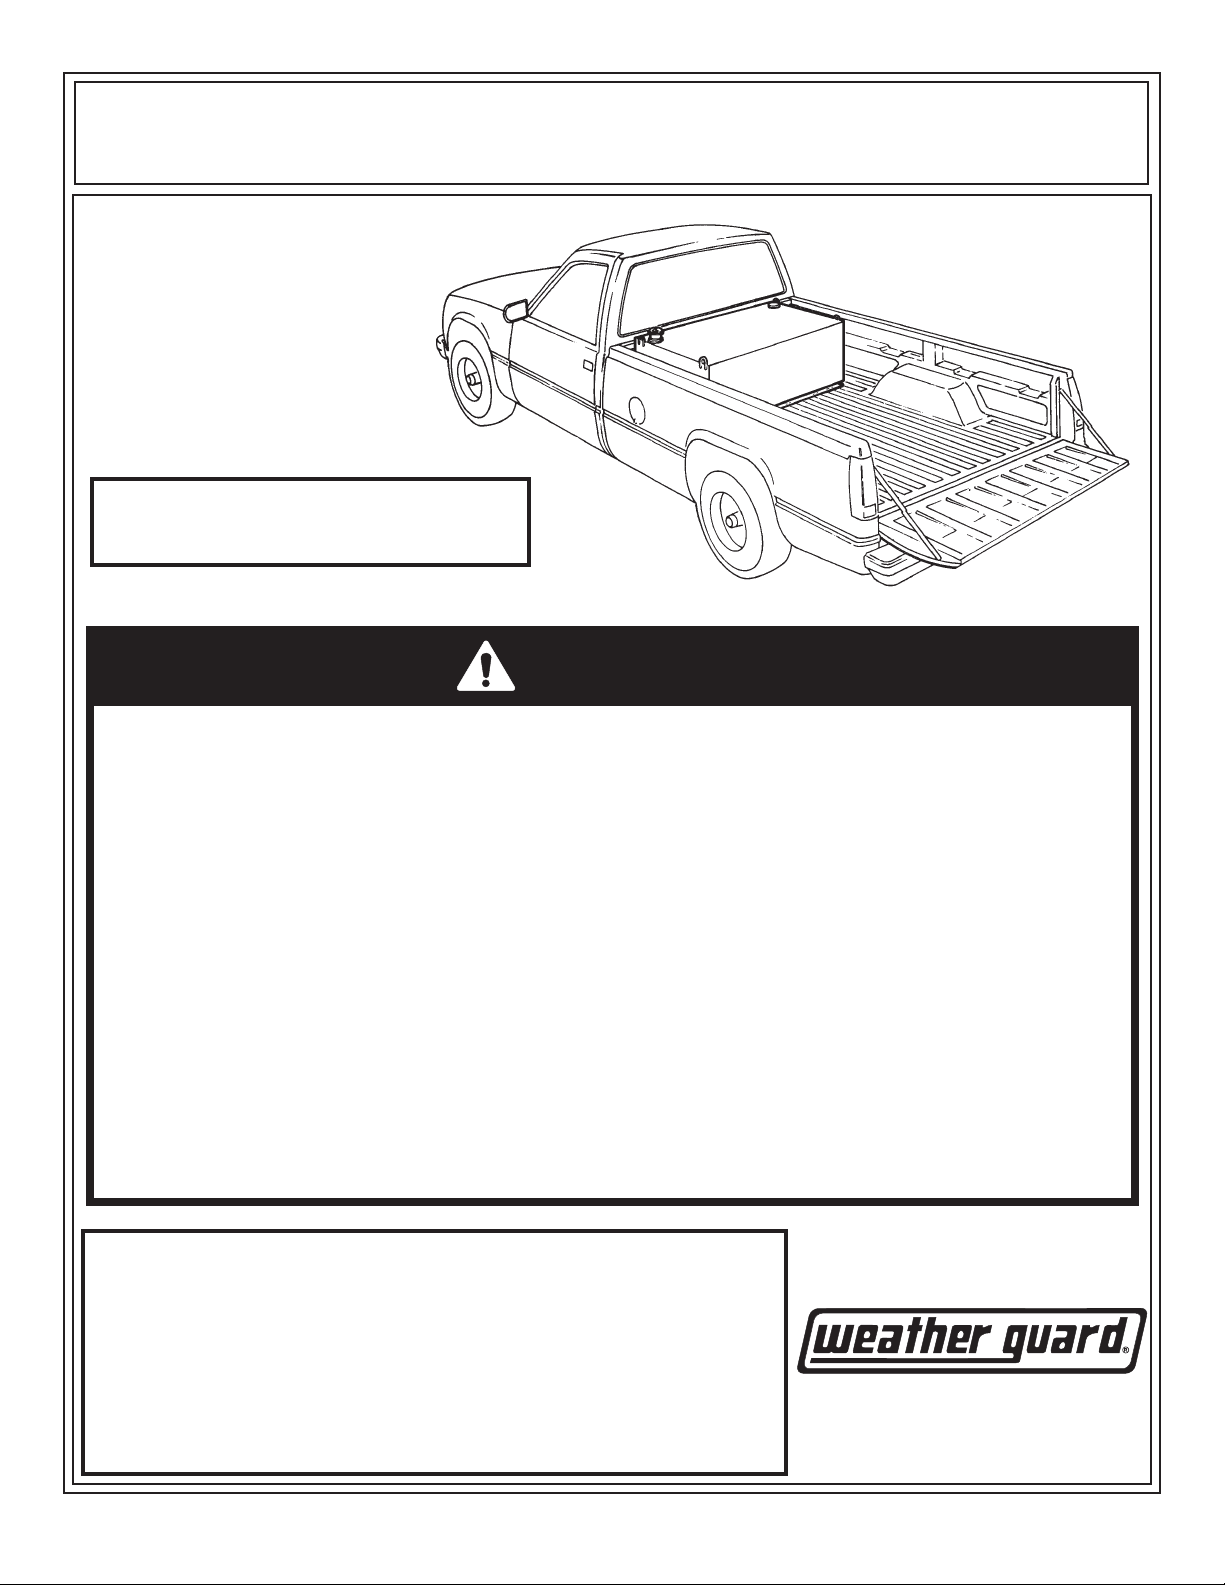
ASSEMBLY AND INSTALLATION INSTRUCTIONS
Transfer Tank - Models 350-3-01, 352-3-01, 354-3-01 358-3-01 and 360-3-01
IMPORTANT
BEFORE YOU BEGIN
Read these instructions and
warnings completely before
installation.
Approximate Assembly & Installation time:
54 min. per unit (0.9 hrs.) depending
on truck equipment installation experience.
DANGER
Use of flammables in this transfer tank may cause an explosion, resulting in serious bodily injury, death,
or property damage.
To avoid such risk:
DO NOT Use this transfer tank to transport, transfer or store flammables, such as gasoline;
DO NOT Use this transfer tank as an auxiliary fuel tank by connecting it to an existing fuel system;
DO NOT Use this transfer tank for fueling aircraft;
DO NOT Modify this transfer tank in any way or use it for any purpose other than its intended use.
DO Use this transfer tank only for the transport, transfer or storage of diesel fuel only.
DO Use this transfer tank only in fueling land-based motor vehicles and equipment;
DO Vent this transfer tank at all times to allow for fuel expansion and to prevent vacuum during
fluid or fuel removal.
NOTE:
This transfer tank does not comply with the following specifications:
• Title 49 of the Code of Federal Regulations for the interstate
transfer of flammables, explosives, hazardous materials and
hazardous wastes.
• Underwriters' Laboratories of Canada C142.13 requirements
for transportation of flammables and combustible liquids.
These tanks may also be subject to individual state or province
regulations, compliance with which is the responsibility of the owner.
Part No. 24-3500 REV. N ECN 5282 03/13
Page 2
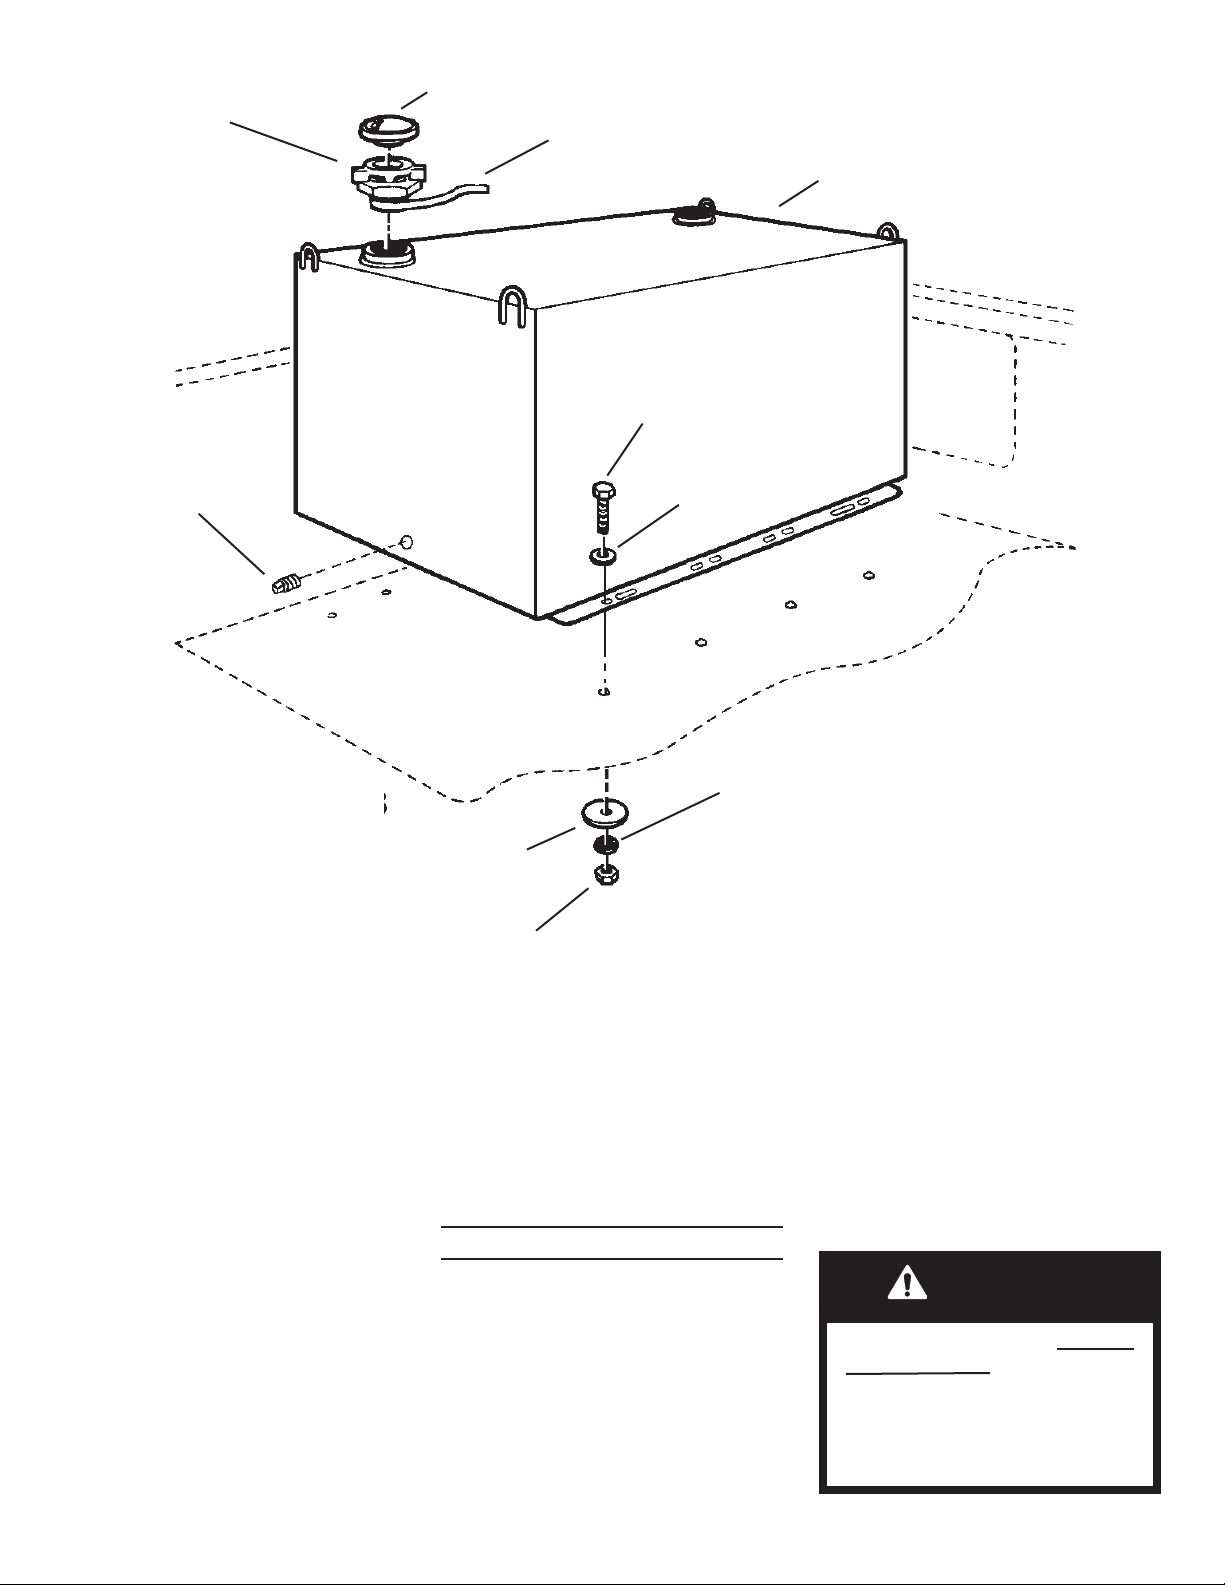
Filler Cap Neck
p/n 21-0552
Vented Fuel Cap
Model 355
Pipe Tape
(local purchase)
Tank
3/8"-16 x 1-1/2" Bolt
(8 places)
Install 1/4" Drain
Plug with Pipe
Tape
MODEL 358-3-01
3/8" Body Washer
(8 places)
PARTS LIST
• Transfer Tank
• Filler Cap Neck
• Filler Cap
• Bolt Kit
TOOLS REQUIRED
• Electric Drill with 7/16" Drill Bit
• 9/16" Open or Box End Wrench (2)
• Pipe Wrench
• Pipe Tape
2
Flat Washer
(8 places)
Lock Washer
(8 places)
3/8"-16 Hex Nut
(8 places)
BOLT KIT
Bolt kit #32-0350 is provided with your
tank. Check this bolt kit to be sure the
following items are included:
Qty. Description
8 3/8-16 x 1-1/2" Hex Bolt
8 3/8-16 Hex Nut
8 3/8" Flat Washer
8 3/8" Lock Washer
8 3/8" Body Washer
1 1/4" Drain Plug
6 Floor Spacer
ASSEMBLY AND
INSTALLATION
INSTRUCTIONS
NOTE: To prevent rust from occurring, touch-up any drilled holes.
1. Install drain plug into drain hole.
2. When installing model 352 Transfer
Tank with a 27" tool box in a full size
short bed pickup, the Tank will need to
be mounted with filler openings toward
center of the bed to avoid tool box hitting wheel wells. Except full size short
wheel base Dodge pickup, where a
27" wide box will not fit.
CAUTION
Transfer Tank bottom must be
fully supported by the floor of
the truck bed so as not to
cause flexing of the tank which
could cause stress cracks and
leakage of the tank.
Page 3

3. Center the tank evenly between
the bed sides and mark eight mounting holes. For the "L" shaped tanks,
mark both holes of the side mounting
angles, as well as four evenly spaced
holes of the longer front mounting
angle. For the Model 358, mark four
holes evenly spaced in each mounting
angle.
WARNING
All floor mounting bolts near
the gas tank area should be
installed from the underside
of the vehicle, to guard against
the gas tank being punctured
in the event of a collision.
FUTURE TRANSFER TANK
REMOVAL
Empty all of the combustible liquid
and use all lifting hooks for safe
and controlled removal of transfer
tank from the vehicle.
CAUTION
To keep debris out of your eyes
when checking the underside
of the vehicle, or when drilling,
always wear protective eyewear.
WARNING
Prior to drilling, so as not to cut
or puncture fuel tanks, fuel
lines, brake lines, electric wires,
etc., check under vehicle for
locations.
4. Remove the tank and drill the
marked hole locations with a 7/16"
drill bit.
NOTE: If any drilled holes fall between the ribs on the lower part of
the floor, it will be necessary to use
Floor Spacers between the Tank
mounting angle and the floor.
5. Replace tank and bolt securely.
6. Before installing Filler Cap Neck,
wrap threaded end with Pipe tape. Do
not use liquid or paste Plumber's pipe
dope. Install the filler cap neck, using
a pipe wrench to tighten.
7. Install Vented Fuel Cap.
NOTE: Use Pipe Tape when using a
manual or electric transfer pump on
the tank.
NOTE: Transfer tank and pump
must be grounded to prevent static
charge build-up.
WEATHER GUARD® PRODUCT
REFINISHING PROCEDURES
All WEATHER GUARD® products are
nished with a polyester powder coat-
fi
ing, and it is important to follow these
procedures to get proper adhesion.
As Knaack LLC. cannot control the
finishing of the products, the warranty
for
WEATHER GUARD® products on
paint is not applicable on refinished
products.
1. Sand the surface to be painted with
180-200 grit sand paper to rough up
the surface. This should be followed
by wet sanding with a 400 grit wet or
dry paper.
2. Wipe down the sanded surface with
ketone based thinner. This removes
the dust and softens the powder coating for better paint adhesion.
NOTE:
When warning decals cannot be read or when they do not stay affixed
to this transfer tank, the owner of this product is legally responsible
for replacing these warning decals for free by contacting:
Knaack LLC at 420 E. Terra Cotta Ave.,
Crystal Lake, Il., 60014 or call 1-800-456-7865 for free replacements.
3. Wipe sanded area with a tack rag
to remove loose dust and particles
before painting.
NOTE: Do not use a lacquer over
the powdered coating.
- NOTICE -
Any modification or unintended use of this product shall immediately void all manufacturer’s warranties.
Manufacturer disclaims all liability for injuries to persons or property resulting from any modification to, or
unintended use of this product.
3
Page 4

DANGER
Danger of explosion. Do not drill, grind, saw, weld or use a torch on this
product. Doing so could result in serious injury, death or property damage.
U.S. - 842268, 1661625, 1663369, 2228051, 2362167; Canada - 282725, 72467, 428587, 1235100, 1218968; U.K. - 1400720; N.Z. - 296049
4
WEATHER GUARD® products are protected by one or more of the following patents or trademarks:
other patents and trademarks pending.
Knaack LLC
If you hav
ATTN: War
420 E. Terr
Crystal Lake, IL 60014
e any questions, please call toll free at 1-800-456-7865.
ranty Claims
a Cotta Avenue
©2013 Knaack LLC
www.weatherguard.com
24-3500 REV. N ECN 5282 03/13
Part No.
 Loading...