

Page 1
ASSEMBLY AND INSTALLATION INSTRUCTIONS
Model 201
IMPORTANT
BEFORE YOU BEGIN
Read these instructions completely before installation.
BOLT KIT
#32-0152 has been provided with
this model. Check this bolt kit to be
sure the following parts are included:
Qty. Description
8 1/4-20 x 5/8" Hex Hd. Bolts
8 1/4-20 nylon lock nut
TOOLS REQUIRED
• Electric drill with 5/16" drill bit
• 7/16" open or box end wrench (2)
INSTALLATION
INSTRUCTIONS
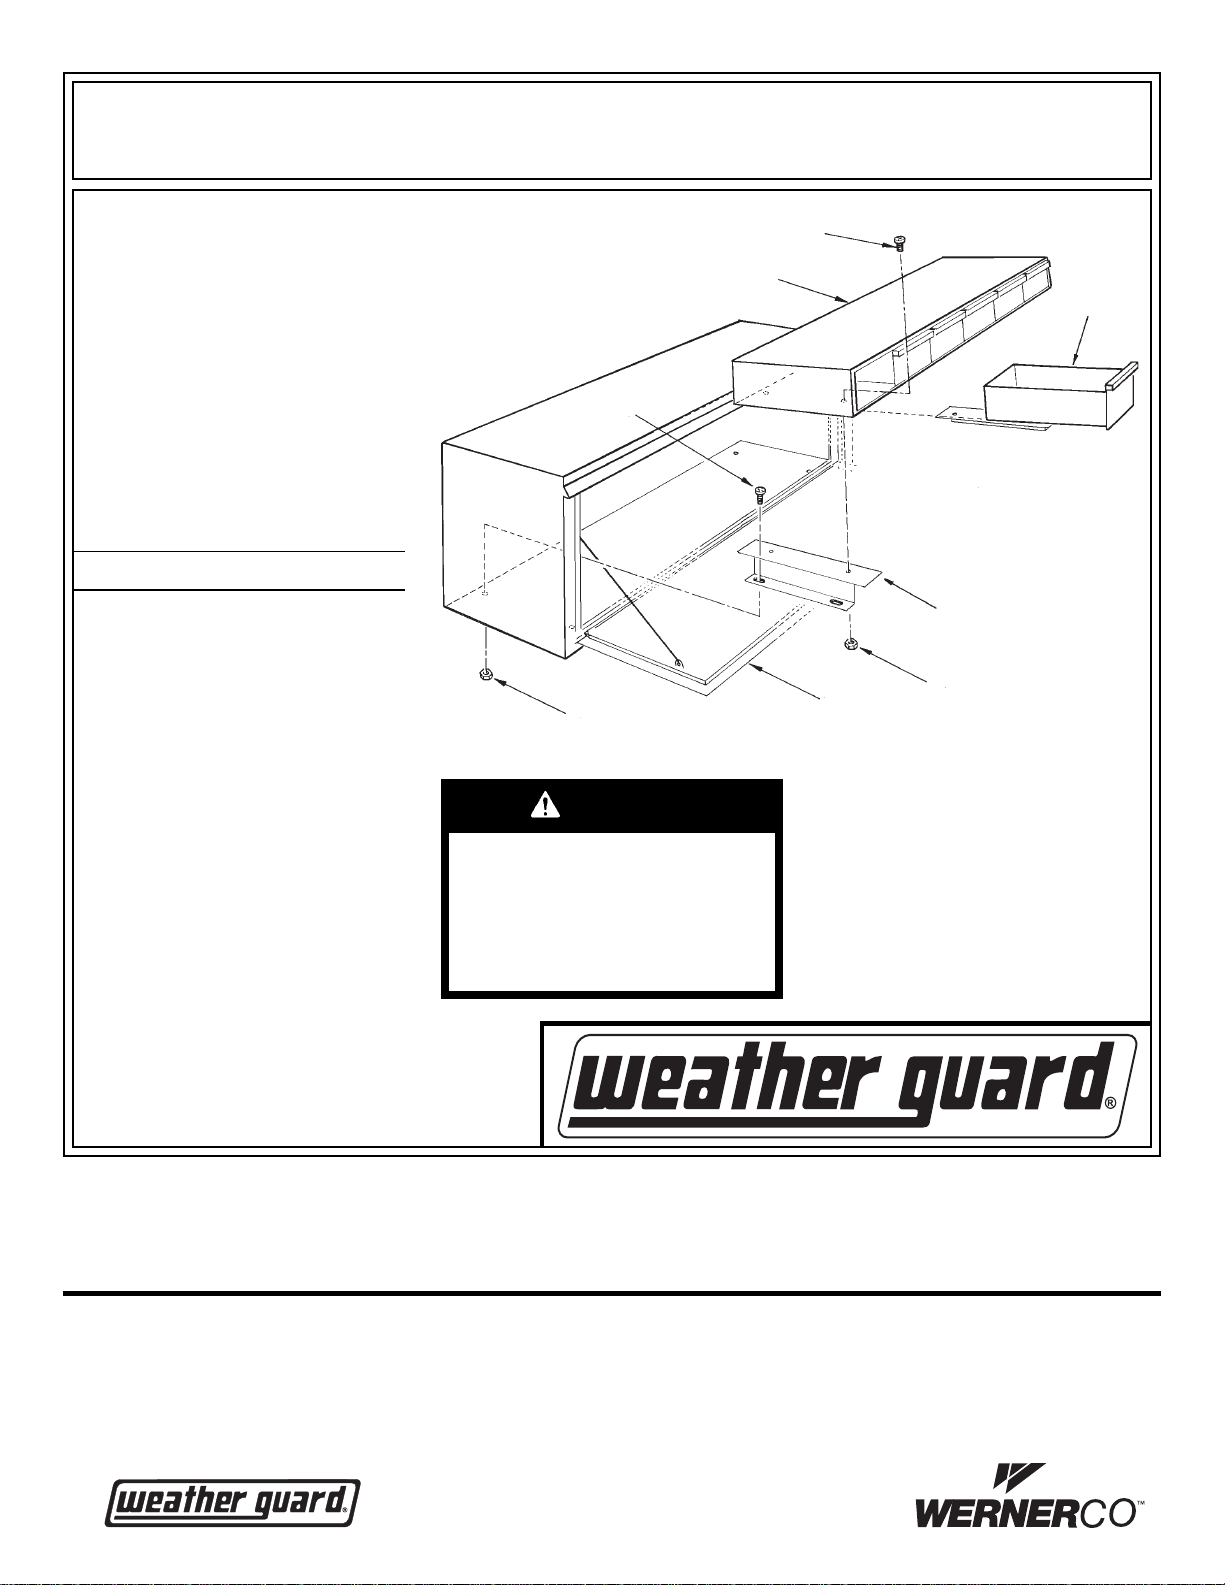
1. Pull both end Drawers out com-
pletely. Place mounting brackets
on the drawer unit, align surface
holes, then fasten.
1/4-20 x 5/8"
Drawer Unit
1/4-20 x 5/8"
Bolt
1/4-20 Nylon
Lock Nut
CA UTION
To keep debris out of your eyes
when checking the underside of
the vehicle, or when drilling, always wear protective eyewear.
Bolt
Mounting
Bracket
Hi-Side
Box
3. Drill the holes in the side box.
4. Place assembled drawer unit into
side box and fasten with remainder
of bolts and nuts.
1/4-20 Nylon
Lock Nut
Drawer
2. Place unit inside, all the way
against the rear wall. Mark through
the mounting bracket holes for location and remove the unit.
- NOTICE -
Any modification or unintended use of this product shall immediately void all manufacturers warranties.
Manufacturer disclaims all liability for injuries to persons or property resulting from any modification to, or
unintended use of this product.
If you have any questions, please give us a call. Call Toll Free 1-800-456-7865
WEATHER GUARD® products are protected by one or more of the following trademarks:
U.S. - 842268, 1661625, 1663369, 2228051; Canada - 282725; U.K. - 1400720; other trademarks pending.
KNAACK LLC
420 E. TERRA COTTA AVENUE - CRYSTAL LAKE, ILLINOIS, 60014 - 815-459-6020
@ 2013 ©Knaack LLC
Part No. 24-0201 REV. D ECN 5315 05/13
 Loading...