

Page 1
ASSEMBLY, WIRING, and SEALANT INSTRUCTIONS
HEAVY-DUTY PROTECT-A-RAIL 1908
PARTS LIST
1 Lower Protect-A-Rail Section
1 Upper Protect-A-Rail Section
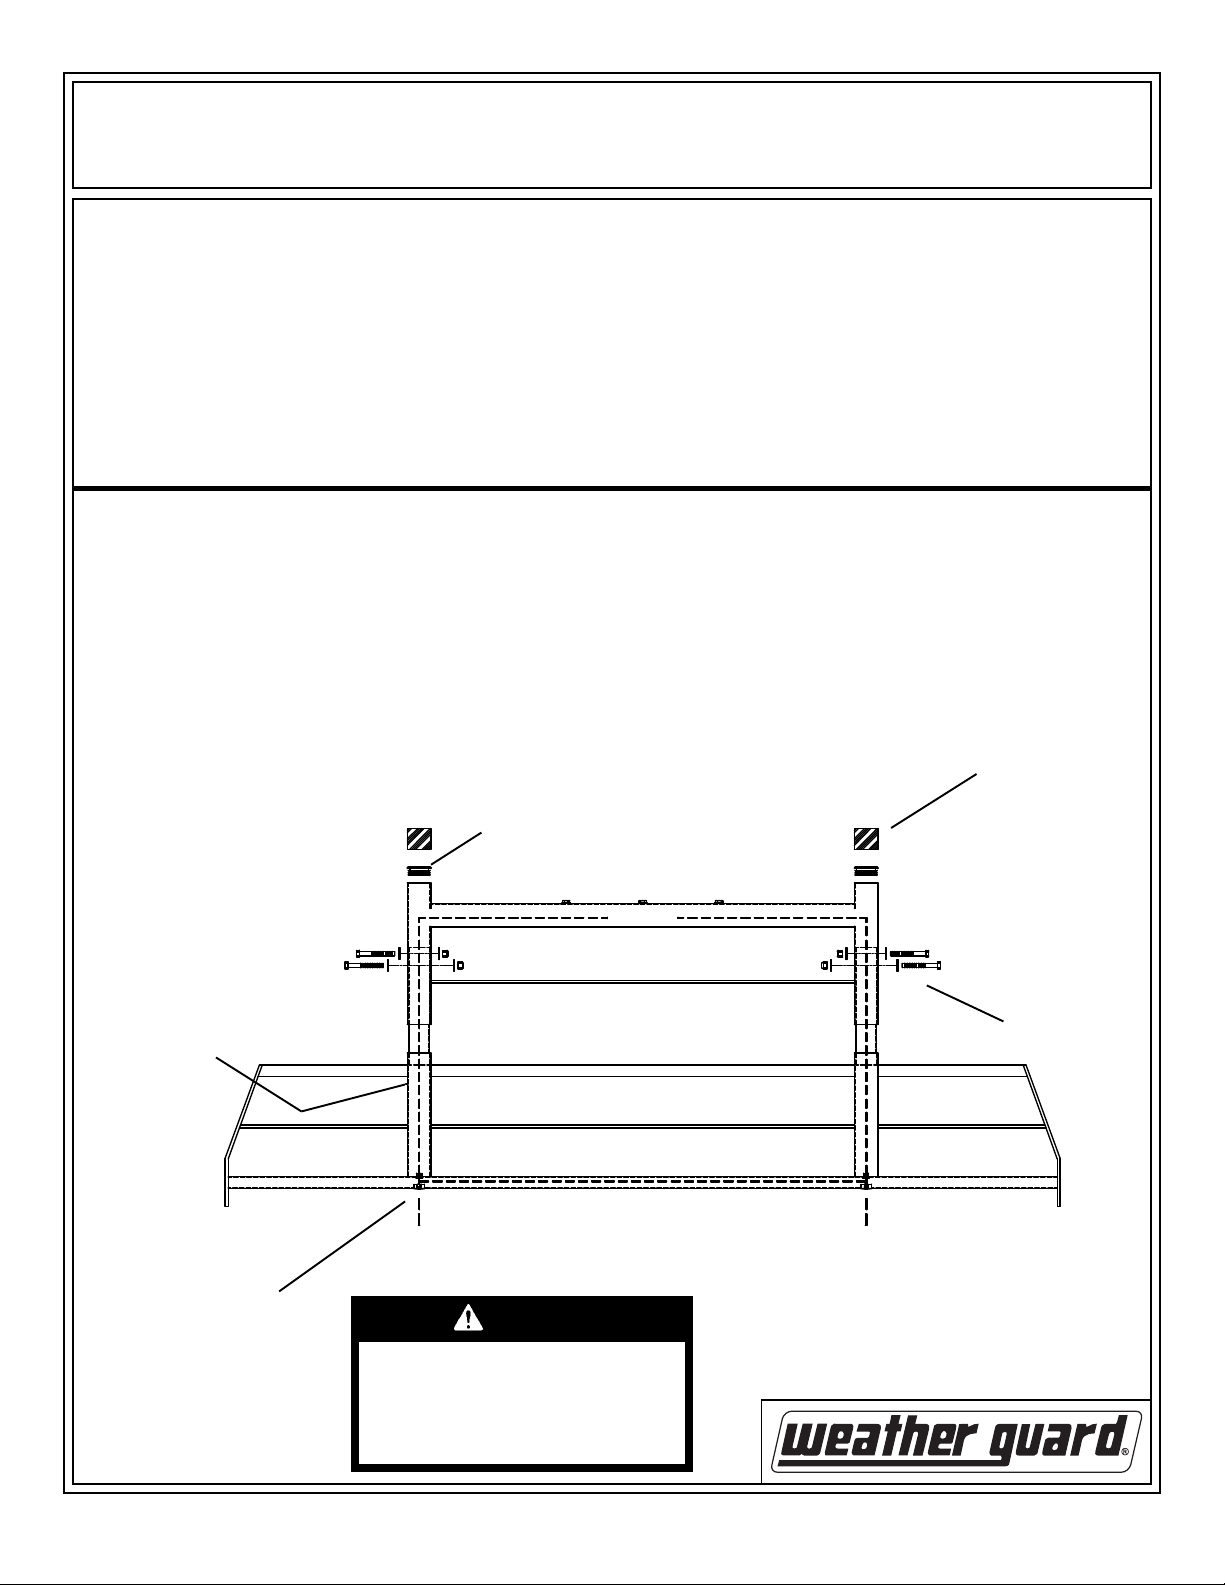
Select the desired height of the Protect-A-Rail for your vehicle and install the four 3/8-16 x 3" fasteners. If you are installing any accessories that require wiring, two snap bushing have been installed internally to protect the wiring. Any additional holes that are added will have to have snap bushings also to protect the wiring. In the bottom of the unit you will
need to install two 7/8" dia. plugs. To install wiring drill a 1/8" dia. hole in the center of the plug(s). Depending on the
quantity and size of the wires this hole may have to be larger. The illustration below shows the open pathways for the
wire. After wiring has been installed, insert the two square plugs into the top openings. Next apply a couple of drops of
the cap adhesive (1/4 oz. tube) to the inside of the red caps and slide them down over the top of the tubes with the
square plugs.
NOTE:
Extra snap bushings
have been provided
for any wiring holes
(7/16" dia.) that are
added.
4 3/8-16 x 3" Hex Head Bolt
4 3/8-16 Nylon Lock Nut
8 3/8 Flat Washer
1 Tube (Black Adhesive Sealant)
2 Red Cap
2 Square Plastic Plug
6 7/16 Dia. Plastic Snap-In Bushing
2 7/8 Dia. Plastic Plugs
1 Tube (Cap Adhesive)
HARDWARE KIT
1/2" Open or Box End Wrench
9/16" Open or Box End Wrench (2)
Electric Drill w/ 1/8" and 7/16" bits
Square Plug
TOOLS REQUIRED
Red Cap
If wiring is desired on
the side areas, drill a
7/16" dia. hole 5/8"
below the 1" x 2" tube.
7/8" dia.
Plug
CAUTION
To keep debris out of your
eyes when drilling, always
wear protective eyewear.
3/8-16 x 3"
Fasteners
1
Part No. 24-0148 REV. B ECN 5315 05/13
Page 2

After the unit is completely wired and all fasteners are tight, you will need to apply the sealant (3 to 4 oz. tube) to all
fasteners, wiring holes, and joints that would allow water into the tubing. The key areas have been circled below. You
will also need to seal any additional holes you drill into the tubing. Warranty will be void if sealant is not applied to all
seams, openings and fasteners. The three accessory fasteners on top of the unit are sealed, but if removed, they will
need to be resealed.
One of the following Mounting Base Kits
will be required with this rack
1916 - Mounting Base Kit for GM
1912 - Mounting Base Kit for Dodge
1913 - Mounting Base Kit for 1997 or
newer Ford light duty trucks
1915 - Mounting Base Kit for Ford super duty
and 1996 or older light duty trucks
- NOTICE -
Any modification or unintended use of this product shall immediately void all manufacturers warranties.
Manufacturer disclaims all liability for injuries to persons or property resulting from any modification to, or
unintended use of this product.
If you have any questions, please give us a call. Call Toll Free 1-800-456-7865
WEATHER GUARD® products are protected by one or more of the following trademarks:
U.S. - 842268, 1661625, 1663369, 2228051, 2362167, 1750034, 2291111; Canada - 282725;
U.K. - 1400720; N.Z. - 296049; Aus. - 761964;
KNAACK LLC
420 E. TERRA COTTA AVENUE - CRYSTAL LAKE, ILLINOIS, USA 60014
815-459-6020
©2003 Knaack LLC
2
Part No. 24-0148 REV. B ECN 5315 05/13
 Loading...