

Page 1
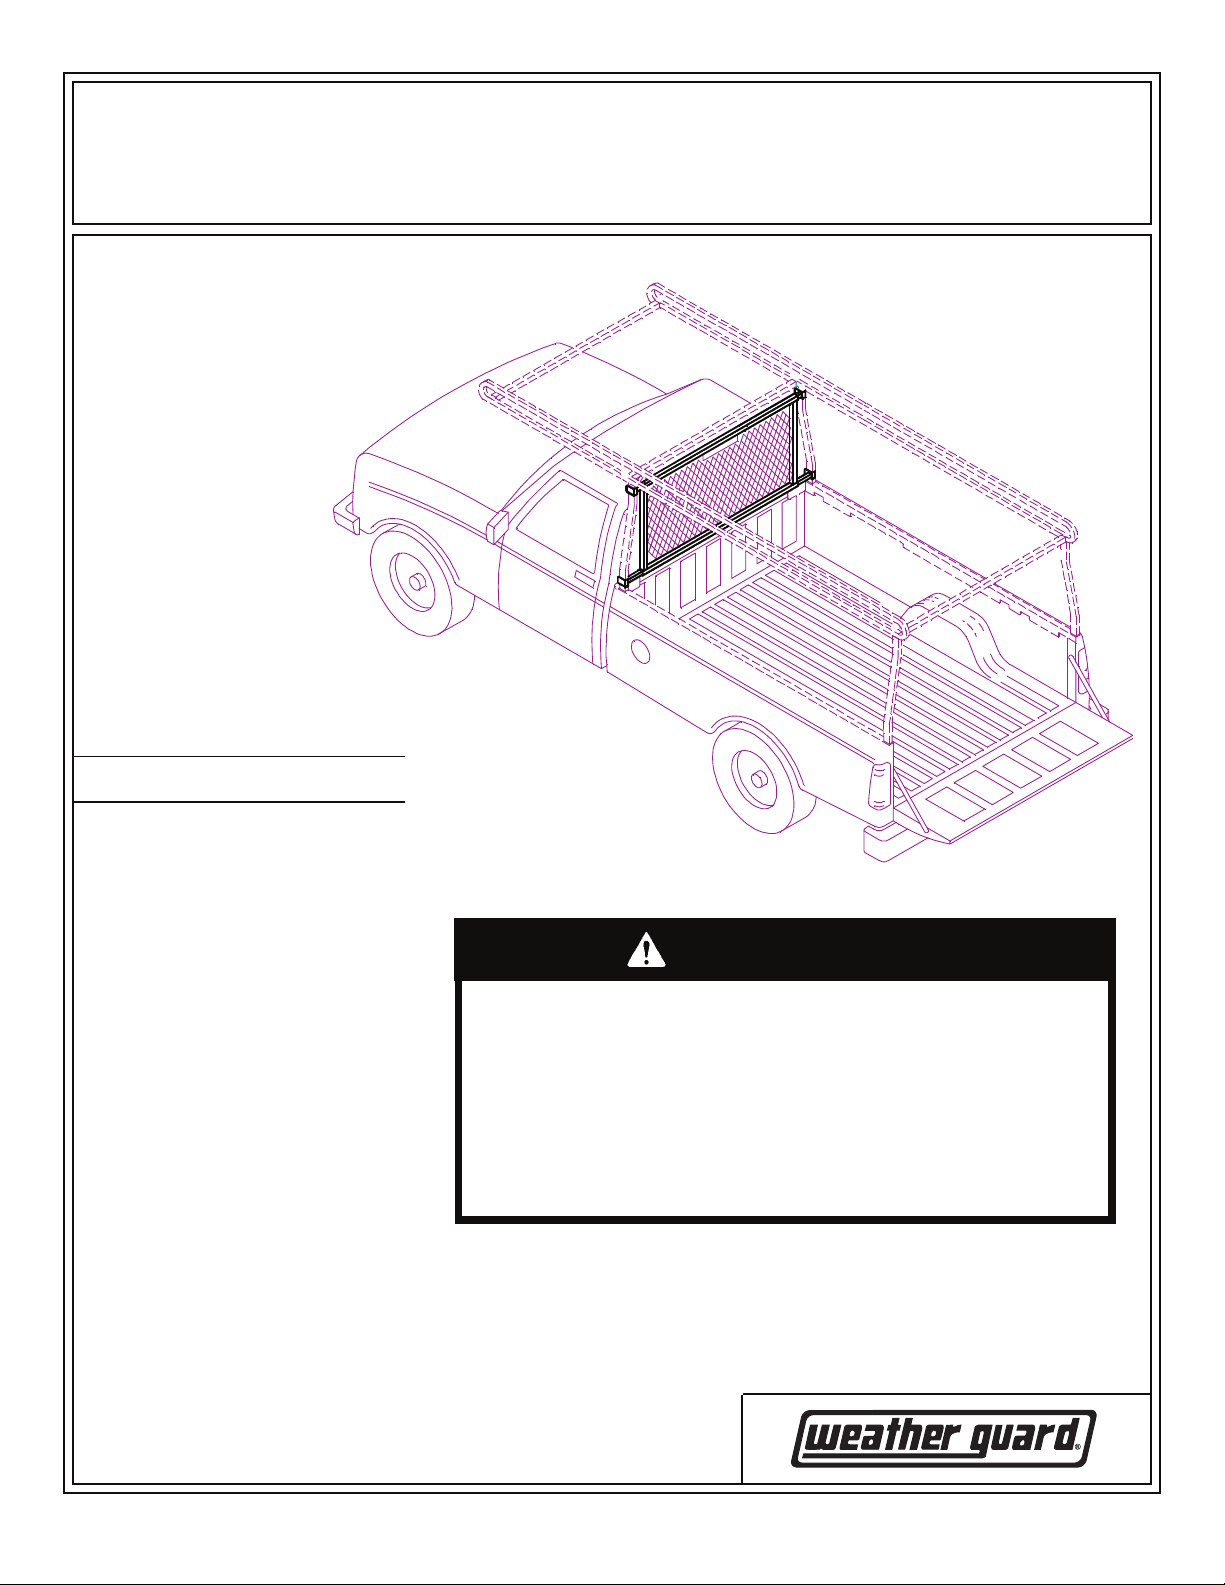
ASSEMBLY AND INSTALLATION INSTRUCTIONS
Model 1285 Accessory Screen
IMPORTANT
BEFORE YOU BEGIN
Read these instructions and
warnings completely before
assembly and installation.
BOLT KIT
Bolt Kit #32-0094 is provided with
your Accessory Screen. Check
this bolt kit to be sure the following
parts are included:
(Fits Model 1280 Full Size Truck Rack)
Quan. Description
4 5/16-18 x 2-1/4 Carriage Bolt
4 3/8-16 x 3/4 Bolt, thd. cutting
4 5/16-18 Nylon Lock Nut
4 5/16 Flat Washer
PARTS LIST
• 1- Screen Assembly
• 4- Screen Sockets
• Tube E-6000 Sealant
TOOLS REQUIRED
• 1/2" & 9/16" Open or Box End
Wrench
WARNING
This product can reduce the driver’s ability to clearly see roadways, vehicular or pedestrian traffic and other objects through
the rear and side windows of the vehicle, which can cause an
accident. Extra precautions should be taken when driving a vehicle with this product. Make all adjustments necessary to ensure maximum visibility, including but not limited to, changing
mirror and seating positions. State and local laws may prohibit
obstruction of windows in a moving vehicle.
Part No. 24-0085 REV. C ECN 5305 04/13
Page 2
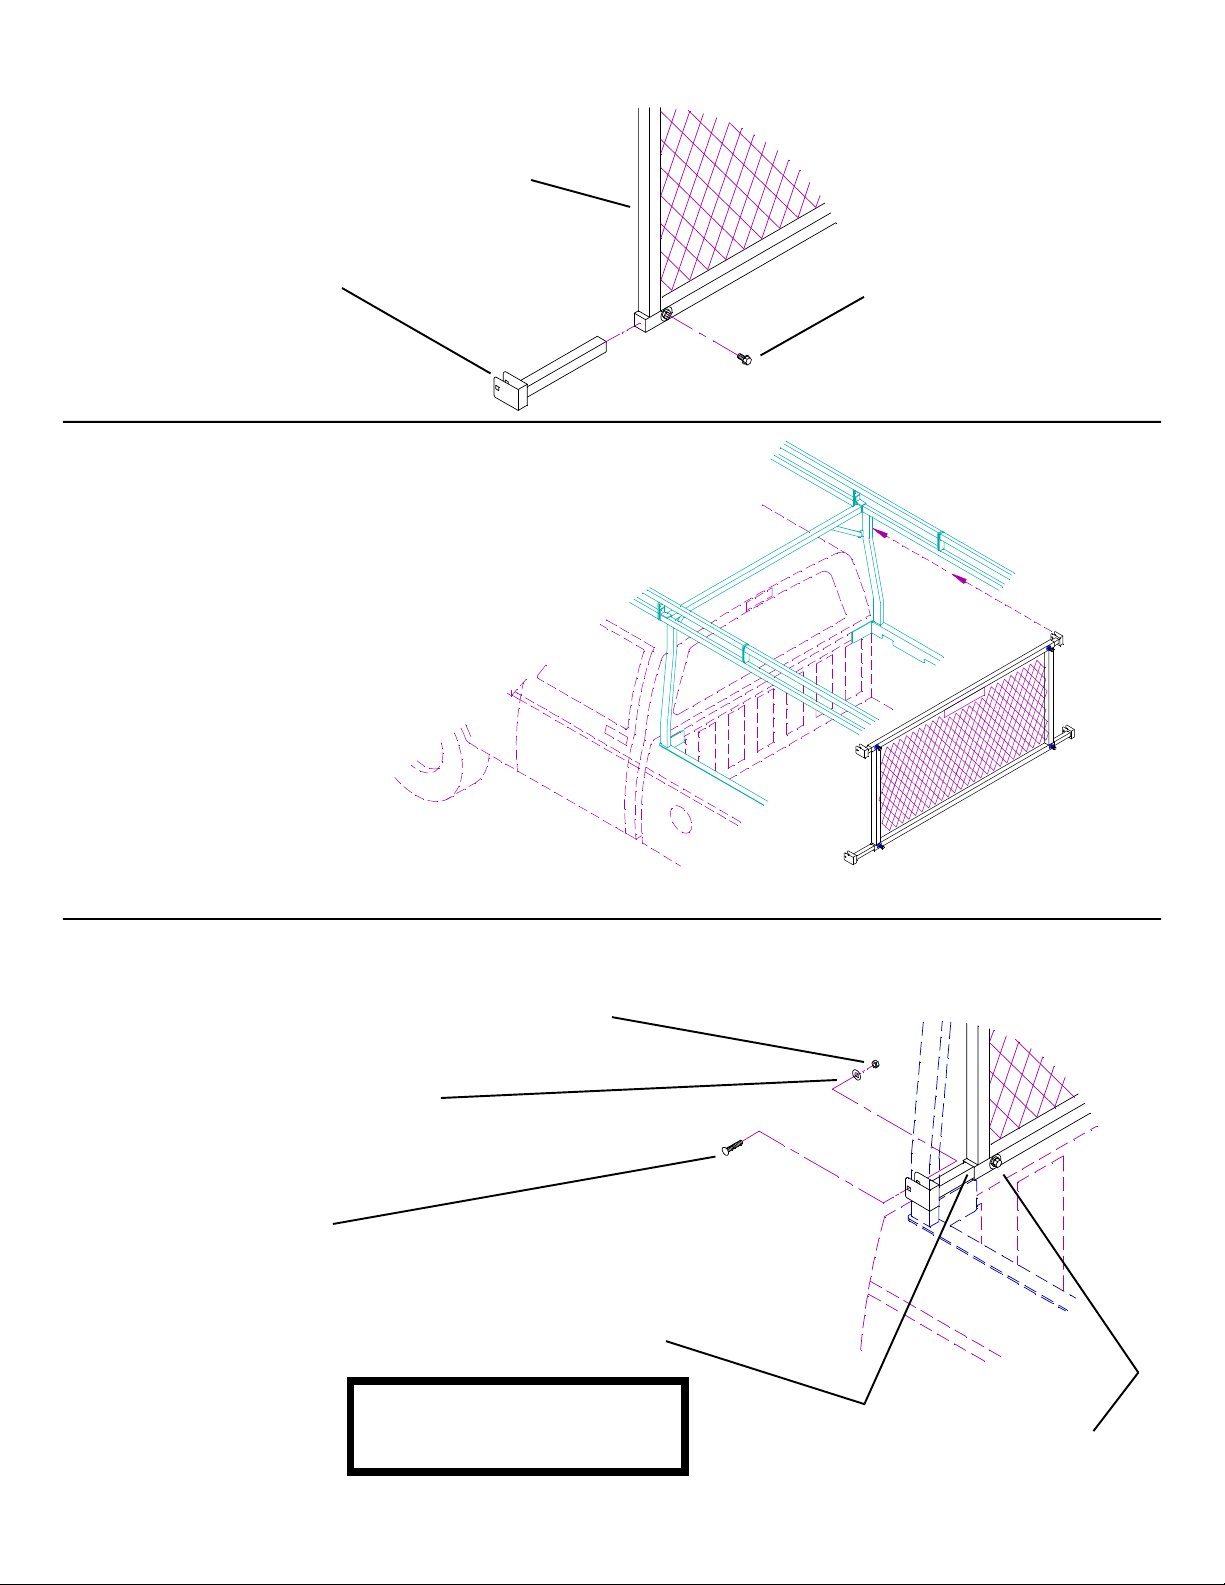
Step 1. Socket Assembly.
1285 Screen Assembly
Clamp Socket
23-0204
Step 2. Frame to Rack Assembly.
Center screen between the ladder
rack legs.
NOTE: The cutout in the screen
must be in alignment with the light
mounted on the rear of cab.
3/8"-16 x 3/4"
Self Tap. Screw
Do not tighten at this time.
Step 3. Clamping and Sealant
5/16"
Flat Washer
5/16"-18 x 2-1/4"
Carriage Bolt
5/16"-18 Nylon
Lock Nut
Seal socket to sleeve
with E-6000
WARRANTY WILL BE VOID IF
SEALANT IS NOT APPLIED TO
ALL SEAMS AND CREVICES
Tighten after screen is centered
and clamp bolts are tight.
Page 3

WEATHER GUARD® REFINISHING PROCEDURES
All WEATHER GUARD® products are finished with a polyester powder coating, and it is important to follow
these proce-dures to get proper adhesion. As Knaack LLC cannot control the finishing of the products, Knaack
LLC’s warranty on paint is not applicable on refinished products.
1. Sand the surface to be painted with 180-200 grit sand paper to rough up the surface. This should be followed by wet
sanding with a 400 grit wet or dry paper.
2. Wipe down the sanded surface with ketone based thinner. This removes the dust and softens the powder coating for
better paint adhesion.
3. Wipe sanded area with a tack rag to remove loose dust and particles before painting.
NOTE: Do not use a lacquer over the powdered coating.
- NOTICE -
Any modification or unintended use of this product shall immediately void all manufacturers warranties.
Manufacturer disclaims all liability for injuries to persons or property resulting from any modification to, or
unintended use of this product.
U.S. - 842268, 1661625, 1663369, 2228051; Canada - 1218968, 282725; U.K. - 1400720; N.Z. - 296049; AUS. -761964 other trademarks pending.
WEATHER GUARD® products are protected by one or more of the following trademarks:
Knaack LLC
ATTN: Warranty Claims
420 TE. erra ACotta venue Crystal ILLake, 60014
If you have any questions, please call toll free at 1-800-456-7865.
©2013 Knaack LLC
Part No. 24-0085 REV. C ECN 5305 04/13
 Loading...