

Page 1
Model #:_____________ Serial #:_______________
OPERATORS MANUAL
STEEL & ALUMINUM SADDLE BOX
STEEL & ALUMINUM CROSS BOX
MODELS 114- X -01 THRU 156- X -01
WWW.WEATHERGUARD.COM
PRODUCT REGISTRATION
For your convenience,
place product registration
tear-o sticker here
Purchase Date: __________________
Place of Purchase: _______________
Key Code: ______________________
INSTALLATION TIME
Approximate installation time: 30 minutes (1/2 hr.) depending on installer experience.
T OOLS REQUIRED
• reluR•hcnerW tehctaR "2/1
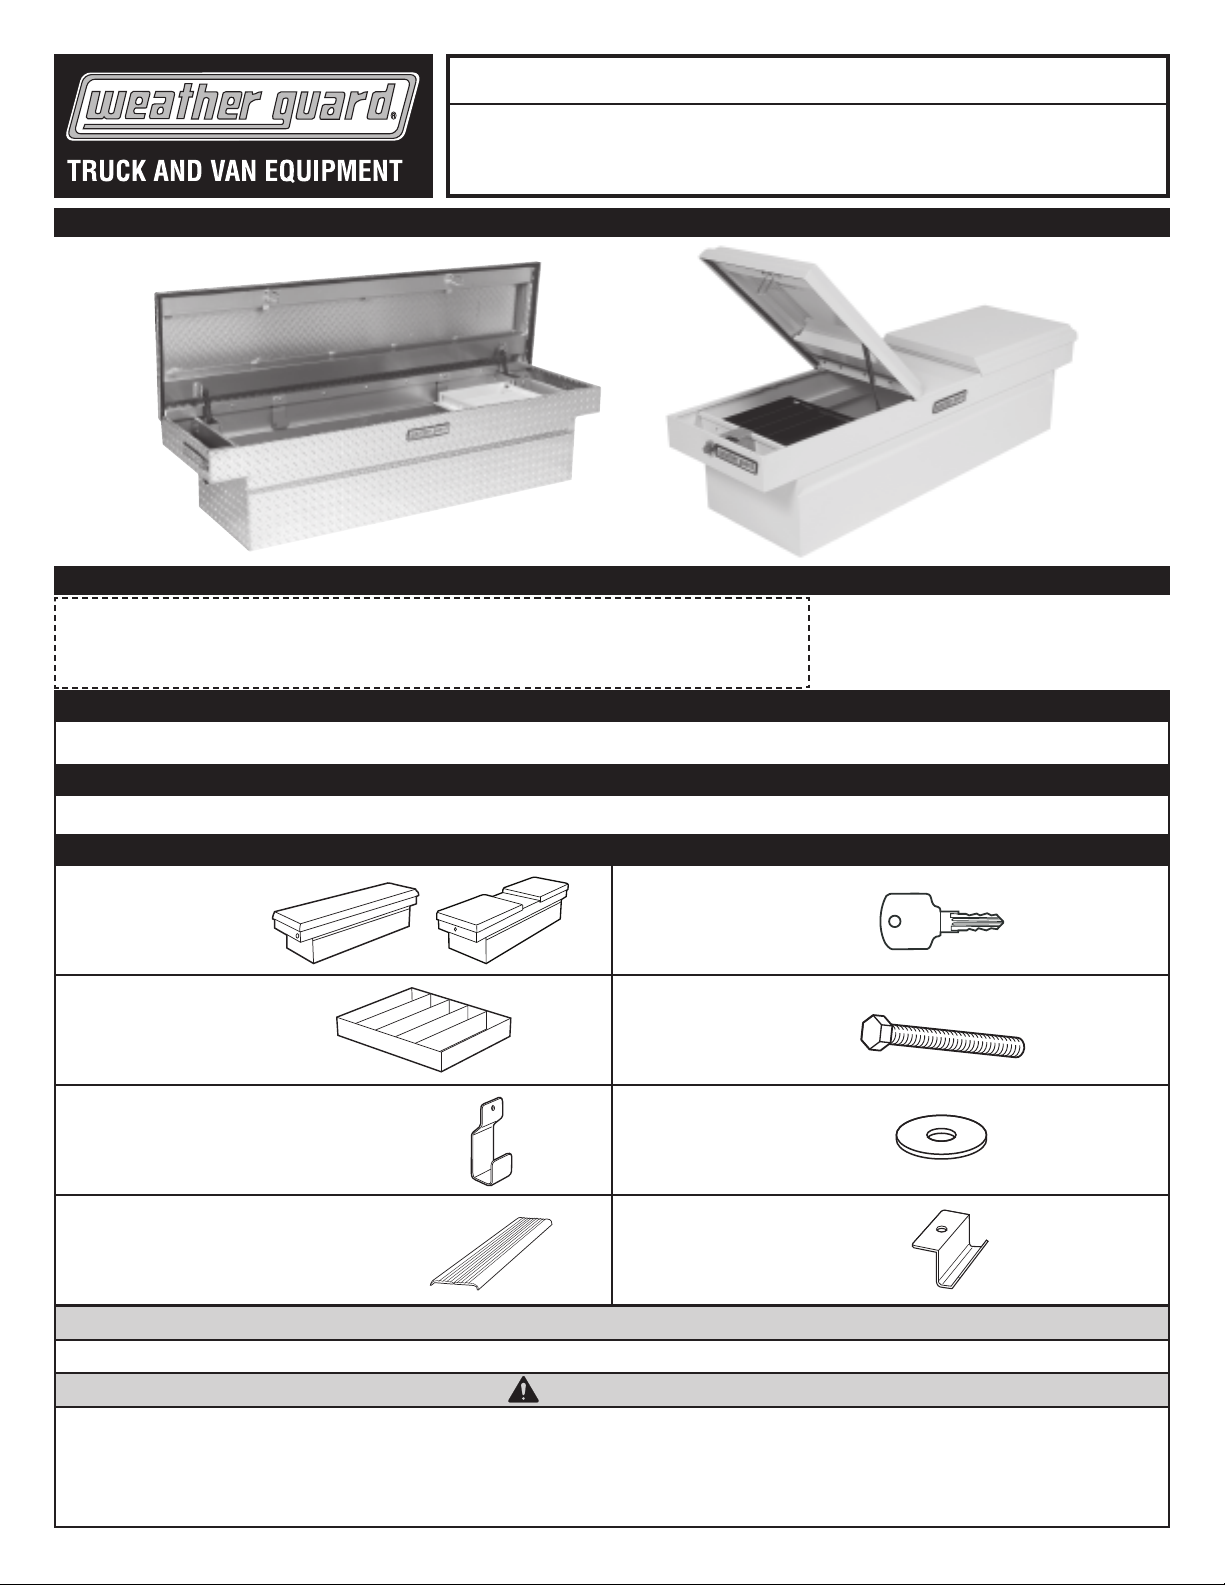
PARTS LIST
(1) Saddle or Cross Box
(1) Tray with Dividers
(2) Level Holder Brackets (saddle box only)
(2) Rubber Mounting Pads
Note: The rubber mounting pad comes as
a single piece and must be separated into
two pieces, one for each side of the truck.
(2) Keys
(4) 5/16”-18 x 2-1/4” Hex Head Bolts
(4) Fender Washers
(4) Mounting Clamps
–
ATTENTION
Read and understand all instructions and warnings before operating or using this product.
DANGER
Danger of explosion. Do not use this product for storing or transporting ammables, explosives, hazardous materials, or hazardous
waste, such as containers of gasoline, solvents, gun powder, dynamite, propane tanks, acetylene tanks and cutting torches. This
product is only intended and safe for use in storing and transporting small tools, equipment and other similar materials. Any modications made to, or unintended use of this product, could create a hazardous condition that can cause death, serious personal
injury or property damage.
–
Part No. 24-0156 REV. C ECN 5305 04/13
Page 2
INSTALLATION INSTRUCTIONS
Rubber
Mounting
Pad
Rubber
Mounting
Pad
Bed Lip
Mounting Pad
End Panel Slot
Mounting Clamp
Fender Washer
5/16"-18 x 2-1/4"
Hex Head Bolt
Note:
• If your pickup is fitted with a plastic drop-in bed liner, it may
need to be drilled, trimmed, or cut for proper installation of
truck box.
•
Truck box cover may not properly latch until box is fully bolted to truck bed (4) places.
• Because truck bed configurations vary, (6) mounting slots
have been provided, to ensure the use of (4) mounting
clamps.
• Periodically check tightness of mounting clamps to insure
proper attachment.
• Use touch-up paint on any drill holes to prevent oxidation.
• Install boxes with vehicle parked on level ground.
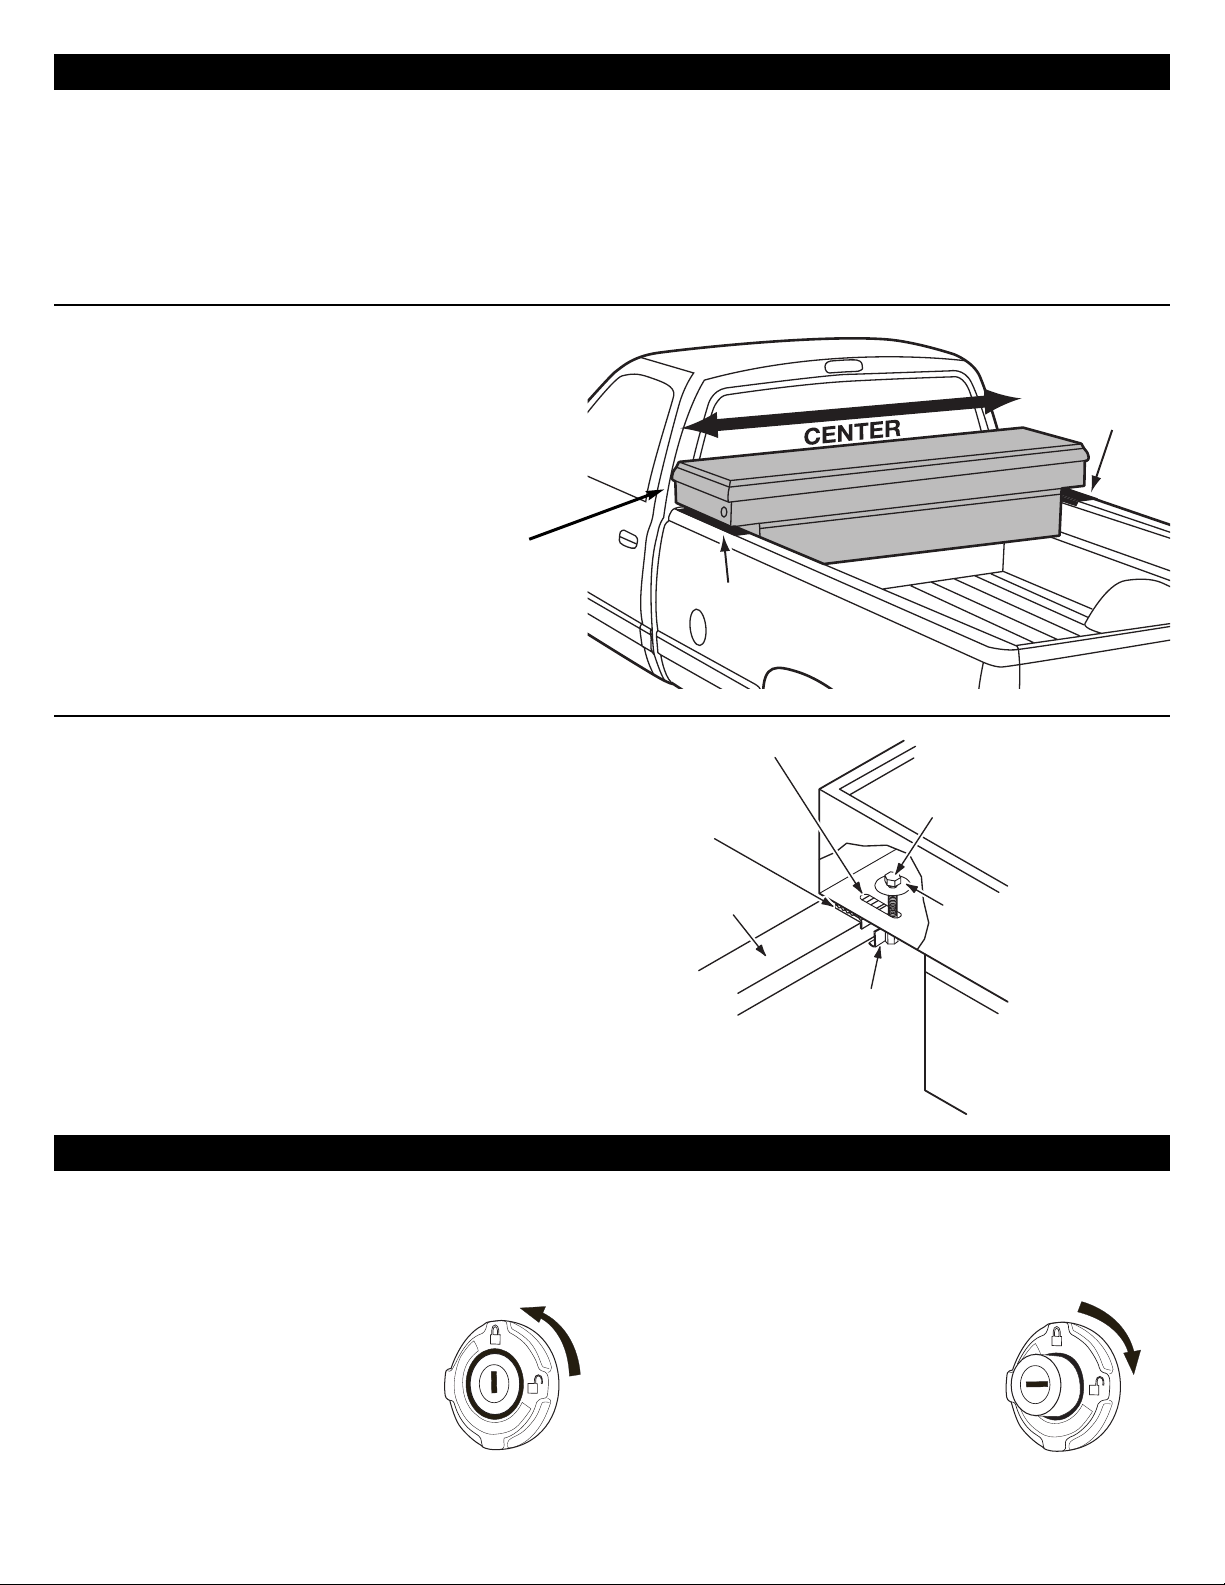
Step 1: LOCATE BOX IN TRUCK BED
• Place rubber mounting pads on bed rails.
Place box into position on top of mounting pads.
•
• Use ruler to ensure box is centered in truck bed, and
that cover opens fully without interference.
Check clearance
with cover open
Step 2: ATTACH BOX TO TRUCK BED
• Attach mounting clamp, bolts and washers as shown in
Figure 2.
• Start with slot at drivers side front and work clock-wise until
all four clamps have been installed.
Note: Mounting clamp bolt may be difficult to turn due to the
“lock nut” feature.
Apply a small amount of grease to
bolt threads prior to installation to ease assembly.
Figure 1
Figure 2
LOCK SYSTEM
The WEATHER GUARD® Extreme Protection™ Lock is designed to provide maximum security, while providing ease
of use and years of reliable service. When in the locked mode, the button remains retracted in a tamper-resistant
position. When the button is pressed in the unlock mode, the latches are activated and the cover opens.
LOCK
Turn the key counterclockwise to the
locked position as indicated on the
lock bezel. When the button is now
pressed, it will stay in the retracted
or tamper-resistant position until
unlocked.
FEATURE OPERATION
UNLOCKED
Turn the key clockwise to the un-
locked position as indicated on the
lock bezel. Button will pop out and is
now ready to release the latches
when pressed.
2
Page 3

FEATURE OPERATION (cont.)
LATCH SYSTEM
The WEATHER GUARD® Latch System utilizes automotive grade latches in conjunction with high strength latch
strikers to ensure maximum security. The WEATHER GUARD® Latch System is designed to open with a single touch
of the button, and close securely. Expect years of reliable service from the WEATHER GUARD® Latch System with
only minimal maintenance: Lubricate latch pivot points bi-annually with white grease. If latch strikers are accidentally
knocked out of alignment, simply use a mallet to re-align.
12V ELECTRICAL
ACCESS
Figure 3
WEATHER GUARD® Truck Boxes are equipped with a 12 volt
electrical access grommet for easy electrical accessory fit-ups.
To
use, simply cut along one or more perforations in the rubber grommet and run wire through.
Electrical Access
WARNING
To prevent electric shock, explosion, fire and/or serious personal injury when using saddle/cross box with:
Extension Cord -
• Follow all Extension Cord manufacturer’s warnings and instructions.
•
Do NOT insert extension cord through hole without grommet in place (see Figure 3).
• Only use a three-wire extension cord with all three prongs intact. Never remove the round grounding prong.
• Extension cord must be connected to a 120 Volt GFCI protected outlet with proper ground. If GFCI outlet is not available, use an extension
cord with GFCI protection built in.
• Check the insulation and plugs of extension cord before using. Do NOT use cord if it is worn or damaged.
• Do NOT overload extension cord.
• Remove extension cord from the grommet hole before moving or transporting saddle/cross box.
• Only use an extension cord that is rated for outdoor use.
• Do NOT connect extension cord to outlet that also supplies critical safety equipment with power.
Cordless Power Tool Battery Chargers -
• See Charger’s Owner’s Manual for proper use and care of charger and batteries. Follow all warnings and instructions provided with your
battery charger
• Place chargers and electrical connections in tray.
• Chargers are Dry location use only. Do NOT expose to liquid, vapor, or rain. Should your charger become wet, Do NOT attempt to use.
Unplug extension cord from supply before handling wet charger or cords.
• Only use chargers and batteries that are intact and operating properly.
• Do NOT touch metal prongs when plugging charger into extension cord.
• Keep flammable materials like paper or rags away from charger, cords or connections.
• Do NOT place or attempt to charge lead acid, car type batteries in saddle/cross box.
.
LEVEL HOLDER
WEATHER GUARD® Saddle Boxes are equipped with brackets
that allow safe and easy storage of levels. Install using existing
bolts per Figure 4.
Install holders using
existing bolts
MOUNTING BRACKETS
Wide-flange mounting bolts provide secure mounting without crimping bed rails and allow full unobstructed use of side pockets.
3
Figure 4
Page 4

SERVICE PARTS
FOR REPLACEMENT PARTS GO TO WWW.WEATHERGUARD.COM
ITEM PART DESCRIPTION FITS
NO.
NO. MODEL #
1 900 Gas Spring 125-X-01
1 7008 Gas Spring 117-X-01
1 7009 Gas Spring 123-X-01, 127-X-01, 137-X-01, 147-X-01, 154-X-01
1 7250 Gas Spring 126-X-01, 128-X-01, 136-X-01, 156-X-01
1 7251 Gas Spring 116-X-01
1 7900 Gas Spring 115-X-01
1 7916 Gas Spring 114-X-01, 124-X-01
2 7748-XX Lock & Key Set (XX = key code) All Saddle / Cross
3 7750-XX Key Replacement (XX = key code) (2 keys) All Saddle / Cross
4 7731 Latch & Striker Kit All Saddle
4 7732 Latch & Striker Kit All Cross
5 7106 Striker Kit (1 striker and mounting hardware) All Saddle / Cross
6 7730 Weather Strip Kit (various styles for 1 box) All Saddle / Cross
7 615 Tray (1 tray plus dividers) 123-X-01, 124-X-01, 127-X-01, 137-X-01, 147-X-01
7 617 Tray (1 tray plus dividers) 114-X-01, 115-X-01, 116-X-01, 117-X-01
8 7733 Mounting Kit (4 mounting clamps, All Saddle / Cross
9 7737 Level Holder (2 Brackets) All Saddle
10 7746 Nameplate Kit (3 stickers, All Saddle / Cross
11 7749 Grommet Kit All Saddle / Cross
12 7782-X Cover 117-X-01
12 7783-X Cover 123-X-01, 127-X-01
12 7784-X Cover 137-X-01, 154-X-01
12 7796-X Cover 114-X-01
12 7797-X Cover 124-X-01
12 7861-X Cover 116-X-01
12 7864-X Cover 126-X-01, 128-X-01
12
12 7873-X Cover 115-X-01
12 7874-X Cover 125-X-01
12 7893-X Cover 147-X-01
13 7738 Latch Rod Kit (Not Shown) 116-X-01, 117-X-01, 123-X-01, 126-X-01, 127-X-01, 128-X-01
13 7739 Latch Rod Kit (Not Shown) 136-X-01, 137-X-01, 154-X-01, 156-X-01
13 7894 Latch Rod Kit (Not Shown) 147-X-01
Note: In the model numbers above, X represents the color code for your model; 0 = Clear, 3= White, 5 = Black
(1 lock, 2 keys, retainer clip)
(1 latch, 1 striker, & mounting hardware)
(1 latch, 1 striker, & mounting hardware)
125-X-01, 126-X-01, 128-X-01, 136-X-01, 154-X-01, 156-X-01
4 bolts, 4 washers, 2 mount pads)
2 side bezels, 1 back bezel)
7871-X Cover 136-X-01, 156-X-01
12
10
6
SADDLE BOX
5
1
3
1
9
4
7
11
2
6
4
9
8
12
CROSS BOX
5
7
10
2
4
1
11
–NOTICE–
Any
liability for injuries to persons or property resulting from any
This LIMITED WARRANTY is made by Kn aack LLC 420 E . Terra Cotta Ave., Crystal L ake, Illinois to the original retail pu rchaser of KNAACK ® or WEATHER
GUARD ® products.
KNAACK LLC WARRANTS THAT KNAACK OR WEATHER GUARD PRODUCTS WILL BE FREE FROM DEFECTS IN MATERIAL AND WORKMANSHIP FOR A PERIOD OF THREE (3) YEARS
FROM DATE OF PURCHASE BY THE ORIGINAL RETAIL PURCHASER.
If, before the expiration of the Warranty period, purchaser discovers that the KNAACK or WEATHER GUARD product fails to fulll the Warranty, purchaser shall contact
Knaack LLC to make arrangements for an inspection of the product. If Knaack LLC determines a defect exists, Knaack LLC shall, at its
option and expense, repair or replace any defective part. All Warranty repairs shall be made by an authorized KNAACK Product dealer or Knaack LLC approved
service company .
This Warranty shall not apply if the KNAACK or WEATHER GUARD product has been subjected to misuse, abnormal service or handling, improper maintenance, or alterations
made by anyone other than a KNAACK or WEA THER GUARD Product dealer or a Knaack LLC approved service company.
THE WARRANTY PRINTED ABOVE IS THE ONLY WARRANTY APPLICABLE TO THIS PURCHASE. ALL OTHER WARRANTIES, EXPRESS OR IMPLIED, INCLUDING
BUT NOT LIMITED TO THE IMPLIED W ARRANTIES OF MERCHANT ABILITY AND FITNESS FOR A PAR TICULAR PURPOSE ARE HEREBY DISCLAIMED.
KNAACK LLC SHALL NOT BE LIABLE FOR ANY INCIDENT AL OR CONSEQUENTIAL DAMAGES ARISING OUT OF ANY BREACH OF THIS
WARRANTY . NOR SHALL THE DAMAGES EXCEED THE RETURN AMOUNT OF THE PURCHASE PRICE PAID BY THE ORIGINAL PURCHASER.
This Warranty is in lieu of all Warranties express or implied. The terms of this Warranty shall not be modied by any party, their successors or assigns. This Warranty gives
you specic legal rights, and you may also have other rights which vary from state to state.
Product based on vehicle design available at the revision date. Vehicle manufacturers may change specs after the
revision date, so if you have a vehicle produced with a model year date after the revision date, please contact your
distributor or Knaack LLC to verify of product to vehicle.
WEA THER GUARD Products are protected by one or more of the following patents: U.S. 5145087, 5308126,
4509787, 4573731, 4618083, D-346355, D-346994, D-353574; Canada 1218968, 1224230, 1235100 and; U.K.
2233036. Other patents pending
or unintended use of this product shall immediately void all manufacturers warranties. Manufacturer disclaims all
to, or unintended use of this product.
LIMITED WARRANTY
.
Knaack LLC
ATTN: Warranty Claims
420 E. Terra Cotta Avenue Crystal Lake, IL 60014
If you have any questions, please call toll free at 1-800-456-7865.
©2013 Knaack LLC
Part No. 24-0156 REV. C ECN 5305 04/13
 Loading...