

Page 1
QUICK START GUIDE
GUIDE D’INSTALLATION RAPIDE
KURZANLEITUNG ZUR INSTALLATION
BEKNOPTE INSTALLATIEHANDLEIDING
GUÍA DE INSTALACIÓN RÁPIDA
GUIDA INTRODUTTIVA RAPIDA
IROP2
BASIC CLOTHES DRYING FUNCTION
FONCTION PRINCIPALE DE SÉCHAGE
EINFACHE TROCKNUNGSFUNKTION FÜR KLEIDUNG
BASIS DROOGFUNCTIE VOOR KLEDING
SECADO BÁSICO DE ROPAS
FUNZIONE ASCIUGATURA VESTIARIO
Page 2
ENGLISH
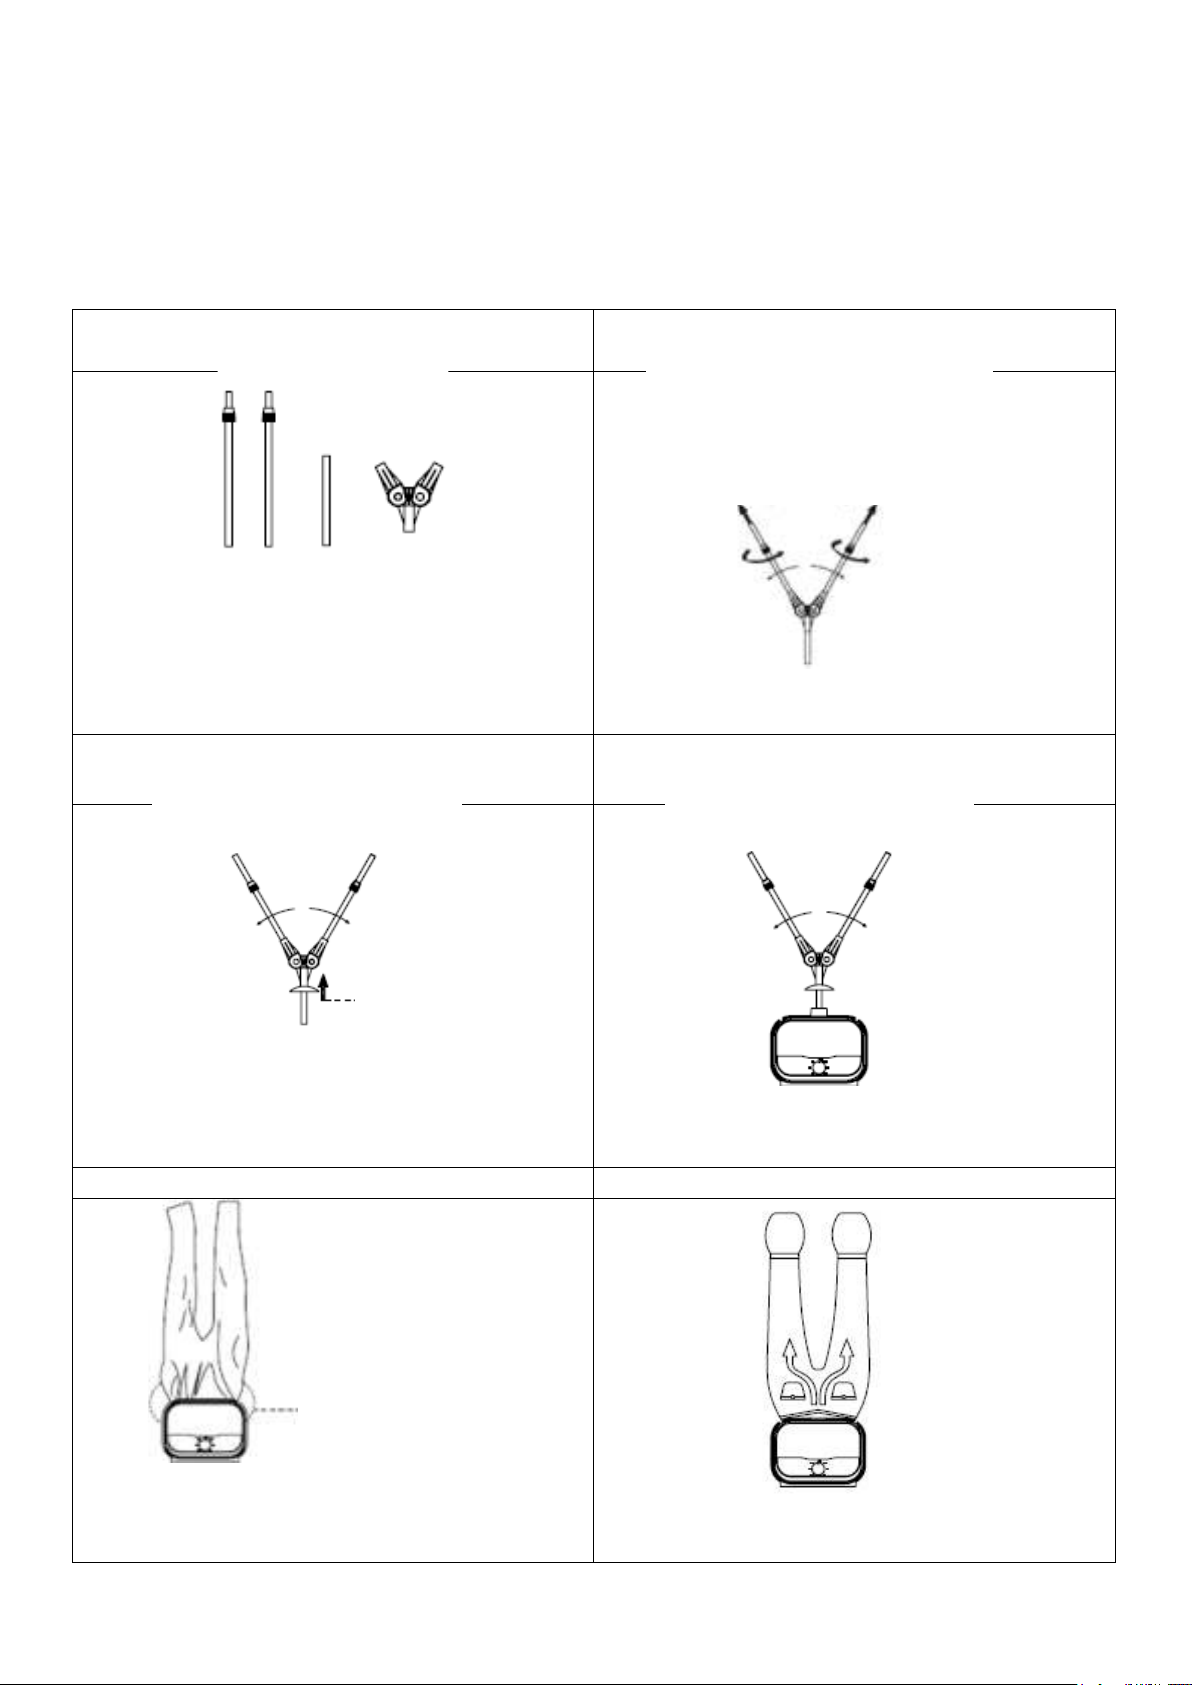
1. Take the aluminium tube out
2. Take the rotating rod out
3. Assemble the rotating rod out
4. Assemble the rotating rod
5. Put the telescopic rod into the recess
on the top of the motor unit
6. Put the nylon balloon on
7. Put the trousers on
Pull the aluminium tube out
Rotate counter clockwise
Adjustable angle
Adjustable angle
Put the
water
Adjustable angle
The zipper
should align to
the middle of the
motor unit
(BASIC CLOTHES DRYING FUNCTION)
QUICK START GUIDE
Page 3
FRANÇAIS
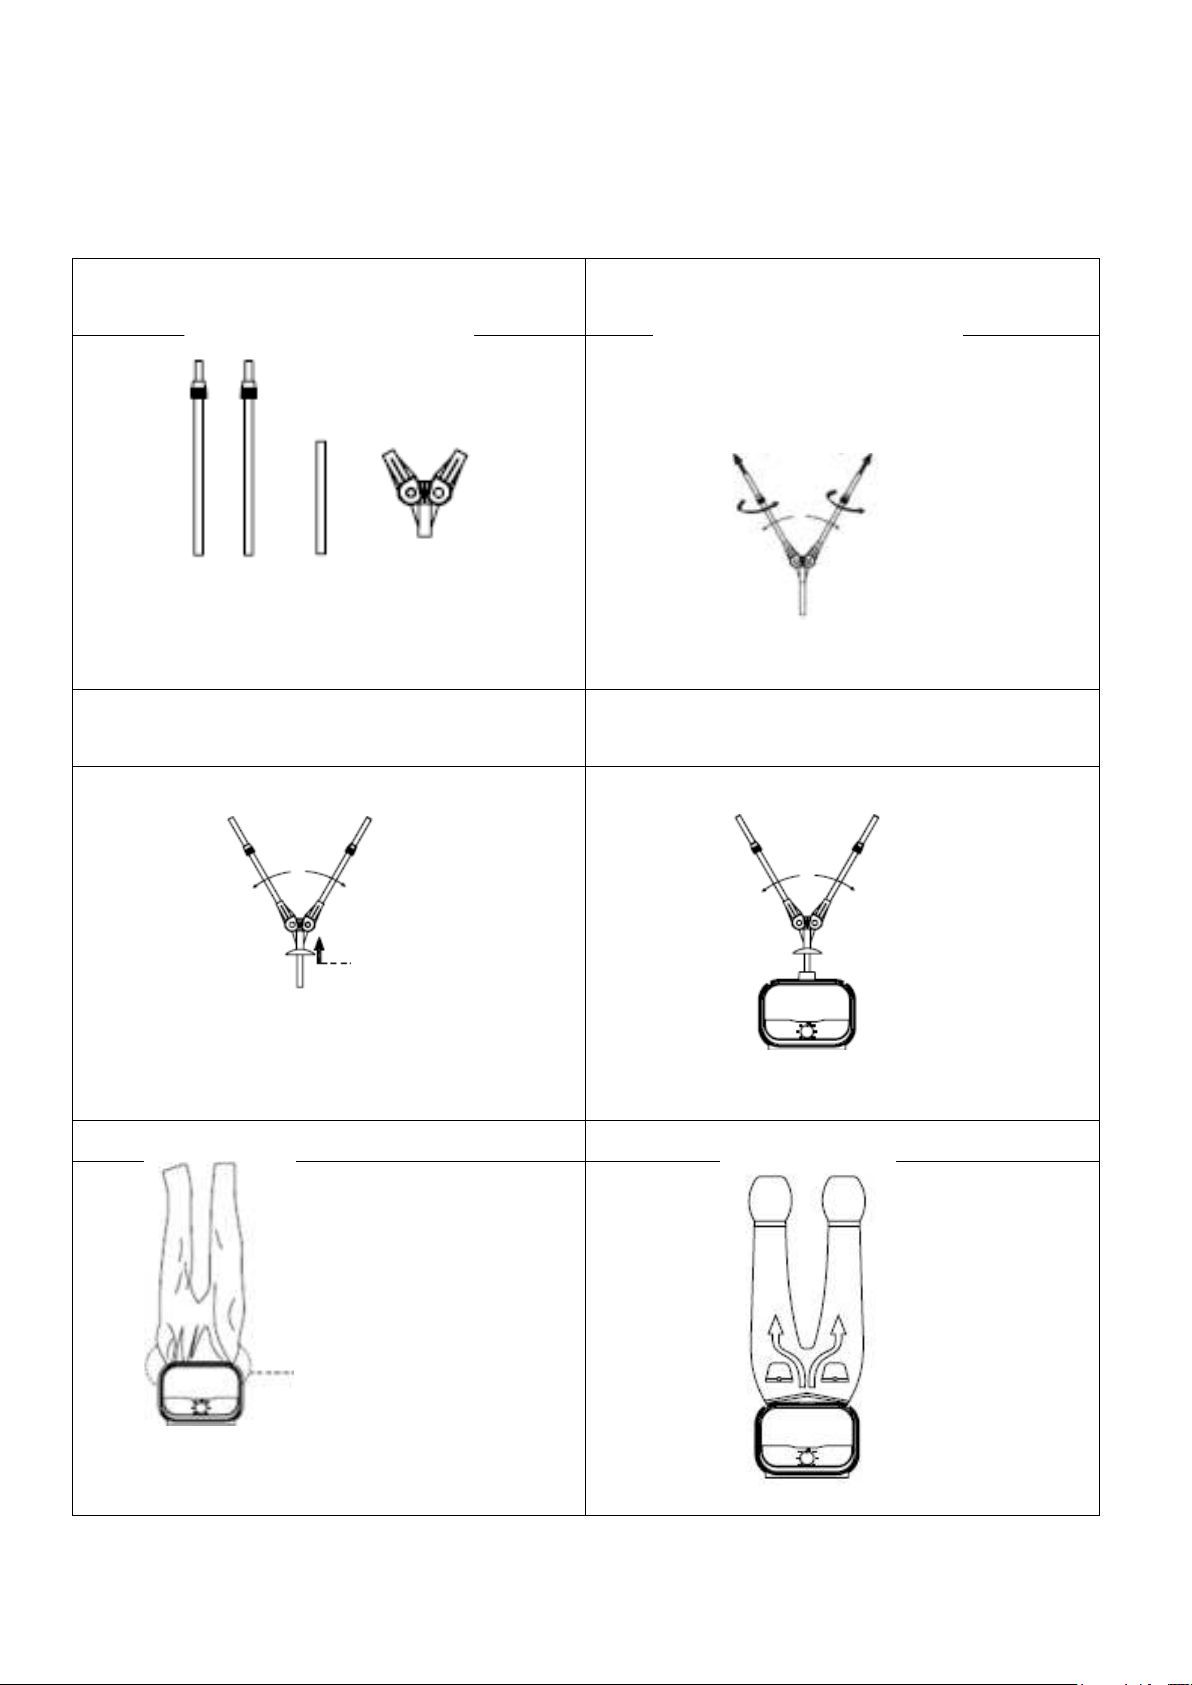
1. Sortir le tube d’aluminium
2. Sortir le tube tournant
3. Ajuster le tube tournant
4. Assembler le tube tournant
5. Placer le tube télescopique dans
l’encoche du bloc-moteur
6. Mettre la baudruche de nylon
7. Mettre le pantalon
Sortir le tube d’aluminium
Tourner vers la gauche
Angle réglable
Angle réglable
Installer la
protection
Angle réglable
Le zip doit être
aligné avec le
milieu du bloc-
(FONCTION PRINCIPALE DE SÉCHAGE)
GUIDE D’INSTALLATION RAPIDE
Page 4

DEUSCH
1. Entnehmen Sie das Aluminium-Rohr.
2. Entnehmen Sie die Drehstange.
3. Montieren Sie die Drehstange.
4. Montieren Sie die Drehstange.
5. Setzen Sie die Teleskopstange in die
Aussparung oben auf der Motoreinheit ein.
6. Ziehen Sie den Nylon-Ballon an.
7. Ziehen Sie die Hose an.
Das Aluminium-Rohr herausziehen
Linksläufig drehen
Einstellbarer Winkel
Einstellbarer Winkel
Ziehen Sie den
Wasserschutz an
Einstellbarer Winkel
Der
Reißverschluss
muss in der Mitte
der Motoreinheit
angepasst
werden.
KURZANLEITUNG ZUR INSTALLATION
(EINFACHE TROCKNUNGSFUNKTION FÜR KLEIDUNG)
Page 5

NEDERLANDS
1. Trek de aluminium buis eruit
2. Neem de draaibare buis eruit
3. Plaats de draaibare buis
4. Plaats de draaibare buis
5. Plaats de telescopische buis in het gat
bovenop de motorunit
6. Plaats de nylonballon
7. Doe de broek erom
Trek de aluminium buis eruit
Draai tegen de klok in
Aanpasbare hoek
Aanpasbare hoek
Plaats het
spatscherm
Aanpasbare hoek
De rits moet in het
midden van de
motorunit komen
BEKNOPTE INSTALLATIEHANDLEIDING
(BASIS DROOGFUNCTIE VOOR KLEDING)
Page 6

ESPANOL
1. Monte las barras telescópicas
2. Acople la barra base en la unión
3. Monte el soporte
4. Inserte el paraguas en el soporte
5. Inserte el soporte en el orificio de la
unidad del motor
6. Coloque la bolsa de nylon alrededor
de la unidad del motor
7. Coloque una prenda de ropa inferior en el
conjunto
Ángulo ajustable
Ángulo ajustable
Coloque el paraguas
en la barra base del
soporte
Ángulo ajustable
El zipper de la
boca debe quedar
en el medio de la
unidad
GUÍA DE
INSTALACIÓN RÁPIDA
(SECADO BÁSICO DE ROPAS)
Page 7

ITALIANO
1. Prendere il tubo di alluminio
2. Prendere il bastone rotante
3. Assemblare il pistoncino rotante
4. Montare l'asta rotante
5. Mettere l'asta telescopica nella
rientranza sulla parte superiore del
gruppo motore
6. Montare il palloncino nylon
7. Inserire i pantaloni
Tirare il tubo di alluminio fuori
Ruotare in senso antiorario
Angolazione regolabile
Angolazione regolabile
Montare
paraschizzi
Angolazione regolabile
La cerniera
dovrebbe allinearsi
al centro del
gruppo motore
(FUNZIONE ASCIUGATURA VESTIARIO)
GUIDA INTRODUTTIVA RAPIDA
 Loading...