

Page 1

Way5000 User Manual
This document is copyright 2008 WAY Systems, Inc. All Rights Reserved.
way5000 User Manual V1.00 4/3/2009 i
WAY Systems
200 Unicorn Park Drive
Woburn, MA 01801
www.waysystems.com
Page 2

Disclaimer
This document is subject ti change without notice. No part of this document may be reproduced, stored in a
retrieval system, or transmitted, in any form or means electronically, mechanically, photocopied, or
otherwise, without prior written permission from WAY Systems, Inc.
Trademarks
WAY and the WAY Systems, Inc. logo are trademarks of WAY Systems, Inc. in the United States and other
countries. Other products mentioned herein are either trademarks or registered trademarks of their
respective companies, in the United States and other countries.
Customer/Product Support
For WAY Support and Documentation, visit http://www.waysystems.com. Technical phone support is also
available from WAY Support Center 7 days a week, 24 hours a day at 1-866-WAY-MTT1
(1-866-929-6881).
way5000 User Manual V1.00 4/3/2009 ii
Page 3

TABLE OF CONTENTS
I. INTRODUCTION; THIS DOCUMENT .....................................................................................5
II. INTRODUCTION; THE WAY5000 POS TERMINAL ...............................................................5
III. WAY5000 BASICS.................................................................................................................. 6
WAY
5000 K
USB D
T
URNING THE WAY
C
HECKING FOR SOFTWARE UPDATES
S
ELECTING MENU ITEMS AND FUNCTIONS
C
ANCELLING AND NAVIGATING THROUGH PREVIOUS WINDOWS
E
NTERING ALPHA AND NUMERIC VALUES
R
ECHARGING THE WAY
E
NTERING A
EYPAD
............................................................................................................................................6
ATA/CHARGER PORT AND CHARGE INDICATOR LOCATION
5000 ON/OFF.......................................................................................................................7
(“C
PIN N
HECK FOR UPDATES
..........................................................................................................7
...........................................................................................................7
5000
BATTERY
UMBER
.................................................................................................................................7
...............................................................................................................7
”)..........................................................................7
.........................................................................6
..........................................................................7
IV. USING THE WAY5000 RECEIPT PRINTER........................................................................... 8
Loading Paper............................................................................................................................................8
Printing Receipts or Reports ......................................................................................................................9
Feed Button................................................................................................................................................9
Testing the Printer......................................................................................................................................9
Recharging printer battery .........................................................................................................................9
V. PRINTED RECEIPTS............................................................................................................ 10
Receipt Information............................................................................................................................................. 10
VI. WAY5000 MENU STRUCTURE............................................................................................ 12
TOP-L
EVEL MENU; ONLINE TRANSACTIONS, REPORTS & SETUP
SUB-M
ENUS
...................................................................................................................................................13
Setup Menus ............................................................................................................................................13
Offline Transaction Menu .........................................................................................................................14
.......................................................................12
VII. TRANSACTION DEFINITIONS............................................................................................. 15
T
RANSACTION TYPES
Sale (Credit/Debit):...................................................................................................................................15
Authorize-Only (Credit): ...........................................................................................................................15
Return (Credit/Debit): ...............................................................................................................................15
Void (Credit/Debit):...................................................................................................................................15
Force (Credit/Debit):.................................................................................................................................15
R
ECONCILE
When To Use Reconcile ..........................................................................................................................16
What is in the Reconciliation Report ........................................................................................................16
O
PTIONAL DATA ENTRY FIELDS IN TRANSACTIONS
: ...............................................................................................................................................1516
......................................................................................................................................15
...........................................................................................17
VIII. ONLINE TRANSACTIONS.................................................................................................... 18
S
ALE TRANSACTIONS
Credit........................................................................................................................................................18
Debit.........................................................................................................................................................23
Cash.........................................................................................................................................................27
O
THER TRANSACTIONS
Authorize Only..........................................................................................................................................29
Return ......................................................................................................................................................33
Credit .................................................................................................................................................................. 33
Debit ................................................................................................................................................................... 36
......................................................................................................................................18
...................................................................................................................................29
way5000 User Manual V1.00 4/3/2009 3
Page 4

Void ..........................................................................................................................................................39
Force ........................................................................................................................................................41
IX. RECONCILE AND UPLOAD................................................................................................. 44
R
ECONCILE
U
PLOAD
I
NQUIRY
Transaction List........................................................................................................................................49
Last Trans ................................................................................................................................................51
Re-Print Transaction ................................................................................................................................52
Total Info ..................................................................................................................................................54
Clear Transactions ...................................................................................................................................55
Reports.....................................................................................................................................................57
SETUP...........................................................................................................................................................60
Admin SetUp ............................................................................................................................................60
Application Configuration .........................................................................................................................64
User Preferences .....................................................................................................................................72
Printer Test...............................................................................................................................................74
About Way5000 (Display Way5000 Information) .....................................................................................75
GO TO O
....................................................................................................................................................44
.........................................................................................................................................................47
.........................................................................................................................................................49
Details Report & Totals Report ........................................................................................................................... 57
Reset Admin Code.............................................................................................................................................. 60
Reset Admin Password ...................................................................................................................................... 62
Application Settings ............................................................................................................................................ 64
Merchant Information.......................................................................................................................................... 68
Reset Configuration ............................................................................................................................................ 70
Backlight Time .................................................................................................................................................... 72
FFLINE MODE
....................................................................................................................................76
X. OFFLINE MODE ................................................................................................................... 77
S
ALE
..............................................................................................................................................................78
Credit........................................................................................................................................................78
Cash.........................................................................................................................................................82
O
THER TRANSACTIONS
Authorize Only..........................................................................................................................................84
Return ......................................................................................................................................................88
Void ..........................................................................................................................................................90
Force ........................................................................................................................................................92
GO TO O
NLINE MODE
...................................................................................................................................84
.....................................................................................................................................95
XI. ERROR MESSAGES AND TROUBLESHOOTING............................................................... 96
XII. AVS/CVV/CID RESPONSE CODES ................................................................................... 101
AVS R
ESPONSE CODES
...............................................................................................................................101
way5000 User Manual V1.00 4/3/2009 4
Page 5

I. Introduction; This Document
This User Manual explains how to set up and use your way5000 POS terminal to process credit
card, debit card, and cash receipt transactions in both online and offline mode. It also describes
more advanced way5000 administrative and troubleshooting topics.
Depending on the terminal configuration selected by your payment service provider:
• Some transaction types may not be available.
• The system may or may not include a receipt printer
• Some transaction types may require optional data entry for:
• Security code
• Cardholder Zip Code
• Cardholders billing address #
• Invoice/Job #
• Convenience Fee
• Toll Amount
• Tip Amount
II. Introduction; The way5000 POS Terminal
WAY Systems, Inc.’s mobile point-of-service terminal, the way5000, is a new generation of WAY’s
small, portable, wireless transaction processing terminals. The model 5000 integrates
technologies that open an endless number of possibilities. The way5000 lets merchant’s accept
payment anywhere at any time.
The way5000 is programmable, can run multiple applications, and can download new software
applications, settings and updates over-the-air (OTA). In addition to WAY’s standard Way2Pay
credit/debit card application, the way5000 enable 3rd party development of a variety of other
payment and non-payment services such as; Check, Loyalty and inventory look up.
way5000 User Manual V1.00 4/3/2009 5
Page 6

way5000 Basics
way5000 Keypad
Mag Stripe
Card
Reader
Navigation
Button
Screen
Addressable
Soft Key [F1]
Future
Numeric
Keypad
Screen
Addressable
Soft Key [F2]
Power On/Off
Cancel
Clear/
Backspace
Enter
USB Data/Charger port and Charge Indicator Location
Charge
Port
Serial
Number
Charge
Indicator
To power your
way5000 and/or the battery, plug a charger into the USB/Charge Port or connect to a PC USB port
(cable not included). A wall charger is provided as a standard accessory with the way5000. A car
charger is also available at www.waysystems.com.
way5000 User Manual V1.00 4/3/2009 6
Page 7

Turning the way5000 On/Off
To turn way5000 on, press the Power On/Off key until the WAY logo appears, then release.
To turn way5000 off, press the Power On/Off key until “Powering Off Please Wait” appears.
Checking for Software Updates (“Check For Updates”)
Upon power up, the way5000 may display “Check for updates?". Press F2 (No) to proceed
directly to the idle screen. Press F1 (Yes) to check for updates. If there are updates scheduled,
they will be downloaded. After the download, press the F2 key to continue to the way5000 idle
screen. If no updates are scheduled, the way5000 will display “No scheduled download” and
proceed to the idle screen.
Selecting Menu Items and Functions
Press the number corresponding to the function that you want from the menu; or use the
navigation button and then press the F2 key to proceed.
Cancelling and Navigating Through Previous Windows
To exit Way2Pay and return to the idle screen, press the red Cancel key. To return to the previous
screen, select the Back function [F1] or press the yellow Clear/Backspace key.
Entering Alpha and Numeric Values
Some fields allow numeric entry only. In fields that allow alpha entry and numeric entry, press the
number key with the desired letter /number one or more times depending on the letter/number’s
location. To enter a number, press the key a fourth time.
Recharging the way5000 battery
To charge your way5000, plug a charger into the USB/Charge Port or connect to a PC's USB port
(cable not included), as shown in the illustration above.
Entering a PIN Number
Debit card transactions require cardholder entry of a personal identification number (PIN). The
front keypad is used for secure PIN entry. PINs range from 4 to 6 digits.
When the way5000 prompts for PIN entry, hand the way5000 to the cardholder. Ask the cardholder
to enter their PIN and then press the green F2 or ENT key when finished.
For privacy, PIN digits display as dashes.
If the customer needs to retype their PIN, they should press the CLR key to backspace and delete
each digit of the PIN, re-type the PIN from the keypad and press F2 or ENT.
CLR key
ENT key
way5000 User Manual V1.00 4/3/2009 7
Page 8

III. Using the way5000 Receipt Printer
Power L
ight
The MP100 receipt printer is a small portable thermal printer that uses a wireless infrared (ir)
interface to communicate with the way5000 terminal. Receipts are printed without the need of a
cable to connect the terminal and printer. To print, simply point the terminal at the printer and
press the appropriate key on the terminal.
Loading Paper
Power Button
Mode Button
Line Feed
Button
Tear Bar
Cover
Release
Mode Light
USB Port
Charge Port
Note: Be sure to use paper rolls that meet specifications. Do not use paper rolls that have the
paper glued to the core because the printer cannot detect the paper end correctly. The correct
paper size is 2 ¼” by 50 feet long.
To install a new paper roll, follow these steps:
1. Make sure that the printer is not receiving data.
2. Open the paper roll cover by gently pulling up on the cover release.
3. Remove the used paper roll core (if there is one).
4. Insert the paper roll with the paper coming from underneath the roll.
5. Pull out a small amount of paper and then close the cover paper roll with the paper coming from
underneath the roll.
6. Tear off the paper. Be sure to pull the paper forwards. If pulled backwards, the paper will not
tear.
Note: Go to www.waysystems.com to order paper and other accessories
way5000 User Manual V1.00 4/3/2009 8
Page 9

Printing Receipts or Reports
Check periodically to ensure there is sufficient paper in the printer and install a new roll when
needed.
To print receipts or reports:
1. If the printer is not already on, press the Power button. The Power light will turn on.
Power Light: Steady Green – battery fully charged
Blinking Green – printer sleep mode (see below)
Blinking Red – Low battery. Please plug into charger.
Mode Light: Steady Red- Battery charging
Blinking Green – No Paper/Paper Cover Open (printer will not print)
---------------------------------------------------------------------------------------------------------------------------
Note: If the printer is already ON but idle for more than a few minutes, the printer enters power
save mode (the Power light slowly blinks green) to reduce battery consumption. When the printer is
in power save mode and you need to print a receipt, simply print from the way5000 as you
normally would. The printer will exit power save mode and start printing.
----------------------------------------------------------------------------------------------------------------------------
2. When the printing prompt or menu displays on the way5000, select OK/Yes and point the
way5000 directly at and no more than 20 inches away from the front of the printer. Do not move
the way5000 until the receipt or report begins to print. You must select either OK/Yes (F2) or
Done/No (F1) to exit the printing prompt; there is no automatic time-out for this function
Feed Button
Press the Feed button once to advance the paper one line above the cutter. Press and hold the
Feed button to advance the paper continuously
Testing the Printer
To perform a quick test of the printer from the way5000:
1. Make sure that there is sufficient paper in the printer.
2. Press the printer's Power button. The green Power light is now lit.
3. From the idle menu, press 1 to select WAY2Pay.
4. From the Transactions menu, press 4 to select Setup.
5. From the Setup menu, select 4 to run the printer test.
6. Press F2 (OK) and point the way5000 directly at the printer. This will print the current mode
and communication settings.
Recharging printer battery
When the Power light begins to alternately blink red and green, this indicates that the battery is
depleted and you must recharge it. You should also recharge the printer battery whenever it is not
in use. To recharge the battery:
1. Plug one end of the battery charging cable into the mating power connector on the left side
of the printer and the other end into an AC power receptacle.
2. The indicator on the inline cable box glows red while the battery is charging. When it turns
green, the battery is fully charged and you can disconnect the cable To conserve battery
life, you can use the same power cable to run the printer on AC power.
way5000 User Manual V1.00 4/3/2009 9
Page 10

IV. Printed Receipts
#
(shown).
Receipt Information
The example below describes information that is printed on the merchant copy of the Credit Sale
transaction receipt, including a toll, tip, and convenience fee amount, and an invoice number.
Depending on your configuration, some of these fields may or may not appear. For questions,
please contact your Payment Service Provider.
Transaction
type
Transaction date
in
MM/DD/YYYY
Optional Footer: Up to
4 additional lines below
signature for company
messages or other
---------------------------------------------------------------------Merchant ID
1234567
Terminal ID
2133
Trans. Type Credit - Sale
Batch #
12
Seq
8
Card Type
Visa
Cardholder
John H. Smith
Account#
xxxxxxxxxxxx1245
Exp. Date
xx/xx
Ref # Demo
12111
Auth #
2134546
Invoice/Job#
235677
AVS U
CVV2/CID X
Tran ID ASD123
Validation Code 23
Sale
21.45
Convenience Fee:
1.05
Sale Receipt
Merchant Inc.
157 Main St.
Suite 222
Anytown, MA 11111
www.website.com
1-222-333-4444
04/02/2008
11:10:27
Merchant name and
address lines. Default is
1 line for address. 2
Optional address lines
Transaction
time in
The various items on the sample receipt above, are explained in the following table.
way5000 User Manual V1.00 4/3/2009 10
Page 11

Field Description
Merchant ID The merchant's account number assigned by the payment processor.
Terminal ID An identification number assigned by the payment processor (often used when multiple
terminals are assigned to one merchant).
Trans Type This is the type of transaction such as Sale, Return, Void, etc.
Batch No. This is a batch number assigned by WAY Systems for tracking purposes. This number is
incremented by 1 after each reconciliation. NOTE: This batch number has no relation to
the batch number that is assigned by your payment processor.
Seq. No. The sequence number for this transaction within the WAY batch. The sequence number
is incremented by one after each transaction and resets to 001 after each reconciliation.
Card Type Type of payment, such as Visa (, MasterCard, American Express. If this is a Debit
transaction, the card type is DB. For Cash (if enabled), the card type is CA.
Cardholder This is the name of the cardholder if it is available from the magnetic stripe.
Acct No. Account number on payment card. Due to recent security regulations, only the last 4
digits of the account number may be printed on the receipt.
Exp. Date Expiration date of the card, printed as **/**. For security, the actual date is not printed.
Ref# An optional reference code that the payment processor may send to the way5000 after
processing certain transactions. The Ref# corresponds to a specific transaction on the
payment processor's system.
Auth# The code that the payment processor returns to the way5000, approving an amount.
Invoice/Job # If Invoice/Job# is enabled, this is the value that was entered during a transaction.
AVS Response code returned by the card issuer if you entered an address number.
Call your payment systems provider or see attached appendix for more information on
what these responses mean.
CVV2/CID Response code returned by the card issuer if you entered a 3 or 4 digit code from the
card. Contact your payment service provider or see attached appendix for more
information on what these response codes mean.
Tran ID This is a number assigned by some payment processors for authorizations.
Contact your payment systems provider for more information.
Validation Code This is a number assigned by some payment processors for authorizations.
Contact your payment systems provider for more information.
Sale Amount of Sale, excluding tip, toll, and convenience fee amounts.
Convenience Fee Amount of the convenience fee (if any) calculated by the terminal.
Toll Amount of any toll entered.
Tip Amount of any tip entered.
Cash Back The amount of cash back given (if enabled) for a Debit transaction. In some cases, there
may be a maximum cash back amount set by the payment service provider.
Total The currency and total amount of the transaction, including any tip, toll, cash back, and
convenience fee amounts.
Signature Line where the customer signs the merchant copy of the receipt for a Credit transaction.
way5000 User Manual V1.00 4/3/2009 11
Page 12

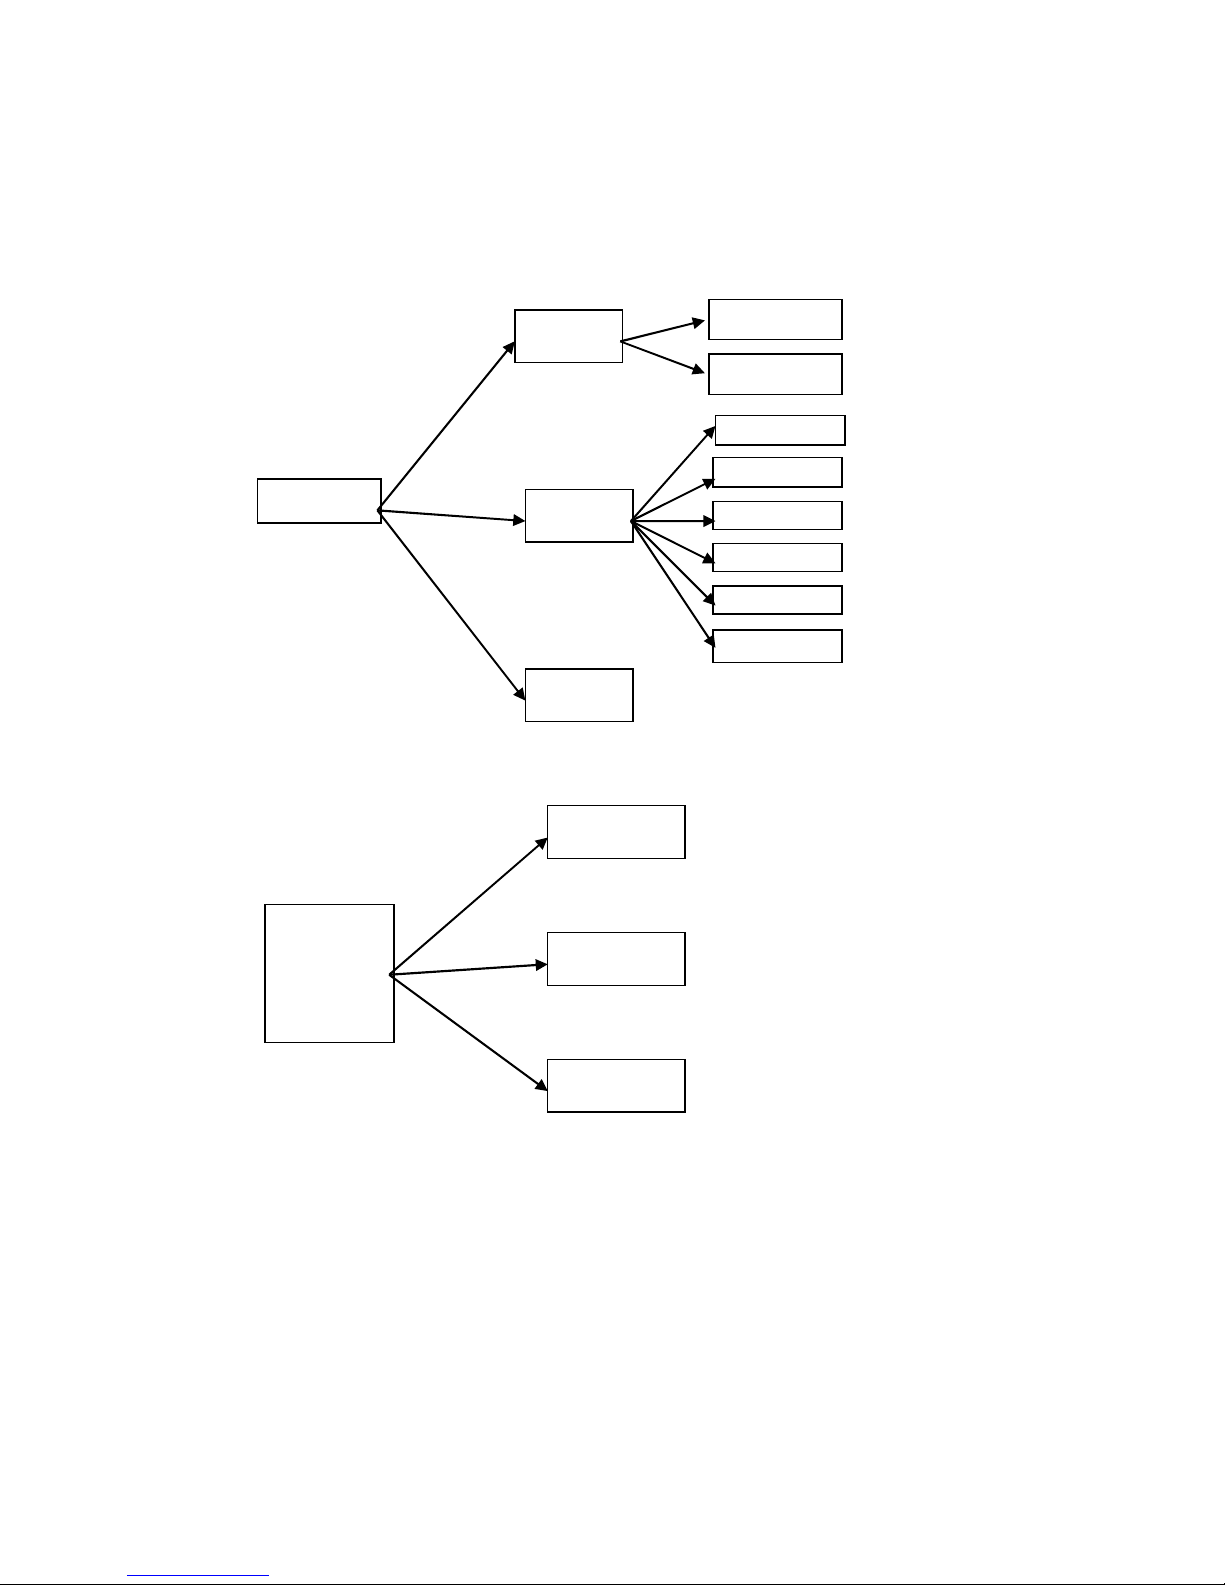
V. way5000 Menu Structure
1
Setup
Config
Report
Top-Level Menu; Online Transactions, Reports & Setup
1. Credit
WAY
2Pay
1. Sale
2. Other
Transactions
3. Inquiry
2. Debit
3. Cash
1. Authorize
Only
2. Return
3. Void
4. Force
5. Reconcile
6. Upload
1. Trans. List
2. Last Trans
3. Re-Print
Trans.
4. Total Info
4. Setup
5. Offline Mode
5. Clear Trans.
6. Reports
1. Admin
5. About
Way5000
2. App
3. User Prefs
4. Printer Test
1
1. Details
2.Totals
Report
1. Reset Adm
2. Reset Adm
1. Backlight
Time
See details on next page
way5000 User Manual V1.00 4/3/2009 12
Page 13
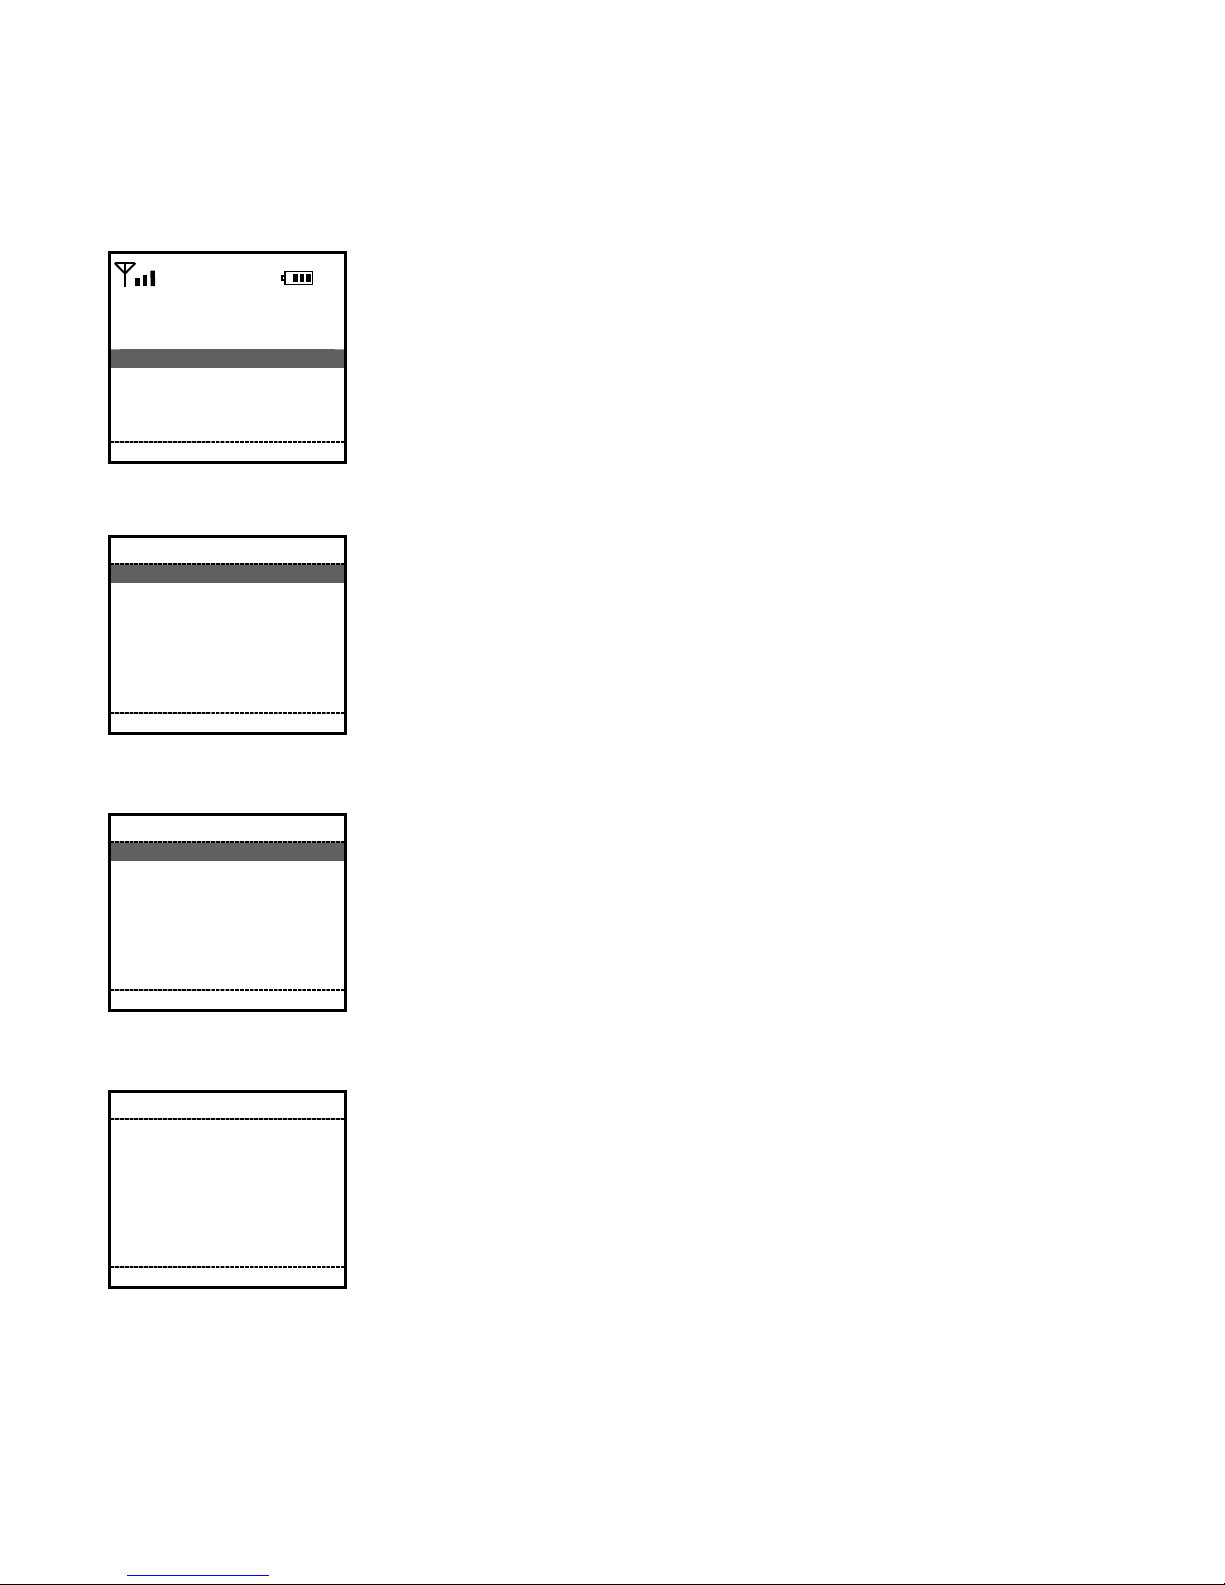
Sub-Menus
1
1
Setup Menus
App Config
1. App
Settings
2.Merchant
Info
3. Reset
Config
1. Check
Update
1. Invoice/Job#
2. Cash Receipt
1. URL
2. Footer 1
3. Footer 2
4. Footer 3
5. Footer 4
6. Phone Num.
Check
2. Setup
Update
3. System
Version
For WAY Helpdesk Use Only
way5000 User Manual V1.00 4/3/2009 13
Page 14

1
Offline Transaction Menu
1. Credit
1. Sale
2. Cash
1. Authorize
Only
WAY2Pay
2. Other
Transactions
3. Inquiry
2. Return
3. Void
4. Force
1. Trans. List
2. Last Trans
3. Re-Print
Trans.
4. Total Info
5. Clear Trans.
6. Reports.
1. Details Report
2.Totals Report
way5000 User Manual V1.00 4/3/2009 14
4. Setup
5. Go To
Online Mode
1. Admin
Setup
2. App
Config
3. User Prefs
4. Printer Test
5. About
way5000
1
See details on previous page
1. Reset Admin
Code
2. Reset Admin
Passwd
1. Backlight
Page 15

VI. Transaction Definitions
Transaction Types
Sale (Credit/Debit):
This transaction charges the customer for a sale of goods or services. This transaction will require
the user to input at least one amount corresponding to the charge to be applied. After this
transaction is completed, there is no way to adjust the amount. A credit sale can be performed
online or offline, but some restrictions may apply depending on the processor rules. A debit sale
can only be done online and can not be voided.
Authorize-Only (Credit):
This transaction pre-authorizes an amount for a sale of goods or services. This transaction will
require the user to input at least one amount corresponding to the authorization requested. The
objective of this transaction is only to verify available funds. This transaction is not billed to the
cardholder account, can not be voided, and can not be performed offline.
Return (Credit/Debit):
This transaction refunds a specific amount to the cardholder account.
Void (Credit/Debit):
This transaction voids (cancels) a previous transaction. Different payment processors impose
different deadlines for entering Void transactions. In general, a Void must be entered the same
day as the transaction being voided.
Force (Credit/Debit):
This transaction enters a transaction that was previously authorized with a voice authorization or
other method. This transaction can not be voided.
Reconcile:
This transaction uploads any offline transactions stored in the terminal, and clears all transactions
from memory. Reconciliation can only be done online mode.
Upload:
The objective of this transaction is to send all the offline transactions that are sitting in the terminal
to the host to be processed for possible authorization.
Reports:
The reports are printed and used to check the transactions and the totals in the batch
Offline Transactions:
When no wireless signal is available to complete transactions, you can choose to store
transactions to be uploaded later. These are called offline transactions. It is important to
understand that Offline Transactions are NOT authorized until they are uploaded; therefore you
accept these transactions at your own risk. You should perform transactions online whenever
possible, and upload offline transactions as soon as possible (as soon as you return to a location
where there is wireless coverage). If your terminal is lost, stolen, or damaged before you upload
offline transactions, there may be no way for you to process (obtain payment for) these
transactions.
way5000 User Manual V1.00 4/3/2009 15
Page 16

Reconciliation
04/02/2008
When To Use Reconcile
Reconcile once a day (usually at the end of the day) to print a reconciliation report and clear the
day's transactions from the way5000.
What is in the Reconciliation Report
A list by WAY's transaction sequence number of each transaction that was processed, including
type, amount, whether a credit or debit, and authorization code or other transaction status. The
transaction list also includes cash, if enabled.
A summary by type of the number of Credit Sale, Void, Cash (if enabled), Credit Return, Debit
Sale, Debit Return, and Force transactions; the monetary amount of each; whether a credit or
debit; and the total number and net amount of all transactions.
This section of the
report provides totals by
transaction type
The “Count” column
shows the number of
transactions for each
transaction type
The “Total” column
shows the dollar total
monetary amount for
each transaction type
Reconciliation Report
Anytown, MA 11111
-------------------------------------------------------------Merchant ID 0001234567
Terminal ID 0001234562
Batch# 11
Transaction List
====================================
Seq# Card
Type
001 VI Sl 80.00 123456
002 MC Sl 125.00 133444
003 DB Sl 60.00 55444
004 VI Vd 70.00 13344
005 AX Rt 10.00 125679
006 CA Sl 65.00
007 DB Rt 5.00 21333
Totals by Trans Type (w/o cash)
=====================================
Type Count Total
Sl 004 330.00
Fr 000 0.00
Rt 002 15.00
Vd 001 70.00
Au 000 0.00
Cn 000 0.00
Dc 000 0.00
Cash Totals
=====================================
Sl 65.00
Vd 0.00
VI=VISA MC=MASTERCARD DS=Discover
AX=American Express OT=Other
DB=PIN Debit CA=Cash
Sl=Sale Fr=Force Rt=Return
Vd= Void Au= Authorization Only
Cn= Cancelled DC=Declined
Merchant Inc.
157 Main St.
Suite 222
www.website.com
1-222-333-4444
11:10:27
Trans
Trans Amount
Type
(USD)
=
=
Auth#
This section of the report
lists all transactions in the
terminal’s memory; in order
by WAY sequence number:
In the “Type” column,
S=Sale, V=Void, R=Return,
F=Force, Au=Auth Only,
C=Cash, Cn=Cancelled,
Dc=Declined
way5000 User Manual V1.00 4/3/2009 16
Page 17

Optional Data Entry Fields in Transactions
You may be prompted to enter or verify data in various fields during transactions. Depending on
the setup of your device, some of the common fields are:
Card Number: This is the customer’s card account number which may be read from the magnetic
stripe or may be entered manually (for Credit) if the magnetic stripe is damaged.
Expiration date: This is the expiration date of the customer’s card account which may be read
from the magnetic stripe or may be entered manually (for Credit) if the magnetic stripe is damaged.
AMEX CID: This is the 4 digit security code that is located on the front of American Express cards.
VISA CVV2: This is the 3 digit security code that is located on the back of Visa cards in the
signature panel.
Master Card CVC: This is the 3 digit security code that is located on the back of MasterCard
cards in the signature panel.
Discover CID: This is the 3 digit security code that is located on the back of Discover cards in the
signature panel.
AVS ZIP: This is the cardholder’s billing zip code (5 or 9 digits)
AVS Address: This is the cardholder’s street number portion of their address.
Invoice/Job Number: This is a 1 to 17 digit long entry that can be used for Invoice or Job
Number.
Transaction Amount: This is the total amount of the sale in dollars and cents.
Convenience Fee: A fee charged by some retailers for card acceptance.
Toll Amount: This is an amount entry for tolls.
Tip Amount: This is an amount for Tips for taxis, limos, etc.
way5000 User Manual V1.00 4/3/2009 17
Page 18
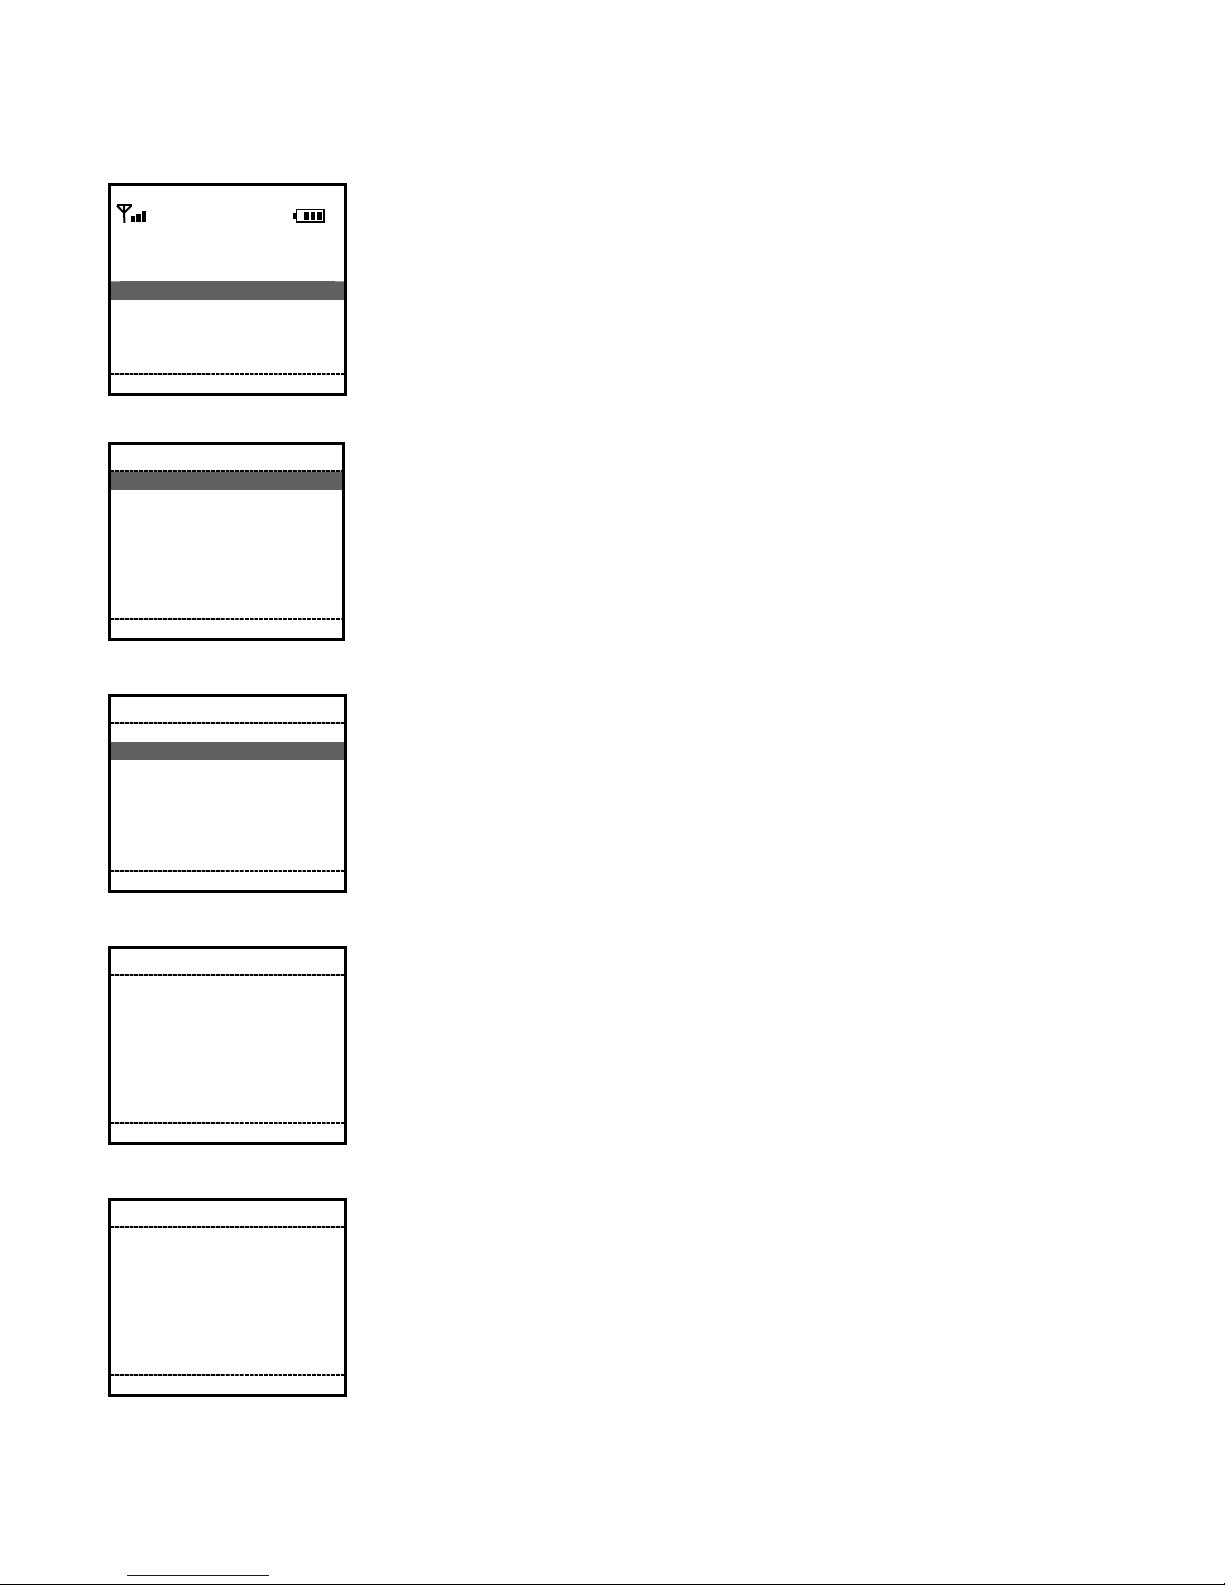
VII. Transaction Flow Details; Online Transactions
Sale Transactions
Sale - Credit
T-Mobile
way5000
1. Way2Pay
2. Check Updates
W2P OK
Connected
Please swipe
Your card
Step 1
To start WAY2Pay, press F2 (Way2Pay) or press ‘1’ to continue.
Transactions
1. Sale
2. Other Trans.
3. Inquiry
4. Setup
5. Offline Mode
Back OK
Sale
1. Credit
2. Debit
3. Cash
Back OK
Step 2
To choose Sale, press the ‘1’ key or press F2 to continue.
Step 3
To Choose Credit, press the ‘1’ key or press F2 to continue.
Debit and Cash Sale may or may or may not appear based on your setup.
If you are only setup for Credit, this step will not appear.
Sale - Credit
Swipe Card Or
Enter Card
Back OK
Number
Step 4
Swipe the Credit Card through the reader. If this is successful, skip to
step 6.
If the swipe does not work or the card is not present, you may manually
enter the card number. Continue with Step 5.
way5000 User Manual V1.00 4/3/2009 18
Page 19

Sale - Credit
Enter Exp. Date
MMYY Format
Back OK
Back OK
Back OK
00/00
Sale - Credit
Enter 4 Digits
Number From
The Front Of The
Card
1234
Sale - Credit
Enter 3 Digits
Number From
The Back Of The
Card
123
Step 5
When the card number is entered manually, the way5000 will prompt for
the card expiration date. Enter the expiration date (MM/YY) and press F2
(OK) to continue.
Step 6-1 (Optional Screen – AMERICAN EXPRESS)
If the card is an American Express card, the way5000 may prompt for the
American Express Security Code which is a 4 digit number located on the
front of the card. Press F2 (OK) to continue.
Step 6-2 (Optional Screen – VISA, MC, DISCOVER)
If the card is a Visa, MC or Discover card, the way5000 may prompt for
the Security Code which is a 3 digit number located on the back of the
card in the signature panel. Enter the code and press F2 (OK) to continue.
Sale - Credit
Select reason
1. Not Legible
2. Not Present
3. Skip Entry
Back OK
1. Not Legible
2. Not Present
Back OK
Sale - Credit
Select reason
Step 7-1 (Optional Screen for Visa/MasterCard)
If the Security Code is not present or is not legible, the way5000 will
prompt for a reason when the Security Code entry is left blank.
Select the appropriate reason by pressing 1, 2, or 3 and hit F2 (OK) to
continue.
Step 7-2 (Optional Screen for Discover)
The terminal will prompt for a reason when the CID is skipped (left in
blank) in the previous steps (Step 6-1 or 6-4). If the CID information is
entered, the terminal will not prompt this screen
Select the appropriate reason and hit F2 (OK) to continue.
way5000 User Manual V1.00 4/3/2009 19
Page 20

Sale - Credit
Enter Zip Code
For Cardholder
Billing Address
01801
Back OK
Enter Cardholder
Back OK
Back OK
Sale – Credit
Billing Address #
200
Sale – Credit
Enter
Invoice/Job#
or Press
OK to Continue
123456
Step 8 (Optional Screen – AVS - ZIP CODE)
The way5000 may prompt for the cardholder‘s billing zip code; the
number may be 5 or 9 digits. Enter the digits and press F2 (OK) to
continue.
Step 9 (Optional Screen – AVS – STREET ADDRESS)
The way5000 may prompt cardholder‘s billing address street number.
Enter the digits and press F2 (OK) to continue.
Step 10 (Optional Screen – INVOICE/JOB Number)
If this field is enabled in the terminal configuration, the way5000 will
prompt for and Invoice or Job Number. Enter the digits and press F2 (OK)
to continue. To skip this entry, press F2 (OK) to continue.
Sale – Credit
Enter Amount
1.00
Back OK
Amount 1.00
C.Fee 1.00
Back OK
Sale - Credit
Please Confirm
The Conv Fee
Step 11
Enter the transaction amount; and press F2 (OK) to continue.
Step 12 (Optional Screen – Convenience Fee)
If this field is enabled in the terminal configuration, the way5000 will ask
you to confirm the convenience fee amount. Check the amount and press
F2 (OK) to continue.
way5000 User Manual V1.00 4/3/2009 20
Page 21

Sale - Credit
Enter Toll Amount
Back OK
1. Enter Tip Amt
2. Print Tip Rcpt
Back OK
Enter Tip Amount
Back OK
1.00
Sale - Credit
Sale - Credit
1.00
Step 13 (Optional Screen – Toll Amount)
If this field is enabled in the terminal configuration, the way5000 will
prompt for the toll amount. Enter the toll amount and press F2 (OK) to
continue. To skip this entry, press F2 (OK) to continue.
Step 14 (Optional Screen – Tip Receipt)
If this field is enabled in the terminal configuration, the way5000 will
prompt for the tip amount. Press F2 (OK) to continue.
Step 15 (Optional Screen – Tip Amount)
If this field is enabled in the terminal configuration, the way5000 will
prompt for the tip amount. To skip this entry, press F2 (OK) to continue.
Sale - Credit
Confirm Details
Amount 1.00
C-Fee 1.00
Tip 0.00
Tolls 0.00
Total 2.00
Back OK
Communication
Processing
Please Wait
Step 16
Once all the amounts are entered, the terminal will confirm the amounts
and final total for the transaction. Press F1 (Back) to go back and fix any
amount or press F2 (OK) to continue with the next step.
Step 17
Processing
This screen will be displayed when the terminal is trying to process
(send/receive) the transaction.
way5000 User Manual V1.00 4/3/2009 21
Page 22

Sale - Credit
Approved
Auth Code 123456
Print Receipt
1. Merchant Copy
2. Customer Copy
Done OK
Sale - Credit
Declined
OK
Step 18-1 (Optional Screen - Approved Transaction 1)
Press F2 (OK) or ‘1’ to print the merchant receipt and continue with the
next step. Press '2' to print the customer copy of the receipt.
Press F1 (Done) to finish the transaction and go to the Transactions Menu
of the Payment Application.
Step 18-2 (Optional Screen - Declined Transaction)
If the transaction is declined, the terminal will only show the transaction
status on the screen. Press F2(OK) to finish the transaction and return to
the Transactions Menu of the Payment Application
way5000 User Manual V1.00 4/3/2009 22
Page 23
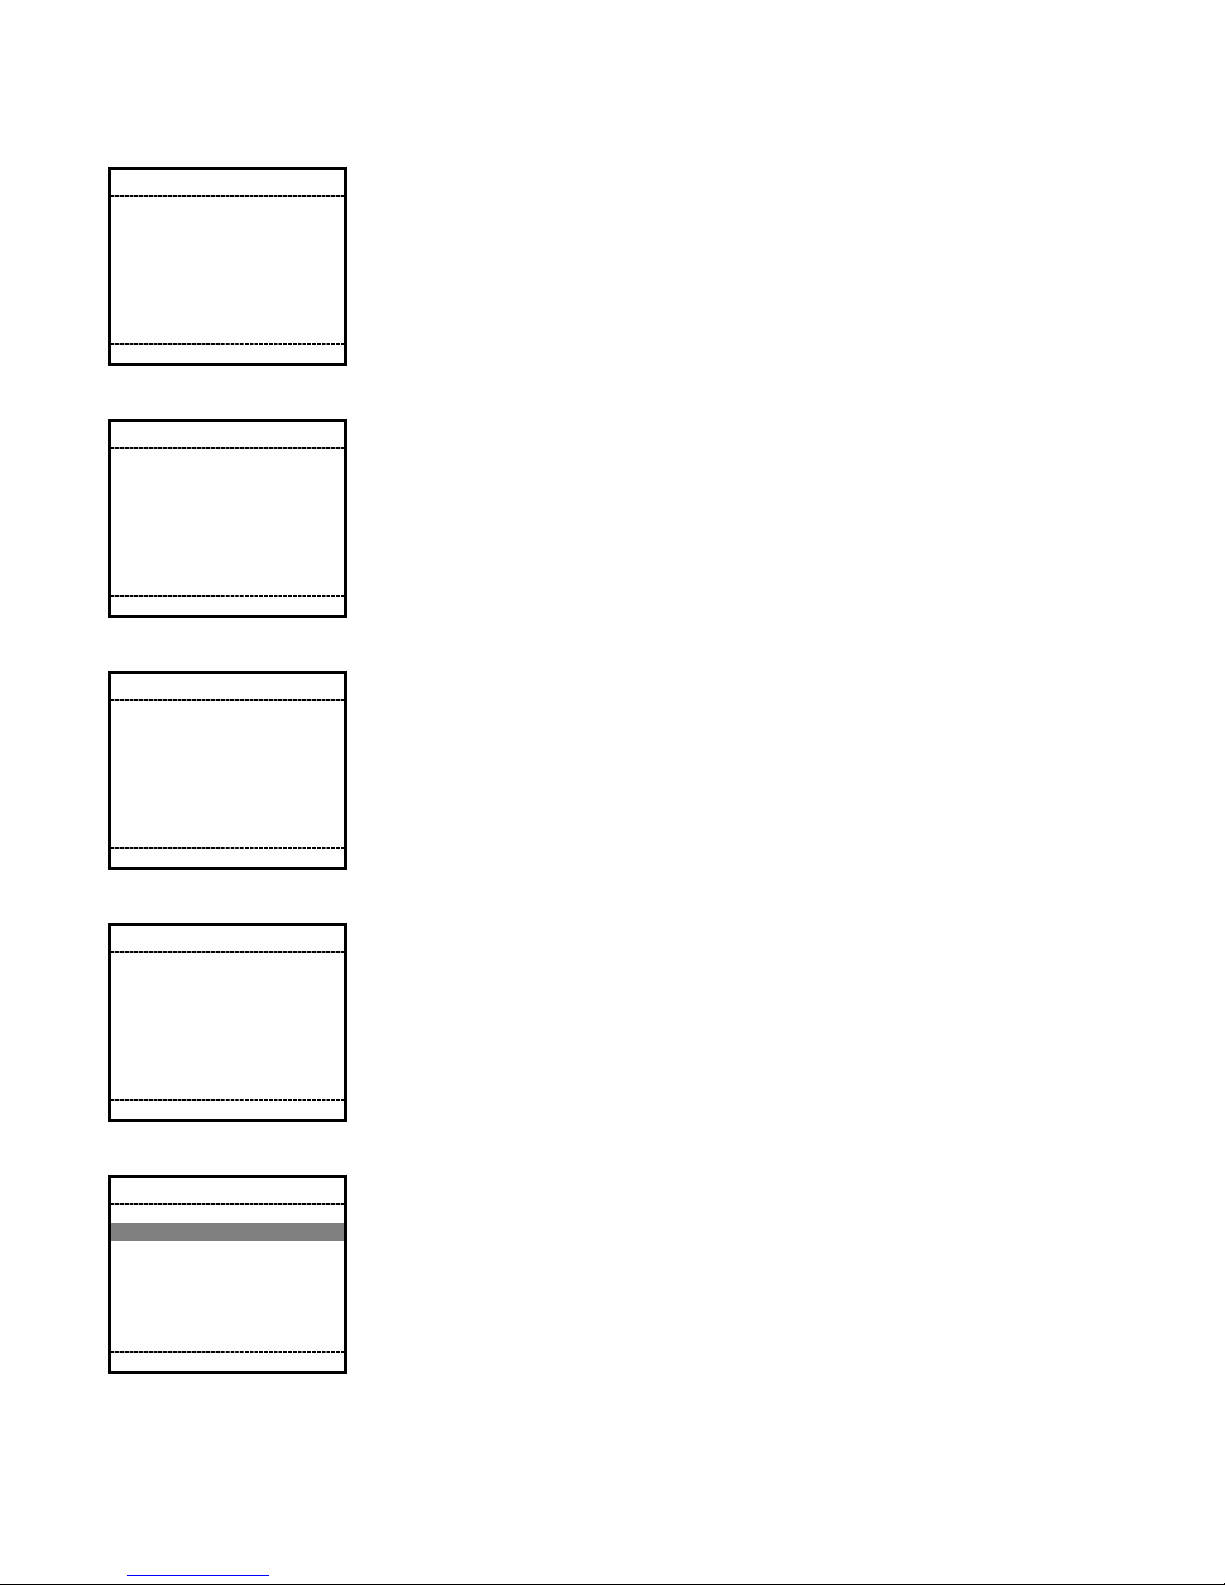
Sale - Debit
T-Mobile
way5000
1. Way2Pay
2. Check Updates
W2P OK
1. Sale
2. Other Trans.
3. Inquiry
4. Setup
5. Offline Mode
Back OK
Connected
Please swipe
Your card
Transactions
Step 1
To start WAY2Pay, press F2 (Way2Pay) or press ‘1’ to continue.
Step 2
To choose Sale, press the ‘1’ key.
Sale
1. Credit
2. Debit
3. Cash
Back OK
Sale - Debit
Swipe Card
Back OK
Number or Press
Back OK
Sale - Debit
Enter
Invoice/Job #
OK to Continue
123456
Step 3
To Choose Debit, press the ‘2’ key.
Cash Sale may or may or may not appear based on your setup.
.
Step 4
Swipe the Credit Card through the reader.
(Manual Entry of Card Data is not allowed for Debit transactions.)
Step 5 (Optional Screen – INVOICE/JOB Number)
If this field is enabled in the terminal configuration, the way5000 will
prompt for and Invoice or Job Number. Enter the digits and press F2 (OK)
to continue. To skip this entry, press F2 (OK) to continue.
way5000 User Manual V1.00 4/3/2009 23
Page 24
Sale – Debit
Enter Amount
1.00
Back OK
Back OK
Enter Toll Amount
Back OK
Sale - Debit
Please Confirm
The Conv. Fee
Amount 1.00
C.Fee 1.00
Sale - Debit
1.00
Step 6
Enter the transaction amount; and press F2 (OK) to continue.
Step 7 (Optional Screen – Convenience Fee)
If this field is enabled in the terminal configuration, the way5000 will ask
you to confirm the convenience fee amount. Check the amount and press
F2 (OK) to continue.
Step 8 (Optional Screen – Toll Amount)
If this field is enabled in the terminal configuration, the way5000 will
prompt for the toll amount. Enter the toll amount and press F2 (OK) to
continue. To skip this entry, press F2 (OK) to continue.
Sale - Debit
Enter Cash Back
Back OK
1. Enter Tip Amt
2. Print Tip Rcpt
Back OK
amount
1.00
Sale - Debit
Step 9 (Optional Screen – Cash Back Amount)
If this field is enabled in the terminal configuration, the way5000 will
prompt for the cash back amount. Enter the cash back amount and press
F2 (OK) to continue. To skip this entry, press F2 (OK) to continue.
Step 10 (Optional Screen – Tip Receipt)
If this field is enabled in the terminal configuration, the way5000 will
prompt for the tip amount. Press F2 (OK) to continue.
way5000 User Manual V1.00 4/3/2009 24
Page 25
Sale – Debit
Enter Tip Amount
Back OK
Confirm Details
Amount 1.00
C-Fee 1.00
Tip 0.00
Tolls 0.00
Cash Back 1.00
Total 3.00
Back OK
Back OK
1.00
Sale – Debit
Sale – Debit
Total USD3.00
Enter PIN
****
Step 11 (Optional Screen – Tip Amount)
If this field is enabled in the terminal configuration, the way5000 will
prompt for the tip amount. To skip this entry, press F2 (OK) to continue.
Step 12
Once all the amounts are entered, the terminal will confirm the amounts
and final total for the transaction. Press F1 (Back) to go back and fix any
amount or press F2 (OK) to continue with the next step.
Step 13
Hand the way5000 to the customer. Have them enter their Personal
Identification Number (PIN) and press F2 (OK) to continue.
Communication
Processing
Please Wait
Auth Code 123456
1. Merchant Copy
2. Customer Copy
Done OK
Sale – Debit
Approved
Print Receipt
Step 14
This screen will be displayed when the terminal is trying to process
(send/receive) the transaction.
Step 15-1 (Optional Screen - Approved Transaction 1)
Press F2 (OK) or ‘1’ to print the merchant receipt and continue with the
next step. Press '2' to print the customer copy of the receipt.
Press F1 (Done) to finish the transaction and go to the Transactions Menu
of the Payment Application.
way5000 User Manual V1.00 4/3/2009 25
Page 26

Sale - Debit
OK
Declined
Step 15-2 (Optional Screen - Declined Transaction)
If the transaction is declined, the terminal will only show the transaction
status on the screen. Press F2(OK) to finish the transaction and return to
the Transactions Menu of the Payment Application
way5000 User Manual V1.00 4/3/2009 26
Page 27
Sale - Cash
T-Mobile
Way5000
1. Way2Pay
2. Check Updates
W2P OK
1. Sale
2. Other Trans.
3. Inquiry
4. Setup
5. Offline Mode
Back OK
Connected
Please swipe
Your card
Transactions
Step 1
To start WAY2Pay, press F2 (Way2Pay) or press ‘1’ to continue.
Step 2
To choose Sale, press the ‘1’ key.
Sale
1. Credit
2. Debit
3. Cash
Back OK
Sale – Cash
Back OK
Back OK
Enter
Invoice/Job# or
Press OK to
Continue
123456
Sale – Cash
Enter Amount
1.00
Step 3
To Choose Cash, press the ‘3’ key.
Credit and Debit Sale may or may or may not appear based on your
setup.
.
Step 4 (Optional Screen – INVOICE/JOB Number)
If this field is enabled in the terminal configuration, the way5000 will
prompt for and Invoice or Job Number. Enter the digits and press F2
(OK) to continue. To skip this entry, press F2 (OK) to continue.
Step 5
Enter the transaction amount; and press F2 (OK) to continue.
way5000 User Manual V1.00 4/3/2009 27
Page 28

Sale - Cash
Enter Toll Amount
1.00
Back OK
1. Enter Tip Amt
2. Print Tip Rcpt
Back OK
Enter Tip Amount
Back OK
Sale - Credit
Sale - Cash
1.00
Step 6 (Optional Screen – Toll Amount)
If this field is enabled in the terminal configuration, the way5000 will
prompt for the toll amount. Enter the toll amount and press F2 (OK) to
continue. To skip this entry, press F2 (OK) to continue.
Step 7 (Optional Screen – Tip Receipt)
If this field is enabled in the terminal configuration, the way5000 will
prompt for the tip amount. Press F2 (OK) to continue.
Step 8 (Optional Screen – Tip Amount)
If this field is enabled in the terminal configuration, the way5000 will
prompt for the tip amount. To skip this entry, press F2 (OK) to continue.
Sale - Cash
Confirm Details
Amount 1.00
Tip 0.00
Tolls 0.00
Total 2.00
Back OK
Sale - Cash
Approved
1. Merchant Copy
2. Customer Copy
Done OK
Print Receipt
Step 9
Once all the amounts are entered, the terminal will confirm the amounts
and final total for the transaction. Press F1 (Back) to go back and fix any
amount or press F2 (OK) to continue with the next step.
Step 10
Press F2 (OK) or ‘1’ to print the merchant receipt and continue with the
next step. Press '2' to print the customer copy of the receipt.
Press F1 (Done) to finish the transaction and go to the Transactions
Menu of the Payment Application.
way5000 User Manual V1.00 4/3/2009 28
Page 29

Other Transactions
Authorize Only
T-Mobile
way5000
1. Way2Pay
2. Check Updates
W2P OK
1. Sale
2. Other Trans.
3. Inquiry
4. Setup
5. Offline Mode
Back OK
Connected
Please swipe
Your card
Transactions
Step 1
To start WAY2Pay, press F2 (Way2Pay) or press ‘1’ to continue.
Step 2
To choose Other Transactions, press the ‘2’ key.
Other Trans.
1. Authorize Only
2. Return
3. Void
4. Force
5. Reconcile
6. Upload
Back OK
Auth. Only
Enter Authorize
Password
Back OK
Back OK
******
Auth. Only
Swipe Card Or
Enter Card
Number
Step 3
Press the ‘1’ key to select Authorize Only.
Step 4 (Optional Screen – Authorize Only Password)
If the authorize password prompt is enabled in the terminal configuration,
the Terminal will prompt for the authorize password, in order to continue
with the next step, the right password must be entered.
Step 5
Swipe the Credit Card through the reader. If this is successful, skip to
step 6.
If the swipe does not work or the card is not present, you may manually
enter the card number. Continue with Step 5.
way5000 User Manual V1.00 4/3/2009 29
Page 30

Auth. Only
Enter Exp. Date
MMYY Format
Back OK
Back OK
Back OK
00/00
Auth. Only
Enter 4 Digits
Number From The
Front Of The Card
1234
Auth. Only
Enter 3 Digits
Number From The
Back Of The Card
123
Step 6
When the card number is entered manually, the way5000 will prompt for
the card expiration date. Enter the expiration date (MM/YY) and press F2
(OK) to continue.
Step 7-1 (Optional Screen – AMERICAN EXPRESS)
If the card is an American Express card, the way5000 may prompt for the
American Express Security Code which is a 4 digit number located on the
front of the card. Press F2 (OK) to continue.
Step 6-2 (Optional Screen – VISA, MC, DISCOVER)
If the card is a Visa, MC or Discover card, the way5000 may prompt for
the Security Code which is a 3 digit number located on the back of the
card in the signature panel. Enter the code and press F2 (OK) to continue.
Auth. Only
Select reason
1. Not Legible
2. Not Present
3. Skip Entry
Back OK
Auth. Only
Select reason
1. Not Legible
2. Not Present
Back OK
Step 8-1 (Optional Screen for Visa/MasterCard)
If the Security Code is not present or is not legible, the way5000 will
prompt for a reason when the Security Code entry is left blank.
Select the appropriate reason by pressing 1, 2, or 3 and hit F2 (OK) to
continue.
Step 8-2 (Optional Screen for Discover)
The terminal will prompt for a reason when the CID is skipped (left in
blank) in the previous steps (Step 6-1 or 6-4). If the CID information is
entered, the terminal will not prompt this screen
Select the appropriate reason and hit F2 (OK) to continue.
way5000 User Manual V1.00 4/3/2009 30
Page 31

Auth. Only
Enter Zip Code
For Cardholder
Billing Address
01801
Back OK
Enter Cardholder
Billing Address #
Back OK
Back OK
Auth. Only
200
Auth. Only
Enter
Invoice/Job#
or Press
OK to Continue
123456
Step 9 (Optional Screen – AVS - ZIP CODE)
The way5000 may prompt cardholder ‘s billing zip code; the number may
be 5 or 9 digits. Enter the digits and press F2 (OK) to continue.
Step 10 (Optional Screen – AVS – STREET ADDRESS)
The way5000 may prompt cardholder‘s billing address street number.
Enter the digits and press F2 (OK) to continue.
Step 11 (Optional Screen – INVOICE/JOB Number)
If this field is enabled in the terminal configuration, the way5000 will
prompt for and Invoice or Job Number. Enter the digits and press F2 (OK)
to continue. To skip this entry, press F2 (OK) to continue.
Auth. Only
Enter Amount
1.00
Back OK
Amount 1.00
Total 1.00
Back OK
Auth. Only
Confirm Details
Step 12
Enter the transaction amount; and press F2 (OK) to continue.
Step 13
Once all the amounts are entered, the terminal will confirm the amounts
and final total for the transaction. Press F1 (Back) to go back and fix any
amount or press F2 (OK) to continue with the next step.
way5000 User Manual V1.00 4/3/2009 31
Page 32

Auth. Only
Approved
Auth Code 123456
Print Receipt
1. Merchant Copy
2. Customer Copy
Done OK
Auth. Only
OK
Declined
Step 15-1 (Optional Screen - Approved Transaction 1)
Press F2 (OK) or ‘1’ to print the merchant receipt and continue with the
next step. Press '2' to print the customer copy of the receipt.
Press F1 (Done) to finish the transaction and go to the Transactions Menu
of the Payment Application.
Step 15-2 (Optional Screen - Declined Transaction)
If the transaction is declined, the terminal will only show the transaction
status on the screen. Press F2(OK) to finish the transaction and return to
the Transactions Menu of the Payment Application
way5000 User Manual V1.00 4/3/2009 32
Page 33
Return
Return - Credit
T-Mobile
way5000
1. Way2Pay
2. Check Updates
W2P OK
1. Sale
2. Other Trans.
3. Inquiry
4. Setup
5. Offline Mode
Back OK
Connected
Please swipe
Your card
Transactions
Step 1
To start WAY2Pay, press F2 (Way2Pay) or press ‘1’ to continue.
Step 2
To choose Other Transactions, press the ‘2’ key.
Other Trans.
1. Authorize Only
2. Return
3. Void
4. Force
5. Reconcile
6. Upload
Back OK
Return
Enter Return
Password
Back OK
1. Credit
2. Debit
Back OK
******
Return
Step 3
Press the ‘2’ key to select Return.
Step 4 (Optional Screen – Return Password)
If the authorize password prompt is enabled in the terminal configuration,
the Terminal will prompt for the authorize password, in order to continue
with the next step, the right password must be entered.
Step 5 (Payment Menu)
Press the ‘1’ key to select Credit Return.
If the offline mode is enabled in the terminal or Debit is not enabled, the
Debit option will not be present in the menu.
way5000 User Manual V1.00 4/3/2009 33
Page 34

Return - Credit
Swipe Card Or
Enter Card
Number
Back OK
Back OK
Back OK
Return - Credit
Enter Exp. Date
MMYY Format
00/00
Return - Credit
Enter Amount
1.00
Step 6
Swipe the Credit Card through the reader. If this is successful, skip to
step 6.
If the swipe does not work or the card is not present, you may manually
enter the card number. Continue with Step 5.
Step 7
When the card number is entered manually, the way5000 will prompt for
the card expiration date. Enter the expiration date (MM/YY) and press F2
(OK) to continue.
Step 8
Enter the transaction amount; and press F2 (OK) to continue.
Return - Credit
Confirm Details
Amount 1.00
Total 1.00
Back OK
Return - Credit
Approved
Auth Code 123456
Print Receipt
1. Merchant Copy
2. Customer Copy
Done OK
Step 9
Once all the amounts are entered, the terminal will confirm the amounts
and final total for the transaction. Press F1 (Back) to go back and fix any
amount or press F2 (OK) to continue with the next step.
Step 10-1 (Optional Screen - Approved Transaction 1)
Press F2 (OK) or ‘1’ to print the merchant receipt and continue with the
next step. Press '2' to print the customer copy of the receipt.
Press F1 (Done) to finish the transaction and go to the Transactions Menu
of the Payment Application.
way5000 User Manual V1.00 4/3/2009 34
Page 35

Return - Credit
OK
Declined
Step 10-2 (Optional Screen - Declined Transaction)
If the transaction is declined, the terminal will only show the transaction
status on the screen. Press F2(OK) to finish the transaction and return to
the Transactions Menu of the Payment Application
way5000 User Manual V1.00 4/3/2009 35
Page 36
Return - Debit
T-Mobile
way5000
1. Way2Pay
2. Check Updates
W2P OK
1. Sale
2. Other Trans.
3. Inquiry
4. Setup
5. Offline Mode
Back OK
1. Authorize Only
2. Return
3. Void
4. Force
5. Reconcile
6. Upload
Back OK
Connected
Please swipe
Your card
Transactions
Other Trans.
Step 1
To start WAY2Pay, press F2 (Way2Pay) or press ‘1’ to continue.
Step 2
To choose Other Transactions, press the ‘2’ key.
Step 3
Press the ‘2’ key to select Return.
Return
Enter Return
Password
Back OK
1. Credit
2. Debit
Back OK
******
Return
Step 4 (Optional Screen – Return Password)
If the authorize password prompt is enabled in the terminal configuration,
the Terminal will prompt for the authorize password, in order to continue
with the next step, the right password must be entered.
Step 5 (Payment Menu)
Press the ‘2’ key to select Debit Return.
If the offline mode is enabled in the terminal or Debit is not enabled, the
Debit option will not be present in the menu.
way5000 User Manual V1.00 4/3/2009 36
Page 37

Return - Debit
Swipe Card
Back
Back OK
Amount 1.00
Total 1.00
Back OK
Return - Debit
Enter Amount
1.00
Return - Debit
Confirm Details
Step 6
Swipe the Credit Card through the reader.
(Manual Entry of Card Data is not allowed for Debit transactions.)
Step 7
Enter the transaction amount; and press F2 (OK) to continue.
Step 8
Once all the amounts are entered, the terminal will confirm the amounts
and final total for the transaction. Press F1 (Back) to go back and fix any
amount or press F2 (OK) to continue with the next step.
Sale – Debit
Total USD3.00
Enter PIN
Back OK
Auth Code 123456
Print Receipt
1. Merchant Copy
2. Customer Copy
Done OK
****
Return - Debit
Approved
Step 9
Hand the way5000 to the customer. Have them enter their Personal
Identification Number (PIN) and press F2 (OK) to continue.
Step 10-1 (Optional Screen - Approved Transaction 1)
Press F2 (OK) or ‘1’ to print the merchant receipt and continue with the
next step. Press '2' to print the customer copy of the receipt.
Press F1 (Done) to finish the transaction and go to the Transactions
Menu of the Payment Application.
way5000 User Manual V1.00 4/3/2009 37
Page 38

Return - Debit
OK
Declined
Step 10-2 (Optional Screen - Declined Transaction)
If the transaction is declined, the terminal will only show the transaction
status on the screen. Press F2(OK) to finish the transaction and return to
the Transactions Menu of the Payment Application
way5000 User Manual V1.00 4/3/2009 38
Page 39

Void
T-Mobile
way5000
1. Way2Pay
2. Check Updates
W2P OK
1. Sale
2. Other Trans.
3. Inquiry
4. Setup
5. Offline Mode
Back OK
1. Authorize Only
2. Return
3. Void
4. Force
5. Reconcile
6. Upload
Back OK
Connected
Please swipe
Your card
Transactions
Other Trans.
Step 1
To start WAY2Pay, press F2 (Way2Pay) or press ‘1’ to continue.
Step 2
To choose Other Transactions, press the ‘2’ key.
Step 3
Press the ‘3’ key to select Void.
Void
Enter Void
Password
Back OK
Back OK
******
Void
Enter Trans.
Seq. #
123
Step 4 (Optional Screen – Void Password)
If the authorize password prompt is enabled in the terminal configuration,
the Terminal will prompt for the authorize password, in order to continue
with the next step, the right password must be entered. Press F2 (OK) to
continue
Step 5
Enter the transaction sequence number and press F2 (OK) to continue.
The sequence number can be found on the receipt or using the Inquiry
function.
way5000 User Manual V1.00 4/3/2009 39
Page 40

Void
Seq # 001
Auth No. 123456
Amount $1.00
Back OK
Confirm Void?
Step 6
Transaction Information matching the sequence number will be displayed.
If this matches transaction details, press F2 (OK) to continue.
Void
Approved
Auth Code 123456
Print Receipt
1. Merchant Copy
2. Customer Copy
Done OK
Void
OK
Declined
Step 7-1 (Optional Screen - Approved Transaction 1)
Press F2 (OK) or ‘1’ to print the merchant receipt and continue with the
next step. Press '2' to print the customer copy of the receipt.
Press F1 (Done) to finish the transaction and go to the Transactions Menu
of the Payment Application..
Step 7-2 (Optional Screen - Declined Transaction)
If the transaction is declined, the terminal will only show the transaction
status on the screen. Press F2(OK) to finish the transaction and return to
the Transactions Menu of the Payment Application
way5000 User Manual V1.00 4/3/2009 40
Page 41
Force
T-Mobile
way5000
1. Way2Pay
2. Check Updates
W2P OK
1. Sale
2. Other Trans.
3. Inquiry
4. Setup
5. Offline Mode
Back OK
1. Authorize Only
2. Return
3. Void
4. Force
5. Reconcile
6. Upload
Back OK
Connected
Please swipe
Your card
Transactions
Other Trans.
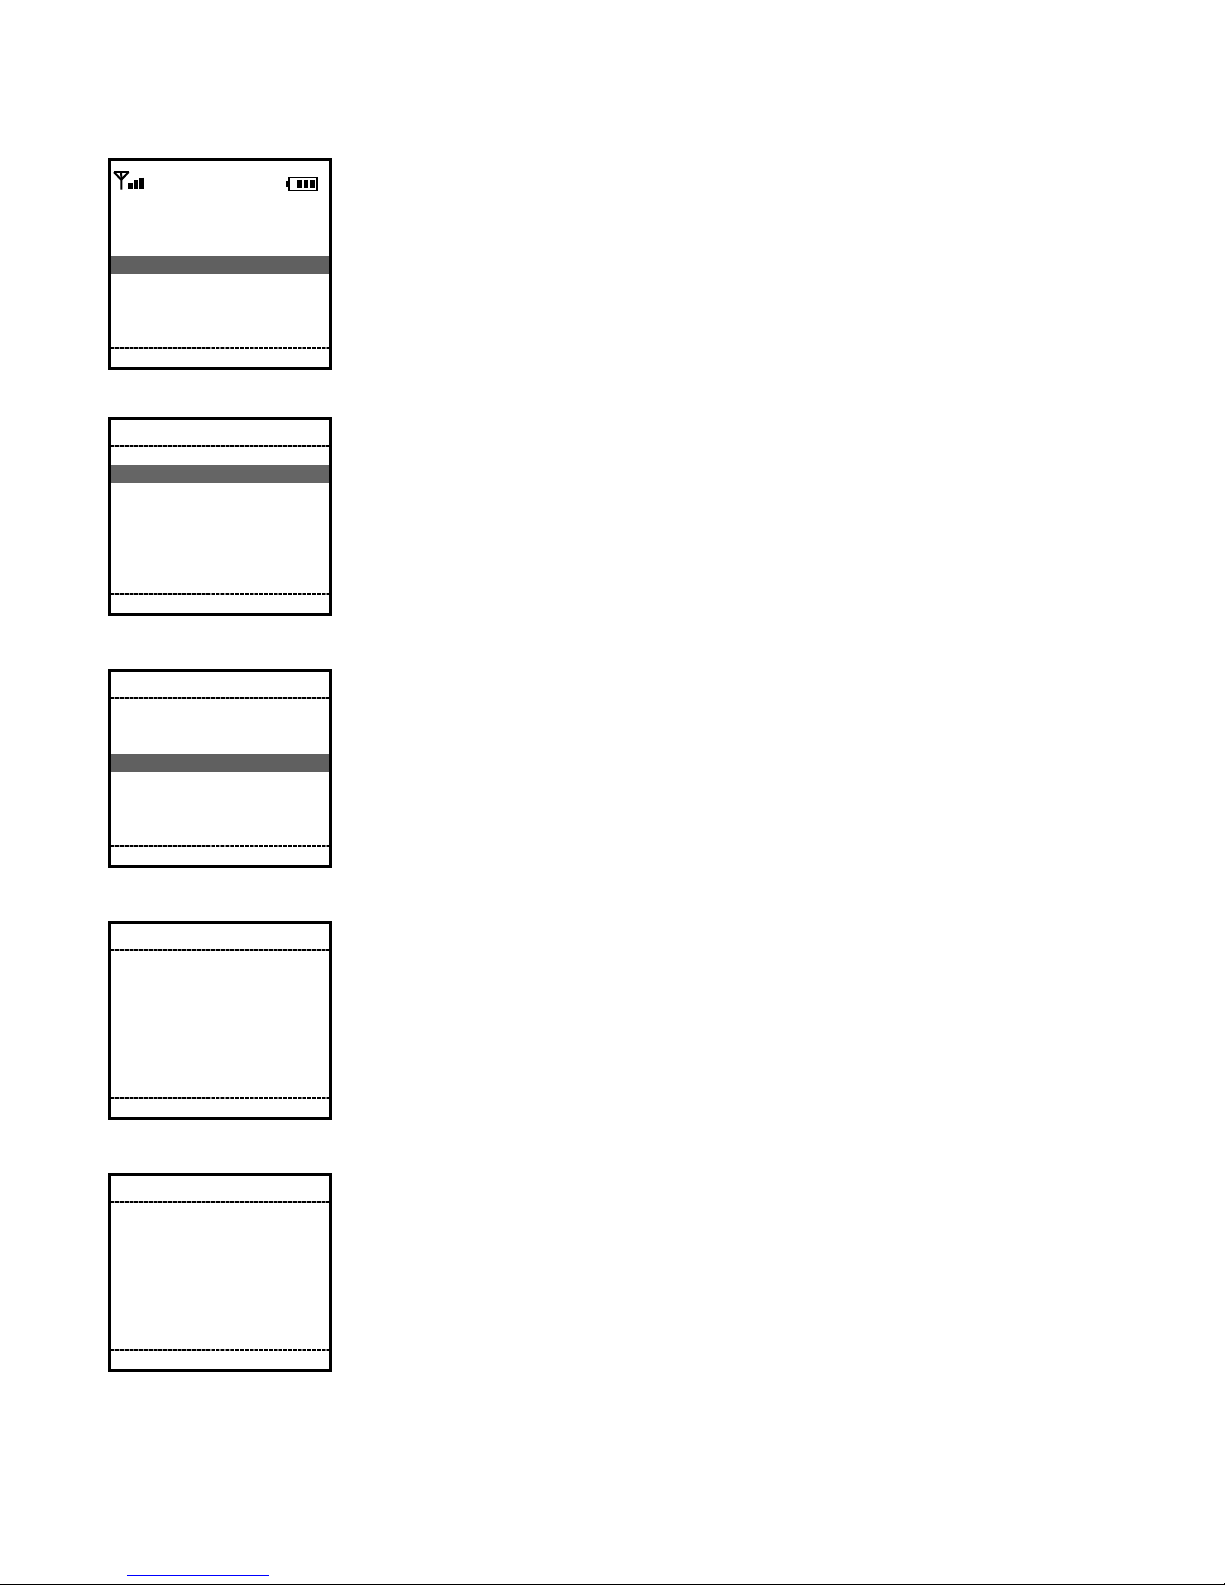
Step 1
To start WAY2Pay, press F2 (Way2Pay) or press ‘1’ to continue.
Step 2
To choose Other Transactions, press the ‘2’ key.
Step 3
Press the ‘4’ key to select Force.
Force
Enter Force
Password
******
Back OK
Back OK
Force
Swipe Card Or
Enter Card
Number
Step 4 (Optional Screen – Force Password)
If the authorize password prompt is enabled in the terminal configuration,
the Terminal will prompt for the authorize password, in order to continue
with the next step, the correct password must be entered. Press F2 (OK)
to continue
Step 5
Swipe the Credit Card through the reader. If this is successful, skip to
step 7.
If the swipe does not work or the card is not present, you may manually
enter the card number. Continue with Step 7.
way5000 User Manual V1.00 4/3/2009 41
Page 42

Force
Enter Exp. Date
MMYY Format
Back OK
Back OK
Back OK
00/00
Force
Enter
Invoice/Job#
or Press
OK to Continue
123456
Force
Enter Amount
1.00
Step 6
When the card number is entered manually, the way5000 will prompt for
the card expiration date. Enter the expiration date (MM/YY) and press F2
(OK) to continue.
Step 7 (Optional Screen – INVOICE/JOB Number)
If this field is enabled in the terminal configuration, the way5000 will
prompt for and Invoice or Job Number. Enter the digits and press F2
(OK) to continue. To skip this entry, press F2 (OK) to continue.
Step 8
Enter the transaction amount; and press F2 (OK) to continue.
Force
Confirm Details
Amount 1.00
Total 1.00
Back OK
Back OK
Force
Enter Auth Code
123456
Step 9
Once all the amounts are entered, the terminal will confirm the amounts
and final total for the transaction. Press F1 (Back) to go back and fix any
amount or press F2 (OK) to continue with the next step.
Step 10
Enter the Authorization Code received for this transaction and press F2
(OK) to continue.
way5000 User Manual V1.00 4/3/2009 42
Page 43

Force
Approved
Auth Code 123456
1. Merchant Copy
2. Customer Copy
Done OK
OK
Print Receipt
Force
Declined
Step 11-1 (Optional Screen - Approved Transaction 1)
Press F2 (OK) or ‘1’ to print the merchant receipt and continue with the
next step. Press '2' to print the customer copy of the receipt.
Press F1 (Done) to finish the transaction and go to the Transactions Menu
of the Payment Application..
Step 11-2 (Optional Screen - Declined Transaction)
If the transaction is declined, the terminal will only show the transaction
status on the screen. Press F2(OK) to finish the transaction and return to
the Transactions Menu of the Payment Application
way5000 User Manual V1.00 4/3/2009 43
Page 44
VIII. Reconcile and Upload
Reconcile
T-Mobile
way5000
1. Way2Pay
2. Check Updates
W2P OK
1. Sale
2. Other Trans.
3. Inquiry
4. Setup
5. Offline Mode
Back OK
Connected
Please swipe
Your card
Transactions
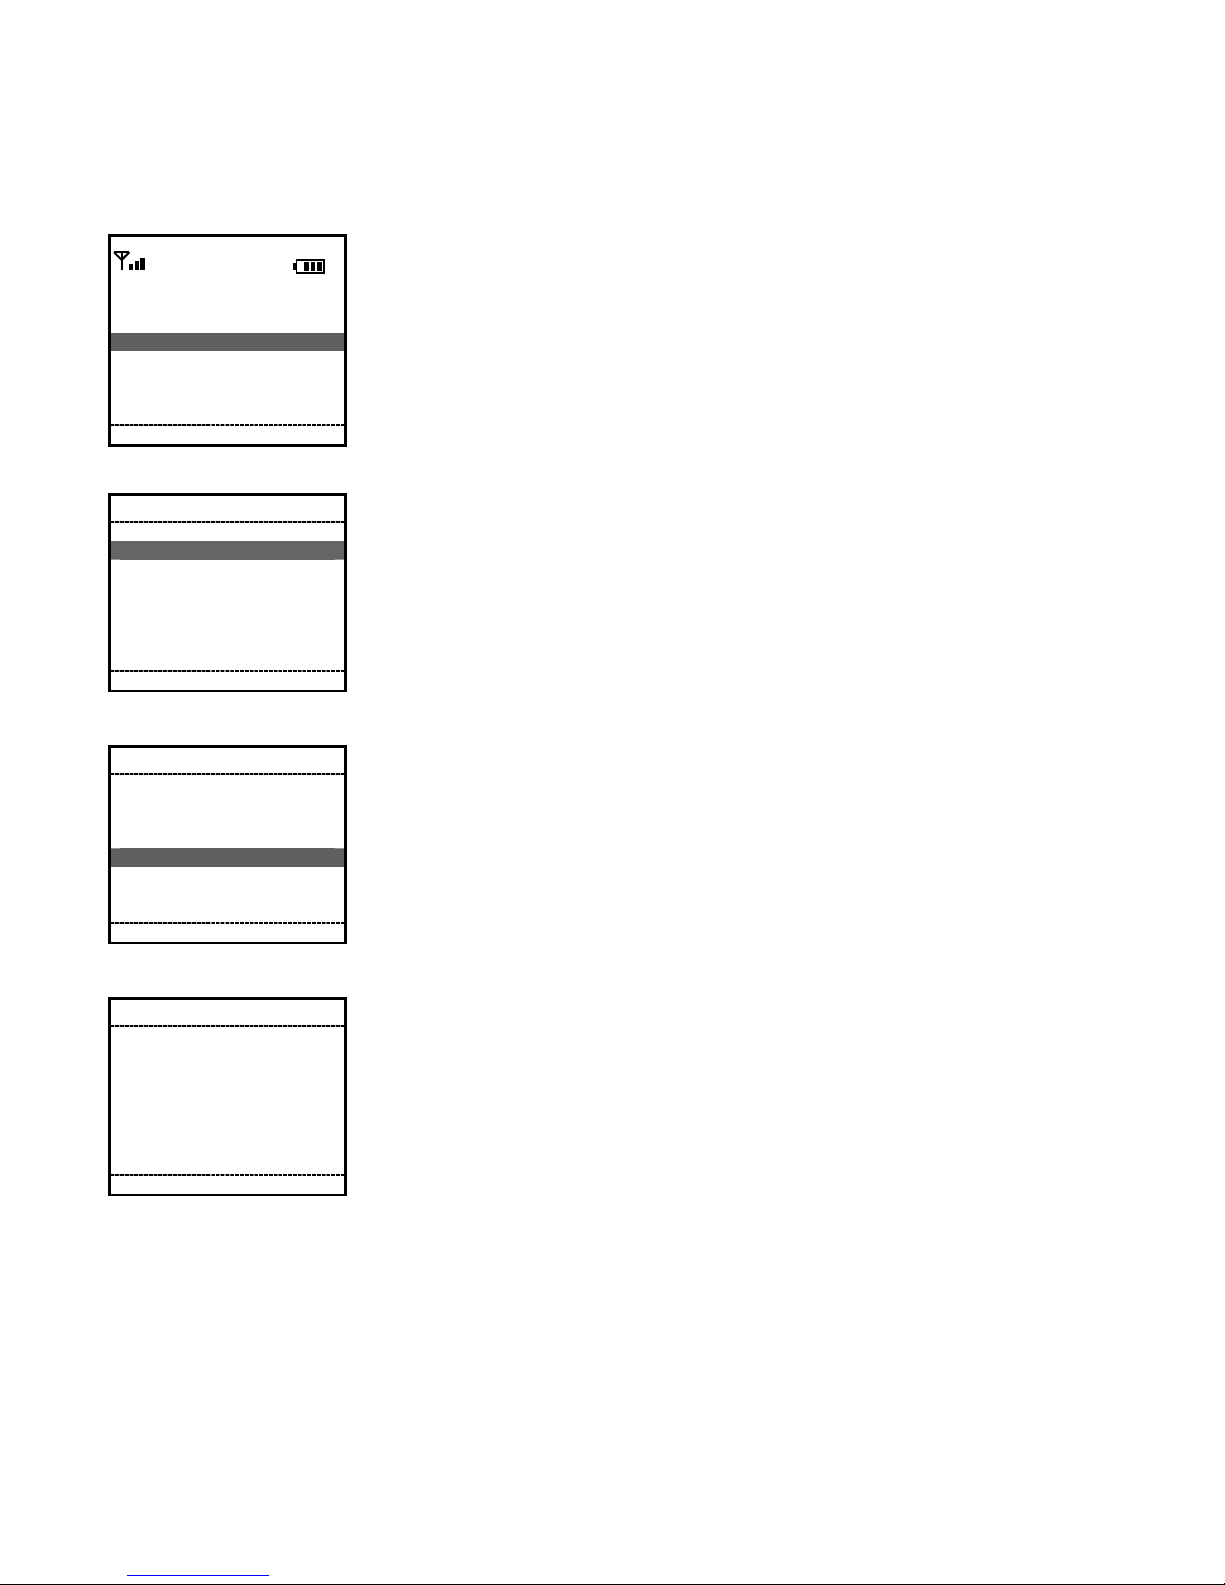
Step 1
To start WAY2Pay, press F2 (Way2Pay) or press ‘1’ to continue.
Step 2
To choose Other Transactions, press the ‘2’ key.
Other Trans.
1. Authorize Only
2. Return
3. Void
4. Force
5. Reconcile
6. Upload
Back OK
Reconcile
007 Offline
Trans. to Upload
Select Upload
To Continue
Back Upload
Step 3
Press the ‘5’ key to select Reconcile.
Step 4
If there are Offline Transactions in the terminal, a message will be
displayed showing the number of Offline Transactions to be Uploaded.
Press F2 (OK) to start the Upload.
way5000 User Manual V1.00 4/3/2009 44
Page 45

Communication
Processing
Uploading
002 of 008
Upload Complete
Done Yes
Reconcile
Apoproved: 11
Declined: 1
Print Uploaded
Transactions?
Reconcile
Printing
002 0f 008
transactions
Please Wait
Step 5 (Print Offline Receipts Option)
Please wait while the transactions are uploaded.
Step 6 (Print Offline Receipts Option)
This is an optional step. To print receipts for all Offline transactions,
Press F2 (Yes) to print the receipts or press F1 (No) to continue to
reconciliation (step 10).
Step 7 (Printing Offline Receipts)
This message displays while uploaded transactions are printing.
Reconcile
Printing Uploaded
Transactions
Continue?
No Yes
Re-Print Uploaded
Done Yes
Reconcile
Transactions?
Step 8 (Continue Printing Offline Receipts Optional Screen)
If there are more than 5 Offline transactions to print, you will be prompted
(after every 5 transactions) to Continue printing Offline transactions.
Press F1 (Yes) to continue printing the receipts or press F2 (No) to
continue with the reconciliation.
Step 9 (Re-Print Uploaded Transactions)
After the printing of uploaded transactions is complete, you will be given
the option of re-printing the uploaded transactions.
way5000 User Manual V1.00 4/3/2009 45
Page 46

Reconcile
Processing
Please Wait
Done Yes
Done Yes
Reconcile
Reconciliation
Complete
Print
Reconciliation
Report?
Reconcile
Re-Print
Reconciliation
Report?
Step 10 (Continue Printing Offline Receipts Optional Screen)
After Uploading and Printing any Offline transactions, the terminal will
automatically start the reconciliation process.
Step 11
Once the reconciliation is complete, the terminal will prompt for printing.
Press F1 (Yes) to print the reconciliation report or press F2 (No) to finish
the transaction and return to the Transactions Menu of the Payment
Application.
Step 12
To re-print the reconciliation report, press F2 (Yes).
way5000 User Manual V1.00 4/3/2009 46
Page 47

Upload
T-Mobile
way5000
1. Way2Pay
2. Check Updates
W2P OK
1. Sale
2. Other Trans.
3. Inquiry
4. Setup
5. Offline Mode
Back OK
1. Authorize Only
2. Return
3. Void
4. Force
5. Reconcile
6. Upload
Back OK
Connected
Please swipe
Your card
Transactions
Other Trans.
Step 1
To start WAY2Pay, press F2 (Way2Pay) or press ‘1’ to continue.
Step 2
To choose Other Transactions, press the ‘2’ key.
Step 3
Press the ‘6’ key to select Upload.
Upload
007 Offline
Trans. to Upload
Select Upload
Back Upload
To Continue
Communication
Processing
Uploading
002 of 007
Step 4
If there are Offline Transactions in the terminal, a message will be
displayed showing the number of Offline Transactions to be Uploaded.
Press F2 (OK) to start the Upload.
Step 5
Please wait while the transactions are uploaded.
way5000 User Manual V1.00 4/3/2009 47
Page 48

Upload
Upload Complete
Done Yes
Printing Uploaded
No Yes
Approved: 4
Declined: 1
Pending 2
Print Uploaded
Transactions?
Upload
Printing
002 of 007
transactions
Please Wait
Upload
Transactions
Continue?
Step 6 (Print Offline Receipts Option)
To print receipts for all Offline transactions, Press F1 (Yes) to print the
receipts or press F2 (No) to continue with Step 7.
NOTE: If the upload was interrupted or communications were lost, the
pending transactions were not successfully uploaded. Attempt to Upload
pending transactions again later.
Step 7
Please wait while the transactions are uploaded.
Step 8 (Continue Printing Offline Receipts)
If there are more than 5 Offline transactions to print, you will be prompted
(after every 5 transactions) to Continue printing Offline transactions.
Press F1 (Yes) to continue printing the receipts or press F2 (No) to
continue with the next step.
Upload
Re-Print Uploaded
Transactions?
Continue?
Done Yes
Step 9 (Re-Print Uploaded Transactions)
After the printing of uploaded transactions is complete, you will be given
the option of re-printing the uploaded transactions
way5000 User Manual V1.00 4/3/2009 48
Page 49
Inquiry
Transaction List
T-Mobile
way5000
1. Way2Pay
2. Check Updates
W2P OK
1. Sale
2. Other Trans.
3. Inquiry
4. Setup
5. Offline Mode
Back OK
Connected
Please swipe
Your card
Transactions
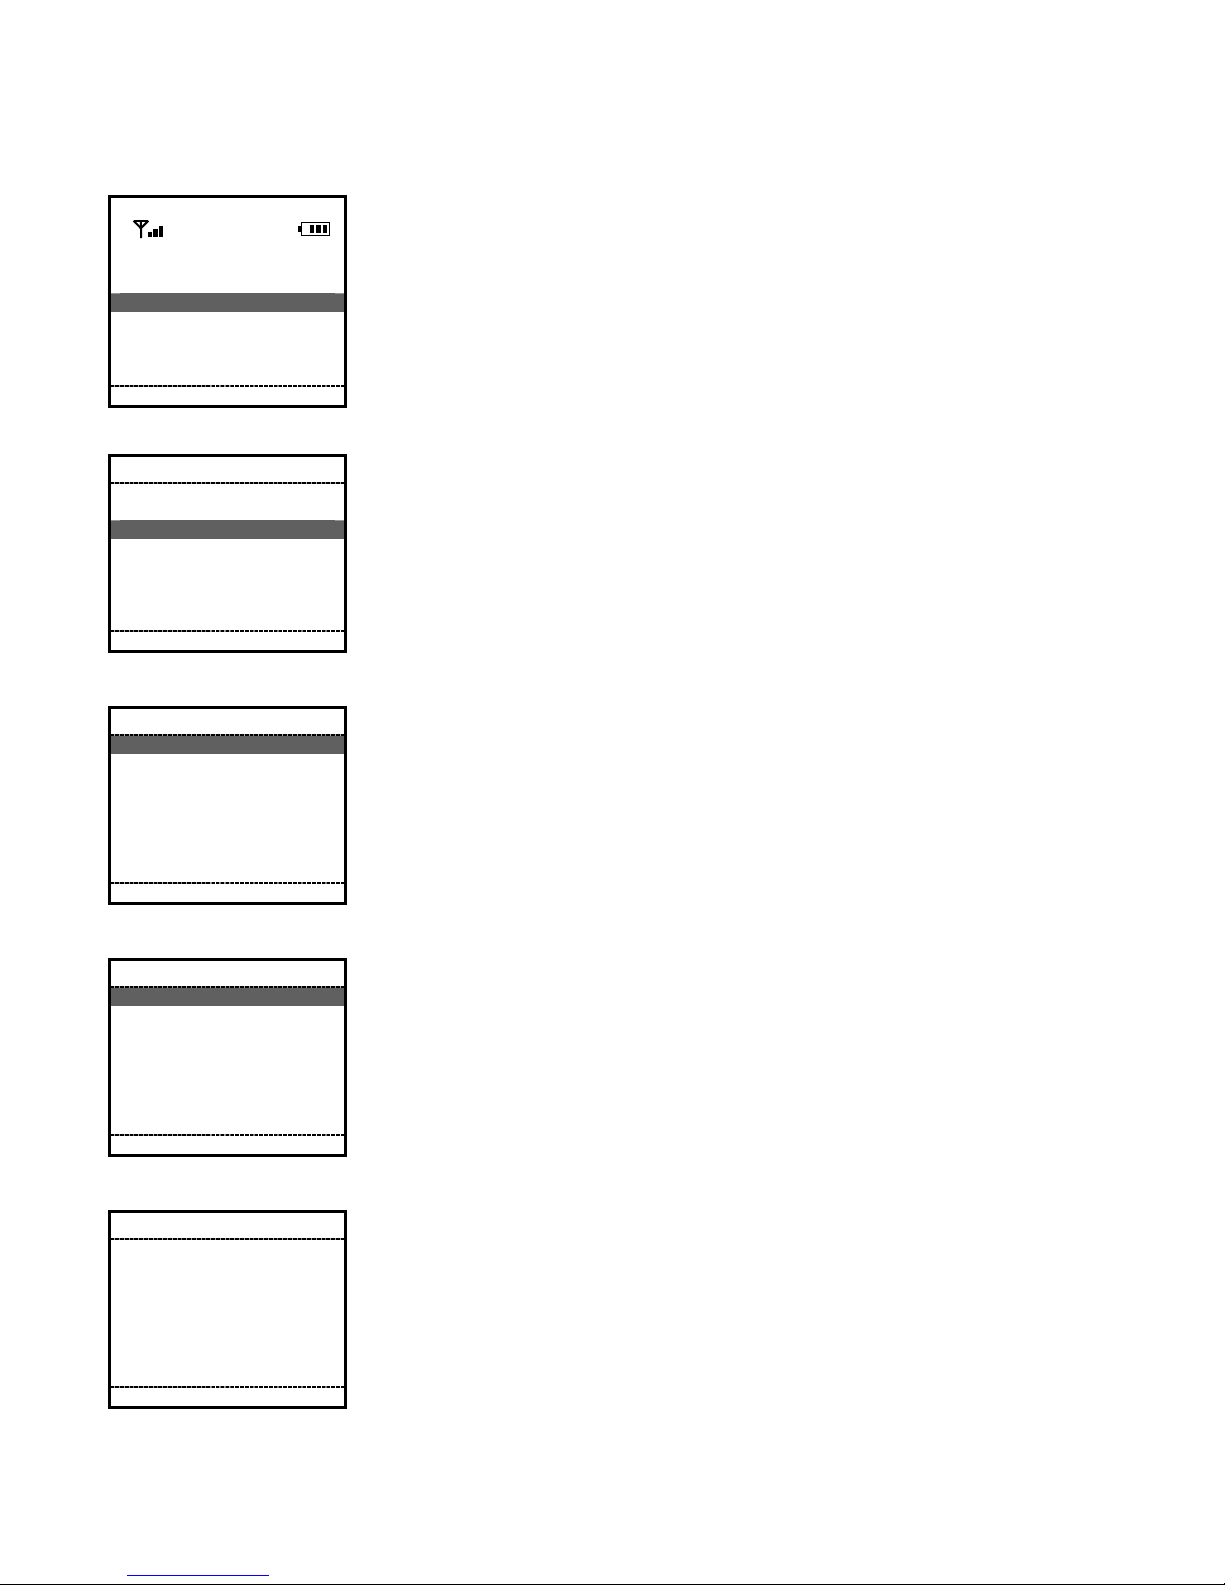
Step 1 (Idle Screen)
To start WAY2Pay, press F2 (Way2Pay) or press ‘1’ to continue.
Step 2 (Transaction Menu)
Press ‘3’ to continue.
Inquiry Menu
1. Trans. List
2. Last Trans.
3. Re-Print Trans.
4. Total Info.
5. Clear Trans.
6. Reports
Back OK
Trans. List
1. 011 01/13:45:31
2. 012 01/14:00:31
3. 013 01/14:15:31
4. 014 01/14:35:31
5. 015 01/15:18:31
6 .016 02/07:10:31
7. Next
Back OK
Trans. List
06/01 13:45:31
Seq #: 123
Card: ****4797
Total: $11.00
Status: Offline
Re-Print Receipt?
Done Yes
Sale -Credit
Step 3 (Inquiry Menu)
Press ‘1’ to continue to the Transactions List.
Step 4
A list of transactions will be displayed by Sequence Number (3 digits), the
date and the time. To get more information or to reprint a receipt, press
the number of the desired transaction.
Step 5
The terminal will display the information related to the transaction like
Transaction Type, Date, Time , Sequence Number, Card Number (Only
the last 4 digits), Transaction amount and the transaction status.
Press F2 (OK) to re-print this receipt. If the F1 (Done) key is pressed, the
terminal will return to Step 4.
way5000 User Manual V1.00 4/3/2009 49
Page 50

Re-Print
Approved
Auth Code 123456
1. Merchant Copy
2. Customer Copy
Done OK
Print Receipt
Step 6 (Optional Screen – Re-Print)
If desired, press 1 or 2 to re-print the merchant copy or the customer
copy of the receipt.
Press F1 (Done) to return to Step 4.
way5000 User Manual V1.00 4/3/2009 50
Page 51

Display Last Trans
T-Mobile
way5000
1. Way2Pay
2. Check Updates
W2P OK
1. Sale
2. Other Trans.
3. Inquiry
4. Setup
5. Offline Mode
Back OK
1. Trans. List
2. Last Trans.
3. Re-Print Trans.
4. Total Info.
5. Clear Trans.
6. Reports
Back OK
Connected
Please swipe
Your card
Transactions
Inquiry Menu
Step 1
To start WAY2Pay, press F2 (Way2Pay) or press ‘1’ to continue.
Step 2
Press ‘3’ to continue.
Step 3
Press ‘2’ to display the Last Transaction..
Last Trans.
Sale –Credit
06/01 13:45:31
Seq #: 123
Card: ****4797
Total: $11.00
Status: Offline
Re-Print Receipt?
Done Yes
Re-Print
Approved
Auth Code 123456
1. Merchant Copy
2. Customer Copy
Done OK
Print Receipt
Step 4
The terminal will display the information related to the transaction like
Transaction Type, Date, Time , Sequence Number, Card Number (Only
the last 4 digits), Transaction amount and the transaction status.
Press F2 (OK) to re-print this receipt. If the F1 (Done) key is pressed, the
terminal will return to the Inquiry Menu of the Payment Application.
Step 5 (Optional Screen – Re-Print)
If desired, press 1 or 2 to re-print the merchant copy or the customer
copy of the receipt.
Press F1 (Done) to finish the transaction and go to the Inquiry Menu of
the Payment Application.
way5000 User Manual V1.00 4/3/2009 51
Page 52

Re-Print Transaction
T-Mobile
way5000
1. Way2Pay
2. Check Updates
W2P OK
1. Sale
2. Other Trans.
3. Inquiry
4. Setup
5. Offline Mode
Back OK
1. Trans. List
2. Last Trans.
3. Re-Print Trans.
4. Total Info.
5. Clear Trans.
6. Reports
Back OK
Connected
Please swipe
Your card
Transactions
Inquiry Menu
Step 1 (Idle Screen)
To start WAY2Pay, press F2 (Way2Pay) or press ‘1’ to continue.
Step 2 (Transaction Menu)
Press ‘3’ to continue.
Step 3 (Inquiry Menu)
Press 3 to re-print the last transaction.
Re-Print
Enter Transaction
Back OK
06/01 13:45:31
Seq #: 123
Card: ****4797
Total: $11.00
Status: Offline
Re-Print Receipt?
Back OK
Seq. #
001
Re-Print
Sale –Credit
Step 4
Enter the sequence number of the transaction to reprint and press F2
(OK) to continue.
Step 5
The terminal will display the information related to the transaction like
Transaction Type, Date, Time , Sequence Number, Card Number (Only
the last 4 digits), Transaction amount and the transaction status.
Press F2 (OK) to re-print this receipt. If the F1 (Back) key is pressed, the
terminal will return to Step 4..
way5000 User Manual V1.00 4/3/2009 52
Page 53

Re-Print
Approved
Auth Code 123456
1. Merchant Copy
2. Customer Copy
Done OK
Print Receipt
Step 6 (Optional Screen – Re-Print)
If desired, press 1 or 2 to re-print the merchant copy or the customer copy
of the receipt.
Press F1 (Done) to finish the transaction and go to Step 4.
way5000 User Manual V1.00 4/3/2009 53
Page 54

Total Info
T-Mobile
way5000
1. Way2Pay
2. Check Updates
W2P OK
1. Sale
2. Other Trans.
3. Inquiry
4. Setup
5. Offline Mode
Back OK
1. Trans. List
2. Last Trans.
3. Re-Print Trans.
4. Total Info.
5. Clear Trans.
6. Reports
Back OK
Connected
Please swipe
Your card
Transactions
Inquiry Menu
Step 1
To start WAY2Pay, press F2 (Way2Pay) or press ‘1’ to continue.
Step 2
Press ‘3’ to continue.
Step 3
Press 4 to display totals information.
Total Info
Total 12
Complete 5
Rejected 1
Offline 3
Cancelled 0
OK
Step 4 (Inquiry Menu)
The terminal will display statistic information like the total count of
transactions, the number of completed transactions, the number of
rejected transactions and the number of offline transactions.
Press F2 (OK) to return to the Inquiry Menu of the Payment Application
way5000 User Manual V1.00 4/3/2009 54
Page 55

Clear Transactions
CAUTION:
Do not use this function unless instructed to by an authorized Helpdesk. If there are
offline transactions in the terminal that have not been uploaded, these transactions will be lost and
cannot be recovered.
T-Mobile
way5000
1. Way2Pay
2. Check Updates
W2P OK
1. Sale
2. Other Trans.
3. Inquiry
4. Setup
5. Offline Mode
Back OK
Connected
Please swipe
Your card
Transactions
Step 1
To start WAY2Pay, press F2 (Way2Pay) or press ‘1’ to continue.
Step 2
Press ‘3’ to continue.
Inquiry Menu
1. Trans. List
2. Last Trans.
3. Re-Print Trans.
4. Total Info.
5. Clear Trans.
6. Reports
Back OK
Clear Trans.
Enter Admin Code
Back OK
123
Step 3
Press ‘5’ to display clear transactions from the terminal memory.
Step 4
Enter the administrator code (default is 123) and press F2 (OK) to
continue.
way5000 User Manual V1.00 4/3/2009 55
Page 56

Clear Trans.
Enter Admin
Password
******
Back OK
Step 5
Enter the administrator password (default is 123123) and press F2 (OK)
to continue.
Clear Trans.
Clear All The
Transactions?
Back OK
Clear Trans.
Transactions
Cleared
Step 6
The terminal will confirm if the user really wants to clear the transactions
from the batch.
Press F2 (OK) to continue and clear all the transactions or press F1
(Back) to return to the Transactions Menu of the Payment Application
Step 7
Once the transactions were cleared, the terminal displays this screen and
then returns to the Transactions Menu.
way5000 User Manual V1.00 4/3/2009 56
Page 57

Reports
Details Report & Totals Report
T-Mobile
way5000
1. Way2Pay
2. Check Updates
W2P OK
1. Sale
2. Other Trans.
3. Inquiry
4. Setup
5. Offline Mode
Back OK
Connected
Please swipe
Your card
Transactions
Step 1
To start WAY2Pay, press F2 (Way2Pay) or press ‘1’ to continue.
Step 2
Press ‘3’ to continue.
Inquiry Menu
1. Trans. List
2. Last Trans.
3. Re-Print Trans.
4. Total Info.
5. Clear Trans.
6. Reports
Back OK
Reports
1. Details Report
2. Totals Report
Back OK
Step 3
Press ‘6’ to access the Reports menu.
Step 4
Press ‘1’ for a Details Report. or ‘2’ for a Totals Report . Point the terminal
toward the printer.
When finished printing, the terminal will return to this screen.
See the following pages for examples of these reports.
way5000 User Manual V1.00 4/3/2009 57
Page 58

DETAILS REPORT
Transaction Detail Report
Way Systems Inc.
200 Unicorn Park Drive
Woburn, Massachusetts
01801, USA
Phone: 555-555-5555
www.waysystems.com
06/21/2007 13:15:27
=====================================
Merchant ID 1234567890123456
Terminal ID 12345678
Batch # 123456
Transaction List
=====================================
Seq Card Trans Trans Auth
# Type Type Amount #
001 VI Sl $xx,xxx.xx 123456
002 MC Rt $xx,xxx.xx 123456
003 AX Vd $xx,xxx.xx 123456
004 DS SL $xx,xxx.xx 123456
005 VI Fr $xx,xxx.xx 123456
006 CA Sl $xx,xxx.xx 123456
007 VI Cn $xx,xxx.xx Canceled
008 MC Dc $xx,xxx.xx Declined
Totals by Trans Type (w/o Cash)
=====================================
Trans
Type Count Total
Sl 003 $xxx,xxx.xx
Fr 001 $xxx,xxx.xx
Rt 001 $xxx,xxx.xx
Vd 001 $xxx,xxx.xx
Au 001 $xxx,xxx.xx
Cn 001 $xxx,xxx.xx
Dc 001 $xxx,xxx.xx
Cash Totals
=====================================
Sl 032 $xxx,xxx.xx
Vo 001 $xxx,xxx.xx
=====================================
VI=Visa MC=MasterCard DS=Discover
AX=American Express OT=Other
DB=PIN Debit CA=Cash
Sl=Sale Fr=Force Rt=Return
Vd= Void Au=Auth Only
way5000 User Manual V1.00 4/3/2009 58
Page 59

TOTALS REPORT
Transaction Totals Report
Way Systems Inc.
200 Unicorn Park Drive
Woburn, Massachusetts
01801, USA
www.waysystems.com
06/21/2007 13:15:27
====================================
Merchant ID 1234567890123456
Terminal ID 12345678
Batch # 123456
Card Totals
====================================
VI MC
Sl 023 xxx,xxx.xx 016 xxx,xxx.xx
Fr 000 xxx,xxx.xx 001 xxx,xxx.xx
Rt 002 xxx,xxx.xx 003 xxx,xxx.xx
Vd 000 xxx,xxx.xx 000 xxx,xxx.xx
======== ========
Net xxx,xxx.xx xxx,xxx.xx
AX DS
Sl 009 xxx,xxx.xx 010 xxx,xxx.xx
Fr 000 xxx,xxx.xx 000 xxx,xxx.xx
Rt 002 xxx,xxx.xx 003 xxx,xxx.xx
Vd 000 xxx,xxx.xx 000 xxx,xxx.xx
======== ========
Net xxx,xxx.xx xxx,xxx.xx
DB OT
Sl 023 xxx,xxx.xx 000 xxx,xxx.xx
Fr ---- -------------- 000 xxx,xxx.xx
Rt 002 xxx,xxx.xx 000 xxx,xxx.xx
Vd ---- -------------- 000 xxx,xxx.xx
======== ========
Net xxx,xxx.xx xxx,xxx.xx
Card
Total
Sl 071 xxx,xxx.xx xxx,xxx.xx
Fr 001 xxx,xxx.xx xxx,xxx.xx
Rt 011 xxx,xxx.xx xxx,xxx.xx
Vd 000 xxx,xxx.xx xxx,xxx.xx
======== =========
Net xxx,xxx.xx xxx,xxx,xxx
Au 001 xxx,xxx.xx
Cash Totals
=================================
Sl 032 xxx,xxx.xx
Vo 001 xxx,xxx.xx
=================================
VI=Visa MC=MasterCard DS=Discover
AX=American Express OT=Other
DB=PIN Debit CA=Cash
Sl=Sale Fr=Force Rt=Return
Vd= Void
way5000 User Manual V1.00 4/3/2009 59
Page 60
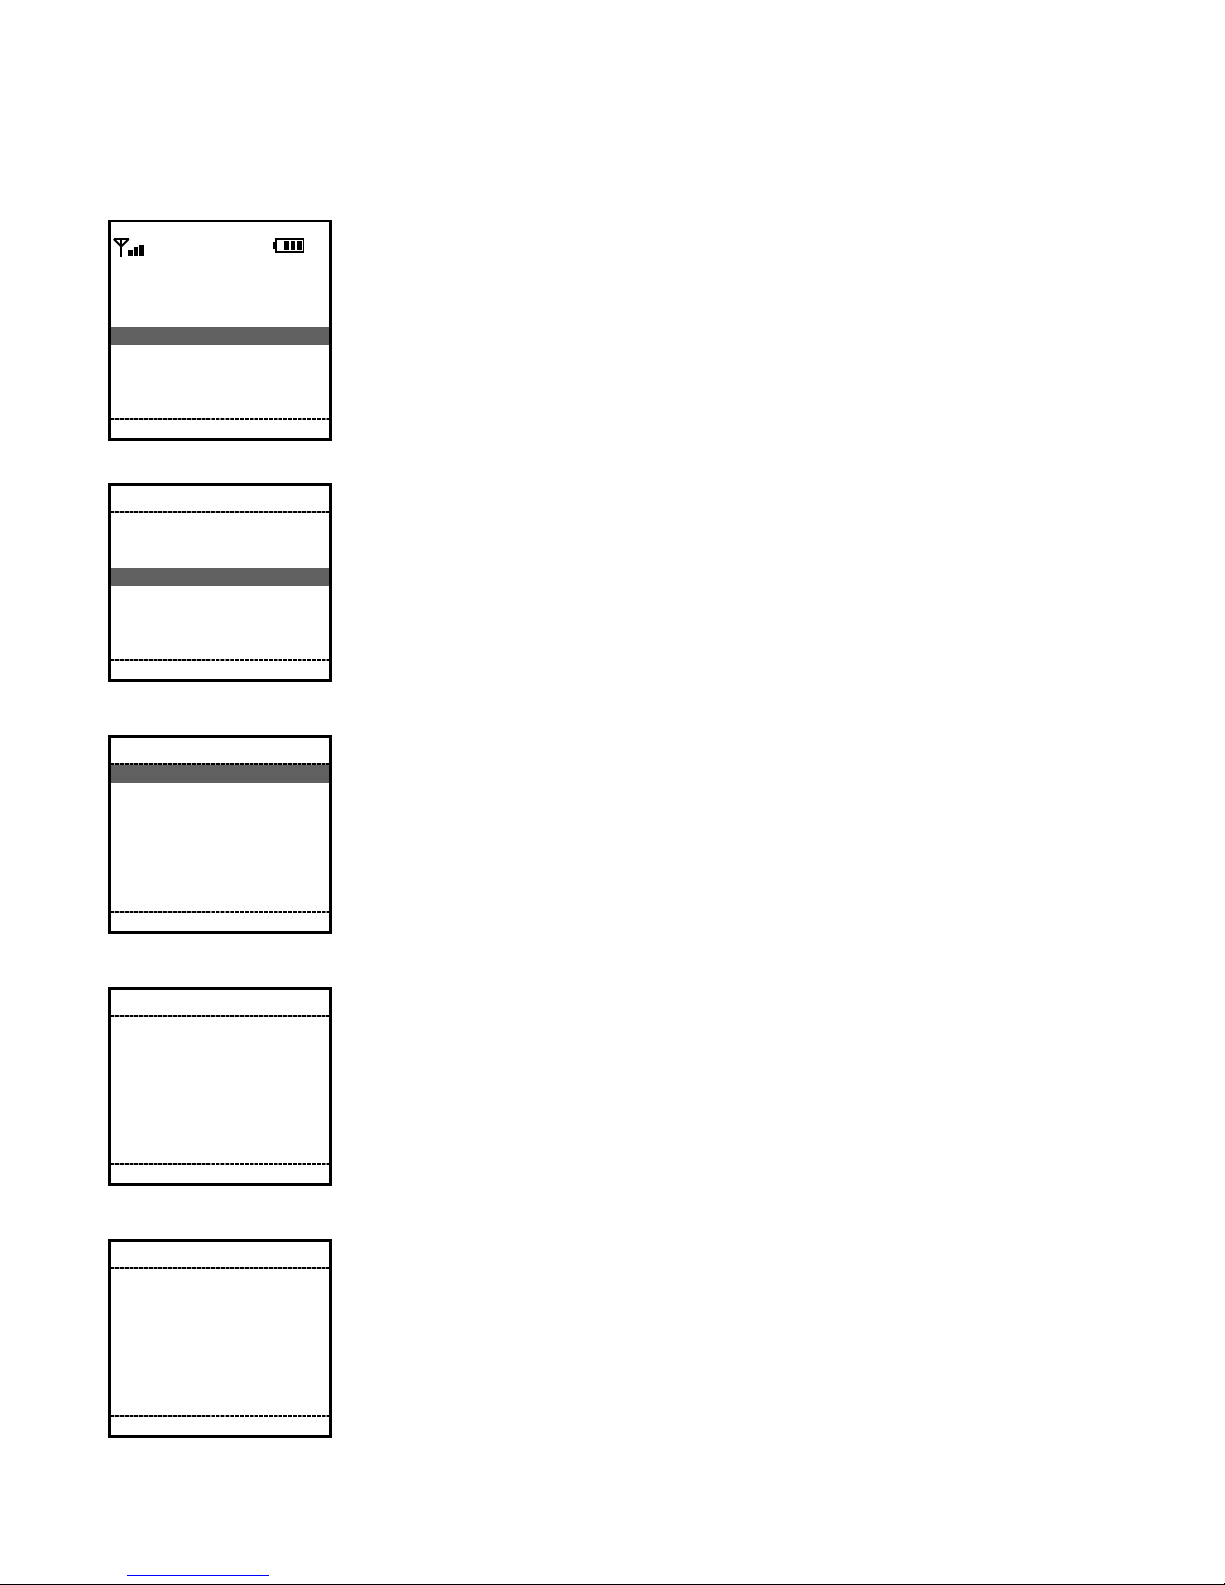
SetUp
Admin SetUp
Reset Admin Code
T-Mobile
way5000
1. Way2Pay
2. Check Updates
W2P OK
1. Sale
2. Other Trans.
3. Inquiry
4. Setup
5. Offline Mode
Back OK
Connected
Please swipe
Your card
Transactions
Step 1
To start WAY2Pay, press F2 (Way2Pay) or press ‘1’ to continue.
Step 2
Press ‘4’ to continue.
Setup
1. Admin Setup
2. App Config
3. User Prefs.
4. Printer Test
5. About Way5000
Back OK
Admin. Pwd
Enter Admin Code
Back OK
Back OK
123
Admin. Pwd
Enter Admin
Password
******
Step 3
Press ‘1’ to access the Admin Setup.
Step 4
Enter the administrator code (default is 123) and press F2 (OK) to
continue.
Step 5
Enter the administrator password (default is 123123) and press F2 (OK) to
continue.
way5000 User Manual V1.00 4/3/2009 60
Page 61
Admin Setup
1. Reset Adm
Code
2. Reset Adm
Passwd
Back OK
Admin. Code
Reset Admin
Code?
Back OK
Back OK
Admin. Code
Enter a New
3 Digits Admin.
Code
123
Step 6
Press ‘1’ to Reset Admin Code(s).
Step 7
Press F2 (OK) to Reset the Admin Code or press F1 (Back) to return to
the POS Setup Menu.
Step 8
Enter the new 3 digits administrator code and press F2 (OK) to continue.
Admin. Code
Confirm the New
Back OK
The Admin Code
3 Digits Admin.
Code
123
Has Been
Successfully
Changed
Step 9
Enter the same new 3 digits administrator code again to confirm the
previous entry and press F2 (OK) to continue.
Step 10
This message displays briefly and then the terminal returns to the Admin
Setup menu.
way5000 User Manual V1.00 4/3/2009 61
Page 62

Reset Admin Password
T-Mobile
way5000
1. Way2Pay
2. Check Updates
W2P OK
1. Sale
2. Other Trans.
3. Inquiry
4. Setup
5. Offline Mode
Back OK
Connected
Please swipe
Your card
Transactions
Step 1
To start WAY2Pay, press F2 (Way2Pay) or press ‘1’ to continue.
Step 2
Press ‘4’ to continue.
Setup
1. Admin Setup
2. App Config
3. User Prefs.
4. Printer Test
5. About Way5000
Back OK
Admin. Code
Enter Admin Code
Back OK
Back OK
123
Admin. Pwd
Enter Admin
Password
******
Step 3
Press ‘1’ to access the Admin Setup.
Step 4
Enter the administrator code (default is 123) and press F2 (OK) to
continue.
Step 5
Enter the administrator password (default is 123123) and press F2 (OK) to
continue.
way5000 User Manual V1.00 4/3/2009 62
Page 63

Admin Setup
1. Reset Adm
Code
2. Reset Adm
Passwd
Back OK
Admin. Password
Reset Admin
Password?
Back OK
Admin. Password
Back OK
Enter a New 6
Digits Admin.
Password
123123
Step 6 (Administrator Setup)
Press ‘2’ to Reset Admin Password.
Step 7
Press F2 (OK) to Reset the Admin Password or press F1 (Back) to return
to the POS Setup Menu.
Step 8
Enter the new 3 digits administrator Password and press F2 (OK) to
continue.
Admin. Password
Confirm the New 6
Back OK
Digits Admin.
Password
123123
The Admin
Password Has
Been
Successfully
Changed
Step 9
Enter the same new 3 digits administrator Password again to confirm the
previous entry and press F2 (OK) to continue.
Step 10
This message displays briefly and then the terminal returns to the Admin
Setup menu.
way5000 User Manual V1.00 4/3/2009 63
Page 64

Application Configuration
Application Settings
Invoice/Job Number
T-Mobile
way5000
1. Way2Pay
2. Check Updates
W2P OK
1. Sale
2. Other Trans.
3. Inquiry
4. Setup
5. Offline Mode
Back OK
Connected
Please swipe
Your card
Transactions
Step 1
To start WAY2Pay, press F2 (Way2Pay) or press ‘1’ to continue.
Step 2
Press ‘4’ to continue to Setup.
Setup
1. Admin Setup
2. App Config
3. User Prefs.
4. Printer Test
5. About Way5000
Back OK
Admin. Code
Enter Admin Code
Back OK
Back OK
123
Admin. Pwd
Enter Admin
Password
******
Step 3
Press 2 to select App Config.
Step 4
Enter the administrator code (default is 123) and press F2 (OK) to
continue.
Step 5
Enter the administrator password (default is 123123) and press F2 (OK) to
continue.
way5000 User Manual V1.00 4/3/2009 64
Page 65
App Config
1. App Settings
2. Merchant Info
3. Reset Config.
Back OK
App Settings
1. Invoice/Job#
2. Cash Receipt
Back OK
Invoice/Job#
Enable Invoice
Prompt?
Back OK
Step 6
Press 1 (App Settings).
Step 7
The terminal will display the Application Settings Menu, press 1
(Invoice/Job#).
Step 8-1
If Invoice/Job# is currently not enabled, press F2 (OK) to enable the
prompt.
Invoice/Job#
Disable Invoice/Job#
Prompt?
Back OK
Save Parameters?
Yes No
App. Settings
This Config Will
Not Be
Synchronized
Again With The
Server
Step 8-2
If Invoice/Job# is currently enabled, press F2 (OK) to disable the
prompt.
Step 9
This parameter change will not be overridden by a parameter update
downloaded from the server.
way5000 User Manual V1.00 4/3/2009 65
Page 66

Cash Receipt
T-Mobile
way5000
1. Way2Pay
2. Check Updates
W2P OK
1. Sale
2. Other Trans.
3. Inquiry
4. Setup
5. Offline Mode
Back OK
1. Admin Setup
2. App Config
3. User Prefs.
4. Printer Test
5. About Way5000
Back OK
Connected
Please swipe
Your card
Transactions
Setup
Step 1
To start WAY2Pay, press F2 (Way2Pay) or press ‘1’ to continue.
Step 2
Press ‘4’ to continue to Setup.
Step 3
Press 2 to select App Config.
Admin. Code
Enter Admin Code
Back OK
Back OK
123
Admin. Pwd
Enter Admin
Password
******
Step 4
Enter the administrator code (default is 123) and press F2 (OK) to
continue.
Step 5
Enter the administrator password (default is 123123) and press F2 (OK)
to continue.
way5000 User Manual V1.00 4/3/2009 66
Page 67

App Config
1. App Settings
2. Merchant Info
3. Reset Config.
Back OK
App Settings
1. Invoice/Job#
2. Cash Receipt
Back OK
Cash Receipt
Enable Cash
Receipt Prompts?
Yes No
Step 6
Press 1 to select App Settings.
Step 7
The terminal will display the Application Settings Menu, press 2 (Cash
Receipt).
Step 8-1
If Cash Receipt is currently not enabled, press F2 (OK) to enable the
prompt.
Cash Receipt
Disable Cash
Receipt Prompts?
Yes No
Save Parameters?
Yes No
App. Settings
This Config Will
Not Be
Synchronized
Again With The
Server
Step 8-2
If Cash Receipt is currently enabled, press F2 (OK) to disable the
prompt.
Step 9
This parameter change will not be overridden by a parameter update
downloaded from the server.
way5000 User Manual V1.00 4/3/2009 67
Page 68

Merchant Information
Change: URL, Footer 1, Footer 2, Footer 3, Footer 4, Phone Number
T-Mobile
way5000
1. Way2Pay
2. Check Updates
W2P OK
1. Sale
2. Other Trans.
3. Inquiry
4. Setup
5. Offline Mode
Back OK
Connected
Please swipe
Your card
Transactions
Step 1
To start WAY2Pay, press F2 (Way2Pay) or press ‘1’ to continue.
Step 2
Press ‘4’ to continue to Setup.
Setup
1. Admin Setup
2. App Config
3. User Prefs.
4. Printer Test
5. About Way5000
Back OK
Admin. Code
Enter Admin Code
Back OK
Back OK
123
Admin. Pwd
Enter Admin
Password
******
Step 3
Press 2 to select App Config.
Step 4
Enter the administrator code (default is 123) and press F2 (OK) to
continue.
Step 5
Enter the administrator password (default is 123123) and press F2 (OK)
to continue.
way5000 User Manual V1.00 4/3/2009 68
Page 69

App Config
1. App Settings
2. Merchant Info
3. Reset Config.
Back OK
Merchant Info
1. Merchant URL
2. Footer 1
3. Footer 2
4. Footer 3…
5. Footer 4
6. Phone Number
Back OK
Merchant Info
Enter Merchant
Footer 1
XXXFooter_InfoXX
Back OK
Step 6
Press 2 to select Merchant Info.
Step 7
The terminal will display the Merchant Information Menu; press the
number corresponding to the option that you want to change.(see
example below.
Step 8
Enter the new information as desired and press F2 (OK).
Merchant Info
This Config Will
Not Be
Synchronized
Again With The
Yes No
Server
Save Parameters?
Step 9
This parameter change will not be overridden by a parameter update
downloaded from the server.
way5000 User Manual V1.00 4/3/2009 69
Page 70
Reset Configuration
T-Mobile
way5000
1. Way2Pay
2. Check Updates
W2P OK
1. Sale
2. Other Trans.
3. Inquiry
4. Setup
5. Offline Mode
Back OK
1. Admin Setup
2. App Config
3. User Prefs.
4. Printer Test
5. About Way5000
Back OK
Connected
Please swipe
Your card
Transactions
Setup
Step 1
To start WAY2Pay, press F2 (Way2Pay) or press ‘1’ to continue.
Step 2
Press ‘4’ to continue to Setup.
Step 3
Press 2 to select App Config.
Admin. Code
Enter Admin Code
Back OK
Back OK
123
Admin. Pwd
Enter Admin
Password
******
Step 4
Enter the administrator code (default is 123) and press F2 (OK) to
continue.
Step 5
Enter the administrator password (default is 123123) and press F2 (OK) to
continue.
way5000 User Manual V1.00 4/3/2009 70
Page 71

App Config
1. App Settings
2. Merchant Info
3. Reset Config.
Back OK
App Settings
The Terminal
Will Reset all
Local Config
Continue?
Yes No
App Settings
All Local Config.
Has Been Reset
And Will Be
Synchronized
With The Server
Step 6
Press 3 to reset the configuration settings to their original state.
Step 7
Press F1 (Yes) to reset all the App. Settings and Merchant Information
and synchronize the information with the server or press F2 (No) to return
to the Application Settings Menu.
Step 8
This screen displays briefly and then the terminal returns to the application
configuration menu.
way5000 User Manual V1.00 4/3/2009 71
Page 72

User Preferences
Backlight Time
T-Mobile
way5000
1. Way2Pay
2. Check Updates
W2P OK
1. Sale
2. Other Trans.
3. Inquiry
4. Setup
5. Offline Mode
Back OK
Connected
Please swipe
Your card
Transactions
Step 1
To start WAY2Pay, press F2 (Way2Pay) or press ‘1’ to continue.
Step 2
Press ‘4’ to continue to Setup.
POS Setup
1. Admin Setup
2. App Config
3. User Prefs.
4. Printer Test
5. About Way5000
Back OK
User Prefs
1. Backlight Time
Back OK
Backlight Time
1. Always Off
2. 5 Seconds
3. 10 Seconds
4. 30 Seconds
5. 60 Seconds
6. Always On
Back OK
Step 3
Press 3 to select User Prefs.
Step 4
Press 1 to set the backlight time.
Step 5
Select the desired backlight time by selecting the number that
corresponds to the option you want.
way5000 User Manual V1.00 4/3/2009 72
Page 73

Warning
Backlight Will
Be Set To
xx seconds
This change may
Affect the Batt.
Life Time
Continue Anyway?
Yes No
Backlight Time
Backlight set to
xx seconds
Step 6
The terminal will display a warning that will reflect the selection of the
previous screen and will indicate the user that the changes on this item
may affect the battery life.
Select F1 (Yes) to set the new value and continue or select F2 (No) to
ignore the changes and return to the setup menu.
Step 7
If F1 (Yes) is selected, a new screen reflecting the new configuration
will be displayed. This screen will be displayed for 3 seconds and then
the terminal will return to the user preferences menu.
way5000 User Manual V1.00 4/3/2009 73
Page 74
Printer Test
T-Mobile
way5000
1. Way2Pay
2. Check Updates
W2P OK
1. Sale
2. Other Trans.
3. Inquiry
4. Setup
5. Offline Mode
Back OK
1. Admin Setup
2. App Config
3. User Prefs.
4. Printer Test
5. About Way5000
Back OK
Connected
Please swipe
Your card
Transactions
POS Setup
Step 1
To start WAY2Pay, press F2 (Way2Pay) or press ‘1’ to continue.
Step 2
Press ‘4’ to continue to Setup.
Step 3
Press 4 to select Printer Test.
Printer Test
Way Systems
Printer Test
Print?
Back OK
Step 4
The terminal will display a Printer Test confirmation, press F2 (OK) to
continue and print the test or press F1 (Back) to return to the POS Setup
Menu.
way5000 User Manual V1.00 4/3/2009 74
Page 75

About Way5000 (Display Way5000 Information)
T-Mobile
way5000
1. Way2Pay
2. Check Updates
W2P OK
1. Sale
2. Other Trans.
3. Inquiry
4. Setup
5. Offline Mode
Back OK
1. Admin Setup
2. App Config
3. User Prefs.
4. Printer Test
5. About Way5000
Back OK
Connected
Please swipe
Your card
Transactions
POS Setup
Step 1
To start WAY2Pay, press F2 (Way2Pay) or press ‘1’ to continue.
Step 2
Press ‘4’ to continue to Setup.
Step 3
Press 5 to display information about the way5000.
About Way5000
App. Version
nn nn nn
Build Number
nnnnnnnnn
OK
Step 4
The terminal will display the Way5000 information; press F2 (OK) to return
to the POS Setup Menu. Press F2 (OK) to return to the POS Setup menu/
way5000 User Manual V1.00 4/3/2009 75
Page 76

Go To Offline Mode
T-Mobile
way5000
1. Way2Pay
2. Check Updates
W2P OK
1. Sale
2. Other Trans.
3. Inquiry
4. Setup
5. Offline Mode
Back OK
No Yes
Connected
Please swipe
Your card
Transactions
Transactions
Switch to Offline
Mode?
Step 1
To start WAY2Pay, press F2 (Way2Pay) or press ‘1’ to continue.
Step 2
Press ‘5’ to continue to go to offline mode.
Step 3
Press ‘5’ to continue to go to offline mode.
Transactions
1. Sale
2. Other Trans.
3. Inquiry
4. Setup
5. Online Mode
Back OK
Step 4
The terminal returns to the transactions menu.
way5000 User Manual V1.00 4/3/2009 76
Page 77

IX. Offline Mode
NOTE: Offline transactions are run at your risk. Final authorization does not occur until transactions
are uploaded for approval.
Offline Mode can be used as a temporary solution for situations where adequate signal is not being
received. Transactions will be stored in the terminal until you Upload or Reconcile. You should
return to Online Mode as soon as possible and upload offline transactions for authorization
Due to regulations, debit transactions cannot be performed in Offline Mode.
way5000 User Manual V1.00 4/3/2009 77
Page 78

Sale
Credit
T-Mobile
way5000
1. Way2Pay
2. Check Updates
W2P OK
1. Sale
2. Other Trans.
3. Inquiry
4. Setup
5. Offline Mode
Back OK
Connected
Please swipe
Your card
Transactions
Step 1
To start WAY2Pay, press F2 (Way2Pay) or press ‘1’ to continue.
Step 2
To choose Sale, press the ‘1’ key.
Sale
1. Credit
2. Cash
Back OK
Sale - Credit
Swipe Card Or
Enter Card
Back OK
Back OK
Number
Sale - Credit
Enter Exp. Date
MMYY Format
00/00
Step 3
To Choose Credit, press the ‘1’ key.
Cash Sale may or may or may not appear based on your setup.
Step 4
Swipe the Credit Card through the reader. If this is successful, skip to
step 6.
If the swipe does not work or the card is not present, you may manually
enter the card number. Continue with Step 5.
Step 5
When the card number is entered manually, the way5000 will prompt for
the card expiration date. Enter the expiration date (MM/YY) and press F2
(OK) to continue.
way5000 User Manual V1.00 4/3/2009 78
Page 79

Sale - Credit
Enter 4 Digits
Number From
The Front Of The
Card
Back OK
Back OK
1234
Sale - Credit
Enter 3 Digits
Number From
The Back Of The
Card
123
Step 6-1 (Optional Screen – AMERICAN EXPRESS)
If the card is an American Express card, the way5000 may prompt for the
American Express Security Code which is a 4 digit number located on the
front of the card. Press F2 (OK) to continue.
Step 6-2 (Optional Screen – VISA, MC, DISCOVER)
If the card is a Visa, MC or Discover card, the way5000 may prompt for
the Security Code which is a 3 digit number located on the back of the
card in the signature panel. Enter the code and press F2 (OK) to continue.
Sale - Credit
Select reason
1. Not Legible
2. Not Present
3. Skip Entry
Back OK
1. Not Legible
2. Not Present
Back OK
Back OK
Sale - Credit
Select reason
Sale - Credit
Enter Zip Code
For Cardholder
Billing Address
01801
Step 7-1 (Optional Screen for Visa/MasterCard)
If the Security Code is not present or is not legible, the way5000 will
prompt for a reason when the Security Code entry is left blank.
Select the appropriate reason by pressing 1, 2, or 3 and hit F2 (OK) to
continue.
Step 7-2 (Optional Screen for Discover)
If the Security Code is not present or is not legible, the way5000 will
prompt for a reason when the Security Code entry is left blank.
Select the appropriate reason by pressing 1, or 2 and hit F2 (OK) to
continue.
Step 8 (Optional Screen – AVS - ZIP CODE)
The way5000 may prompt for a cardholder ‘s billing zip code; the number
may be 5 or 9 digits. Enter the digits and press F2 (OK) to continue.
way5000 User Manual V1.00 4/3/2009 79
Page 80

Sale – Credit
Enter Cardholder
Billing Address #
Back OK
Back OK
Back OK
200
Sale – Credit
Enter
Invoice/Job#
or Press
OK to Continue
123456
Sale – Credit
Enter Amount
1.00
Step 9 (Optional Screen – AVS – STREET ADDRESS)
The way5000 may prompt cardholder‘s billing address street number.
Enter the digits and press F2 (OK) to continue.
Step 10 (Optional Screen – INVOICE/JOB Number)
If this field is enabled in the terminal configuration, the way5000 will
prompt for and Invoice/Job Number. Enter the digits and press F2 (OK) to
continue. To skip this entry, press F2 (OK) to continue.
Step 11
Enter the transaction amount; and press F2 (OK) to continue.
Sale - Credit
Please Confirm
The Conv Fee
Amount 1.00
C.Fee 1.00
Back OK
Enter Toll Amount
Back OK
Sale - Credit
1.00
Step 12 (Optional Screen – Convenience Fee)
If this field is enabled in the terminal configuration, the way5000 will ask
you to confirm the convenience fee amount. Check the amount and press
F2 (OK) to continue.
Step 13 (Optional Screen – Toll Amount)
If this field is enabled in the terminal configuration, the way5000 will
prompt for the toll amount. Enter the toll amount and press F2 (OK) to
continue. To skip this entry, press F2 (OK) to continue.
way5000 User Manual V1.00 4/3/2009 80
Page 81

Sale - Credit
1. Enter Tip Amt
2. Print Tip Rcpt
Back OK
Enter Tip Amount
Back OK
Amount 1.00
C-Fee 1.00
Tip 0.00
Tolls 0.00
Total 2.00
Back OK
Sale - Credit
1.00
Sale - Credit
Confirm Details
Step 14 (Optional Screen – Tip Receipt)
If this field is enabled in the terminal configuration, the way5000 will
prompt for the tip amount. Press F2 (OK) to continue.
Step 15 (Optional Screen – Tip Amount)
If this field is enabled in the terminal configuration, the way5000 will
prompt for the tip amount. To skip this entry, press F2 (OK) to continue.
Step 16
Once all the amounts are entered, the terminal will confirm the amounts
and final total for the transaction. Press F1 (Back) to go back and fix any
amount or press F2 (OK) to continue with the next step.
Sale - Credit
Pending
Stored Offline
Sale - Credit
Pending- Stored
Print Receipt
1. Merchant Copy
2. Customer Copy
Done OK
Offline
Step 17
This message displays briefly and then continues to printing options.
Step 18 (Optional Screen)
Press F2 (OK) or ‘1’ to print the merchant receipt and continue with the
next step. Press '2' to print the customer copy of the receipt.
Press F1 (Done) to finish the transaction and go to the Transactions Menu
of the Payment Application.
way5000 User Manual V1.00 4/3/2009 81
Page 82
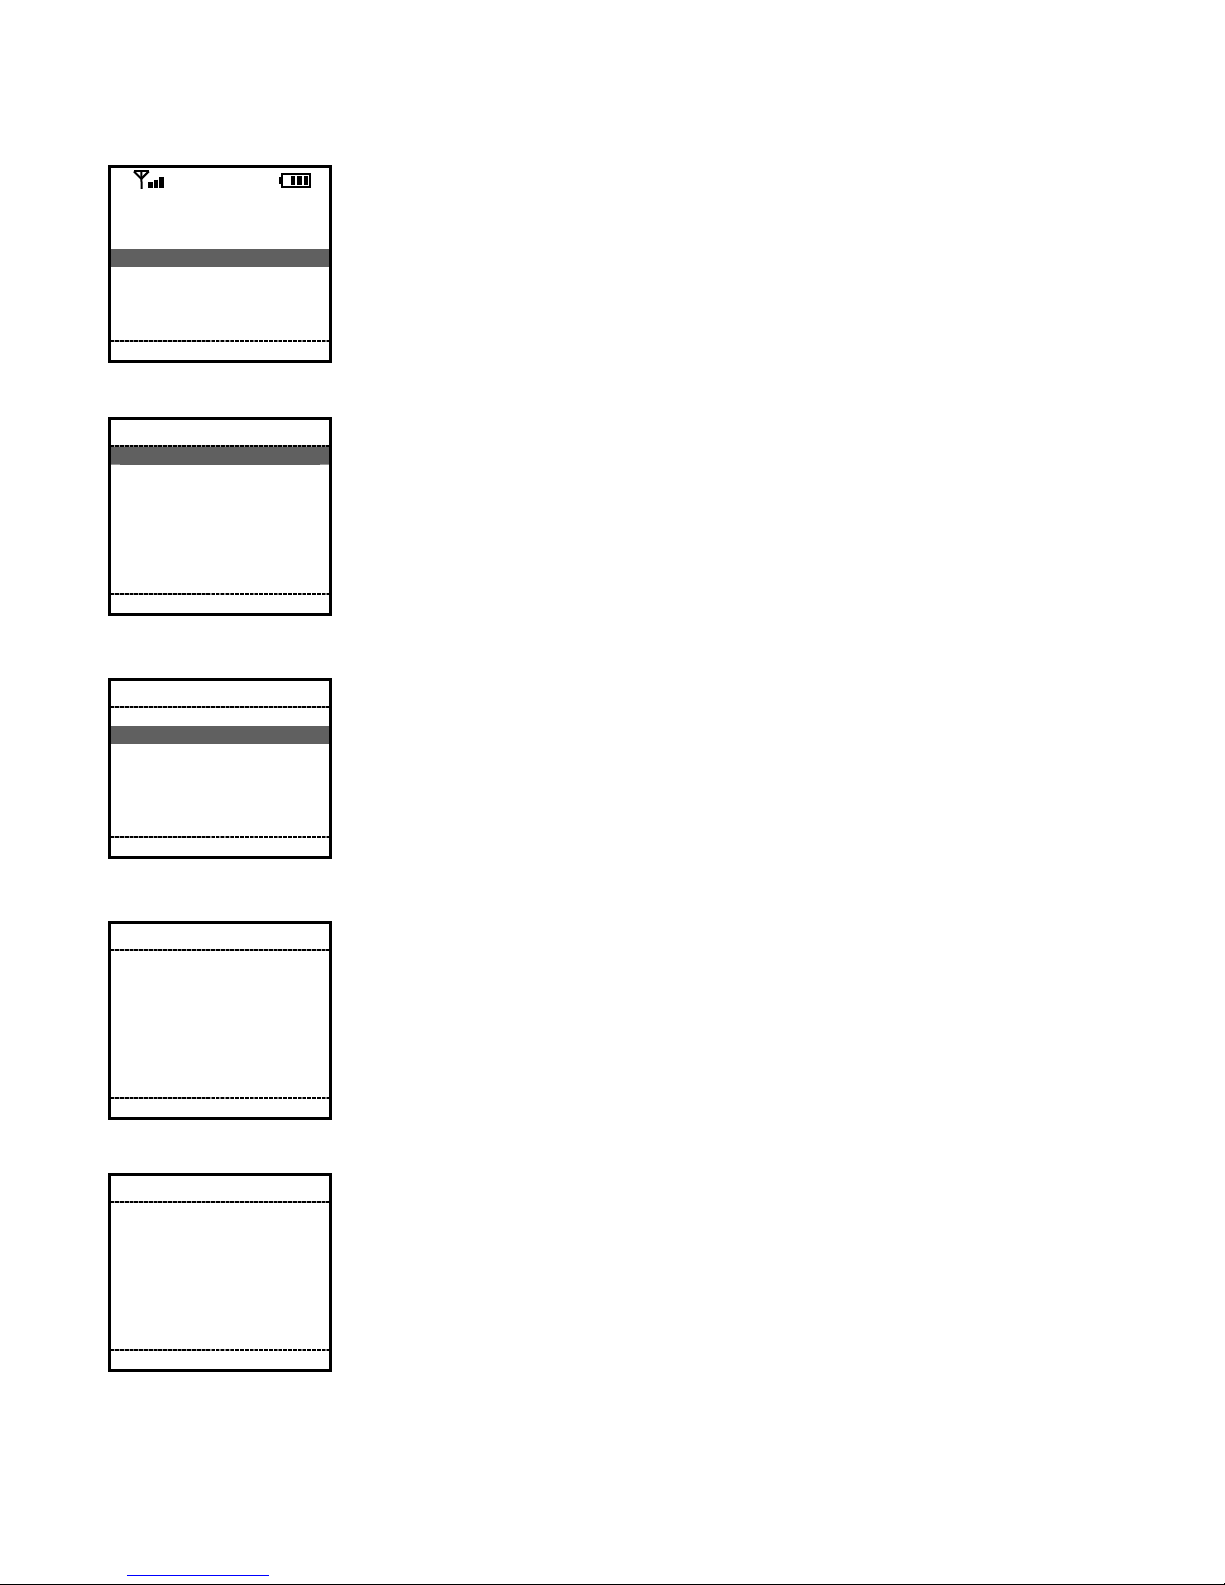
Cash
T-Mobile
way5000
1. Way2Pay
2. Check Updates
W2P OK
1. Sale
2. Other Trans.
3. Inquiry
4. Setup
5. Offline Mode
Back OK
1. Credit
2. Cash
Back OK
Connected
Please swipe
Your card
Transactions
Sale
Step 1
To start WAY2Pay, press F2 (Way2Pay) or press ‘1’ to continue.
Step 2
To choose Sale, press the ‘1’ key.
Step 3
To Choose Cash, press the ‘2’ key.
Sale – Cash
Back OK
Back OK
Enter
Invoice/Job# or
Press OK to
Continue
123456
Sale – Cash
Enter Amount
1.00
Step 4 (Optional Screen – INVOICE/JOB Number)
If this field is enabled in the terminal configuration, the way5000 will
prompt for and Invoice or Job Number. Enter the digits and press F2 (OK)
to continue. To skip this entry, press F2 (OK) to continue.
Step 5
Enter the transaction amount; and press F2 (OK) to continue.
way5000 User Manual V1.00 4/3/2009 82
Page 83
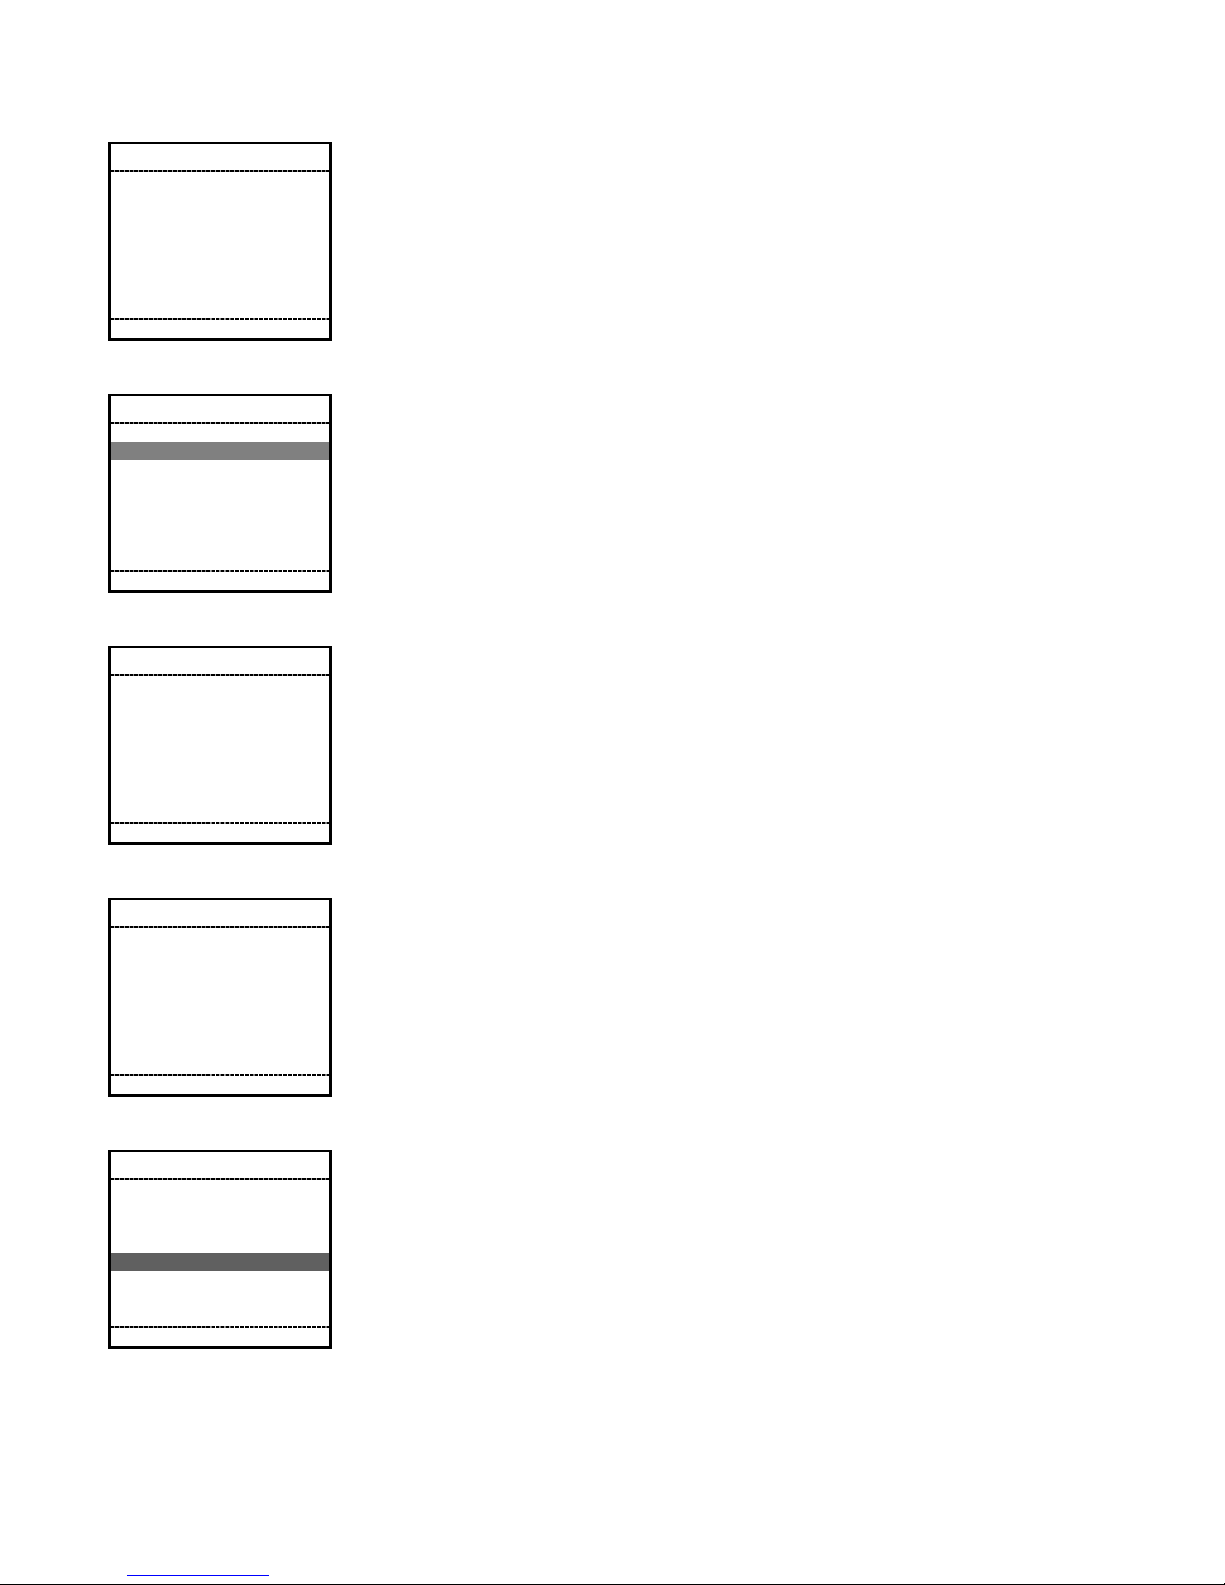
Sale - Cash
Enter Toll Amount
1.00
Back OK
1. Enter Tip Amt
2. Print Tip Rcpt
Back OK
Enter Tip Amount
Back OK
Sale - Credit
Sale - Cash
1.00
Step 6 (Optional Screen – Toll Amount)
If this field is enabled in the terminal configuration, the way5000 will
prompt for the toll amount. Enter the toll amount and press F2 (OK) to
continue. To skip this entry, press F2 (OK) to continue.
Step 7 (Optional Screen – Tip Receipt)
If this field is enabled in the terminal configuration, the way5000 will
prompt for the tip amount. Press F2 (OK) to continue.
Step 8 (Optional Screen – Tip Amount)
If this field is enabled in the terminal configuration, the way5000 will
prompt for the tip amount. To skip this entry, press F2 (OK) to continue.
Sale - Cash
Confirm Details
Amount 1.00
Tip 0.00
Tolls 0.00
Total 2.00
Back OK
Sale - Cash
Approved
1. Merchant Copy
2. Customer Copy
Done OK
Print Receipt
Step 9
Once all the amounts are entered, the terminal will confirm the amounts
and final total for the transaction. Press F1 (Back) to go back and fix any
amount or press F2 (OK) to continue with the next step.
Step 10
Press F2 (OK) or ‘1’ to print the merchant receipt and continue with the
next step. Press '2' to print the customer copy of the receipt.
Press F1 (Done) to finish the transaction and go to the Transactions Menu
of the Payment Application.
way5000 User Manual V1.00 4/3/2009 83
Page 84

Other Transactions
Authorize Only
T-Mobile
way5000
1. Way2Pay
2. Check Updates
W2P OK
1. Sale
2. Other Trans.
3. Inquiry
4. Setup
5. Offline Mode
Back OK
Connected
Please swipe
Your card
Transactions
Step 1
To start WAY2Pay, press F2 (Way2Pay) or press ‘1’ to continue.
Step 2
To choose Other Transactions, press the ‘2’ key.
Other Trans.
1. Authorize Only
2. Return
3. Void
4. Force
Back OK
Auth. Only
Enter Authorize
Password
Back OK
Back OK
******
Auth. Only
Swipe Card Or
Enter Card
Number
Step 3
Press the ‘1’ key to select Authorize Only.
Step 4 (Optional Screen – Authorize Only Password)
If the authorize password prompt is enabled in the terminal configuration,
the Terminal will prompt for the authorize password, in order to continue
with the next step, the right password (default = 123456) must be entered.
Step 5
Swipe the Credit Card through the reader. If this is successful, skip to
step 7.
If the swipe does not work or the card is not present, you may manually
enter the card number. Continue with Step 6.
way5000 User Manual V1.00 4/3/2009 84
Page 85
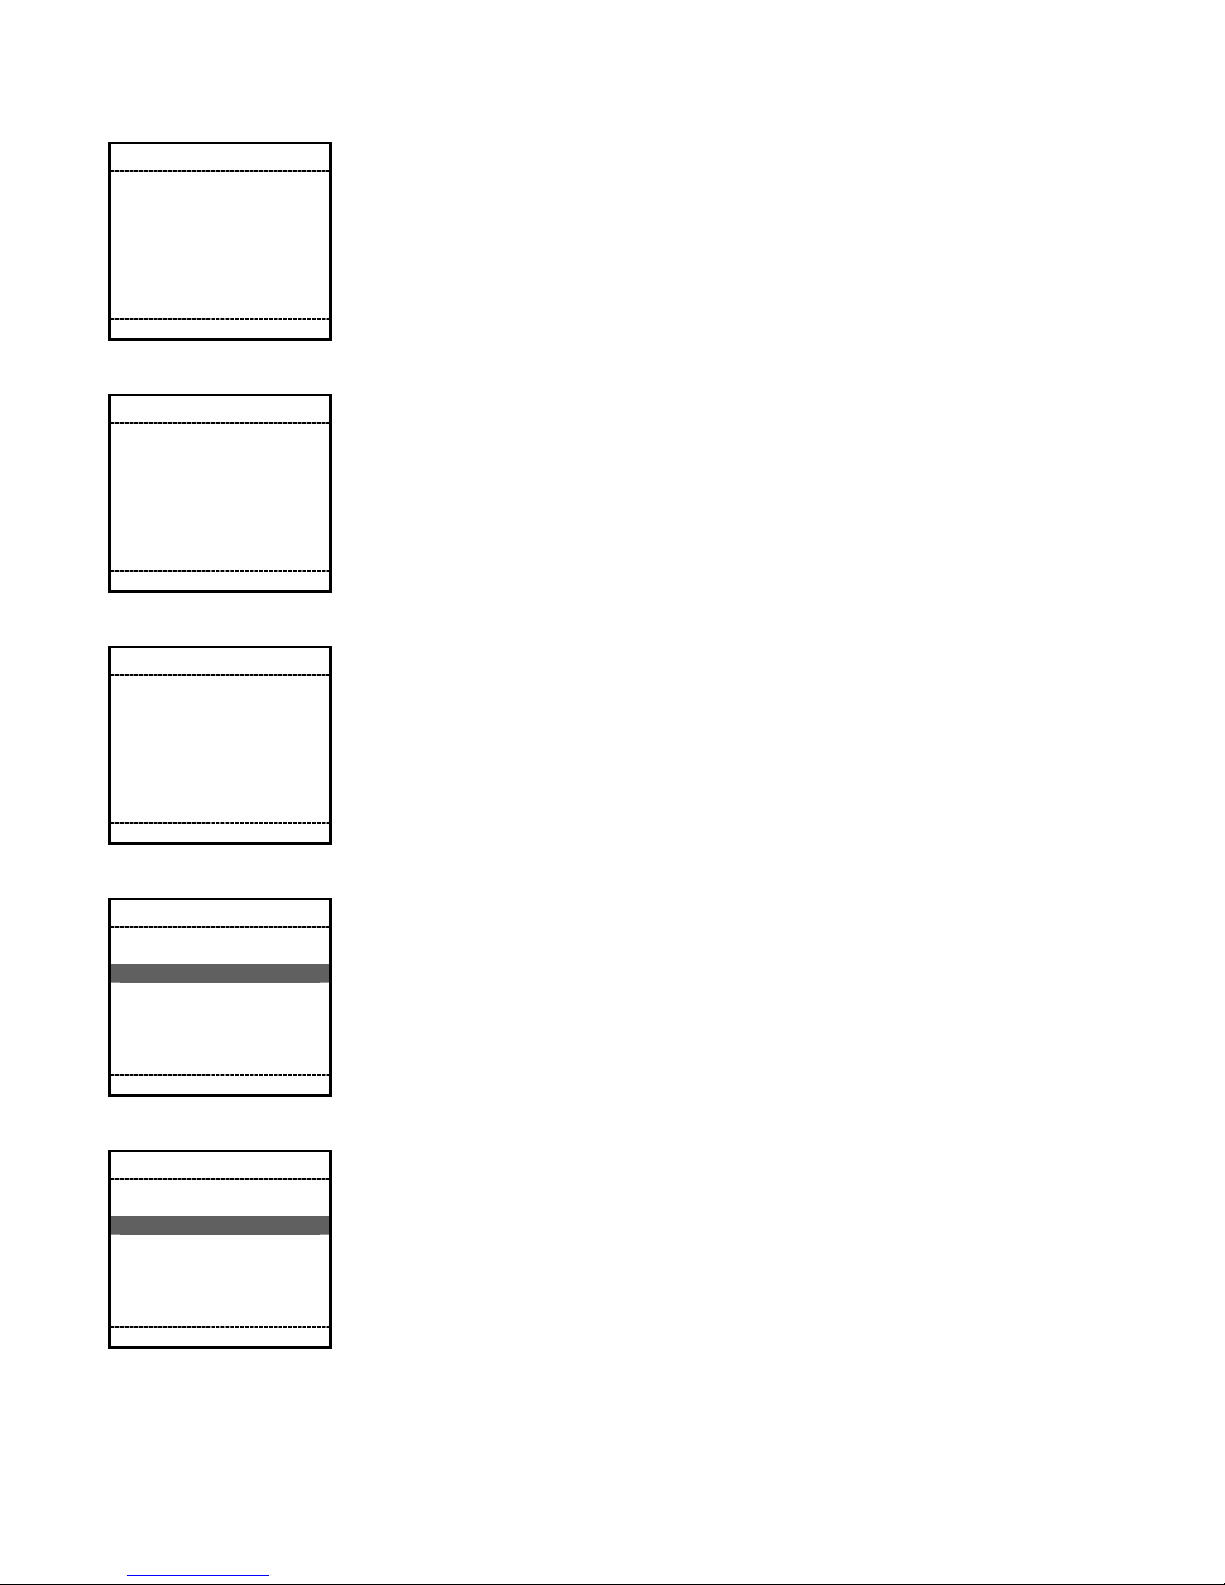
Auth. Only
Enter Exp. Date
MMYY Format
Back OK
Back OK
Back OK
00/00
Auth. Only
Enter 4 Digits
Number From The
Front Of The Card
1234
Auth. Only
Enter 3 Digits
Number From The
Back Of The Card
123
Step 6
When the card number is entered manually, the way5000 will prompt for
the card expiration date. Enter the expiration date (MM/YY) and press F2
(OK) to continue.
Step 7-1 (Optional Screen – AMERICAN EXPRESS)
If the card is an American Express card, the way5000 may prompt for the
American Express Security Code which is a 4 digit number located on the
front of the card. Press F2 (OK) to continue.
Step 7-2 (Optional Screen – VISA, MC, DISCOVER)
If the card is a Visa, MC or Discover card, the way5000 may prompt for
the Security Code which is a 3 digit number located on the back of the
card in the signature panel. Enter the code and press F2 (OK) to continue.
Auth. Only
Select reason
1. Not Legible
2. Not Present
3. Skip Entry
Back OK
Auth. Only
Select reason
1. Not Legible
2. Not Present
Back OK
Step 8-1 (Optional Screen for Visa/MasterCard)
If the Security Code is not present or is not legible, the way5000 will
prompt for a reason when the Security Code entry is left blank.
Select the appropriate reason by pressing 1, 2, or 3 and hit F2 (OK) to
continue.
Step 8-2 (Optional Screen for Discover)
The terminal will prompt for a reason when the CID is skipped (left in
blank) in the previous steps. If the CID information is entered, the terminal
will not display this screen
Select the appropriate reason and hit F2 (OK) to continue.
way5000 User Manual V1.00 4/3/2009 85
Page 86

Auth. Only
Enter Zip Code
For Cardholder
Billing Address
01801
Back OK
Enter Cardholder
Billing Address #
Back OK
Back OK
Auth. Only
200
Auth. Only
Enter
Invoice/Job#
or Press
OK to Continue
123456
Step 9 (Optional Screen – AVS - ZIP CODE)
The way5000 may prompt cardholder ‘s billing zip code; the number may
be 5 or 9 digits. Enter the digits and press F2 (OK) to continue.
Step 10 (Optional Screen – AVS – STREET ADDRESS)
The way5000 may prompt cardholder‘s billing address street number.
Enter the digits and press F2 (OK) to continue.
Step 11 (Optional Screen – INVOICE/JOB Number)
If this field is enabled in the terminal configuration, the way5000 will
prompt for and Invoice or Job Number. Enter the digits and press F2 (OK)
to continue. To skip this entry, press F2 (OK) to continue.
Auth. Only
Enter Amount
1.00
Back OK
Amount 1.00
Total 1.00
Back OK
Auth. Only
Confirm Details
Step 12
Enter the transaction amount; and press F2 (OK) to continue.
Step 13
Once all the amounts are entered, the terminal will confirm the amounts
and final total for the transaction. Press F1 (Back) to go back and fix any
amount or press F2 (OK) to continue with the next step.
way5000 User Manual V1.00 4/3/2009 86
Page 87

Auth. Only
Pending -Stored
Print Receipt
1. Merchant Copy
2. Customer Copy
Done OK
Offline
Step 14-1
Press F2 (OK) or ‘1’ to print the merchant receipt and continue with the
next step. Press '2' to print the customer copy of the receipt.
Press F1 (Done) to finish the transaction and go to the Transactions Menu
of the Payment Application..
way5000 User Manual V1.00 4/3/2009 87
Page 88

Return
T-Mobile
way5000
1. Way2Pay
2. Check Updates
W2P OK
1. Sale
2. Other Trans.
3. Inquiry
4. Setup
5. Offline Mode
Back OK
1. Authorize Only
2. Return
3. Void
4. Force
5. Reconcile
6. Upload
Back OK
Connected
Please swipe
Your card
Transactions
Other Trans.
Step 1
To start WAY2Pay, press F2 (Way2Pay) or press ‘1’ to continue.
Step 2
To choose Other Transactions, press the ‘2’ key.
Step 3
Press the ‘2’ key to select Return.
Return
Enter Return
Password
Back OK
1. Credit
2. Cash
Back OK
******
Return
Step 4 (Optional Screen – Return Password)
If the authorize password prompt is enabled in the terminal configuration,
the Terminal will prompt for the authorize password, in order to continue
with the next step, the right password (default=123456) must be entered.
Step 5 (Payment Menu)
Press the ‘1’ key to select Credit Return.
Cash Sale may or may or may not appear based on your setup.
way5000 User Manual V1.00 4/3/2009 88
Page 89
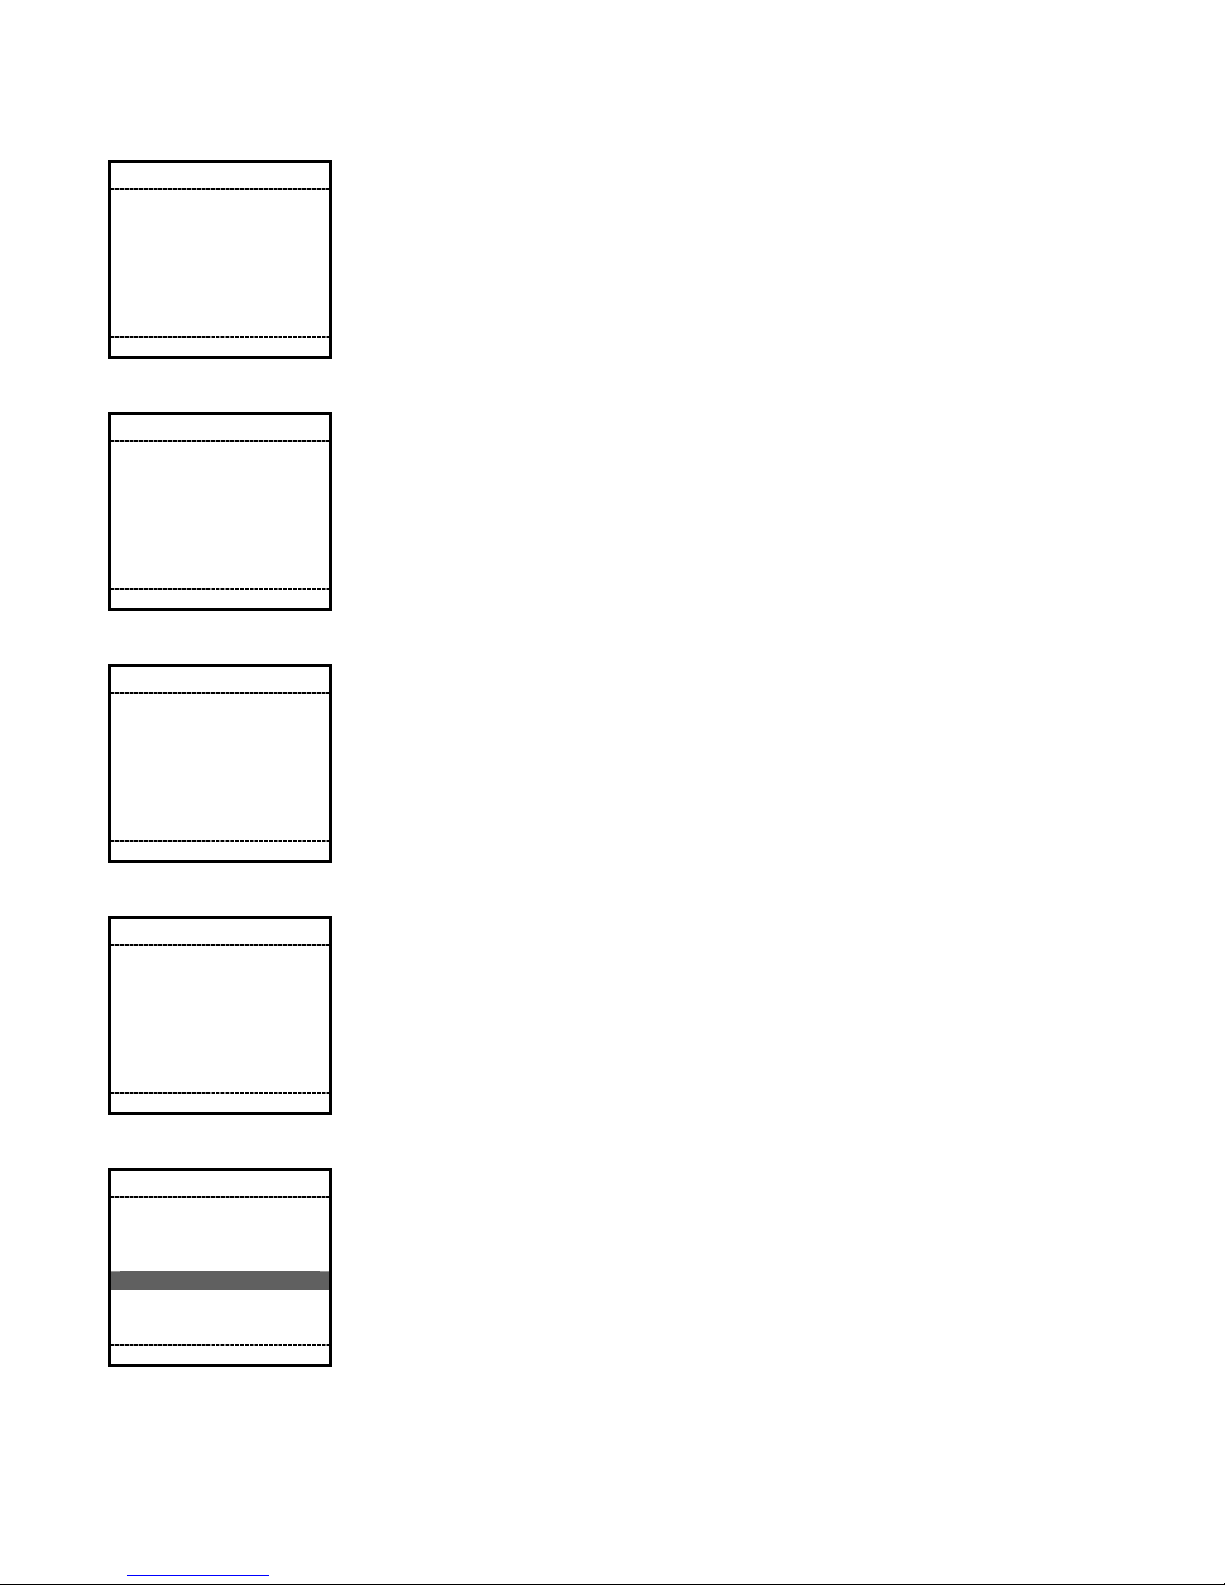
Return - Credit
Swipe Card Or
Enter Card
Number
Back OK
Back OK
Back OK
Return - Credit
Enter Exp. Date
MMYY Format
00/00
Return - Credit
Enter Amount
1.00
Step 6
Swipe the Credit Card through the reader. If this is successful, skip to
step 8.
If the swipe does not work or the card is not present, you may manually
enter the card number. Continue with Step 8.
Step 7
When the card number is entered manually, the way5000 will prompt for
the card expiration date. Enter the expiration date (MM/YY) and press F2
(OK) to continue.
Step 8
Enter the transaction amount; and press F2 (OK) to continue.
Return - Credit
Confirm Details
Amount 1.00
Total 1.00
Back OK
Return - Credit
Pending -Stored
Print Receipt
1. Merchant Copy
2. Customer Copy
Done OK
Offline
Step 9
Once all the amounts are entered, the terminal will confirm the amounts
and final total for the transaction. Press F1 (Back) to go back and fix any
amount or press F2 (OK) to continue with the next step.
Step 10
Press F2 (OK) or ‘1’ to print the merchant receipt and continue with the
next step. Press '2' to print the customer copy of the receipt.
Press F1 (Done) to finish the transaction and go to the Transactions Menu
of the Payment Application.
way5000 User Manual V1.00 4/3/2009 89
Page 90
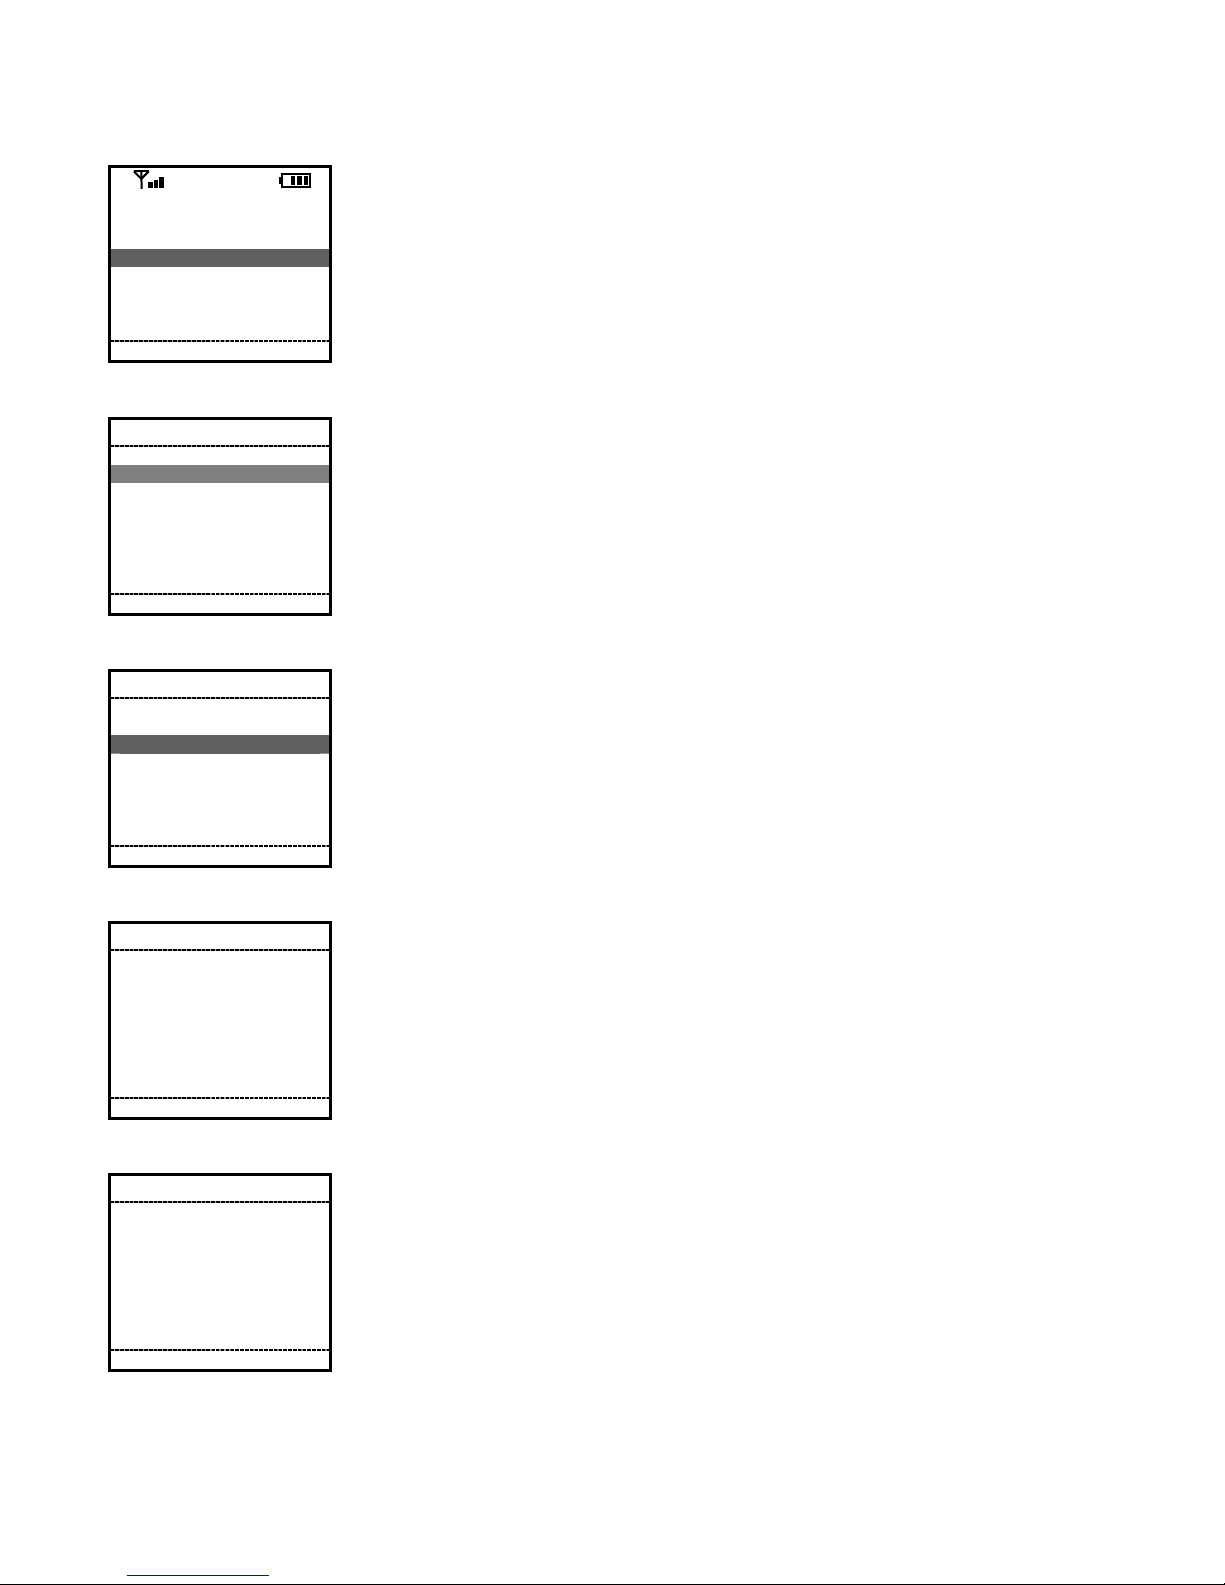
Void
T-Mobile
way5000
1. Way2Pay
2. Check Updates
W2P OK
1. Sale
2. Other Trans.
3. Inquiry
4. Setup
5. Offline Mode
Back OK
1. Authorize Only
2. Return
3. Void
4. Force
5. Reconcile
6. Upload
Back OK
Connected
Please swipe
Your card
Transactions
Other Trans.
Step 1
To start WAY2Pay, press F2 (Way2Pay) or press ‘1’ to continue.
Step 2 (Transaction Menu)
To choose Other Transactions, press the ‘2’ key.
Step 3 (Other Transactions Menu)
Press the ‘3’ key to select Void.
Void
Enter Void
Password
Back OK
Back OK
******
Void
Enter Trans.
Seq. #
123
Step 4 (Optional Screen – Void Password)
If the authorize password prompt is enabled in the terminal configuration,
the Terminal will prompt for the authorize password, in order to continue
with the next step, the right password (default=123456) must be entered.
Press F2 (OK) to continue
Step 5
Enter the transaction sequence number and press F2 (OK) to continue.
way5000 User Manual V1.00 4/3/2009 90
Page 91

Void
Seq # 001
Auth No. 123456
Amount $1.00
Back OK
Confirm Void?
Step 6
Transaction Information matching the sequence number will be displayed.
If this matches transaction details, press F2 (OK) to continue.
Void
Pending –Stored
Print Receipt
1. Merchant Copy
2. Customer Copy
Done OK
Offline
Step 7
Press F2 (OK) or ‘1’ to print the merchant receipt and continue with the
next step. Press '2' to print the customer copy of the receipt.
Press F1 (Done) to finish the transaction and go to the Transactions Menu
of the Payment Application.
way5000 User Manual V1.00 4/3/2009 91
Page 92

Force
T-Mobile
way5000
1. Way2Pay
2. Check Updates
W2P OK
1. Sale
2. Other Trans.
3. Inquiry
4. Setup
5. Offline Mode
Back OK
1. Authorize Only
2. Return
3. Void
4. Force
5. Reconcile
6. Upload
Back OK
Connected
Please swipe
Your card
Transactions
Other Trans.
Step 1
To start WAY2Pay, press F2 (Way2Pay) or press ‘1’ to continue.
Step 2
To choose Other Transactions, press the ‘2’ key.
Step 3
Press the ‘4’ key to select Force.
Force
Enter Force
Password
******
Back OK
Back OK
Force
Swipe Card Or
Enter Card
Number
Step 4 (Optional Screen – Force Password)
If the authorize password prompt is enabled in the terminal configuration,
the Terminal will prompt for the authorize password, in order to continue
with the next step, the correct password (default=123456) must be
entered. Press F2 (OK) to continue
Step 5
Swipe the Credit Card through the reader. If this is successful, skip to
step 7.
If the swipe does not work or the card is not present, you may manually
enter the card number. Continue with Step 7.
way5000 User Manual V1.00 4/3/2009 92
Page 93

Force
Enter Exp. Date
MMYY Format
Back OK
Back OK
Back OK
00/00
Force
Enter
Invoice/Job#
or Press
OK to Continue
123456
Force
Enter Amount
1.00
Step 6
When the card number is entered manually, the way5000 will prompt for
the card expiration date. Enter the expiration date (MM/YY) and press F2
(OK) to continue.
Step 7 (Optional Screen – INVOICE/JOB Number)
If this field is enabled in the terminal configuration, the way5000 will
prompt for and Invoice or Job Number. Enter the digits and press F2
(OK) to continue. To skip this entry, press F2 (OK) to continue.
Step 8
Enter the transaction amount; and press F2 (OK) to continue.
Force
Confirm Details
Amount 1.00
Total 1.00
Back OK
Back OK
Force
Enter Auth Code
123456
Step 9
Once all the amounts are entered, the terminal will confirm the amounts
and final total for the transaction. Press F1 (Back) to go back and fix any
amount or press F2 (OK) to continue with the next step.
Step 10
Enter the Authorization Code received for this transaction and press F2
(OK) to continue.
way5000 User Manual V1.00 4/3/2009 93
Page 94

Force
Pending –Stored
Offline
Print Receipt
1. Merchant Copy
2. Customer Copy
Done OK
Step 11
Press F2 (OK) or ‘1’ to print the merchant receipt and continue with the
next step. Press '2' to print the customer copy of the receipt.
Press F1 (Done) to finish the transaction and go to the Transactions Menu
of the Payment Application.
way5000 User Manual V1.00 4/3/2009 94
Page 95

Go To Online Mode
T-Mobile
way5000
1. Way2Pay
2. Check Updates
W2P OK
1. Sale
2. Other Trans.
3. Inquiry
4. Setup
5. Offline Mode
Back OK
No Yes
Connected
Please swipe
Your card
Transactions
Transactions
Switch to Online
Mode?
Step 1
To start WAY2Pay, press F2 (Way2Pay) or press ‘1’ to continue.
Step 2
Press ‘5’ to continue to go to online mode.
Step 3
Press F2 (Yes) to continue.
Transactions
1. Sale
2. Other Trans.
3. Inquiry
4. Setup
5. Online Mode
Back OK
Step 4
The terminal returns to the transactions menu.
way5000 User Manual V1.00 4/3/2009 95
Page 96

X. Error Messages and Troubleshooting
Transaction Name
No Response
Received (xxxx)
1. Retry
2. Save as Offline
3. Cancel
Back OK
Transaction Name
Unable to Connect
1. Retry
2. Save as Offline
3. Cancel
Back OK
(xxxx)
Error
Card Read
Error
If no response is received from the payment processor, this screen will
be displayed.
The Retry option will attempt to re-send the transaction. The Save as
Offline option will create a new offline transaction with the same
information as the current sale transaction and will display the print
screen The Cancel option will terminate the transaction.
(NOTE: Debit Sale and Debit Refund cannot be saved as offline)
If the way5000 is unable to connect, this screen will be displayed.
The Retry option will attempt to re-send the transaction. The Save as
Offline option will create a new offline transaction with the same
information as the current sale transaction and will display the print
screen The Cancel option will terminate the transaction.
(NOTE: Debit Sale and Debit Refund cannot be saved as offline)
Card Read Error (Magnetic Stripe Read Error)
This screen will be displayed when it is not possible to read the
magnetic stripe of a card (may be because the track is damaged or
because a wrong swipe). The terminal will return to the ‘Swipe Card’
screen.
Error
Invalid Card
way5000 User Manual V1.00 4/3/2009 96
Invalid Card Number
This screen will be displayed when a card number is manually entered
and for some reason the card number is wrong.
Page 97

Error
Expired Card
Expired Card
This screen will be displayed when an expired card is swiped or an
expired card expiration date is manually entered.
Error
Invalid Date
Sequence Number
Error
Invalid
Please
Try Again
Info
Time Out
Transaction
Cancelled
Invalid Date
This screen will be displayed when an invalid date is entered for
instance the months field contains a different value than 01 to 12 or the
days field contains a different value than 01 to 31, (the limit may
change depending on the month). The terminal will return to the Enter
Exp Date screen.
Sequence Number Input Error
This screen will be displayed when an incorrect sequence number is
entered in the terminal. The terminal will return to the Enter Seq #
screen.
Time Out
This screen will be displayed in some cases, when after 30 seconds no
data is entered in a data entry field
.
After this screen is displayed, the terminal will abort/cancel the current
transaction and will return to the main menu.
Info
No Transactions
Found
way5000 User Manual V1.00 4/3/2009 97
No Transactions
This screen will be displayed when the user tries to see or print a
report or to settle a batch and the terminal does not have transactions
stored in the memory.
Page 98

Error
Max. Transaction
Capacity Reached
Please Reconcile
Back OK
No Yes
Warning
Near Maximum
Trans. Capacity
Reconcile Now?
Error
Incorrect
Admin
User/Password
Please
Try Again
Maximum Transactions
This screen will be displayed when the user tries to do a new
transaction and the Batch is already full.
When this screen is displayed, it will be necessary to perform a
Reconcile before being able to run more transactions.
Maximum Capacity Almost Reached
This screen will be displayed after a transaction is performed when the
batch is almost full. The terminal will display this warning after each
transaction until a Reconcile is performed.
Incorrect Administrator User/Password
This screen will be displayed when an incorrect administrator
password is entered in the terminal.
Error
Incorrect
Password
Please
Try Again
Transaction Can
Error
Not be Voided
Incorrect Transaction Password
This screen will be displayed when an incorrect transaction password
is entered in the terminal. (The optional password requirement is set
up by the payment processor.)
Void Transaction Error
This screen will be displayed when the user tries to void a transaction
that is not possible to void.
For example, when trying to void an Authorization Only transaction.
way5000 User Manual V1.00 4/3/2009 98
Page 99

Error
Transaction
Already Voided
Info
Low Battery
Warning
Low Battery
Unable to
Continue
Already Voided
This screen will be displayed when the user tries to void a transaction
that is already voided.
For example, when trying to void a voided sale.
Low Battery Information
This screen will be displayed when the battery level reaches 15% or
less. After this message is displayed, the transactions will continue
normally.
When the terminal is operating in offline mode or airline mode, this
screen will always be displayed after the terminal reaches a battery
level of 10% or less and after displaying the screen the transaction will
continue normally.
Low Battery Warning
This screen will be displayed when the battery level reaches 10% or
less. After this screen is displayed, the terminal will abort the
transaction and return to the Transaction menu of the payment
application.
Info
Enter at least
XX Characters
Info
Enter at least
XX Characters
Or Leave Blank
And Press ‘OK’
To Skip
Input Size Info – For Mandatory Inputs
All of the mandatory data entry screens have a minimum number of
characters that must be entered. If a user tries to enter fewer
characters than the minimum requirement, the terminal will display this
information screen to let the user know the minimum input size.
Input Size Info – For Optional Inputs
All of the optional data entry screens can be skipped by pressing F2
(OK) or if data is entered, require a minimum number of characters to
be entered.
way5000 User Manual V1.00 4/3/2009 99
Page 100
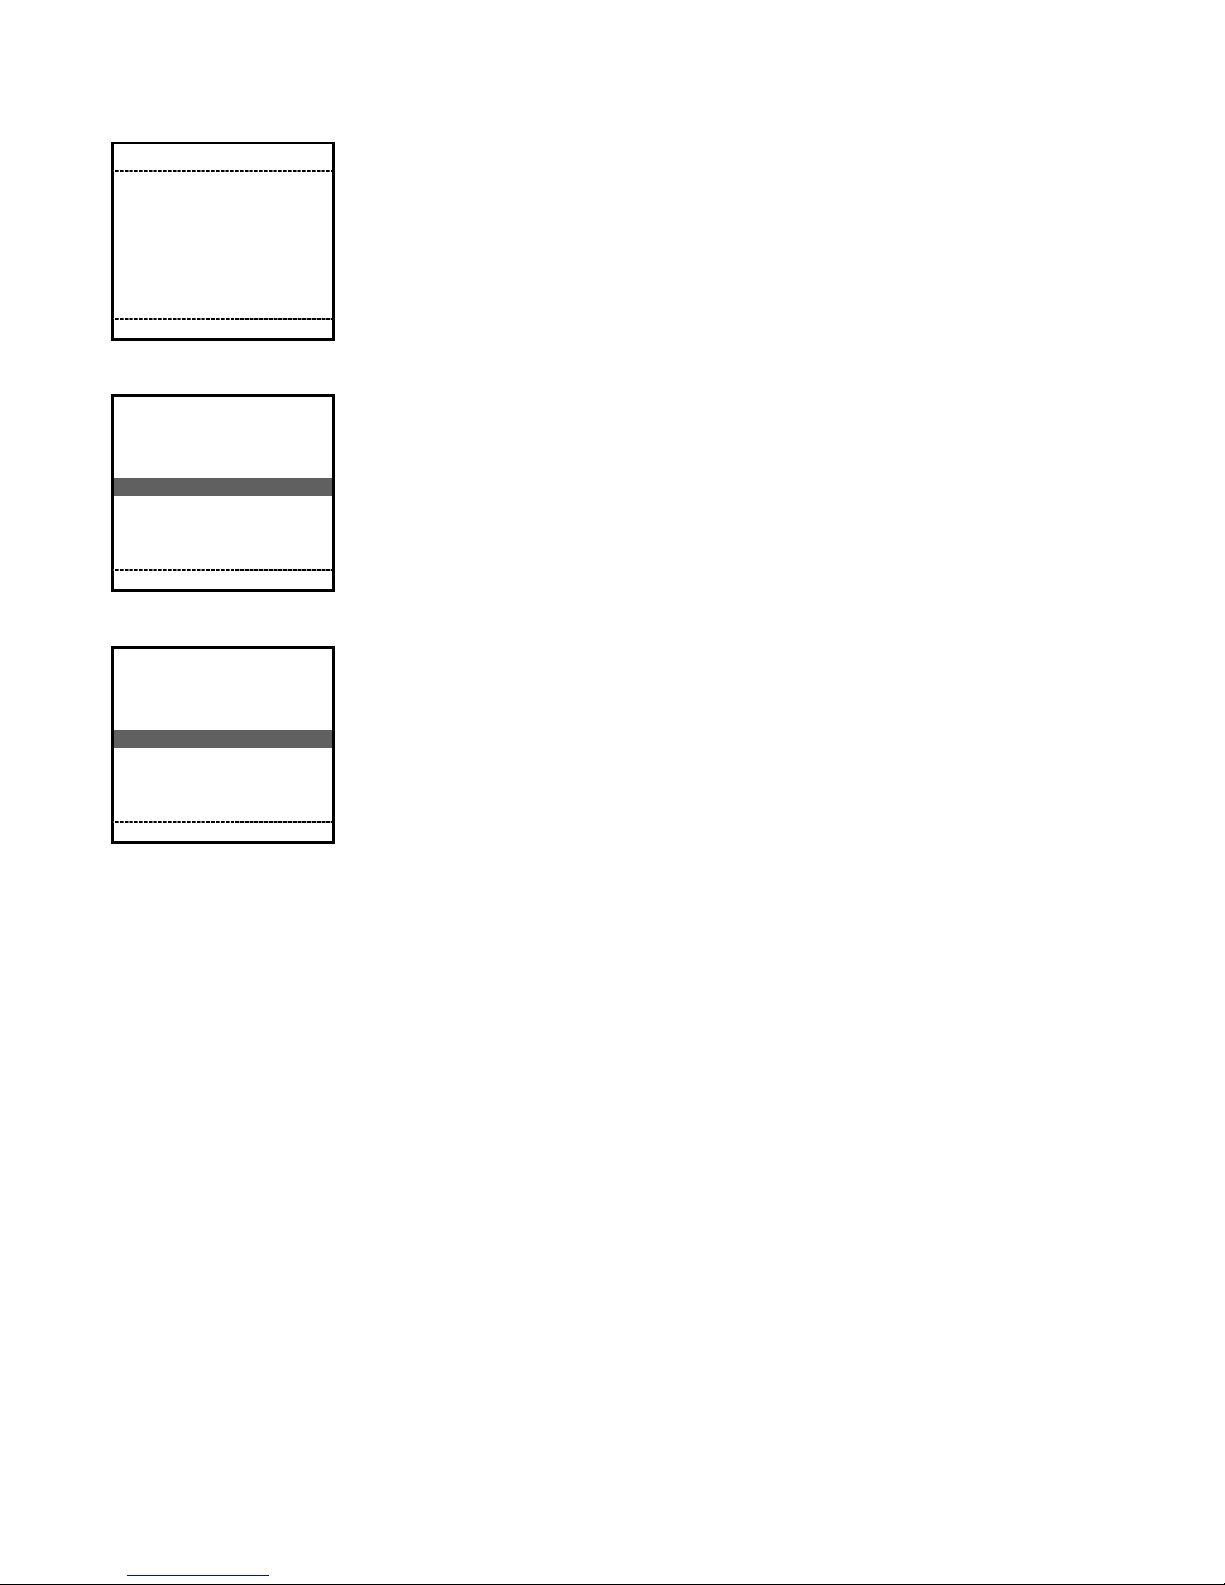
Internal Error
Please Power Off
Error
Occurred
This screen will be displayed when an internal error occurs because of
unexpected conditions.
When this screen is displayed, will be necessary to manually reset the
terminal which means, the user will have to turn off and then turn on
the terminal to use it again.
If the problem persists, please call WAY Support at 1-866-
866-929-6883.
WAY-MTT3 (1-
1. Way2Pay
2. Check Updates
W2P OK
1. Way2Pay
2. Check Updates
W2P OK
WAY5000
No Service
Please swipe
Your card
WAY5000
No SIM
Please swipe
Your card
No GPRS Network Detected
After some time, if the terminal does not find an available cellular
network it will display “No Service” and it will display that text until a
network is found.
While the “No Service” text is displayed, no online transactions will be
allowed.
No SIM Card Present
If the terminal does not have a SIM card, the terminal will display “No
SIM”. Please call WAY Support at 1-866-
WAY-MTT3 (1-866-929-6883.
way5000 User Manual V1.00 4/3/2009 100
 Loading...