

Page 1
Command Translator
USER QUICK-REFERENCE GUIDE
Install Translator and TaskBuilder
1
1 Install the Translator soware then access the login page by opening a Web browser and navigating to
“http://<hostname or IP Address of Translator>/Translator/.”
2 Once on the login page, enter your username and password (default “administrator” and “password”)
then click Login.
3 Select System from the menu bar then click on the TaskBuilder link on the le side of the page.
4 Click on the TaskBuilder link to download and install TaskBuilder on the local machine.
Create a task
2
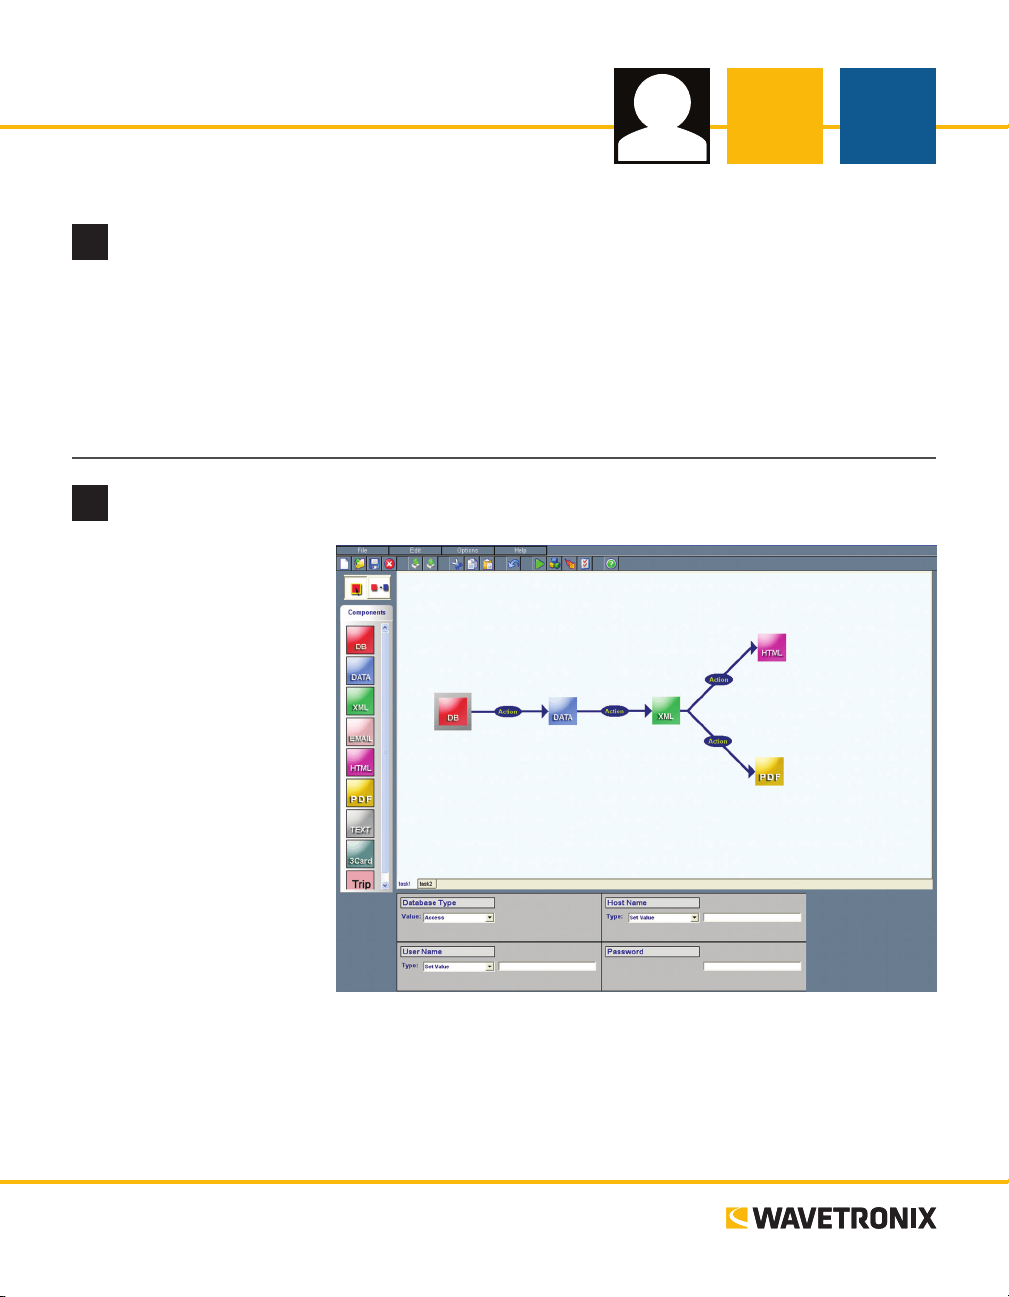
Tasks for Translator are created in TaskBuilder. Once
TaskBuilder is open, follow
the steps below to create a
new task:
1 Select New Task from
the File menu or click
the button on the toolbar,
opening the Task Details
window.
2 Enter the information in
the Task Details window
and click Done (only
Task Name is required).
3 To add components to a
task, drag one or more
components from the
Component List at le to
the main task window.
4 Congure a component by selecting it in the main task window and lling out the applicable properties.
5 Create an action between two components by selecting the button, then using your mouse to drag from
the start component to the end component (valid end components will be highlighted in green).
6 Congure the properties of an action by selecting it in the main task window and lling out the appli-
cable information.
www.wavetronix.com
www.wavetronix.com
801.734.7200
801.734.7200
Page 2
Debugging a task
3
Once a task is created, follow the steps below
to debug the task:
1 Click the button on the toolbar.
TaskBuilder will ask for any user-dened
values, then the Debug menu will open
on the toolbar.
2 Click the button to execute the entire
task. Actions will be highlighted in red
as they are executed. Any errors will
appear aer the task is run in an Error
Report dialog.
If you would like to step through each action
one by one, use the button. Errors will be
displayed immediately aer each step if they
occur. Click to stop execution entirely and return to the normal editing mode.
In the Conguration Options menu, accessed by clicking the button, TaskBuilder can be congured to
run the entire task automatically aer clicking the button, instead of using the Debug toolbar.
Export a task
4
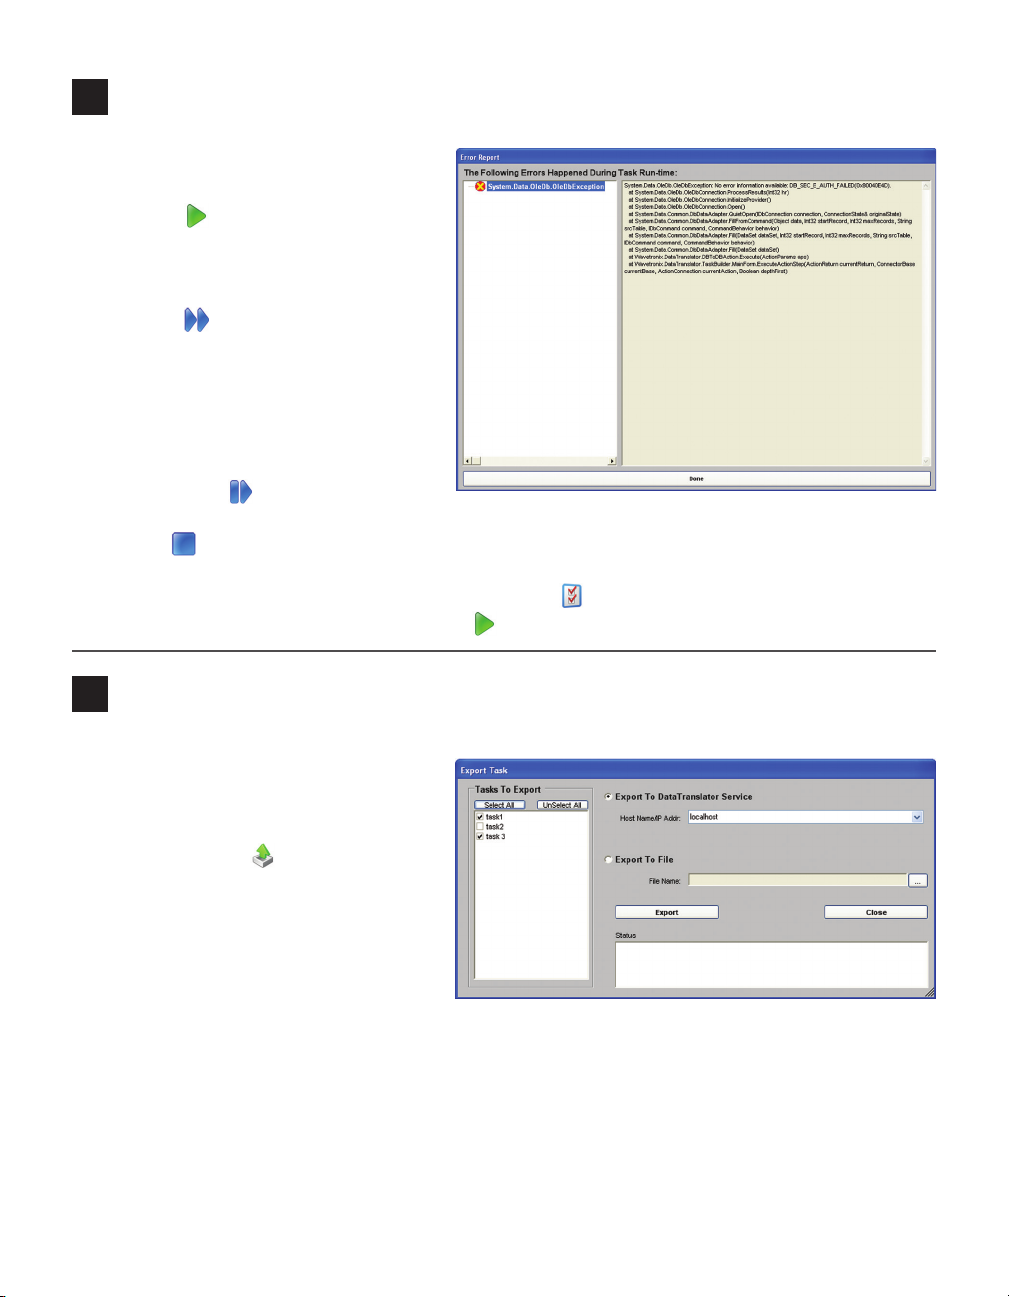
Aer creating a task, follow the steps below
to export that task to the Translator service:
1 Open the Export Task window by select-
ing Export Task(s) from the File menu
or by clicking the button.
2 All registered tasks will be listed in the
Tasks to Export box; check the task(s)
you would like to export.
3 Select Export to Translator Service,
then select the currently running host
name or IP address from the drop-down
list.
4 Click the Export button. e status box will let you know whether the attempt was successful.
You can also export to an XML le. To do this, open the Export Task window and select Export to File.
Enter the le name in the text box or click the . . . button to browse for the le, then click Export.
Page 3

Add a job
5
Now that a task has been created and exported, return to the Translator interface to add
a job (a collection of one or more tasks that
are executed when an assigned event occurs).
Follow the steps below to add a job:
1 Click on Job List in the main toolbar
and open the Jobs tab. Click the Add
Job button and this will take you to the
Job Information page.
2 Enter a name for the job and, if desired,
a description.
3 Click on the Tasks link on the le
side of the page. is section is
where you will select and congure
tasks to be executed with the current job.
4 In the Add Task box, select a task
from the Name drop-down list and
click Add. e task will then be
added to the Tasks to Execute list.
Continue adding tasks in this manner until all desired tasks are in the
Tasks to Execute list.
5 Click on the Events link on the
le side of the page. In this section
you will attach events to a job.
6 In the Add Event box, congure
a schedule for the event under
the Scheduled Time tab. Create
a schedule using the Basic tab or
Advanced tab then click the Add
button.
7 If you would like to receive email notications for job success and/or failure, click on the Notications
link and enter a valid email address.
8 When you’ve nished, click the Save button at the top.
Page 4

Check job results
6
To view more information about a specic
job, click on the job name, which will take
you to the Job Information page. Click on the
History link on the le side of the page to
view results of the job.
e top of this page contains a summary of
the job results. e table in the center of the
page lists all of the executions of the job including each start time and completion time.
When you click on a start time or end time,
the Details box will display detailed information about that execution.
e Jobs tab on the Job List page contains a list of
all dened jobs along with the status of the job and
times of the previous and next run. e status icons
are as follows:
Indicates the last execution of this job succeeded.
Indicates the job is currently running.
Indicates the last execution of this job failed.
Indicates the job is disabled.
Run job manually
7
Jobs are set to run on the schedule that was set on the Job Information page, but you also have the option of
manually running a job. To do this, go to the Job List page and click the Run Now button next to the appropriate job name.
View job results in
the History section
of the Job Information page.
© 2014 Wavetronix LLC. All rights reserved. Protected by US Pat. Nos. 6,556,916; 6,693,557; 7,426,450; 7,427,930; 7,573,400; 7,889,097; 7,889,098; 7,924,170; 7,991,542; 8,248,272;
8,665,113; and Cdn. Pat. Nos. 2,461,411; 2,434,756; 2,512,689; and Euro. Pat. Nos. 1435036; 1438702; 1611458. Other US and international patents pending. Wavetronix, Smar tSensor, Click,
Command and all associated logos are trademarks of Wavetronix LLC. All other product or brand names as they appear are trademarks or registered trademarks of their respective holders. Product specifications are subject to change without notice. This material is provided for informational purposes only; Wavetronix assumes no liability related to its use.
WX-500-0200
 Loading...