

Page 1
Wavecom TT04- 50 Quick Installation Guide
Note:
The interface picture in the quick start guide is for reference only. Please refer to the product specification for the
interfaces availability.
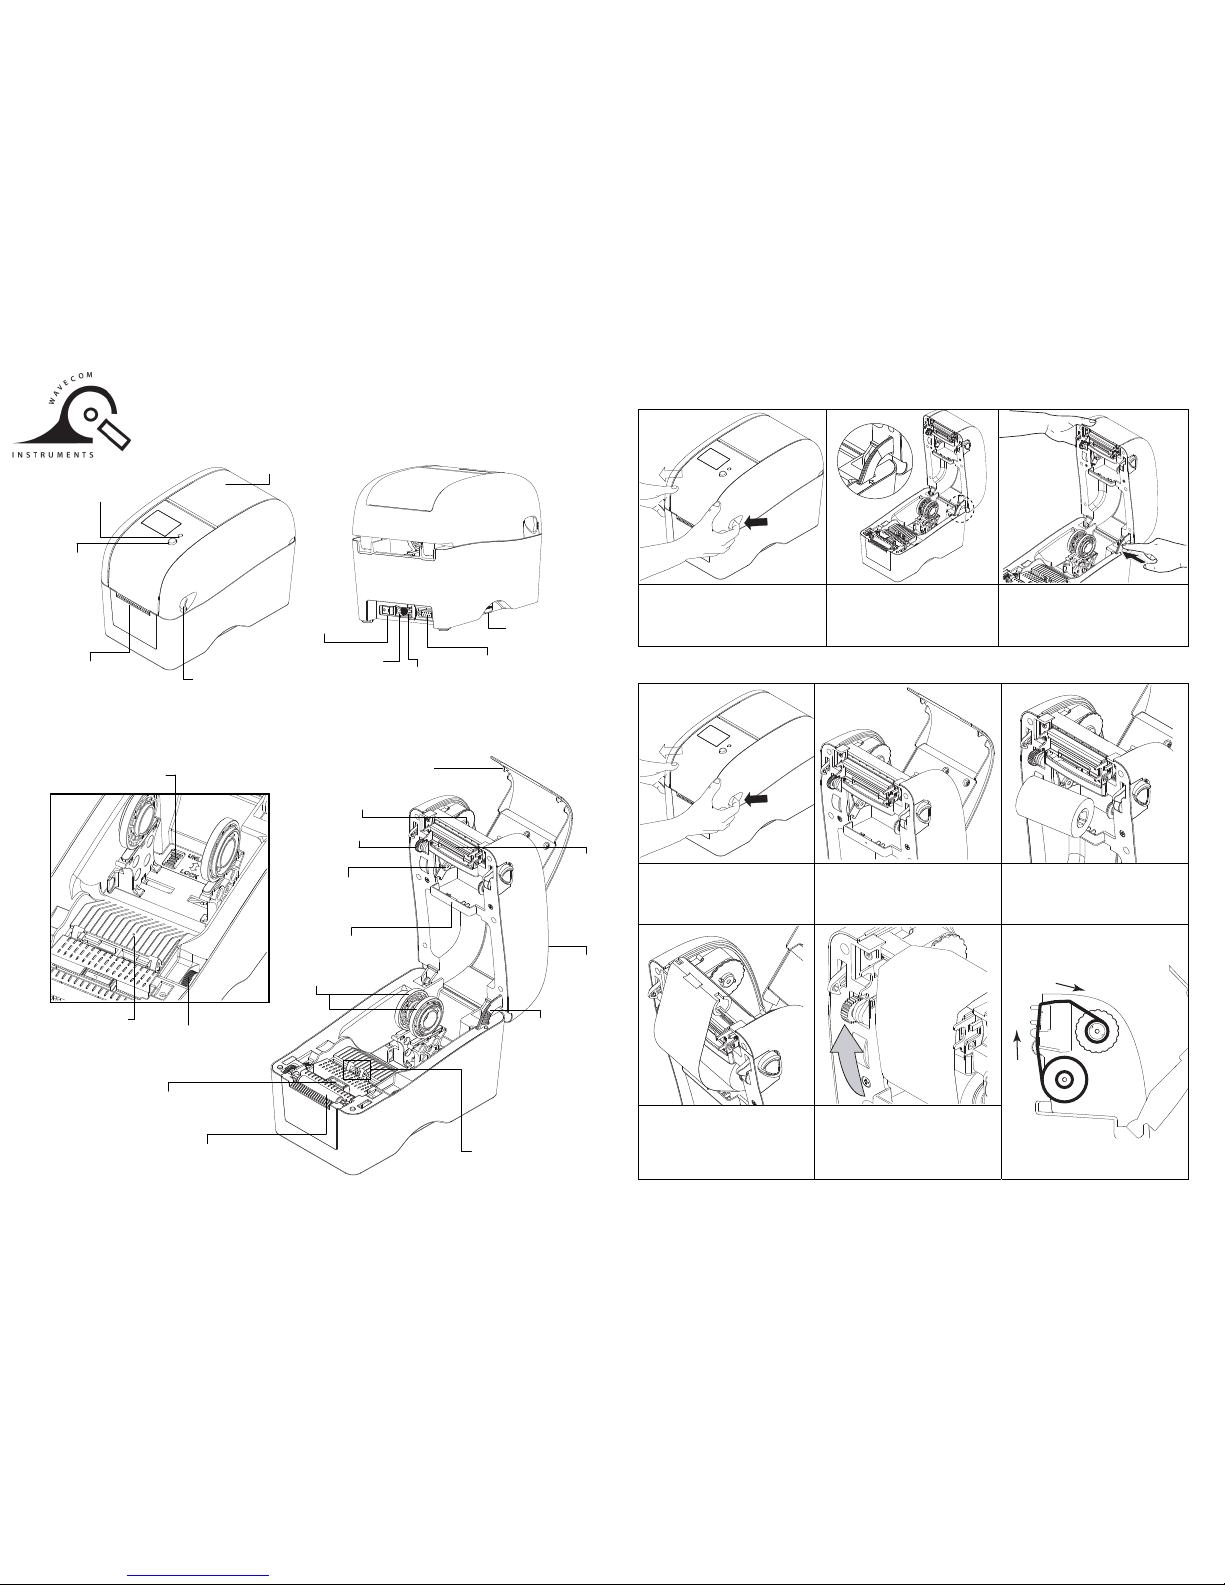
Open / Close the Top Cover
(1) Open the printer top cover by pulling
the tabs located on each side
towards the front of the printer, then
lift the top cover to the maximum
open angle.
(2) A top cover support at the rear of
the printer will engage with lower
inner cover to hold the printer top
cover open.
(3) Hold the top cover and press the top
cover support to disengage the top
cover support with lower inner cover.
Gently close the top cover.
Loading the Ribbon
(1) Open the printer’s top cover by
pulling the top cover open levers
located on each side of the printer
and lifting the top cover to the
maximum open angle.
(2) Open the ribbon access cover. (3) Insert the ribbon right side onto the
supply hub. Align the notches on the
left side and mount onto the spokes.
(4) Stick the ribbon onto the ribbon
rewind paper core and insert the
paper core onto the rewind hub.
(5) Turn the ribbon rewind gear until the
ribbon plastic leader is thoroughly
wound and the black section of the
ribbon covers the print head. Close
the ribbon access cover and the top
cover.
* Loading Path for Ribbon
Page 1 of 2
Print head
Platen roller
Gap sensor (Receiver)
Power
switch
RS-232C interface
USB
interface
LED indicator
Power jack
Feed button
Top cover
open lever
Media view window
Media guides
Black mark sensor
Media holders
Top cover
Gap sensor
(Transmitter)
SD card socket
Paper exit chute
Media holder
lock switch
Ribbon supply hub
Ribbon rewind hub
Ribbon rewind gear
Top cover
support
Ribbon access cover
Media guide
adjuster knob
Page 2
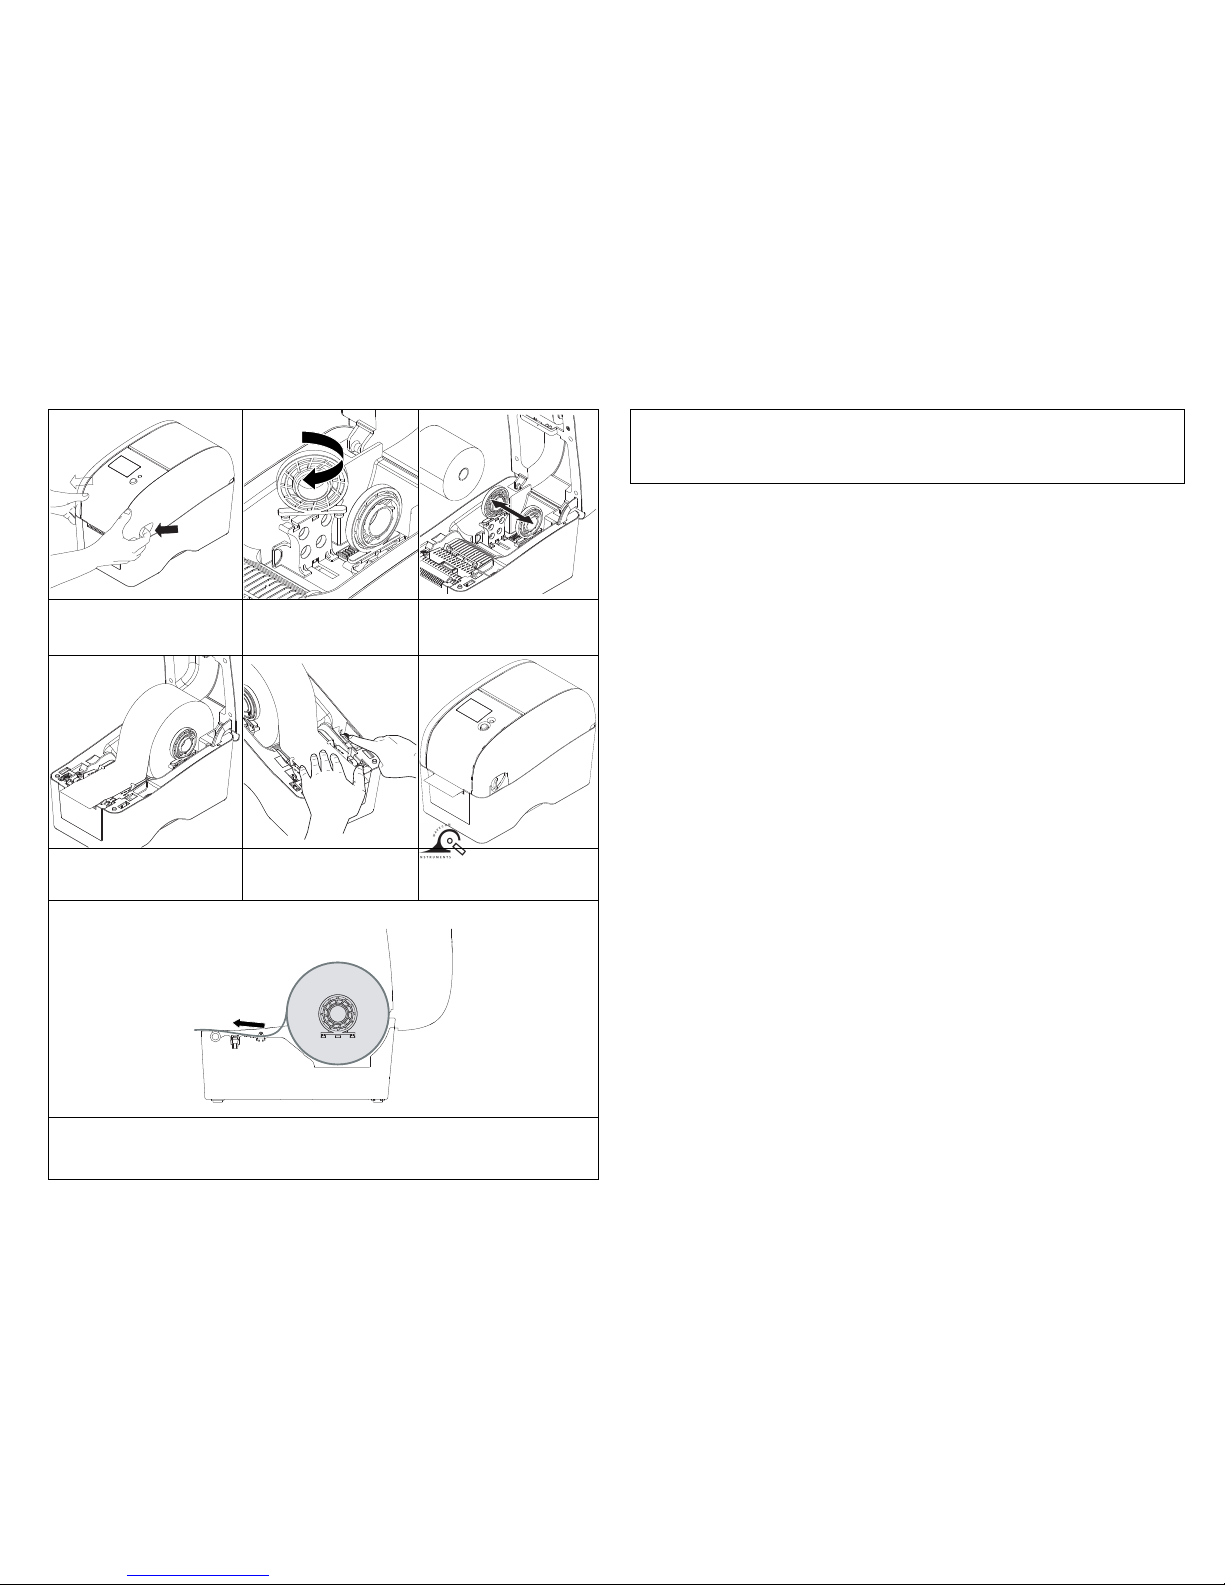
Loading the Media
(1) Open the printer top cover by pulling
the tabs located on each side towards
the front of the printer, and then lift the
top cover to the maximum open angle.
(2) The media holder can be used for
1” and 1.5” media core by rotating
the upper part of label holder 180
degrees clockwise.
(3) Separate the media holders to the
label roll width. Place the roll
between the holders and close
them onto the core.
(4) Place the paper, printing side face up,
through the media guides, media
sensor and place the label leading
edge onto the platen roller.
(5) Move the media guides to fit the
label width by turning the guide
adjuster knob.
(6) Gently close the top cover. Make
sure the cover latches securely.
* Loading Path for Media
(7) Use “Power On Utility" to scalibrate the black mark sensor. With printer OFF hold in FEED button and power ON.
Release FEED button after LED has flashed RED five times. See User Manual.
Note:
Please calibrate the gap/black mark sensor when changing the media.
Button Functions
(1) Feed labels
When the printer is ready, press the button to feed one label to the beginning of next label.
(2) Pause the printing job
When the printer is printing, press the button to pause a print job. When the printer is paused the LED will blink green.
Press the button again to continue the printing job.
Note:
* For more information and features about this printer, please refer to the User’s Manual inside the CD disk.
* Please switch OFF printer power switch prior to plug in the power cord to printer power jack.
* Specifications, accessories, parts and programs are subject to change without notice.
Page 2 of 2
P/NΚ39-0000225-00LF
 Loading...