


!
!
INSTALLATION!INSTRUCTIONS!FOR !T HE !W A V EA U D IA !P W C !ST ER O !S YS T EM!
Ready!for!use!in!24!hours!after!installation!
!
Thoroughly read the instructions before installing any of the components of your Waveaudia PWC stereo system.
The photographs included in this installation guide were taken using a GTI Sea Doo, and serves only as an example
of how the Waveaudia PWC stereo system can be installed.
Contents:!! ! ! ! Additional!Items!Required!for!
• Two!speakers!with!mounting!cleats! Assembly!(not!included):!
• Amplifier!module! ! ! ! Masking!tape! ! ! !
• Volume!control!switch!! ! ! Pliers!
• Four!zip!tie!mounting!pads!
• Ten!zip!ties!
• Two!mounting!cleat!adapters!
• VHB!adhesive!
• Two!terminal!rings!
• MP3!player!bag!
Parts!Included:!
!
!
!
!
!
!
Speakers!
Mounting!
Cleats!
Amplifier!
Module!
Volume!Control!
Switch!
MP3!Player!Bag!
!
Before beginning the installation: !
• Choose a location to mount the speakers that is closest to the operator as possible. The adhesive strip on the back of the mounting
cleat must be attached to a uniform and smooth surface on the watercraft.
• Clean and dry the area of the watercraft where the speakers will be mounted.
• The mounting cleat should be securely inside speaker cavity and locked in place with the spring-loaded plungers, as the entire
speaker unit will be used to mark the desired mounting location.
• Review the instructions and photographs before attaching the mounting cleat to the watercraft.
• Determine if mounting cleat adapter is needed – the adapter should be used if you are mounting to a concave curve on your
watercraft. The mounting cleat by itself has a curve to match a slight convex curve. It is important to get full contact with the
mounting cleat and your watercraft.
• If using the adapter, peel the tape on the adhesive and attach the adapter to the mounting cleat. Then peel the tape from the VHB
adhesive and attach to the adapter.
• If not using the adapter, peel the tape from the VHB adhesive and attach to the mounting cleat.
• Once the adhesive strip on the back of the mounting cleat has been applied to the watercraft, it cannot be moved. Be certain of the
location before the speakers/mounting cleats are pressed into place, as the adhesive strip adheres instantly.
Note: It takes 24 hours from the time of installation for the mounting cleats to properly adhere to your watercraft.
! ! ! !
Zip!ties!&!
mounting!pads!
Mounting!
Cleat!Adaptors
!
Mounting!
Adhesive!
Terminal!
Rings!

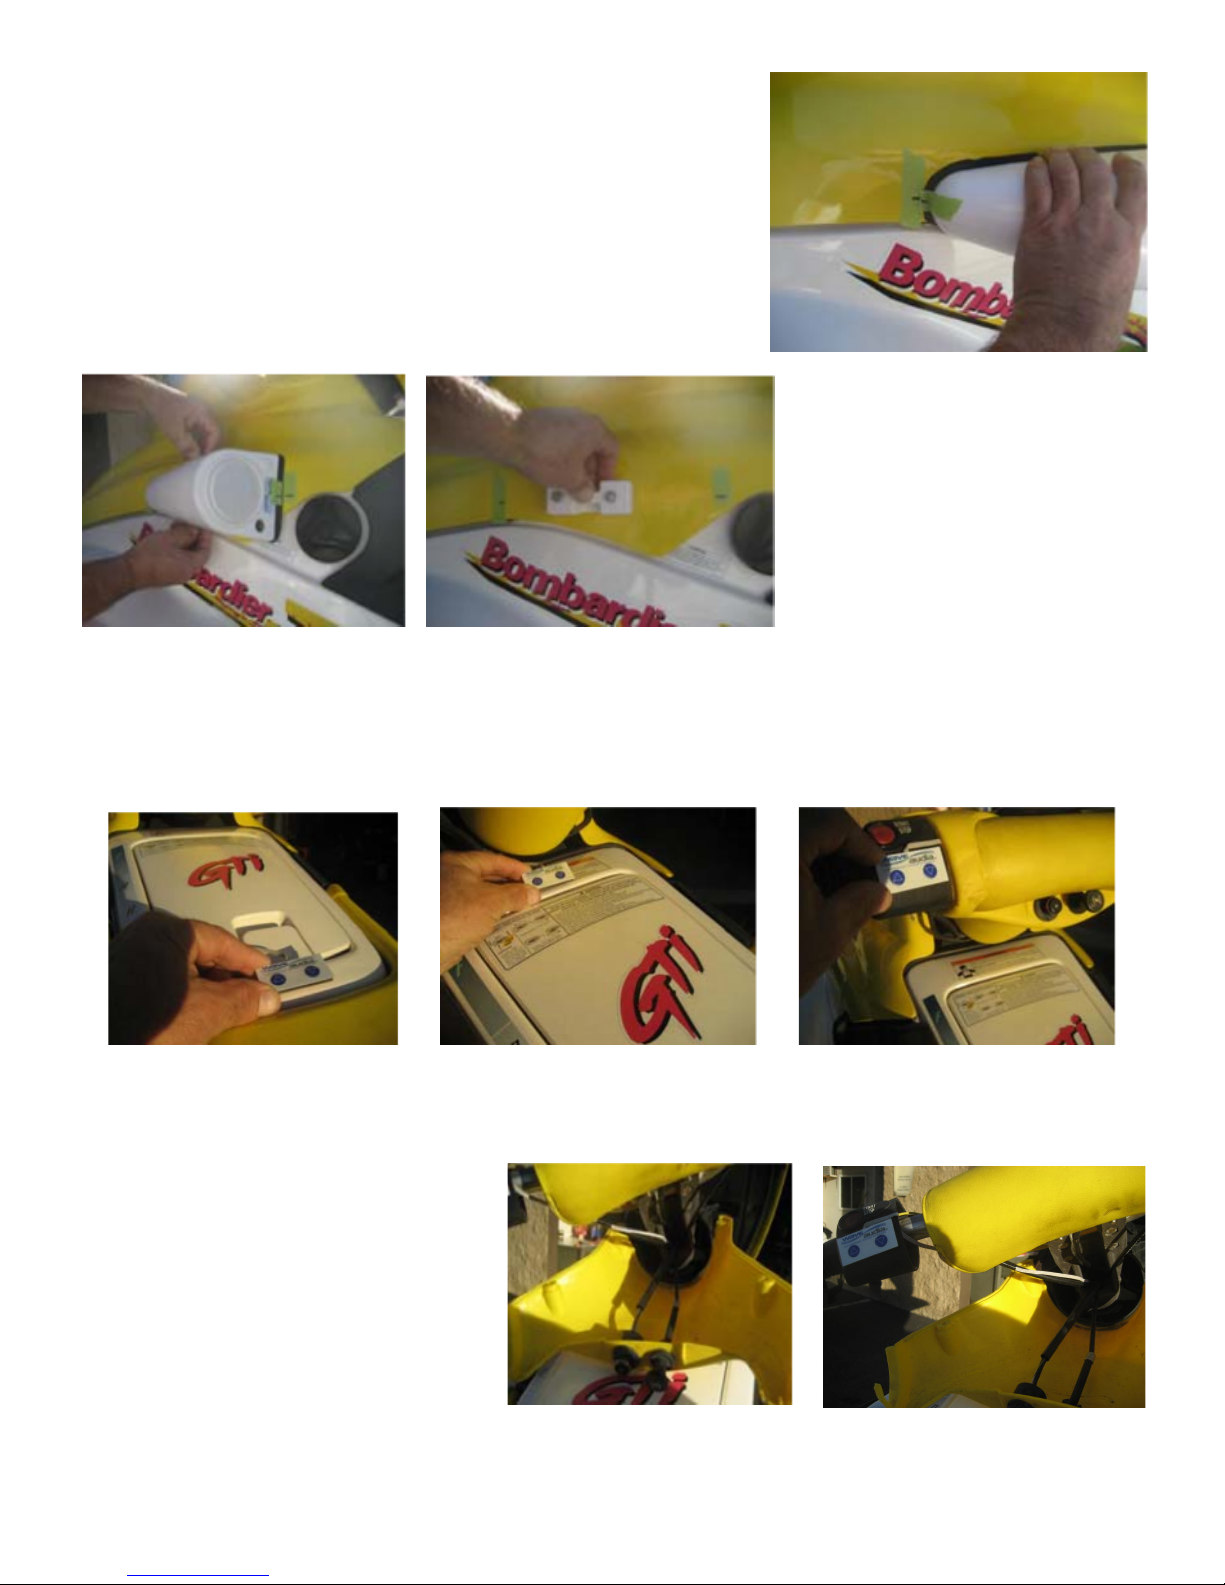
I. INSTALLING THE SPEAKERS
Step 1: Use the speakers to choose the ideal placement. Using masking tape, place each of the speakers in their
desired location. You can verify placement by sitting on your watercraft.
Step 2: Using additional pieces of masking tape, draw aligning
marks on the tape on the front of the speaker and on the tape on
the watercraft as shown in the photograph at the right. Repeat on
the other side of the watercraft.
!
Step 3: Remove the
speakers from the
watercraft, including
the marked masking tape on the speakers. The marked masking
tape for the front and back of each speaker should remain on the
watercraft.
Step 4: Peel the backing tape from the VHB adhesive strip and
attach to the mounting cleat, still securely inside the speaker. Do
not touch the adhesive strip with your hands, as this could
lessen the strength of the bond. Continue through Step 9 on one
side of the watercraft, before moving onto the other side.
Step 4a: If using the mounting cleat adapter, peel the tape on the adhesive
and attach the adapter to the mounting cleat. Then apply the VHB
adhesive to the adapter.
Step 5: Carefully align the speaker with the previously made
placement marks on the adhesive tape without pressing the adhesive
to the body of the watercraft. Once properly aligned, gently press the
exposed adhesive strip to the body of the watercraft.
Step 6: Lift out on the plunger pins on each side of the speaker and
lift the speaker off the mounting cleat, leaving only the mounting cleat
attached to the watercraft.
!
!
!
!
!
!
!
II. INSTALLING THE VOLUME CONTROL SWITCH
Before beginning the installation:
• Review the following instructions and photographs.
• Choose a location to mount the volume control switch that is comfortable and convenient to operate while riding the watercraft.
The most popular locations to mount the volume control switch can be seen below.
• Clean and dry the area of the watercraft where the volume control switch will be mounted.
• Once the adhesive strip on the back of the volume control switch has been applied to the watercraft, it cannot be moved. Be
certain of the location before the volume control switch is pressed into place, as the adhesive strip adheres instantly.
!
!
!
Refer to your watercraft instruction manual to learn how to remove the covering surrounding your
handlebars in order to properly route the wires.
Step 7: Firmly press down on
the mounting cleat so that all
points of the adhesive strip touch
the watercraft. Allow for 24
hours before reattaching the
speakers, as this will ensure the
adhesive bond reaches its full
strength.
Step 1
: If installing the volume
control switch on the handle bars, the
volume control switch wires will need
to be routed through the handle bars
or central column of the watercraft
where the gauge wires are typically
located.

Step 2: Once the volume switch wires have been routed, peel the backing tape from the volume switch and
apply the switch to the desired location. Do not touch the adhesive strip with your hands, as this could lessen
the strength of the bond. Be certain of the location before the switch is pressed into place, as once the adhesive
has been applied, it cannot be moved.
III. INSTALLING THE AMPLIFIER MODULE
Before beginning the installation:
• Review the instructions and photographs below.
• Choose a central location in the front hull section of the watercraft to mount the amplifier module, making sure that the speaker
cables will reach the speaker locations.
• Clean and dry the area of the watercraft where the amplifier module will be mounted.
• It is important to note that once the adhesive strip on the back of the amplifier module is applied to the watercraft, it
cannot be moved. Be certain of location before the amplifier module is pressed into place, as the adhesive strip adheres
instantly.
Step 1: Run right out (R-OUT) and left out (L-OUT) black cables to left and right speakers.
The speaker cables should exit under the hood near each speaker. Using the zip ties provided, cabling under the
front hull section of the watercraft can be held in place.
Step 2: Run the volume control switch cable to the amplifier
module and plug it in. Excess cable can be bundled using zip ties.
Step 3: Run the linein jack from the
amplifier module to a
convenient location for using the MP3 player. In the photographs
below, the line-in jack is run into the glove box from inside the
watercraft.
Step 4: Run the red and black wires from the amplifier module to the battery and cut to length.
Step 5: Strip ¼ inch insulation from the end of the wires and slide wire end into the terminal ring.

!
Crimp terminal ring onto wire
using pliers or other tool. Attach
red wire terminal ring to positive
post on the battery, and the black
wire terminal ring to the negative
post on the battery.
!
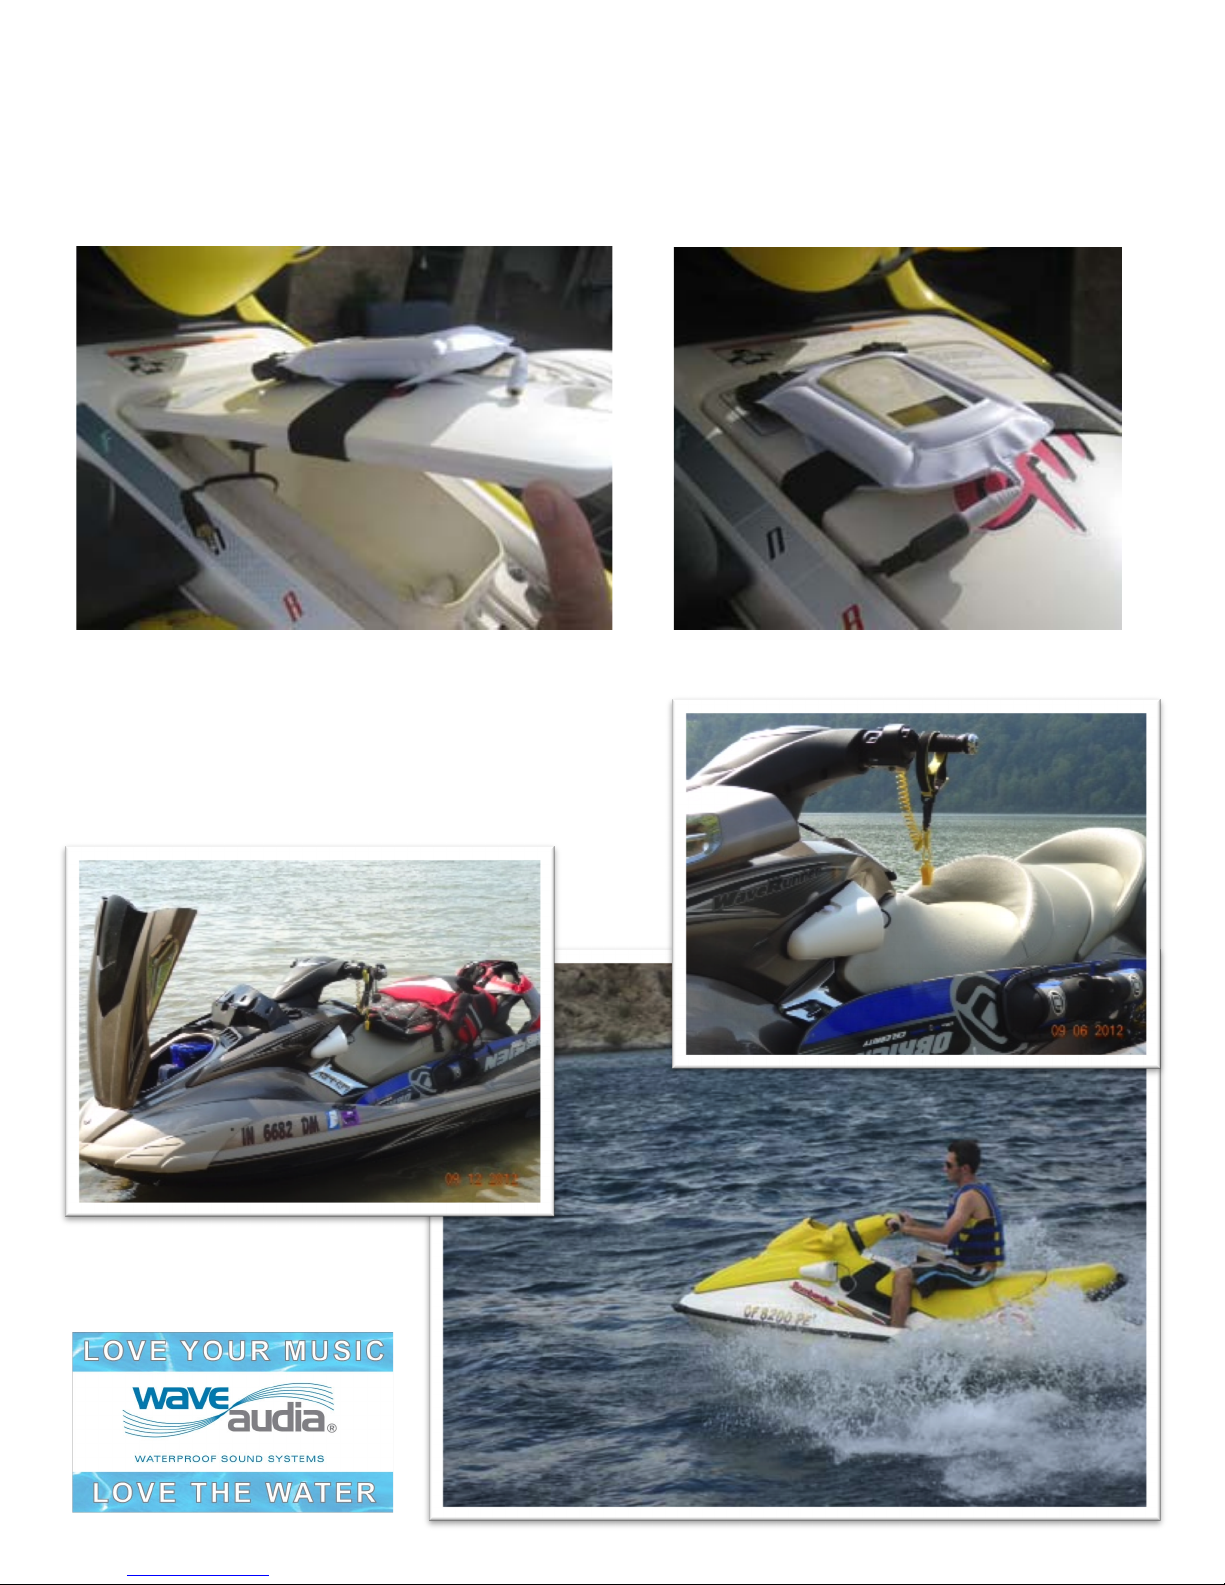
IV.!CONNECTING!THE!MP3!PLAYER!!
!
!
Step!1:!Place!MP3!player!into!the!waterproof!bag!and!connect!headphone!jack.!!
!
Step!2:!Connect!lineEin!jack!to!the!waterproof!bag’s!connection.!
!
Step! 3:! Turn! volume! on! MP3! player! to! near! full! volume.! ! High! and! low! volume! can! now! be!
controlled!with!the!volume!switch.!
!
Step! 4:! !
By sliding the enclosed elastic strap through the loops on the back of the waterproof
MP3 player bag, the MP3 player can be secured in a convenient location so the controls can still
be used while riding the watercraft. In the photograph below, the MP3 player bag is secured to
the lid of the glove box.
!
If you have questions or concerns about how to
install your Waveaudia PWC stereo system,
contact Waveaudia at (888) 833- 0563 or email
steve@waveaudia.com.
!
 Loading...