

Water Street Brass 41005 Installation Manual
Tubular Mortise Bolt Installation
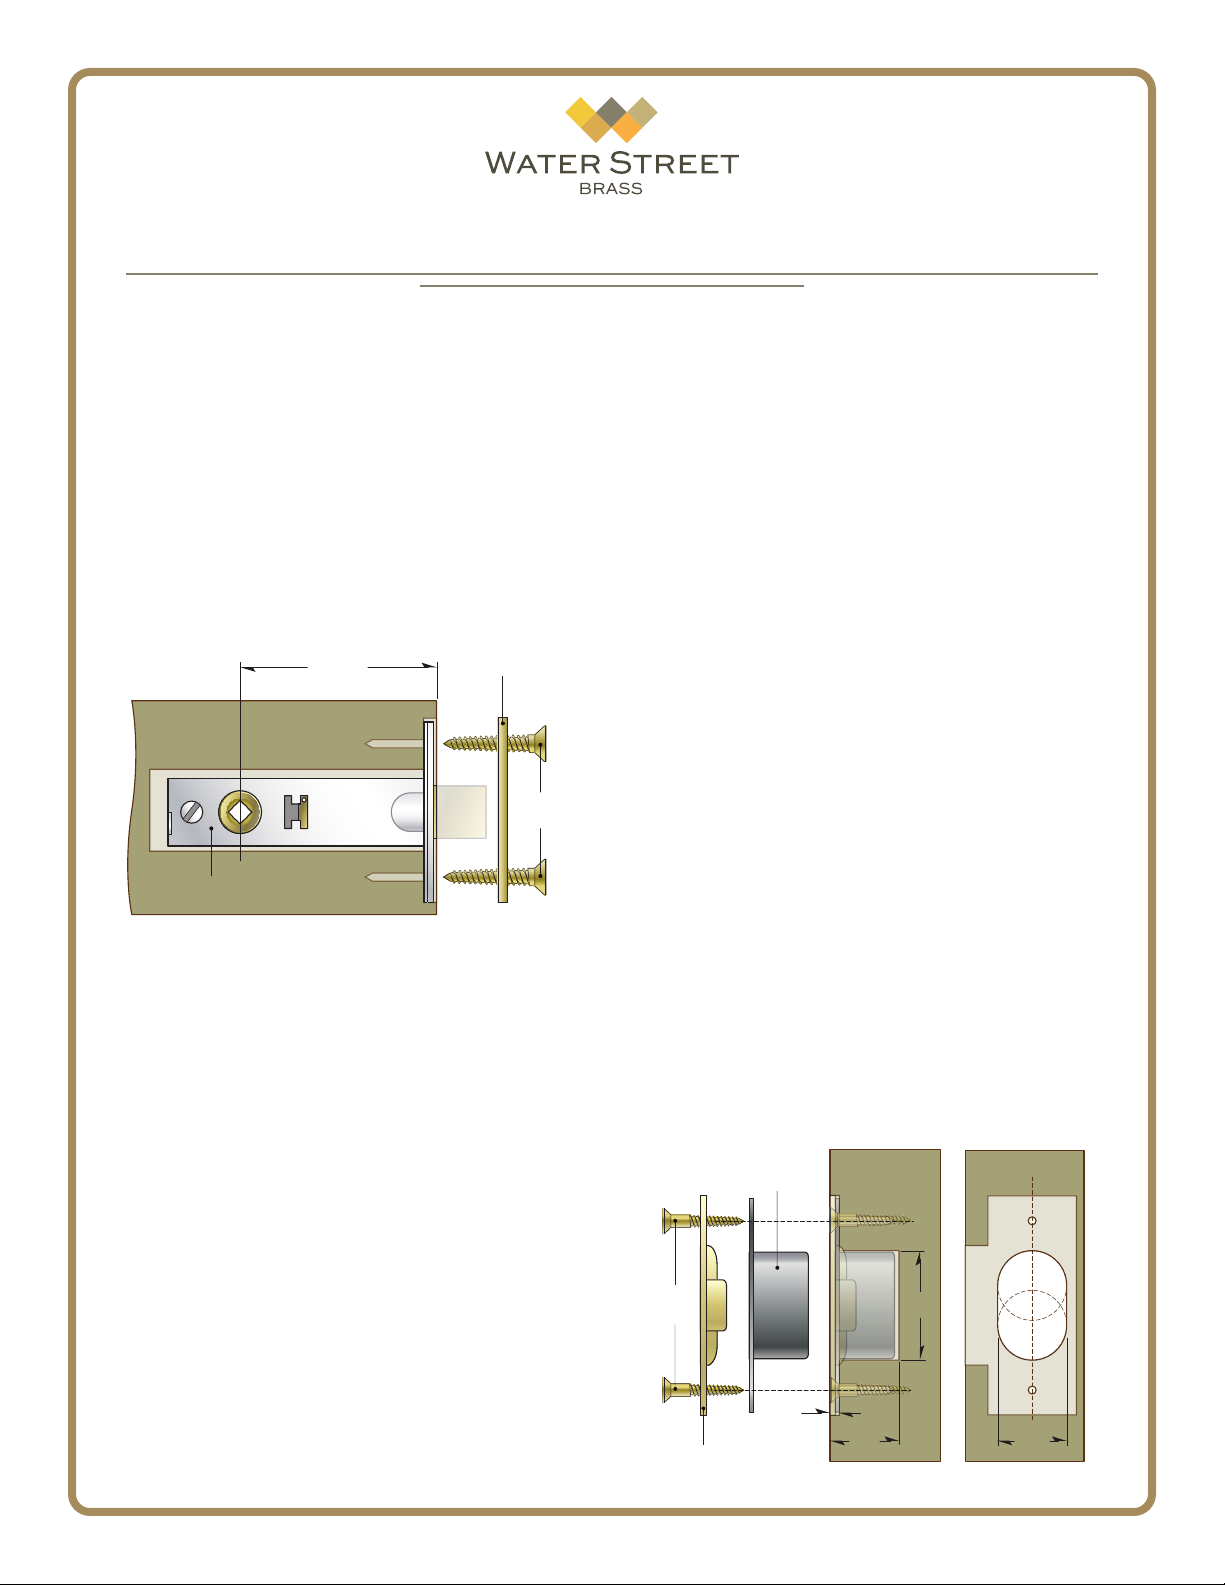
Strike
Screws
3/32”
Dust Box
Strike Plate
Door Jamb
1-3/8”
7/8”
7/8”
Sectional Trim
Prepare the door
Establish the desired location on your door. Using
the provided template for your lock, mark the hole
locations on the door.*
Using the drill & bore sizes specied on the template, carefully drill the door. On the door edge, mark
and drill two pilot holes for the installation screws.
Install the mortise bolt
Install the mortise bolt body and face plate into
the door and secure loosely with the screws provided.
Do not tighten completely at this time.
Backset
Mortise Bolt Body
Face Plate
Face Plate
Screws
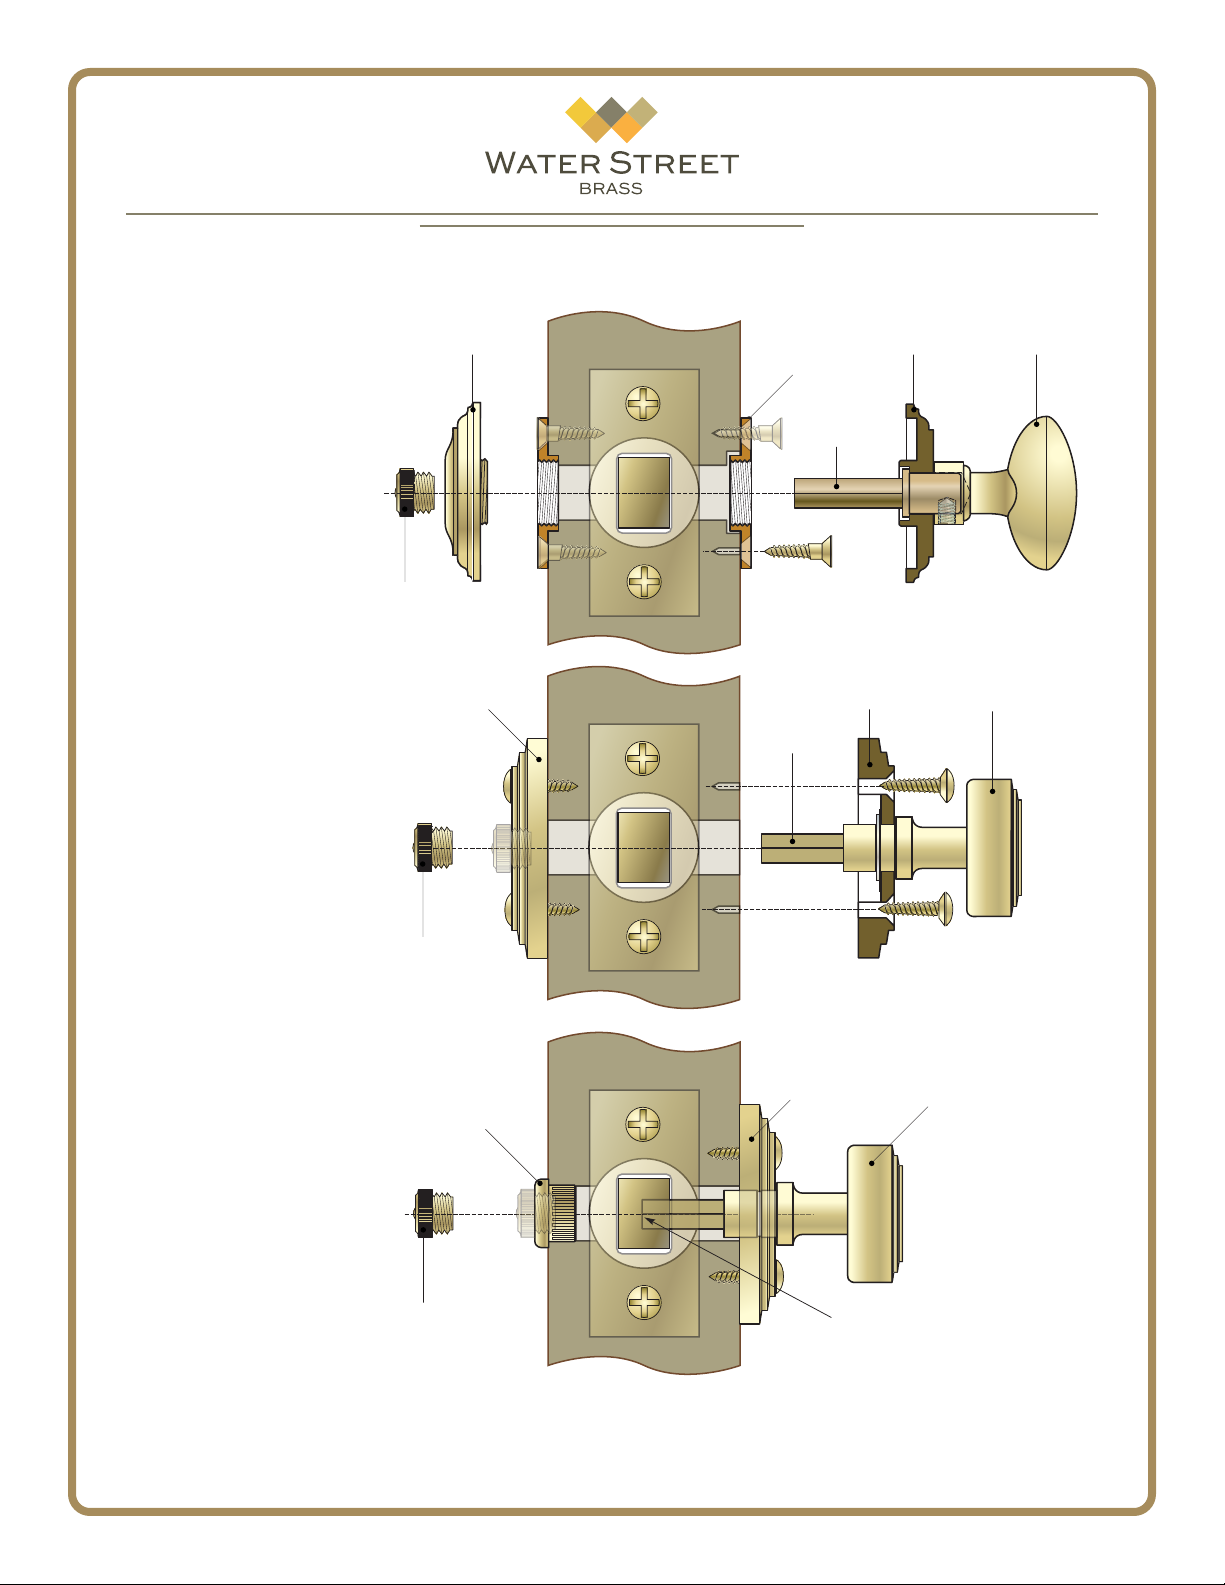
Install the trim
There are three installation methods for your trim.
Select the style that matches your trim.
Concealed screw trim
On the interior side of the door, center the mortise
bolt mounting plate over the through hole. Secure the
plate in position with the two screws provided.
Slide the thumb turn stem into the mortise bolt
body and hand thread the mortise bolt trim plate onto
the mounting plate. If the trim plate does not align
with the mounting plate, you may need to loosen the
screws and adjust the location slightly.
Note: The thumb turn stem is designed to t doors in
excess of 4” thick. Measure and cut this stem so that it
reaches to the approximate center of the mortise bolt
body. If you do not cut this stem to length, the emer-
gency egress function may not work.
Repeat the procedure for the emergency egress
trim on the door exterior.
Surface Mount trim
Position the thumb turn and plate on the interior
side of the door and insert the stem into the bolt body.
Square the plate to the edge of the door and mark
the screw hole locations. Remove the plate and drill
pilot holes for the surface mount screws. These holes
will prevent the wood from cracking or splitting when
inserting the screws.
Cut the thumb turn stem to length (See note
above.) Proceed to install the interior plate and test the
function of the mortise bolt.
Repeat the procedure for the emergency egress
trim on the door exterior.
Tap in exterior trim
If your Emergency Egress trim is the optional tap in
variety, use a rubber mallet to gently tap the emergency egress collar into the through hole on the exterior
side of the door.
Hand screw the emergency egress access button
into the collar - do not over tighten.
Door jamb
Carefully measure the jamb to determine the exact
location that the latch strike and lock bolt land when
the door is fully closed. Mark the locations. Using the
strike plate as a template, outline the shape and begin
to mortise the door jamb to accept the strike.
Mortise the dust box cavity as shown here.
After installation, if the latch does not fully engage
with the strike, loosen the screws and adjust slightly.
1
41005 - 2016 ©Water Street Brass - All rights reserved
Exterior
1-3/4” Door
Interior
Concealed
screw
Surface
Mount
Emergency Egress
Trim Plate
Emergency Egress
Access Button
Emergency Egress
Trim Plate
Moritse Bolt
Mounting
Plate
Actuator
Stem
(Cut to size)
Stem
(Cut to size)
Moritse Bolt
Trim Plate
Moritse Bolt
Trim Plate
Mortise Bolt
Thumb Turn
Mortise Bolt
Thumb Turn
Tap in
*Note: With sectional trim, the
mortise bolt may be located
above or below latch.
The spacing may vary from the
template so conrm the latch
placement and all measurements
before preparing the door.
Emergency Egress
Access Button
Optional
Tap In Emergency
Egress Collar
Emergency Egress
Access Button
410035 - 2016 ©Water Street Brass - All rights reserved
Moritse Bolt
Trim Plate
Important!
Cut stem to t, as shown.
2
Mortise Bolt
Thumb Turn
 Loading...