

Watercool GPU-X2 4870, GPU-X2 4890 Assembly Instructions Manual
Assembly instructions
HEATKILLER® GPU-X²4870/4890
The HEATKILLER® GPU-X² 4870/4890 guarantees the highest degree of cooling power. The unique
design ensures maximum performance on a level with current high-end CPU coolers. Extremely fine
microstructures cool both graphic processors very effectively. All other relevant components (e.g.
RAM, NVIO, VRM) are also cooled.
The top and bottom parts consist of highly pure electrolyte copper.
Dimensions (LxWxH):
143.0 x 119.0 x 12.5 mm
Weight
650 g
Material (base/centre part)
CU/CU
Material (inlay)
stainless steel
Connections
G ¼ inch
Temperature-resistant up to
80°C
Compatible with
ATI 4870, ATI 4890 (reference design)
Notice: A coloured installation manual in PDF format is available in the service section of our
homepage at www.watercool.de
Attention: Conversion at your own risk. Non-observance of the installation instructions may damage
the graphic board. Watercool will assume no liability for damage to the hardware. In case of
uncertainty, please commission an expert with the conversion or use our conversion service.
Dismantling the original cooler may lead to the loss of the manufacturer's warranty. In case of
uncertainty, please contact the manufacturer of the graphic board.
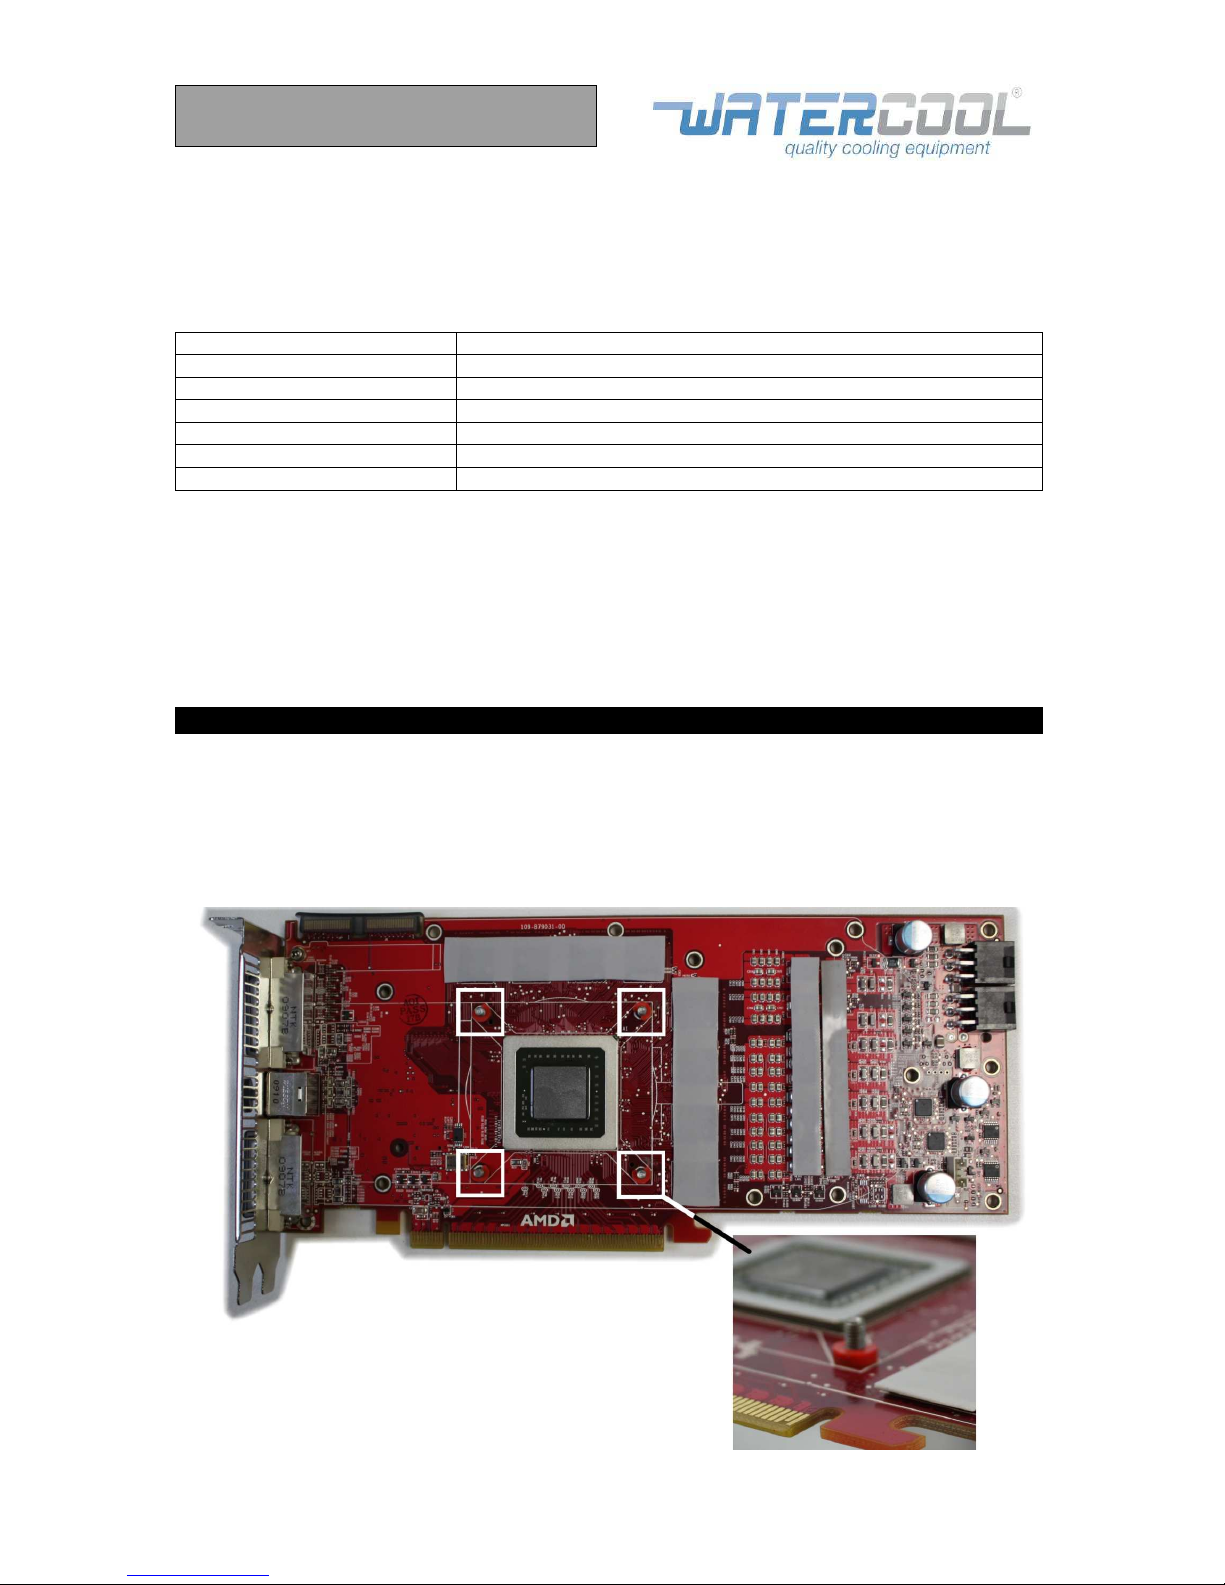
Preparing the graphic board
Remove the original cooling element and all remainders of the thermal pads.
Now fit each of the four M 3 x 8 screws in the GPU area with a washer and press them through the
card from the GPU area below. The red spacers are subsequently positioned from above. It is easier
to screw the screws into the spacers than to press them into them.
Then place the pre-cut pads onto the graphic board, as shown below.
Evenly apply thermal grease to the GPU area.
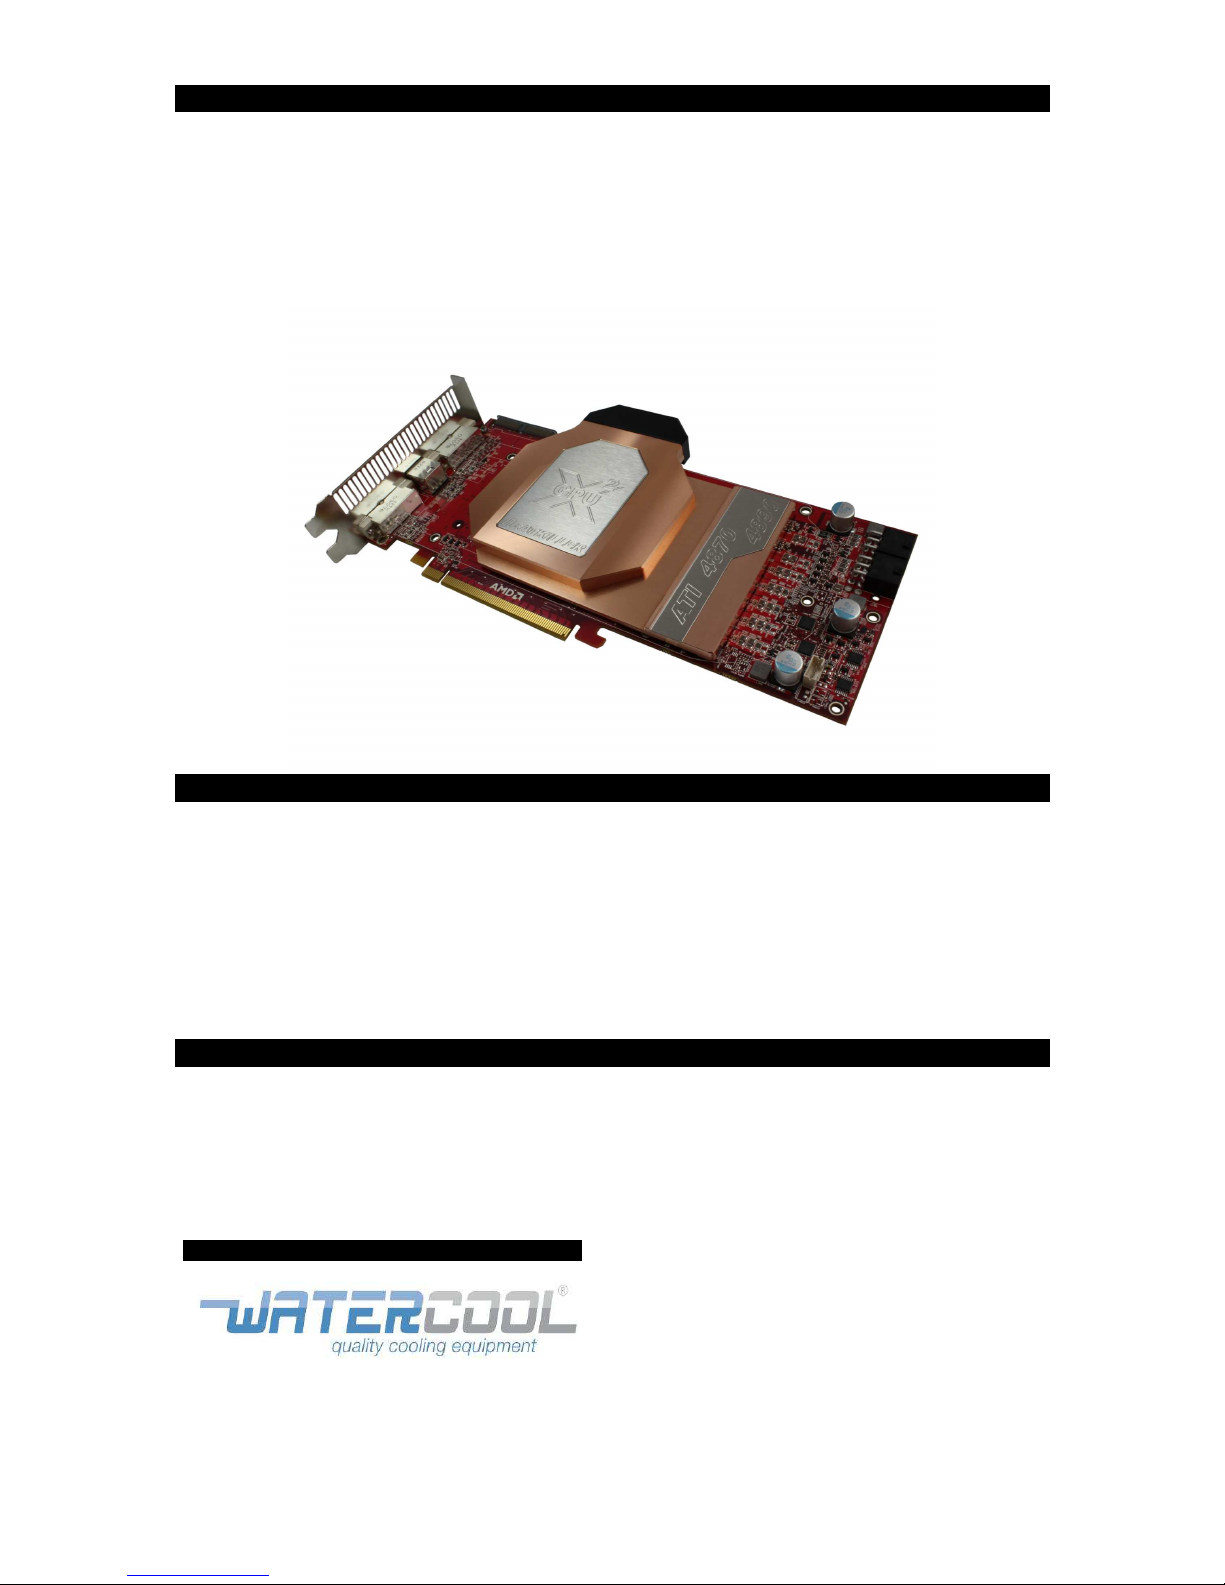
Installation of the cooler
Then place the cooler onto the prepared graphic board and turn it over, including the board. Screw the
screws in the GPU area in slightly – crosswise and uniformly.
PLEASE NOTE: Do not tighten screws yet!
Now screw the two M3 x 5 mm screws into the cooler, in the area of the voltage converters, using one
washer each. Do not tighten these screws either.
Once all screws of the cooler have been positioned, these can be tightened slightly. To do this,
carefully tighten the screws in the GPU area crosswise. Then tighten the screws in the voltage
converter and NVIO areas slightly.
Installation and leak test
After the installation, a check and test run must be performed! The coolers are constructed on the
reference design; still, all sections of the board have to be checked for possible contact to the cooler.
In addition, the contact of the GPU to the cooler must be checked along with the bending of the board.
A slight bending of the board is normal.
A leak test should preferably be performed outside of the computer. If this is not possible, the
hardware may not be turned on during the test run!
Once all of the cooler elements were tested, the computer can be put into operation. Check the
temperature of the GPU immediately after the start!
General information
The HEATKILLER® GPU-X² 4870/4890 has a defined input/output. The port on the left (pointing
towards the slot cover) is the input. The output is located on the right, and the connections can be
installed either on the top or the bottom.
We recommend using demineralised or deionised water (distilled water) as cooling medium. To
prevent the build-up of algae, use common citric acid, which reliably prevents the spread of algae.
HEATKILLER® are manufactured by
Please send your questions, suggestions or
criticism to the following address:
Watercool e.K
Warendorfer Strasse 20
D-17192 Waren
GERMANY
Tel: (+0049) 03991-187601
Fax: (+0049) 03991-187602
E-Mail: info@watercool.de
Web: www.watercool.de
 Loading...