

Waterco FINSBURY User Manual
Filter replacement
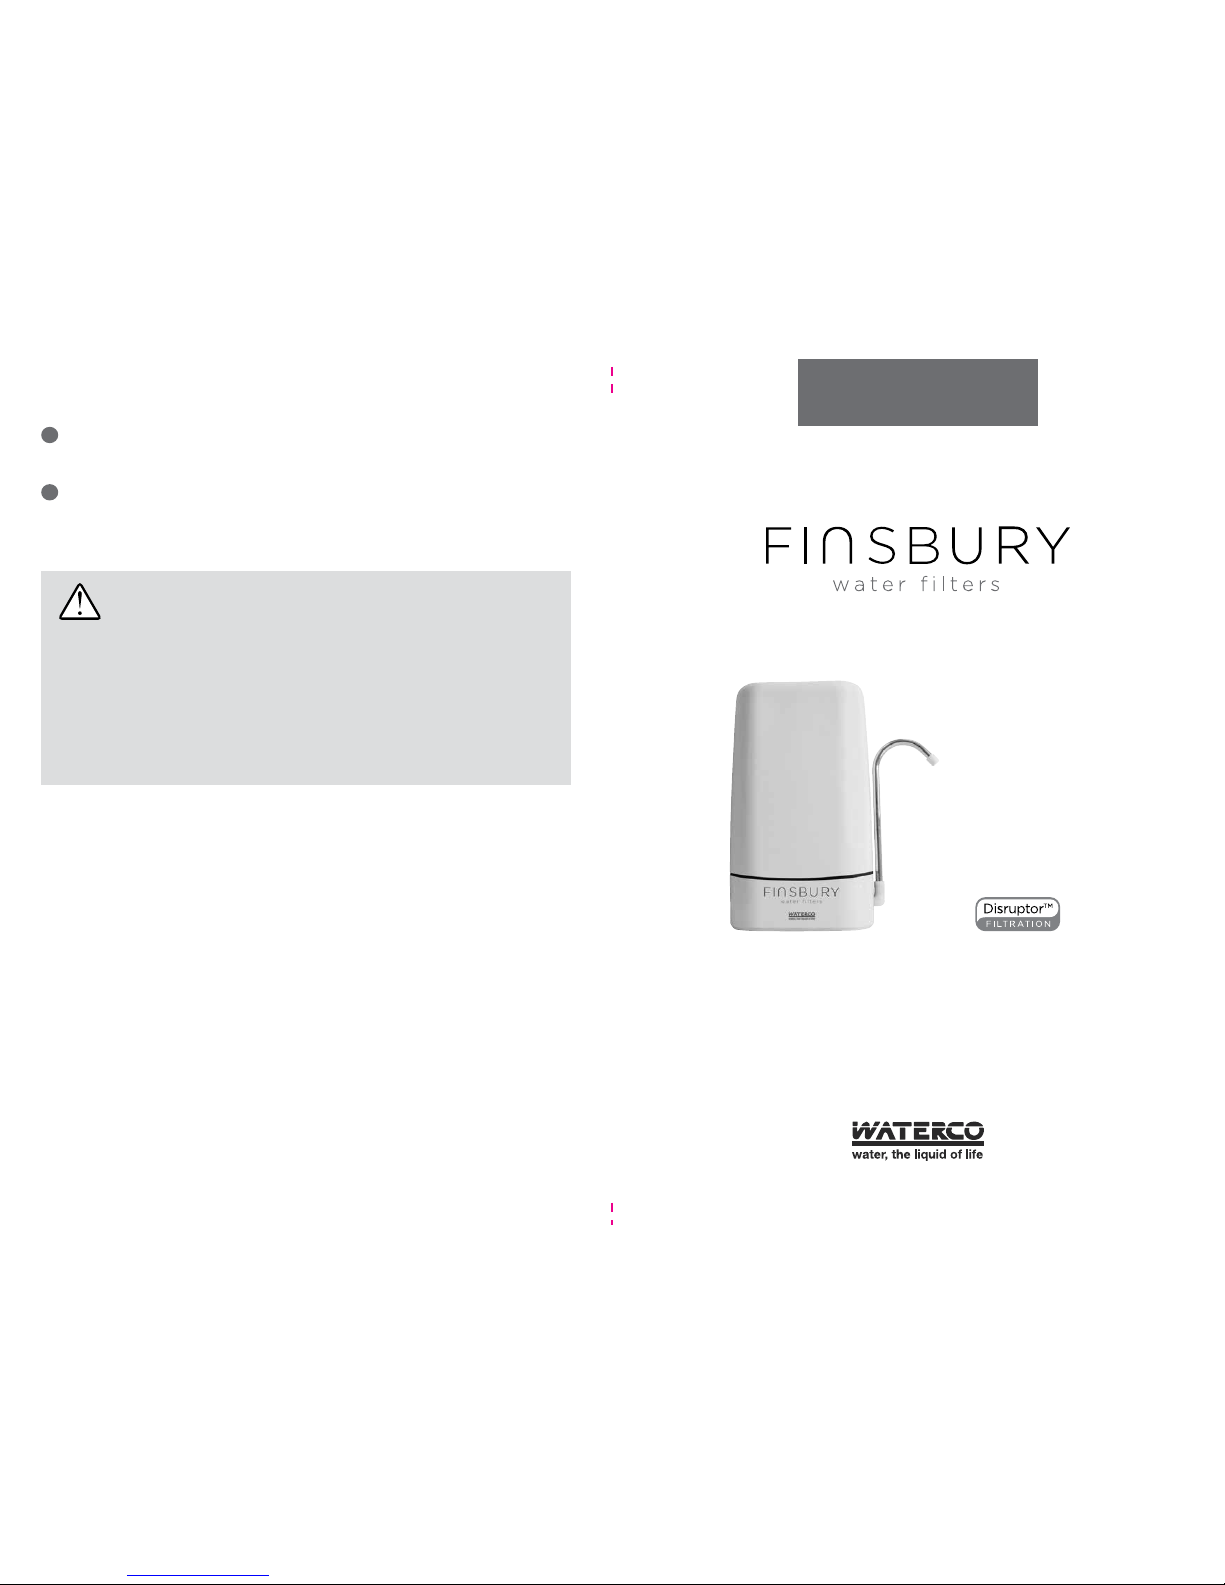
countertopfilter
Disruptor™ filtration technology reduces more impurities
than any other conventional water filter.
www.waterco.com.au
Easy to install
Fits most kitchen taps
Long lasting cartridges
Users Manual
To remove the filter: remove filter cover. Turn filter 1/4 turn to the right.
The filter will rotate away from the filter head. Pull the filter upwards to
remove.
To replace the filter: Insert filter into the filter head. Turn filter 1/4 turn to
the left until it stops. The bottom surface of the filter will be flush with the
bottom of the filter head when fully installed. Replace filter cover.
1
2
ZZM1465 04/2017
Warranty
The Finsbury Countertop Water Filter system is warranted to be free from defects in material and
workmanship for a period of 3 years. Warranty on consumable products such as filters does not apply.
The warranty is expressly limited to the replacement/repair of any part or parts proving defective providing
the installation and operation has been fully in accordance with these instructions and all relevant plumbing
codes and standards. The warranty shall be voided by mechanical damage caused during installation or
neglect. Failure to utilise Finsbury Water Filter branded filters will result in your warranty being null and
void. Failure to comply with scheduled filter changes may result in your warranty being void.
• This system can only filter water between 4 - 38 °C. Do not filter hot water.
• In the beginning, the filtered water may have small black carbon particles
released from the filter. This is normal with no negative health effects. Use
this preliminary dark water for watering or cleaning.
• If the filtered water develops an odour, please replace the filter immediately.
• Please store spare filters in a cool and dry place.
• If required, plumbing tape may be used to secure water tight fitting and
prevent possible leaking.
* In order to maintain optimum filtration, it is recommended to replace
filter after 3000 Litres or 6 months. Because water quality and volume of
consumption varies, filter service life changes.
Important
notes
• reduces cloudiness
• reduces volatile organic
chemicals (voc)
• reduces lead + mercury
• reduces cysts
• reduces dirt, sediment and rust
• reduces chlorine
• reduces particulates
• reduces bacteria
• improves taste
• reduces odours
• reduces chlorine
• reduces particulates
• reduces giardia and
cryptosporidium
OFFICES - AUSTRALIA
NSW - Sydney
(HEAD OFFICE)
Tel : +61 2 9898 8686
VIC/ TAS - Melbourne
Tel : +61 3 9764 1211
WA - Perth
Tel : +61 8 9273 1900
QLD - Brisbane
Tel : +61 7 3299 9900
SA/ NT - Adelaide
Tel : +61 8 8244 6000
ACT Distributor
Tel : +61 2 6280 6476
OFFICES - OVERSEAS
Waterco USA
Augusta, USA
Tel : +1 706 793 7291
Waterco Canada
St-Hyacinthe, QC, Canada
Tel : +1 450 796 1421
Waterco (Europe) Limited
Sittingbourne, Kent. UK
Tel : +44(0) 1795 521 733
Waterco (NZ) Limited
Auckland, New Zealand
Tel : +64 9 525 7570
Waterco (C) Limited
Guangzhou, China
Tel : +8620 3222 2180
Waterco (Far East) Sdn. Bhd.
Selangor, Malaysia
Tel : +60 3 6145 6000
PT Waterco Indonesia
Jakarta, Indonesia
Tel : +62 21 4585 1481
Waterco International Pte Ltd
Singapore
Tel : +65 6344 2378

Contents Installation
Connecting counter top filter
1
Unscrew the end cap on the end of your faucet.
2
If the thread on the end of your faucet is on the inside, screw in the wider
diameter of the supplied hexagonal thread adapter (8) into faucet end and
hand tighten. Otherwise proceed to step 3.
3
Screw on the chrome plated faucet end (7) either onto the hexagonal thread
adapter or directly onto faucet end. Hand tighten.
4
Unscrew the round threaded nut (9) off the inlet spout on the chrome
plated faucet end and attach to one end of the hose (5), ensuring the open
end of the nut is facing towards faucet end.
5
Push hose firmly onto inlet spout nipple (10) until it is sitting flush against
thread. secure by hand tightening the round threaded nut.
6
Remove blue locking clip from the filter unit inlet (11) and connect other end
of hose into the filter unit inlet hole until it stops. Apply the blue locking clip
into the inlet to secure hose.
Operating instructions
7
When the control valve (12) on the chrome plated faucet end is in the
down position, the water from the faucet will come directly from the faucet
(unfiltered).
8
When the control valve is rotated 90 degrees, the water will pass through
the two stage filtration unit. Check for leaks and adjust if necessary.
9
Let the system run for a few minutes to flush the filter cartridges.
10
Allow the system to stand for 2 to 3 hours and then flush again for several
minutes. The system now is operational. Water flow reduction usually
indicates clogging of filter cartridges. Filter cartridge should be changed
based on filter changing instructions. The service life will vary due to water
quality and usage.
2
3 4
6
11
1
5
10
7
12
8
internal thread set-up external thread set-up
1. two stage filtration unit
2. filter cover
3. carbon cartridge filter
4. disruptor cartridge filter
5. hose
6. chrome plated tap spout
7. chrome plated faucet end
8. hexagonal thread adapter
9. round threaded nut
10. inlet spout nipple
11. filter unit inlet
12. control valve
Product technical specifications
Flow rate 1.8L/min
Max. pressure 400 kPa / 60 psi
Filter capacity 3000L
Water source municipal water
Filter life 6 months*
The water source should be municipal water. Please do not
use groundwater for filtration to avoid reducing filtration
effectiveness and shorter filter service life. Tank water may
require a sediment pre-filter unit attached to tank. Please
contact us for more information.
Faucet set-up
9
 Loading...