

Waterboy VPM-T-G2 Assembly Instructions Manual
Assembly Instructions for the
Gen2 Vertical Power Model
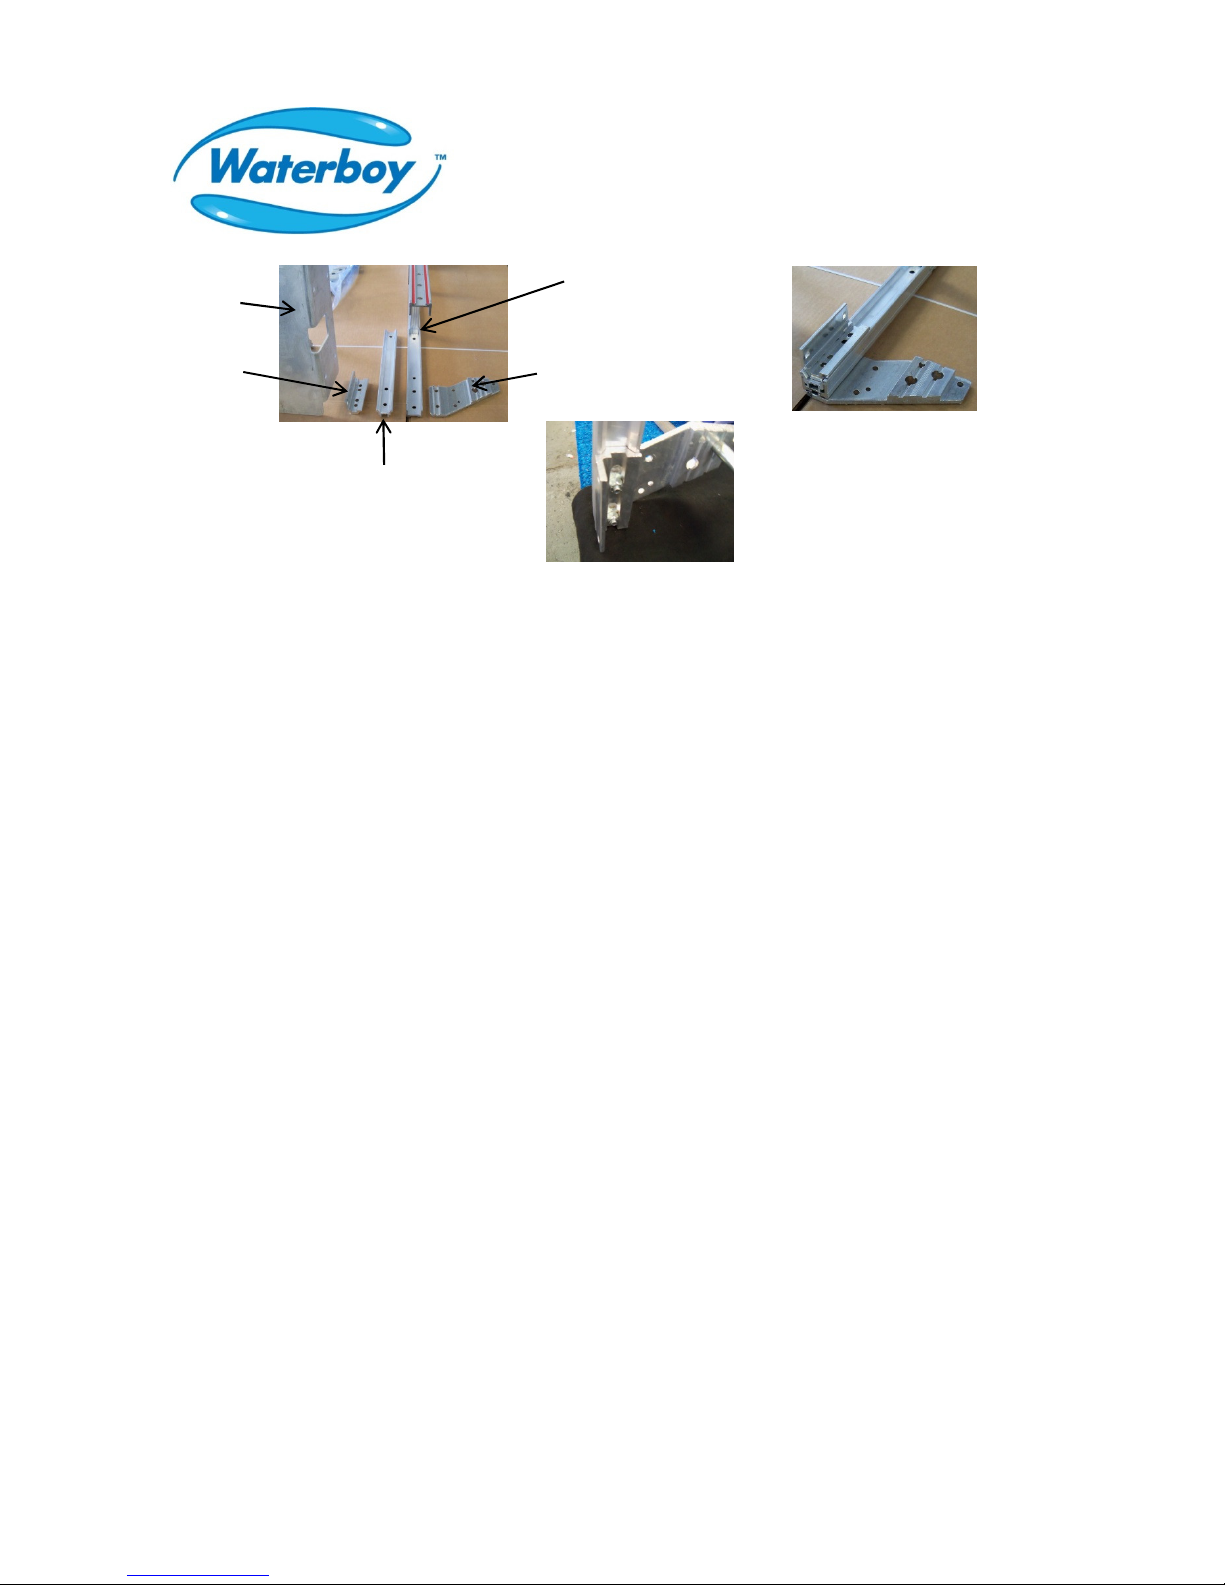
Frame
Nose Plate
Nose Plate
Mounting
Bracket
Frame Reinforcement
Step 1: Dolly Assembly:
• Standing the frame upright, place the alignment guides of the right-side Wheel Bracket into the groove on
the outside of the frame.
• Place the Frame Reinforcement into the inside channel of the frame.
• Place a two-inch bolt through the Wheel Bracket, frame and Frame Reinforcement.
• With the Bracket facing forward (away from the Wheel Bracket) slide the Nose Plate Mounting Bracket onto
the two-inch bolts just installed. Hand-tighten a locknut onto each two-inch Bolt. DO NOT TIGHTEN THE
LOCKNUTS.
• Insert the axle end WITH the roll pin through the upper (furthest from the frame) hole in the wheel bracket.
Rotate the axle until the Roll Pin locks into the grove in the wheel bracket.
• Insert the second Roll Pin into the axle.
• Using the corresponding hole onto the axle, slide the left-side Wheel Bracket onto the axle, fitting the Roll
Pin into the groove.
• Place the left-side Frame Reinforcement into the inside groove of the frame and install two more two-inch
bolts as before.
• Place the left-side Nose Plate Mounting Bracket onto the two-inch bolt and hand-tighten two locknuts. DO
NOT TIGHTEN THE LOCKNUTS.
• Inspect all components for proper location and adjust as necessary.
• Tighten the two-inch bolts and Locknuts.
• Align the square holes of the Nose Plate with the holes in the Nose Plate Mounting Bracket and, using the 4
carriage bolts provided, attach the Nose Plate to the Frame Assembly.
• Slide two thick and one thing washer onto the end of the axle. With the hub (protruding) side facing the
Wheel Bracket, slide a wheel onto the axle. Slide one thin washer onto the axle.
• Insert one cotter pin through the hole at the end of the axle and spread the ends to encircle the axle.
• Position the handle between the frame rails and align the holes. Secure with the provide bolts and locknuts.
Wheel Bracket
How the components
align
Right-side Assembly
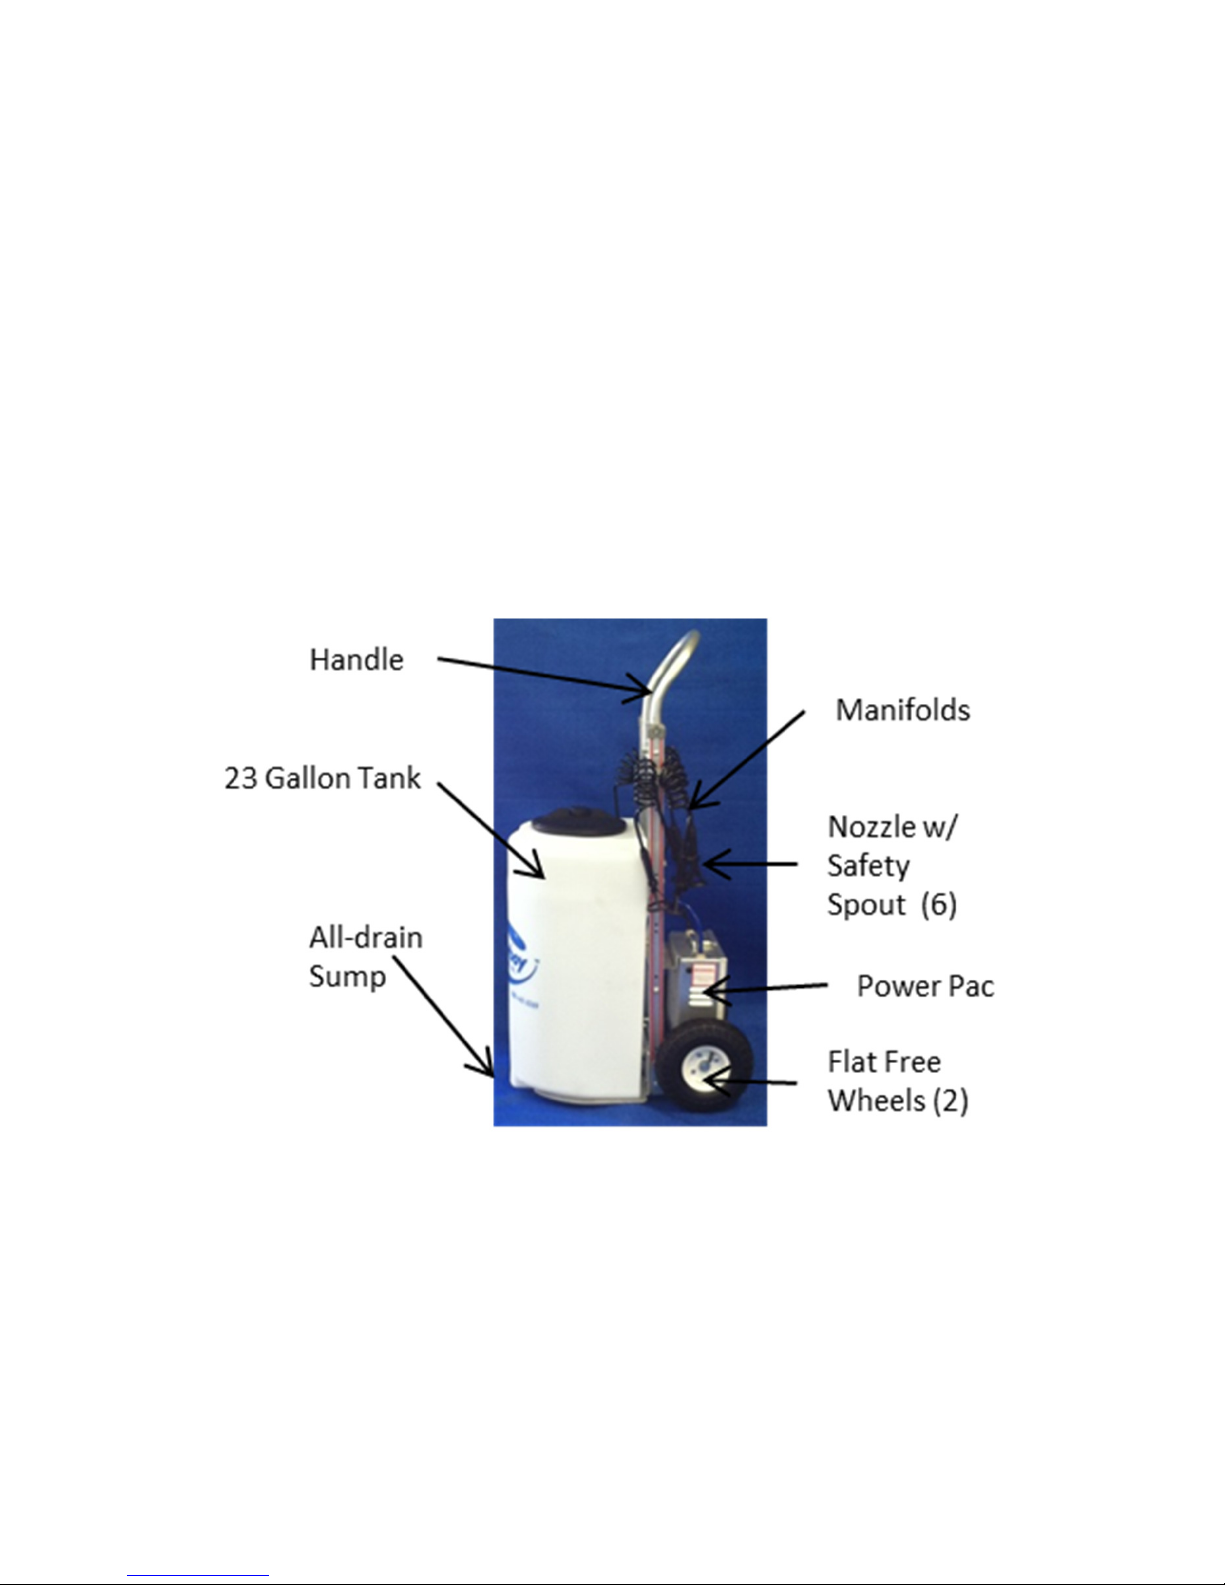
Step 2: Tank Preparation:
• Remove the Push-in Elbow and Supply Line from inside the tank.
• Install the Push-in Elbow into the connector at the bottom-rear of the 23-gallon tank.
• Seat the Supply Line into the Push-in Elbow
• Ensure the drain cap is securely in place
• Set the tank onto the frame, ensuring that the pre-installed Bracket secures the tank to the frame.
Assembly Instructions for the
Gen2 Vertical Power Model
Page two
Step 3: Power Pac Installation and Start-up:
• Open the Power Pac and remove the packing material and charger.
• Remove the switch cover (protects during shipment) and flip the switch “OFF” (down).
• Remove the battery terminal cover and attach the loose wire to the now-exposed terminal.
• Slide the bracket of the Power Pac over the bracket at the rear of the Dolly.
• Fill tank to desired level and flip the switch to the ‘ON’ position. The pump will run for a few seconds while the
manifolds pressurize, then it will turn off. Check for leaks. The most common cause of leaks is an improperly
seated hose. To prevent an unwanted drenching, TURN OFF THE PUMP before disconnecting ANY hoses, then
re-seat the hose.
 Loading...