

Watec WAT-2400 User Manual

WAT-2400
User’s Manual
Rev. 2.00
Watec Co., Ltd.
2016/11/11

2
Revision Record
Rev.
Date
Changes
1.00
January 26, 2016
Initial Release
2.00
November 11, 2016
Change default settings
-Network settings
-Password for ONVIF client software
3. Checking the image from the camera
- Add descriptions on MJPEG stream
4.1.2 System
- Add settings on Network page (TELNET, SSH,
SNMP)
- Add Date & Time page
4.1.3 Camera
- Add descriptions on Video output settings
4.1.4 ONVIF
- Add ONVIF Settings page
- Add ONVIF User management page

3
Table of Contents
WAT-2400 User’s Manual ....................................................................................................... 1
Revision Record ..................................................................................................................... 2
Table of Contents .................................................................................................................... 3
1. Connection and power activation of the camera ............................................................ 4
2. Network settings .............................................................................................................. 5
2.1. WAT-2400 network settings ..................................................................................... 5
2.2. PC network settings ................................................................................................. 6
3. Checking the image from the camera ............................................................................. 8
A case of VLC media player ............................................................................................... 8
4. Changing the camera settings ....................................................................................... 11
4.1. Configuration changes from the Web browser (WAT-2400 System configuration) 11
4.1.1. WAT-2400 System Configuration: Overview (top page) .................................. 11
4.1.2. WAT-2400 System Configuration: System ..................................................... 12
4.1.3. WAT-2400 System Configuration: Camera .................................................... 23
4.1.4. WAT-2400 System Configuration: ONVIF ...................................................... 29
4.2. Setting initialization by the reset button ................................................................. 32
Reference ............................................................................................................................. 33
・ONVIF Device Manager setup steps ............................................................................ 33
・XProtect Essential setup steps ..................................................................................... 36
4
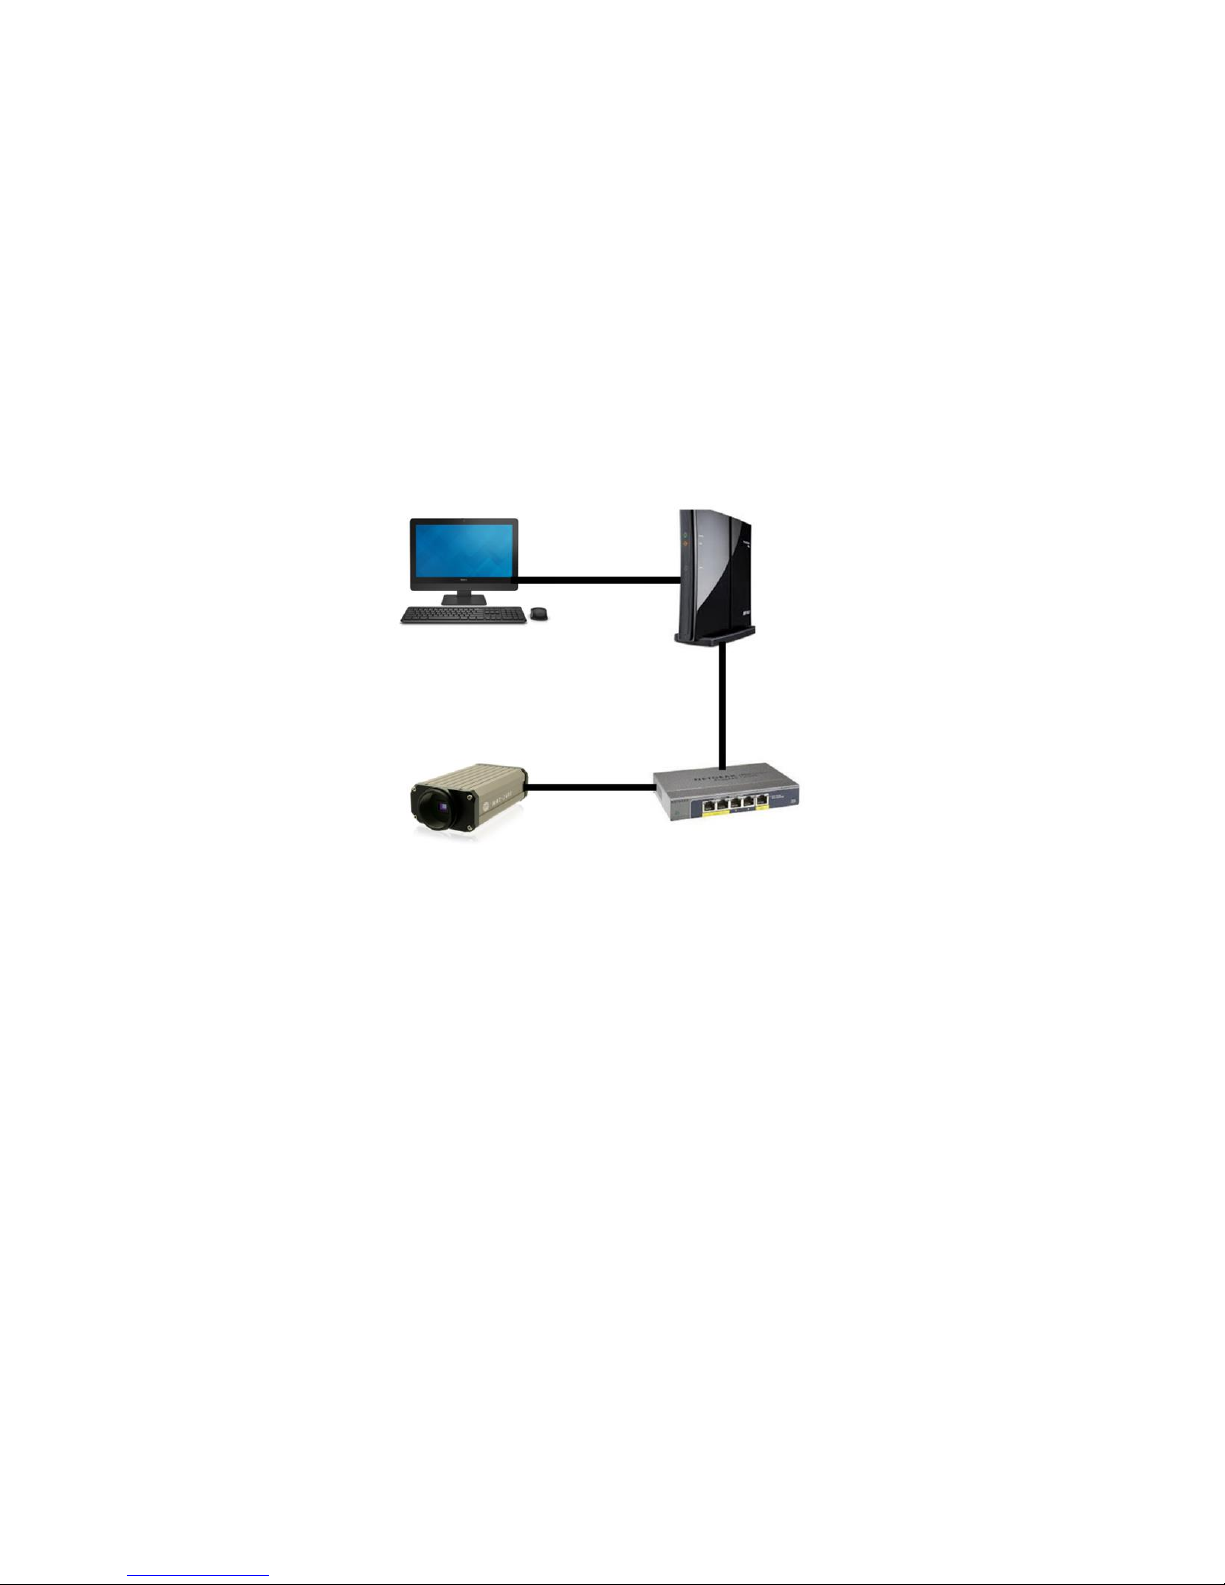
1. Connection and power activation of the camera
The WAT-2400 has two power supply systems. The one is powered by +12VDC input plug
on back panel of the camera, and the other is powered by PoE using a LAN connector.
Please feed by the one or the other of the way above and do not feed the both systems
simultaneously.
The below figure is a connection example of the power supply by PoE hub. In addition, you
need to have the power individually to the router and the PoE hub.
Connect the LAN cable of camera side to a PoE port of the PoE hub and connect the LAN
cable of the router side to a normal LAN port.
If you want to power the camera using the AC power supplies, connect the camera and the
router directly with exception of the PoE hub from the above. The router is also not required
if it is in a closed network configuration and not using DHCP protocol. In that case, connect
the PC and the camera directly in LAN cable.
It takes about 20 seconds to fully boot the WAT-2400 from the power supply start.
PC
WAT-2400
PoE hub
Router
LAN cable
LAN cable
LAN cable

5
2. Network settings
2.1. WAT-2400 network settings
The network default setting of the WAT-2400 is as follows;
IP Address
192.168.0.200 (static)
Netmask
255.255.255.0
Gateway
none
DNS Server
none
Host name
wat-2400-0
Since the used camera has a possibility to have the changed settings. In that case please
contact the administrator of the camera as there might need to change the viewed on PC or
the camera network in accordance with the situation.
The network settings of the WAT-2400 can be changed in the setting change by the Web
browser which will be described later.
If the network setting of the WAT-2400 is unclear, it is possible to initialize all the settings of
the camera, including the network settings while using the reset button which will be
described later.

6
2.2. PC network settings
Set the PC network settings in order to accommodate WAT-2400’s requirement.
PC network settings for a local area connection in Windows7 as follows;
Control Panel>>Network and Internet>>Network and Sharing Center
>>Local Area Connection >>Properties>>Internet Protocol Version 4(TCP/IPv4) Properties
7
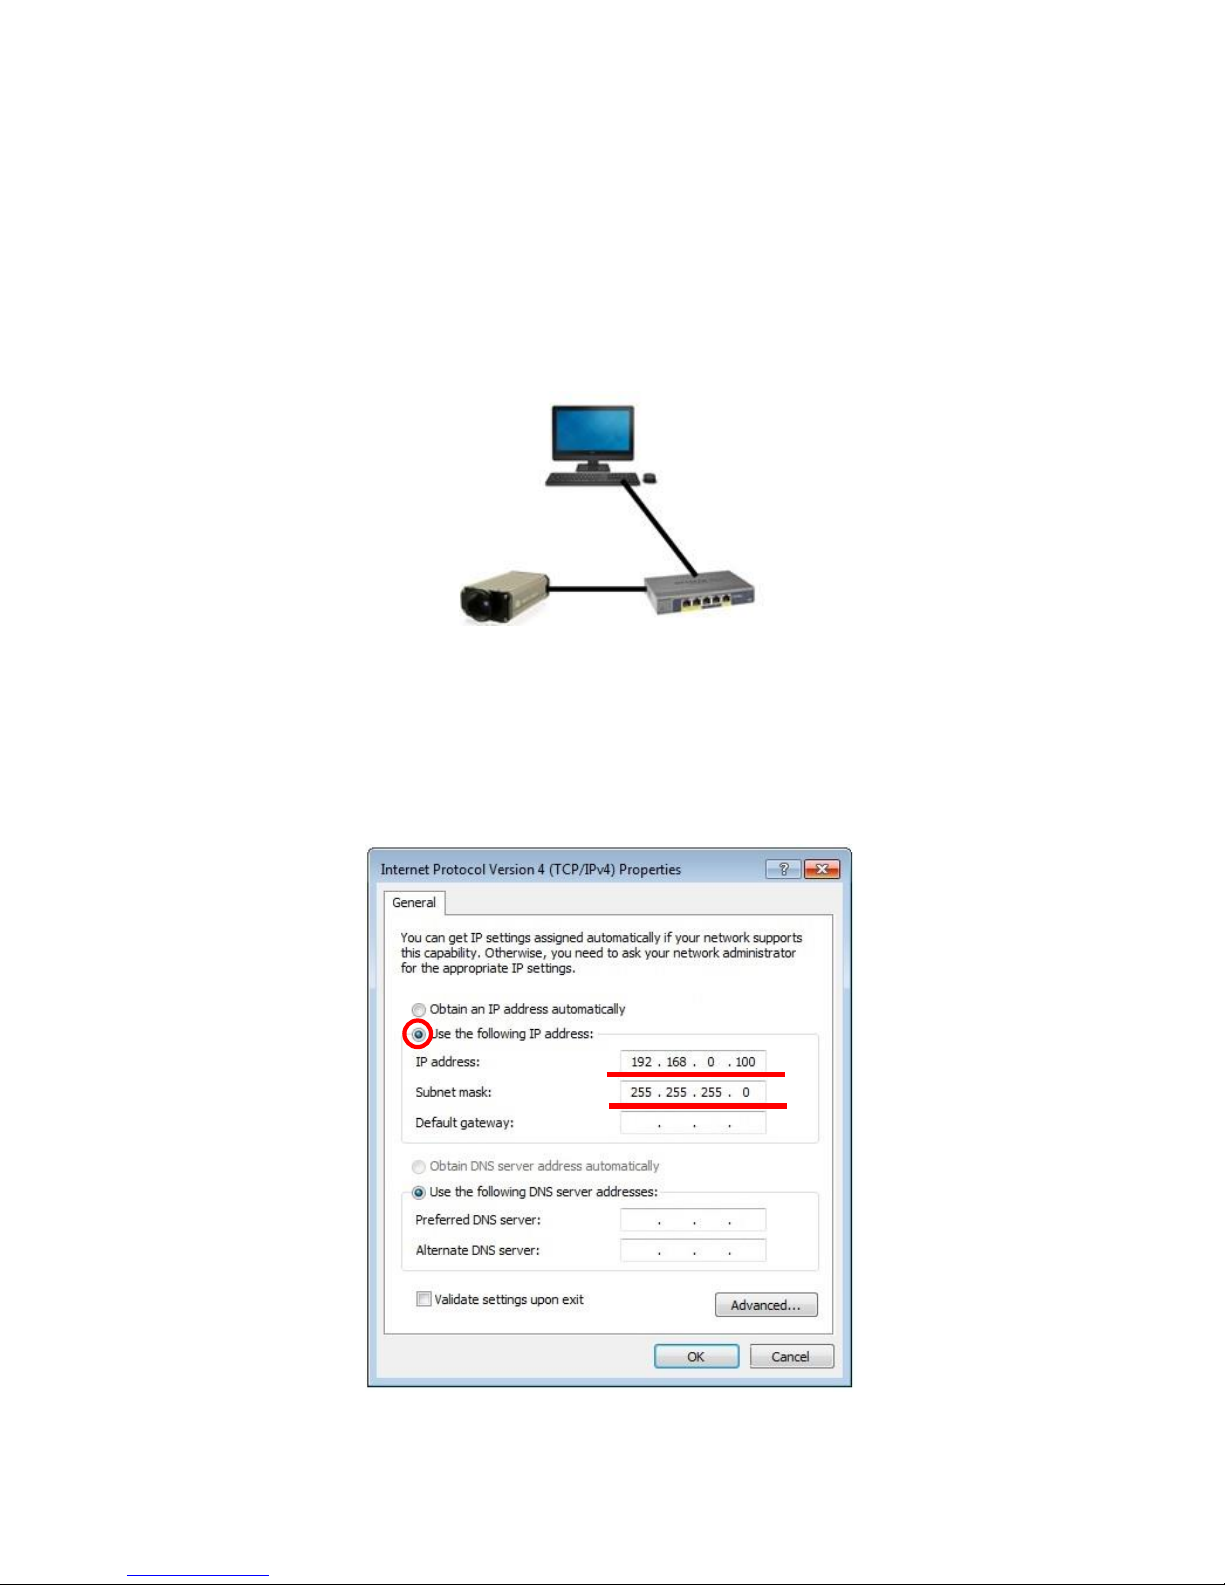
An example of PC network settings
Connect the WAT-2400 and your PC as shown in the below figure. And if the network setting
of the camera is in default configuration (IP Address: 192.168.0.200 (static)), go through the
following steps to set up the PC network settings.
Control Panel>>Network and Internet>>Network and Sharing Center
>>Local Area Connection >>Properties>>Internet Protocol Version 4(TCP/IPv4) Properties.
Input the values below, press the “OK” and close the property.
PC
WAT-2400
LAN cable
PoE hub
LAN cable

8
3. Checking the Camera Images
It is available to check the camera images after completing the network setting.
This section describes the method in the case of viewing the image from the camera using
the VLC media player as a typical way.
WAT-2400 is able to stream by following settings.
ONVIF MODE
Encoding Method
Image Size
Frame Rate [fps]
enable
H.264
1280 * 720
20
MJPEG
1280 * 720
20
disable
H.264
1920 * 1080
30
H.264
1280 * 720
30
When ONVIF MODE is enabled, both of the streams can be distributed simultaneously.
When ONVIF MODE is disabled, only one of them can be distributed by switching settings.
A case of VLC media player
Download the appropriate VLC which meets your PC from VideoLAN official download page
(https://www.videolan.org/vlc/index.ja.html) and install.
Open the VLC media player when the installation is complete.
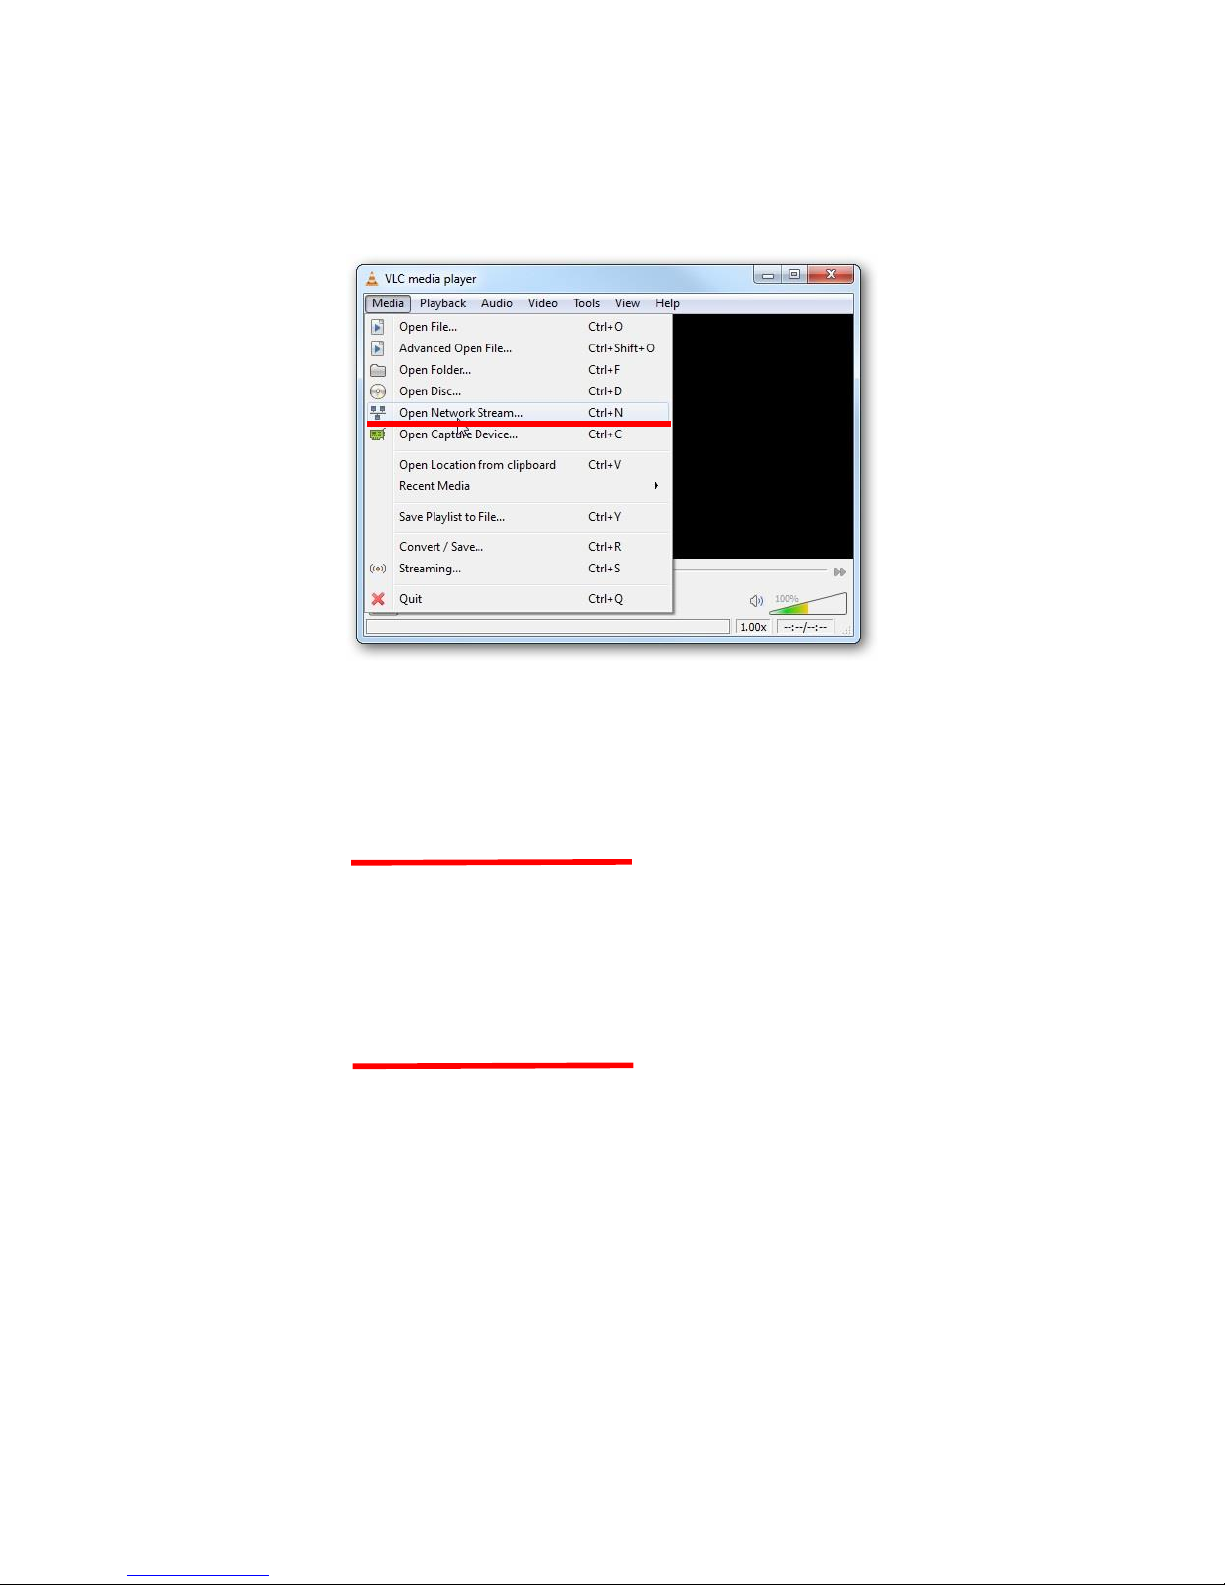
9
Click Media <Open Network Stream from the menu.
Paste your copied URI in the ‘Network Protocol’ box and click the play button. Wait till the
video start streaming in your VLC.
rtsp://”WAT-2400 IP Address”/udp/unicast/Profile_H264
(Example: rtsp://192.168.0.200/udp/unicast/Profile_H264)
The URI above is to see the stream of H.264 format.
The URI below is to see the stream of MJPEG format when ONVIF MODE is enabled.
rtsp://”WAT-2400 IP Address”/udp/unicast/Profile_JPEG
(Example: rtsp://192.168.0.200/udp/unicast/Profile_JPEG)

10
The network connections and settings work property, video starts to stream. Please check
again the network settings if it does not start.
The screen might become grey during the viewing, in that case, please click the stop button
in the lower left and click the play button again.
rtsp://192.168.0.200/udp/unicast/Profile_H264
11
4. Changing the camera settings
4.1. Configuration changes from the Web browser (WAT-2400
System configuration)
The network settings of the WAT-2400 can be changed in the setting change by the Web
browser. The Web browser must correspond to html5 and recommended web browser is
Internet Explorer 11.
4.1.1. WAT-2400 System Configuration: Overview (top page)
Open your web browser and go to following address page.
http://”WAT-2400 IP Address”/index.cgi
(Example: http://192.168.0.200/index.cgi)
Or
http://”WAT-2400 Host name”.local/index.cgi
(Example: http://wat-2400-0.local/index.cgi)
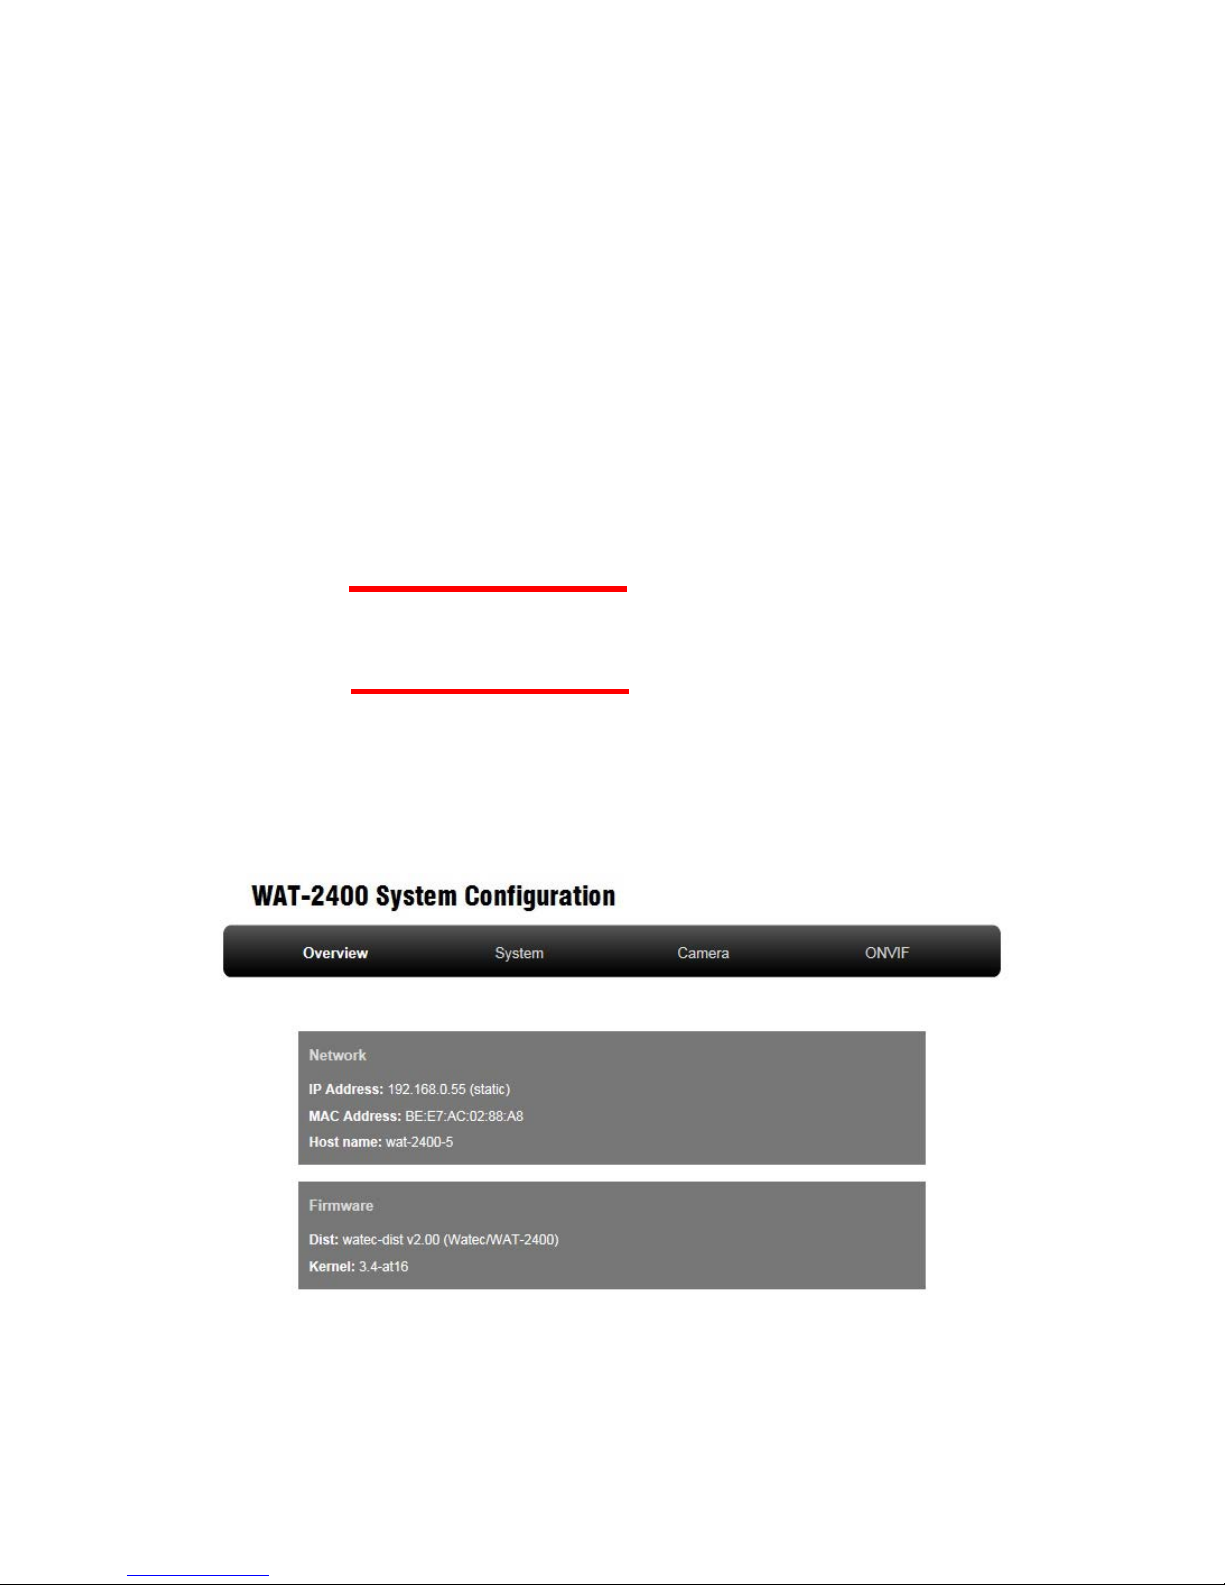
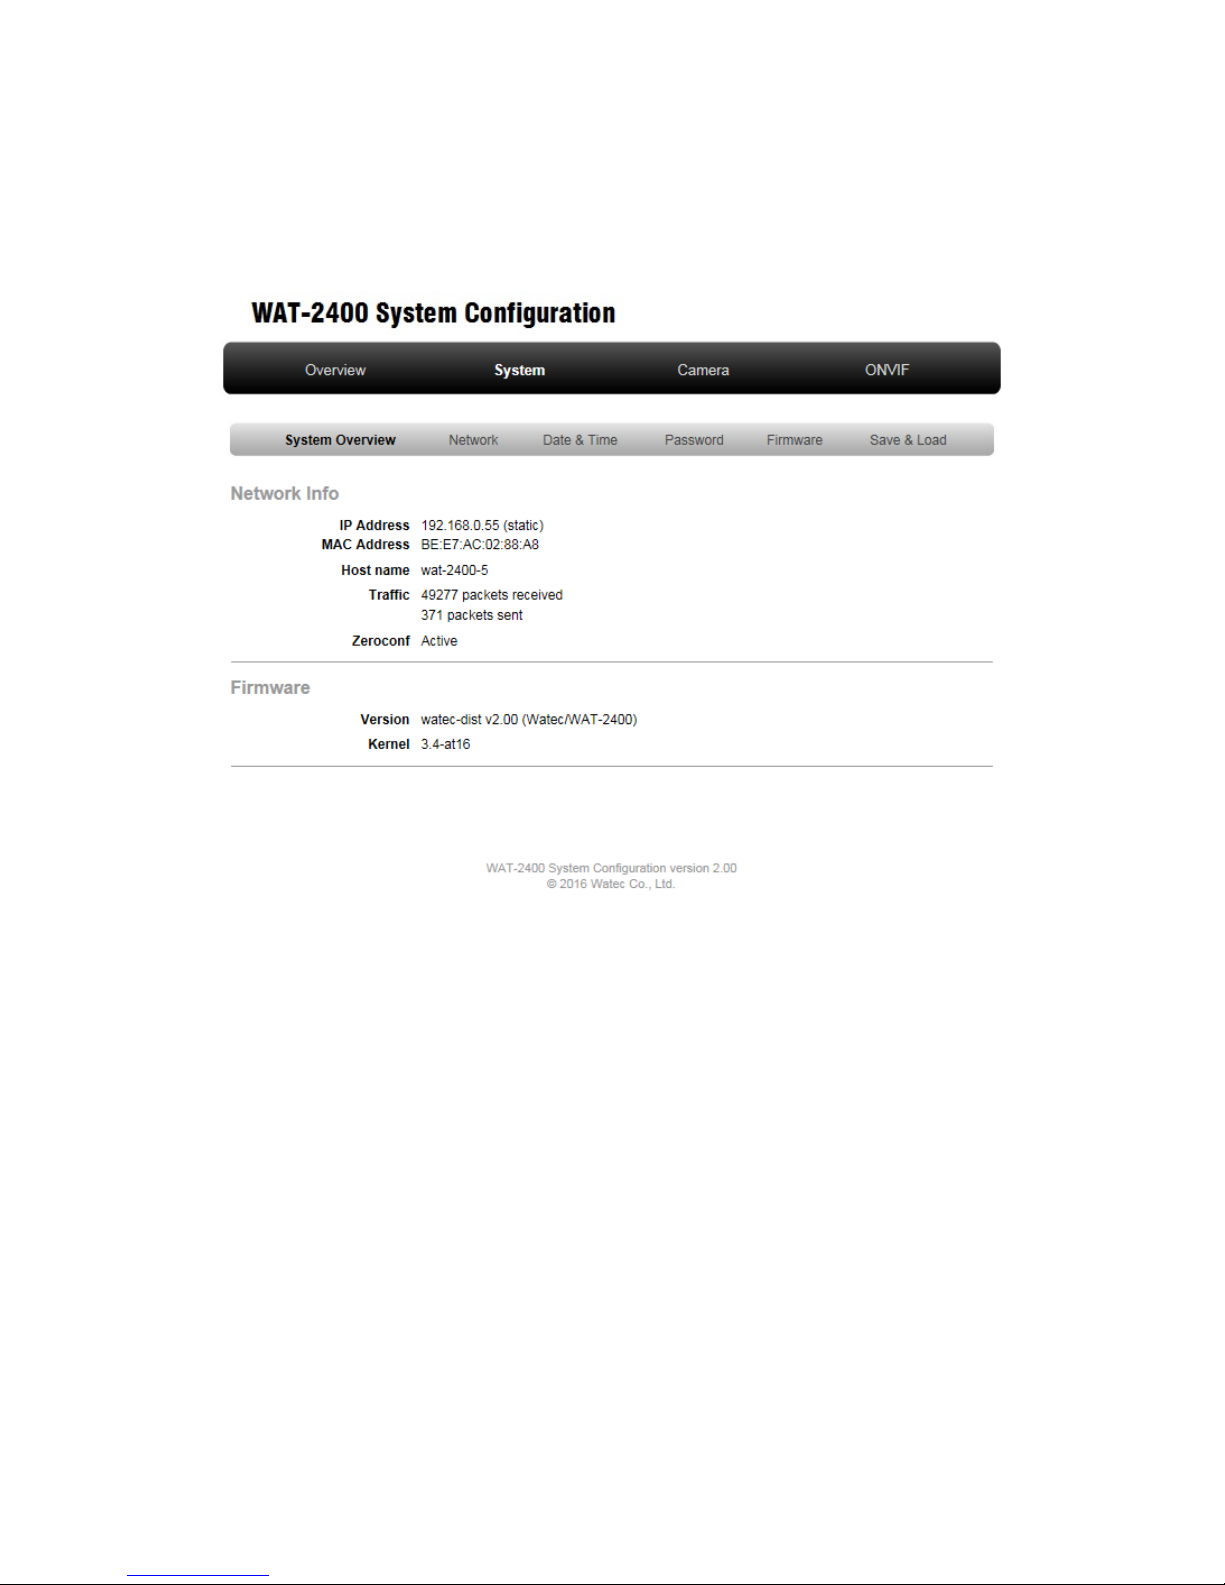
Network settings work properly, ”WAT-2400 System Configuration” will be displayed as
shown in the below figure. This page is the top page and includes a summary of the system.
12
・ Network:
IP address, MAC address and Host name of the WAT-2400 will be displayed.
・ Firmware:
The information about the version of the camera’s userland and kernel will be displayed.
There are 4 major menus and 8 submenus apart from the “Overview” in the WAT-2400
System Configurations. A description of each menu follows;
4.1.2. WAT-2400 System Configuration: System
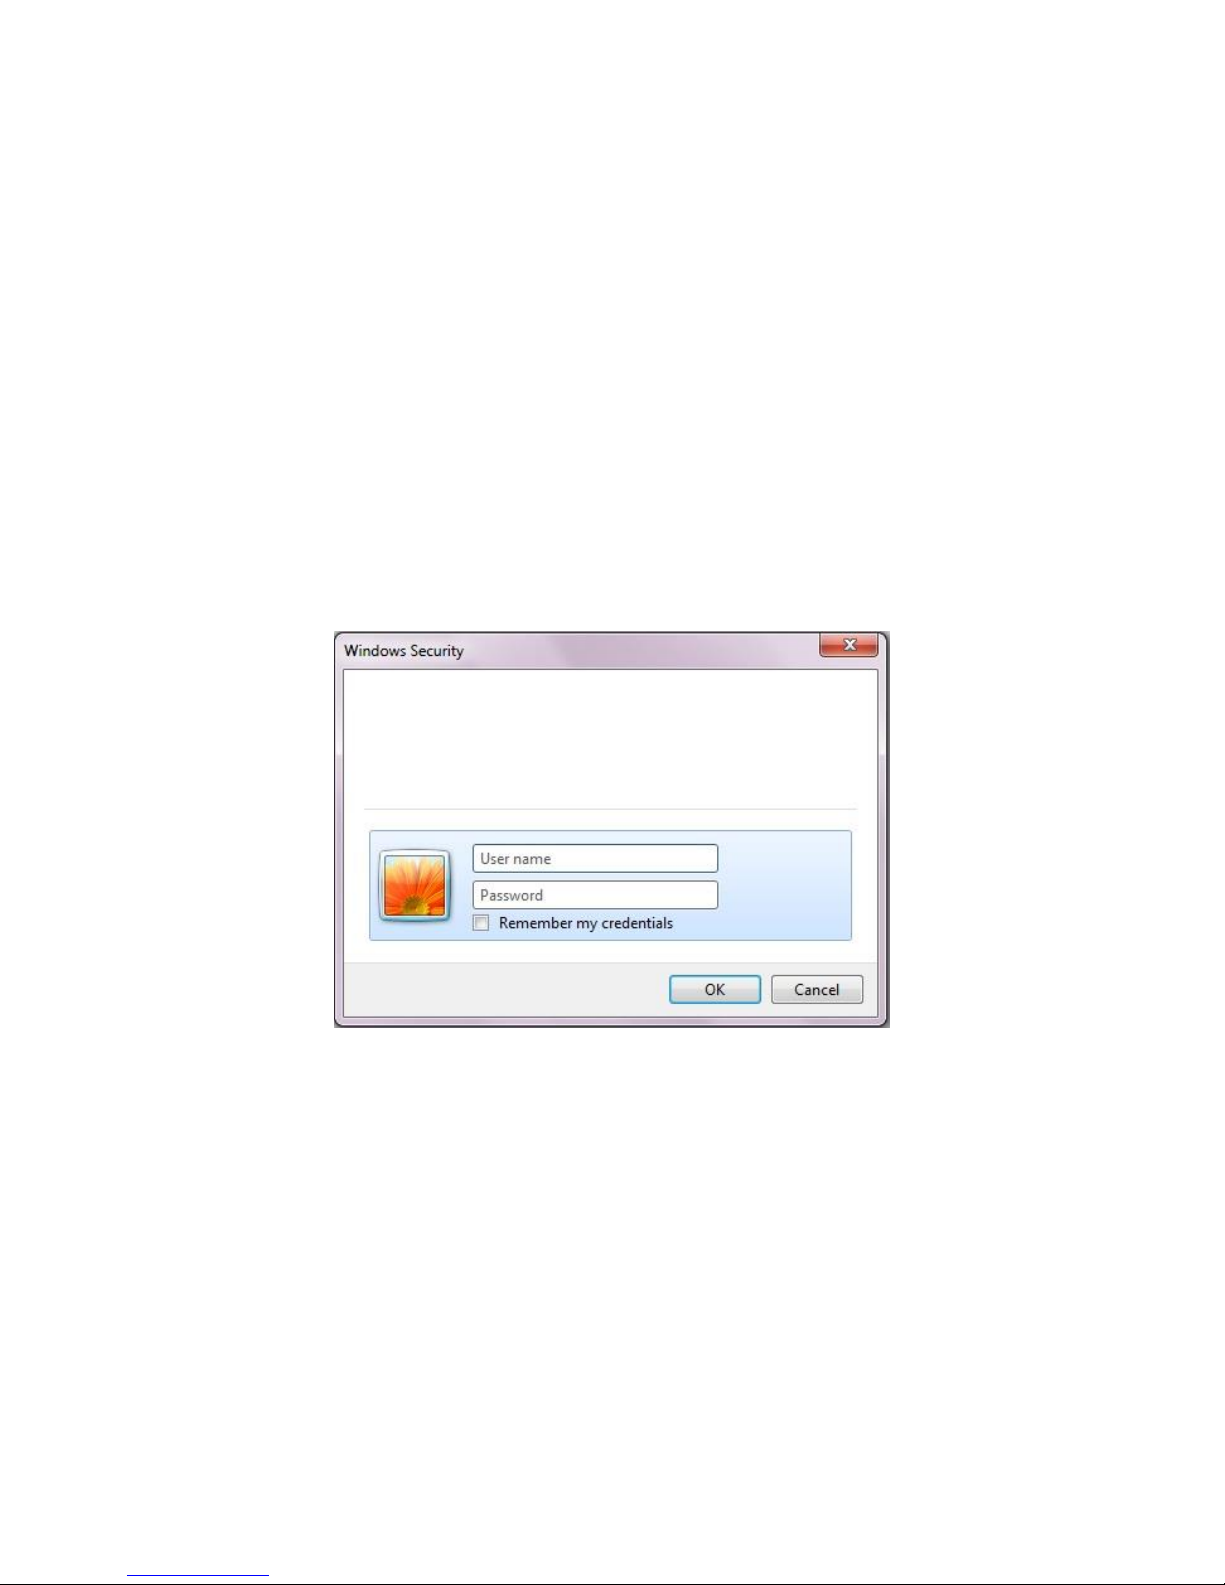
Click on System from the menu and go to the page for updating the firmware and changing
of network settings. At the first time connection, the authentication window will open such as
shown in the below figure.
User name: admin
Password: admin
Enter the above and click the ”OK” button. The user name and password can be changed in
the password submenu which will be described later.
System has 6 submenus, System Overview, Network, Date & Time, Password, Firmware,
Save & Load.
A description of each submenu follows.
The server 192.168.0.200 is asking for your user name and
password. The server reports that it is from admin.
Warning: Your user name and password will be sent using
basic authentication on a connection that isn’t secure.
13
System Overview
Overview of the system will be displayed as same as top page.
 Loading...