

Watchguard WGSENTINEL User Manual
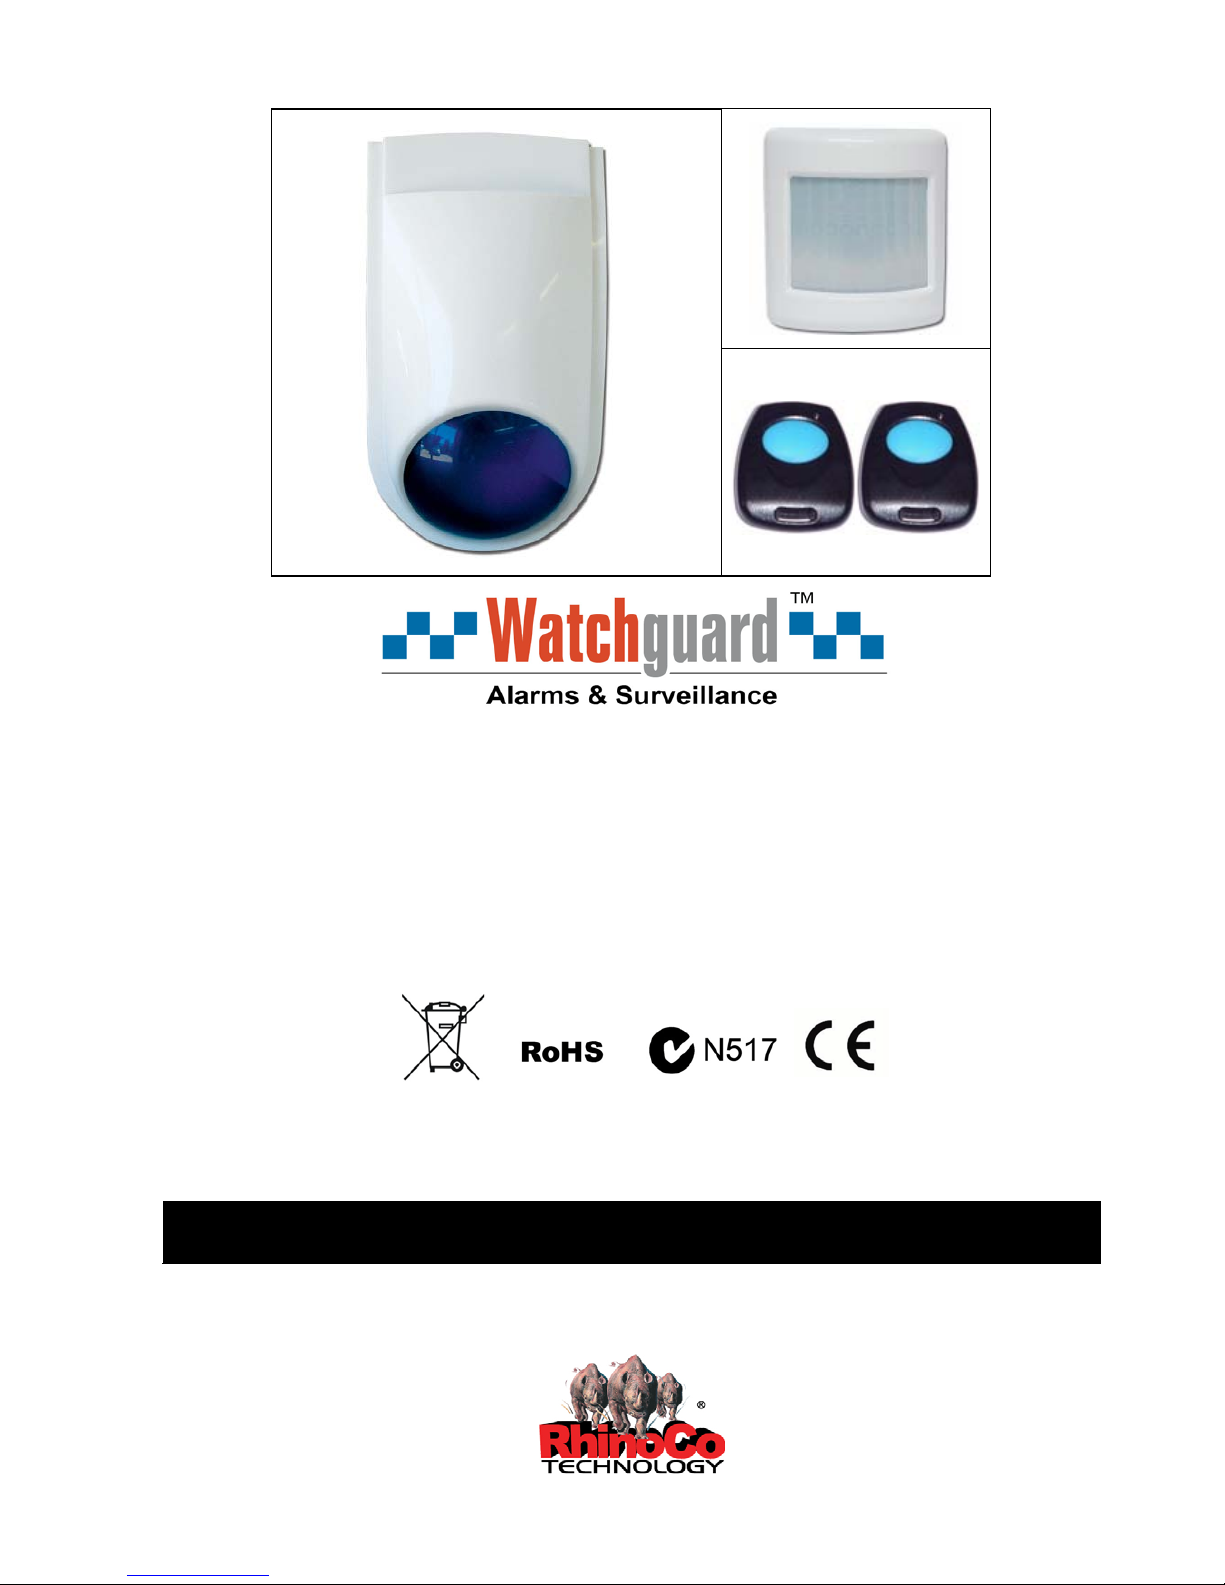
Watchguard™ Sentinel
Wireless Alarm System
Model: WGSENTINEL
Document: Watchguard Sentinel – User Manual.doc
Release: 15 July 2009
User Manual
Designed in Australia & Made in Taiwan By:
www.rhino.com.au

2
Contents
Contents ......................................................................................................... 2
1. Introduction ................................................................................................. 3
1.1. What You Get ....................................................................................... 4
1.2. The Passive Infrared Detector (PIR) ..................................................... 5
1.3 The Strobe and Siren ............................................................................. 5
2. Installatio n ................................................................................................... 6
2.1. Planning the Installation ........................................................................ 6
2.2. The Main Unit ....................................................................................... 7
2.3. The Power Supply ................................................................................ 8
2.4. The Detector ......................................................................................... 9
2.4.1. Tips for positioning ......................................................................... 9
2.4.2. Powering the detector .................................................................. 11
2.4.3. Warm up period ............................................................................ 11
2.4.4 Intelligent Power Saving (IPS) & Normal Mode ............................. 12
2.4.5 Adjusting the Detector Sensitivity .................................................. 12
3.0. Turning the system on ........................................................................ 13
3.1. Remote Control Functions .................................................................. 13
3.2. ARM Mode.......................................................................................... 13
3.3. DISARMING ....................................................................................... 14
3.4. PANIC Mode ....................................................................................... 14
3.8. The Passive Infrared Detector ............................................................ 14
3.8.4. Dual Edge Sensing (DES) technology ‘explained’ ........................ 14
4. Programming ............................................................................................ 17
4.1. Adding New Remotes ......................................................................... 17
4.2. Adding a Detector ............................................................................... 18
4.3 Testing the Detector ............................................................................ 19
4.3.1 Test Mode ..................................................................................... 19
5. Maintenance .......................................................................................... 20
5.1. The Remote Control ........................................................................... 20
5.2. The Detector ....................................................................................... 20
5.2.1. Replacing the batteries ................................................................. 20
5.2.2. Cleaning the pyro detector ........................................................... 21
5.2.3. Cleaning the case and lens .......................................................... 21
6. Warranty ................................................................................................... 22
6.1. Warning Limitations & Warranty.......................................................... 22

3
1. Introduction
Your Watchguard Sentinel Home Alarm System is specifically designed for
simple DIY installation (Do It Yourself). It is suitable for use in homes or
offices where the owner wishes a siren to trigger if there is unauthorized entry
into the premises.
Main Features include:
• Simple installation
• Hand held remote controls
• Remote functions include arm, disarm, and panic.
• Ability to add or erase detectors from your system.
• Up to 5 wireless devices can be used (any combination of remotes or
sensors)
• Protects your family and property
• Suitable for home and office
• Powerful external siren with flashing blue warning light
• Main power adaptor with a 10m lead
•
Latest technology
• Wireless detectors available include Passive Infrared detectors, Reed
Switches and Smoke Sensors.
4
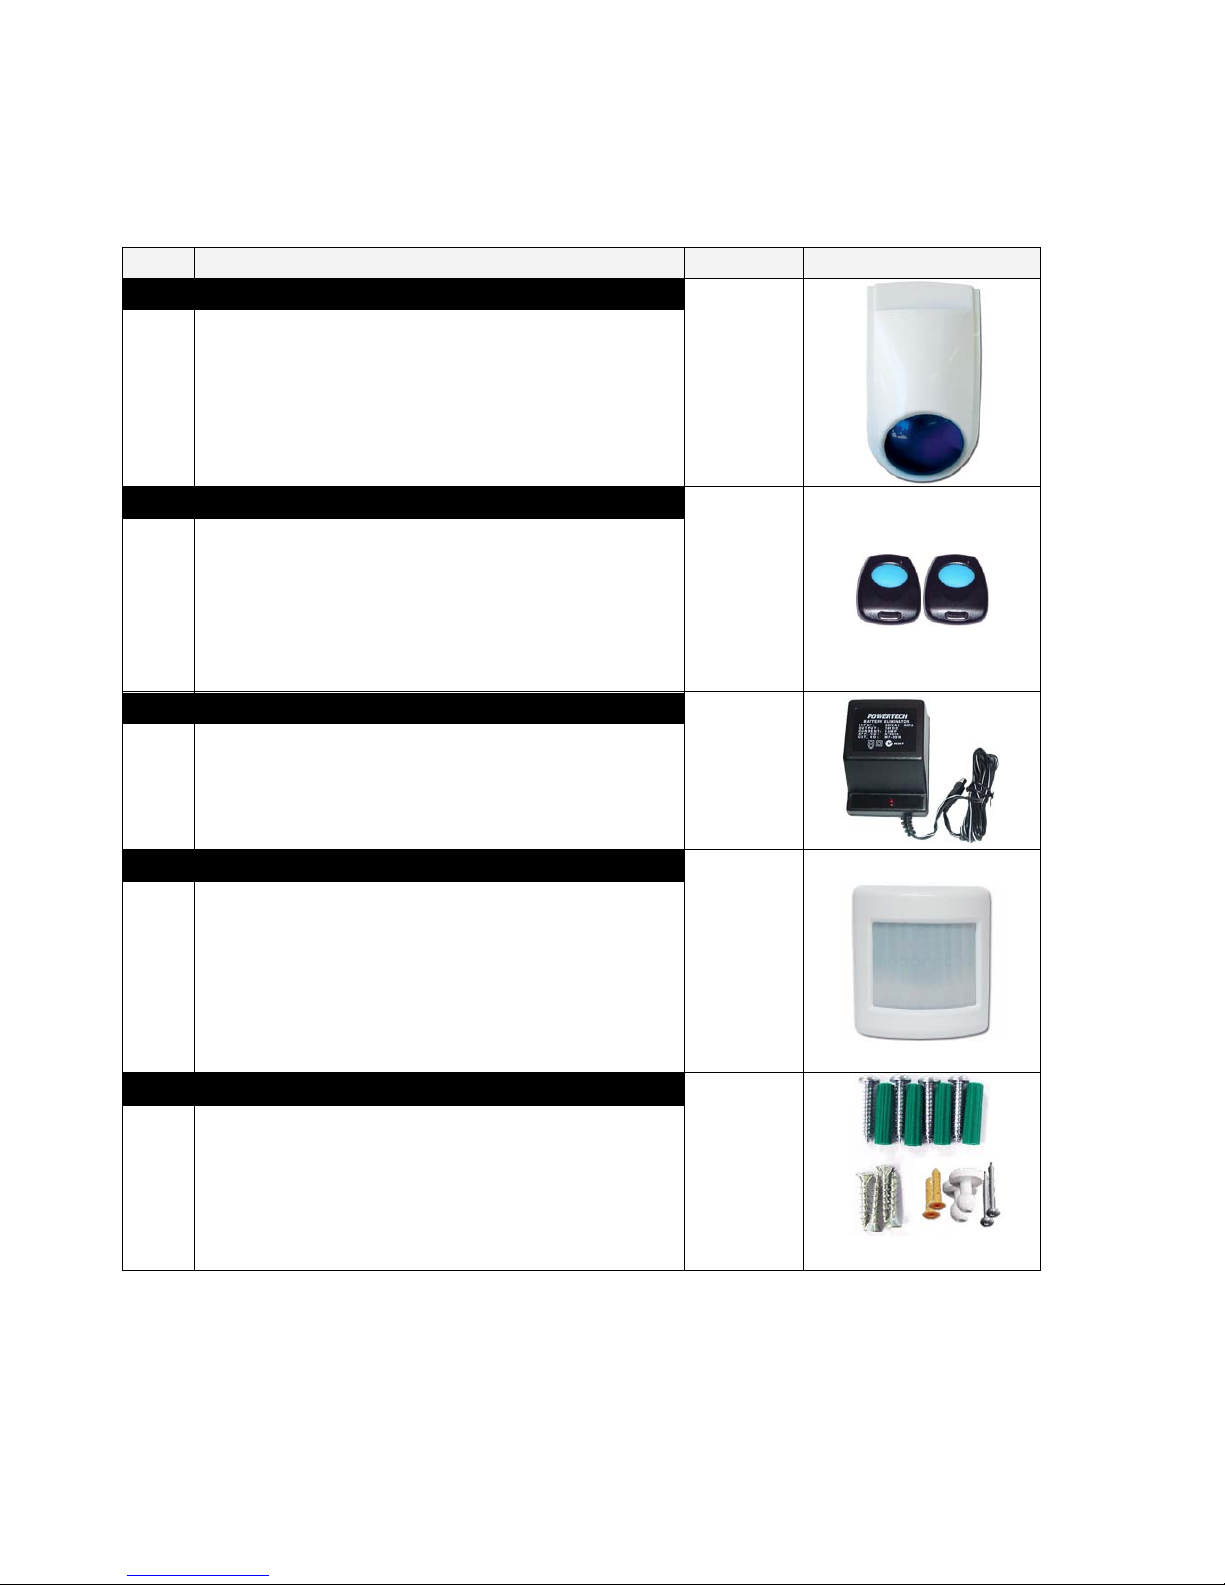
1.1. What You Get
Below is a list of parts included with system.
Item
Description
Quantity
Image
1.
Main control unit
1
The unit incorporates a powerful siren and a
flashing blue strobe light. The system has mains
connection via a low voltage plug pack that is
supplied with the unit. 10m of connection cable is
provided.
2.
Remote controls
2
2 x Remote Controls. These allow you to easily
arm & disarm the system from anywhere in your
home. In case of duress, you can also trigger the
alarm at any time from the remote control. The two
remotes are already pre-learnt into your system, no
programming required.
3.
Power Supply (plug pack)
1
The main unit requires a regular ma
ins power
supply. The Watchguard is supplied with a 12V DC
plug pack that connects to the main unit’s power
connector on the end of the 10m cable.
4.
Passive Infrared Detector
1
Designed to detect the body movement of an
intruder inside your premi
ses. These intelligent
devices allow simple installation, as no cable is
required between the main unit and the detectors.
The long life lithium batteries will last for up to 3
years. The PIR detector is pre-
learnt into your
system, no programming required.
5.
Mounting Material & Screws
1
Necessary wall mounting screws & wall plugs are
included.

5
1.2. The Passive Infrared Detector (PIR)
The detector is a high quality infrared body movement detector, which is
battery operated and communicates with the Watchguard Sentinel Home
Alarm System via radio frequency (RF) transmission. This detector is easy to
install, provides excellent detection sensitivity and has a long battery life (up to
3 years). This detector transmits an alarm code to the unit when a valid
movement is detected.
IMPORTANT NOTES
• NEVER touch the pyro detector with your fingers
• During the warm up period, (first 3 minutes after installing the batteries)
the detector will not respond to movement in front of the detector. You
must wait 3 minutes before it will respond properly.
The wire, which runs around the edge of the detector, is the antenna. Do not
touch, remove or cut this wire
1.3 The Strobe and Siren
The siren/strobe contains the main alarm unit for the Watchguard Sentinel
Home Alarm System.
Functions:
The LED
• The LED will stay on when the unit is in learn mode
• When the unit is disarmed, the LED will flash continuously at a slower
rate (Eg: One flash every two seconds)
• When the unit is armed, the LED will flash continuously at a faster rate
(Eg: One flash per second)
• When the “Exit Delay” function is active, the LED will stay on
continuously for a 20 second period.
The Strobe:
• When the system is armed, the strobe will flash twice
• When the system is disarmed, the strobe will flash three times
• If the alarm is triggered, the strobe will flash continuously until the unit is
disarmed.
6
2. Install ation
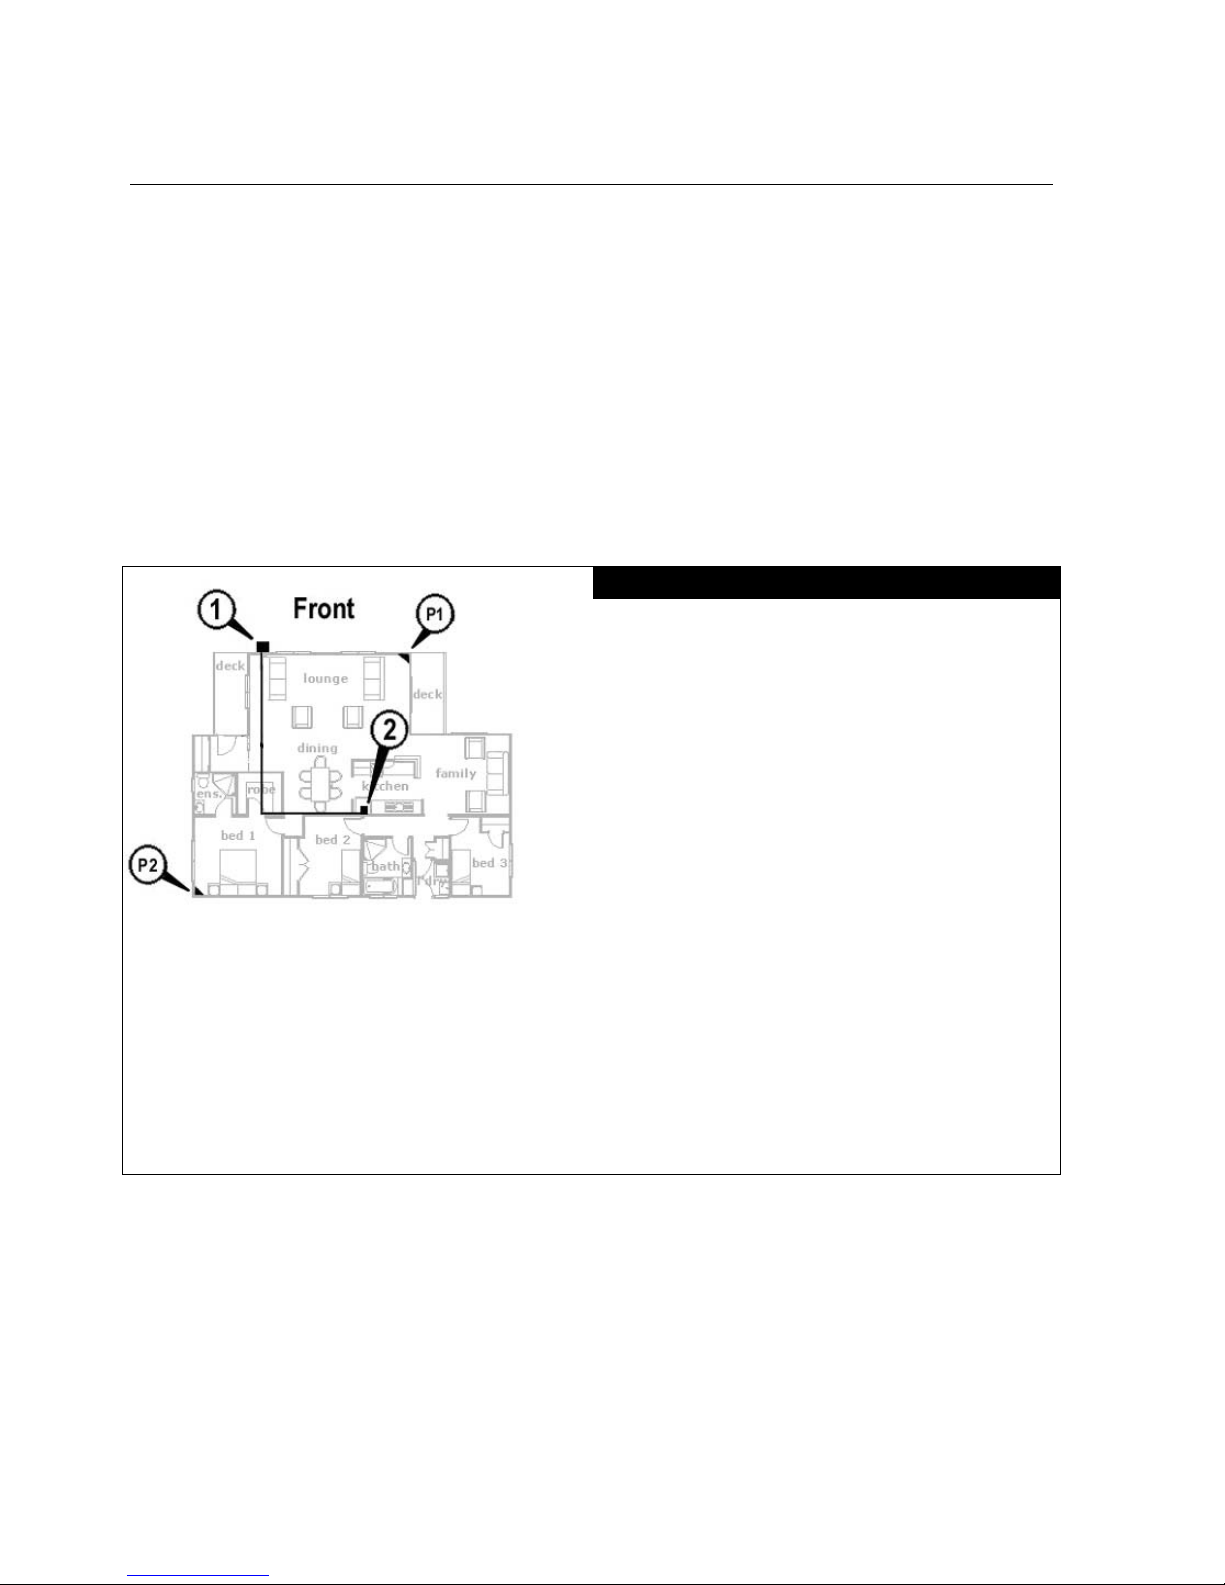
2.1. Planning the Installation
Each separate component of the Watchguard Sentinel Home Alarm System
should be placed in strategic locations. Below is a guide to where you should
place the main unit and the detectors.
It is important that you take into account that the maximum range without any
obstructions between the main unit and each detector is no further than 50
metres. Typically the range inside your house will be around 20-50 metres
depending on the construction of the house.
Planning and Wire Routing
1- The Watchguard Sentinel main
unit should be located high on
the front or front side of the
building under an eave of
covering. (See Section 2.2)
2- Route the white-white/black wire
(2 core-figure 8 cable) from the
main unit through the ceiling to
connect with the plug pack
connector. Another suitable
location for the power supply is
on an available power point at
the rear of the fridge in the
kitchen. (See Section 2.3)
P1- Location of passive infrared
detector zone 1. (Example only)
Figure 1
7
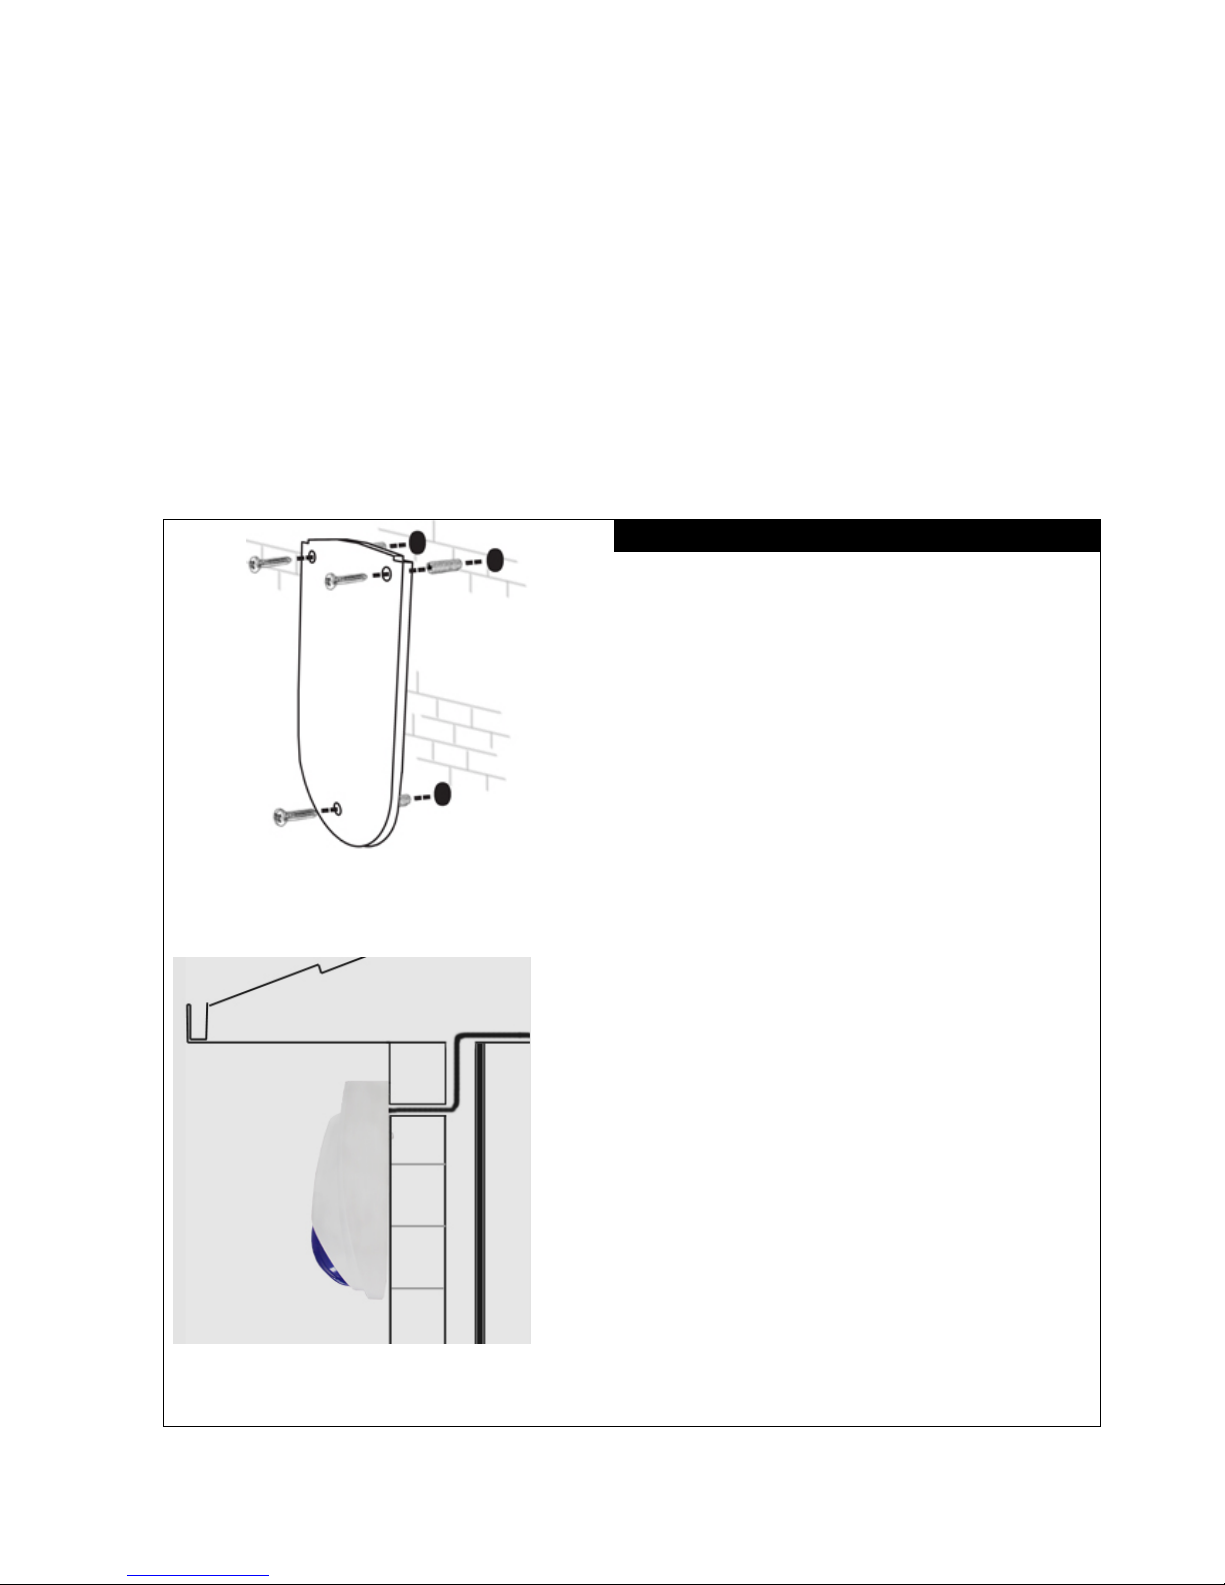
2.2. The Main Unit
Mount the Watchguard main unit at the front or front side of the building. The
mounting position should be under an eave or out of direct contact with rain or
other water sources. The position should allow line of sight viewing from both
the street (for visual deterrence) and from your main point of entry (for visual
confirmation of arming/disarming).
Use the wall plugs and screws provided if suitable for your particular building
construction.
Installing the main unit
1. Drill mounting holes (7mm
diameter, 25mm minimum in
depth) into the chosen wall.
2. Use the green star plug. Press
each one into the 3 main
mounting holes.
3. Make a hole and push the wires
through the wall and up into the
ceiling.
4. Scre w the top 2 screws half way
in.
5. Plac e the unit to support itself
from the top 2 screws.
6. Scre w in and tighten the bottom
mounting screw then tighten the
top two screws.
Figure 2
Figure 3
8
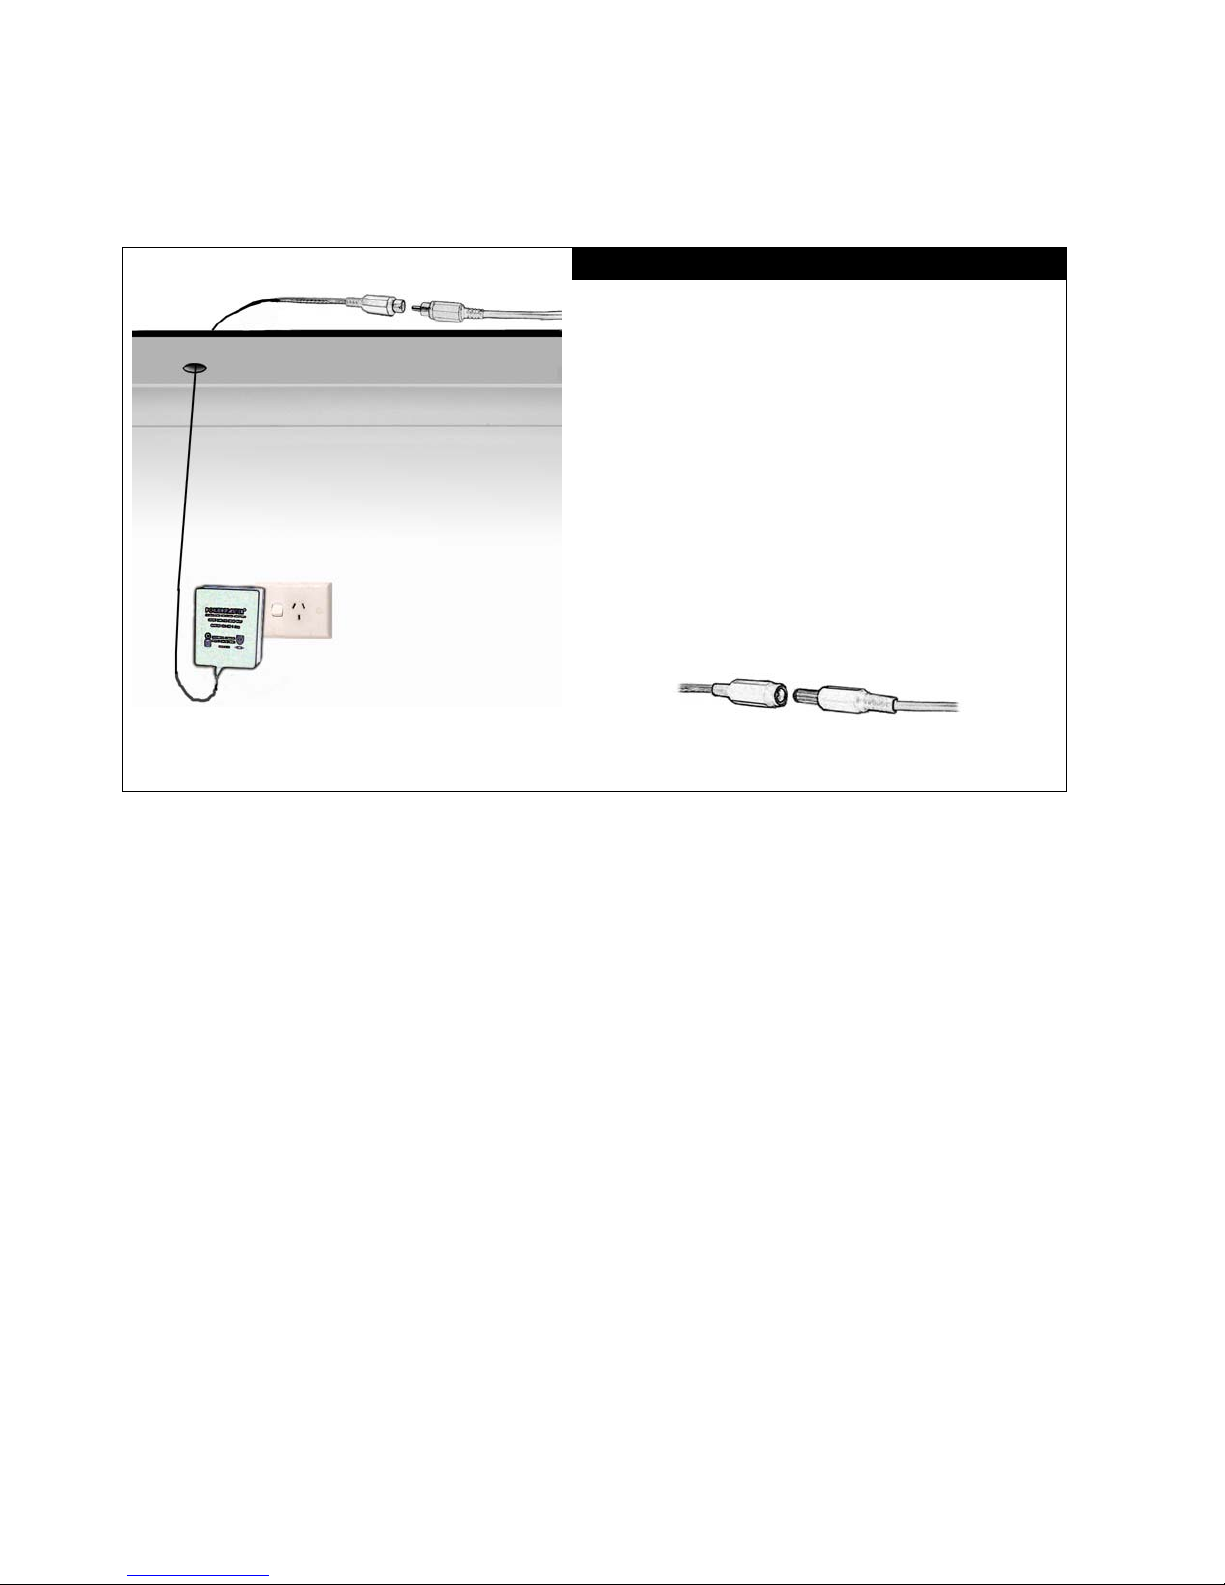
2.3. The Power Supply
Inside Roof
Wall
Power Supply Mounting
1. Drill a small hole (15mm diameter)
into the ceiling where the wire can
go through to be connected to the
wire from the main unit.
2. Feed the wire through the hole in
the ceiling and up to where it will
join the wire from the main unit.
3. Connect the connector from the
power supply into the plug from
the main unit as shown below.
Figure 4
 Loading...