

Watchguard AP300 Hardware Manual

WatchGuard
AP300
AP300
Hardware
Guide

Copyright and Patent Information
Copyright© 2012–2016 WatchGuard Technologies, Inc. All rights reserved.
WatchGuard, the WatchGuard logo, LiveSecurity, and any other mark listed as a trademark in the “Terms of Use” portion of
the WatchGuard Web site that is used herein are either registered trademarks or trademarks of WatchGuard Technologies,
Inc. and/or its subsidiaries in the United States and/or other countries. All other trademarks are the property of their
respective owners.
Printed in the United States of America.
Revised: January 5, 2016
U.S. Patent Nos. 6,493,752; 6,597,661; D473,879. Other Patents Pending.
Complete copyright, trademark, patent, and licensing information can be found in
the WatchGuard product documentation. You can find this document online at:
http://www.watchguard.com/wgrd-help/documentation/overview
Notice to Users
Information in this guide is subject to change without notice. Updates to this guide are posted at:
http://www.watchguard.com/wgrd-help/documentation/hardware-guides
Companies, names, and data used in examples herein are fictitious unless otherwise noted. No part of this guide may be
reproduced or transmitted in any form or by any means, electronic or mechanical, for any purpose, without the express
written permission of WatchGuard Technologies, Inc.
ABOUT WATCHGUARD
WatchGuard® Technologies, Inc. is a global leader of integrated, multi-function
business security solutions that intelligently combine industry standard hardware,
best-of-breed security features, and policy-based management tools. WatchGuard
provides easy-to-use, but enterprise-powerful protection to hundreds of thousands of
businesses worldwide. WatchGuard is headquartered in Seattle, Wash. with offices
throughout North America, Europe, Asia Pacific, and Latin America.
To learn more, visit WatchGuard.com.
ii WatchGuard AP300
ADDRESS
505 Fifth Avenue South
Suite 500
Seattle, WA 98104
SUPPORT
www.watchguard.com/support
U.S. and Canada +877.232.3531
All Other Countries +1.206.521.3575
SALES
U.S. and Canada +1.800.734.9905
All Other Countries +1.206.613.0895

Hardware Specifications
The WatchGuard® AP family of wireless access points provide secure, reliable, wireless communications while
delivering high performance and broad coverage—a perfect combination of services to meet the needs of
enterprise-level customers, small businesses, branch offices, campuses, and hotels alike.
Internal antennas, slim cases, minimalist labeling, and small LEDs, coupled with wall and ceiling mounting
options, make these devices ideal for low profile deployment scenarios. Power can be provided by any PoE
power source, or by the optional WatchGuard PoE injector or AC adapter.
WatchGuard AP300 devices features concurrent 3x3 MIMO (Multiple Input Multiple Output) capability and a
dual radio that supports 2.4GHz (802.11b/g/n) and 5GHz (11a/n/ac) to provide wireless clients with enhanced
reliability and performance.
WatchGuard AP devices are managed and controlled directly from a WatchGuard Firebox or XTM device to
provide centralized, secure management and configuration of all WatchGuard wireless devices on your
network.
This Hardware Guide applies to WatchGuard AP300 devices. If your WatchGuard AP device has a
different model number, your hardware is described in the WatchGuard AP Hardware Guide for that
model.
Requirements
The WatchGuard AP300 device must be managed by a WatchGuard Firebox or XTM device that uses Fireware
OS v11.10.5 or higher.
See the AP300 Quick Start Guide or the Fireware help for information about how to use your Firebox to
manage your WatchGuard AP device.
Hardware Guide 1

Hardware Specifications
Package Contents
WatchGuard AP device
Quick Start Guide
Wall/Ceiling Mounting Kit
T-rail Ceiling Mounting Kit
Mounting bracket
About Your Hardware
Hardware Specifications
AP300
MCU Processor Atheros QCA9558
Memory: Flash 32 MB
Memory: RAM 256 MB (128 MB x 2) DDR2
Radio (Radio 1) Atheros QCA9558 for 2.4GHz
(Radio 2) Atheros QCA9880 for 5GHz
Gigabit Physical
Layer (PHY)
Radio Type and
Frequency Band
Antenna 6x antennas
Ethernet interface 1 RJ45 connector for 10/100/1000 Gigabit Ethernet
Power Interface PoE: DC48v (Supports 802.3af/at)
Power supply 12V 1.25A
Dimensions Diameter: 160mm
Atheros AR8035
2.4GHz, 802.11b/g/n. Max data rate: 450Mbps
5GHz, 802.11a/n/ac. Max data rate: 1.3Gbps
Peak Gain:
2.4 to 2.5GHz / 4.5dBi
5.150-5.875GHz / 5dBi
DC jack (12V DC input)
Height: 38mm
2 WatchGuard AP300

Environmental Requirements
To safely install your WatchGuard AP device, we recommend that you:
Install the device indoors.
Make sure the device has adequate clearance for air flow and cooling.
Connect it to a surge-protected power supply to prevent damage from sudden power changes
Other environmental requirements:
Operating temperature 32 to 104°F (0 to 40°C)
Operating relative humidity 5% to 90% Non-condensing
Non-operating temperature -4 to 140°F (-20 to 60°C)
Non-operating relative humidity 5% to 90% Non-condensing
Hardware Specifications
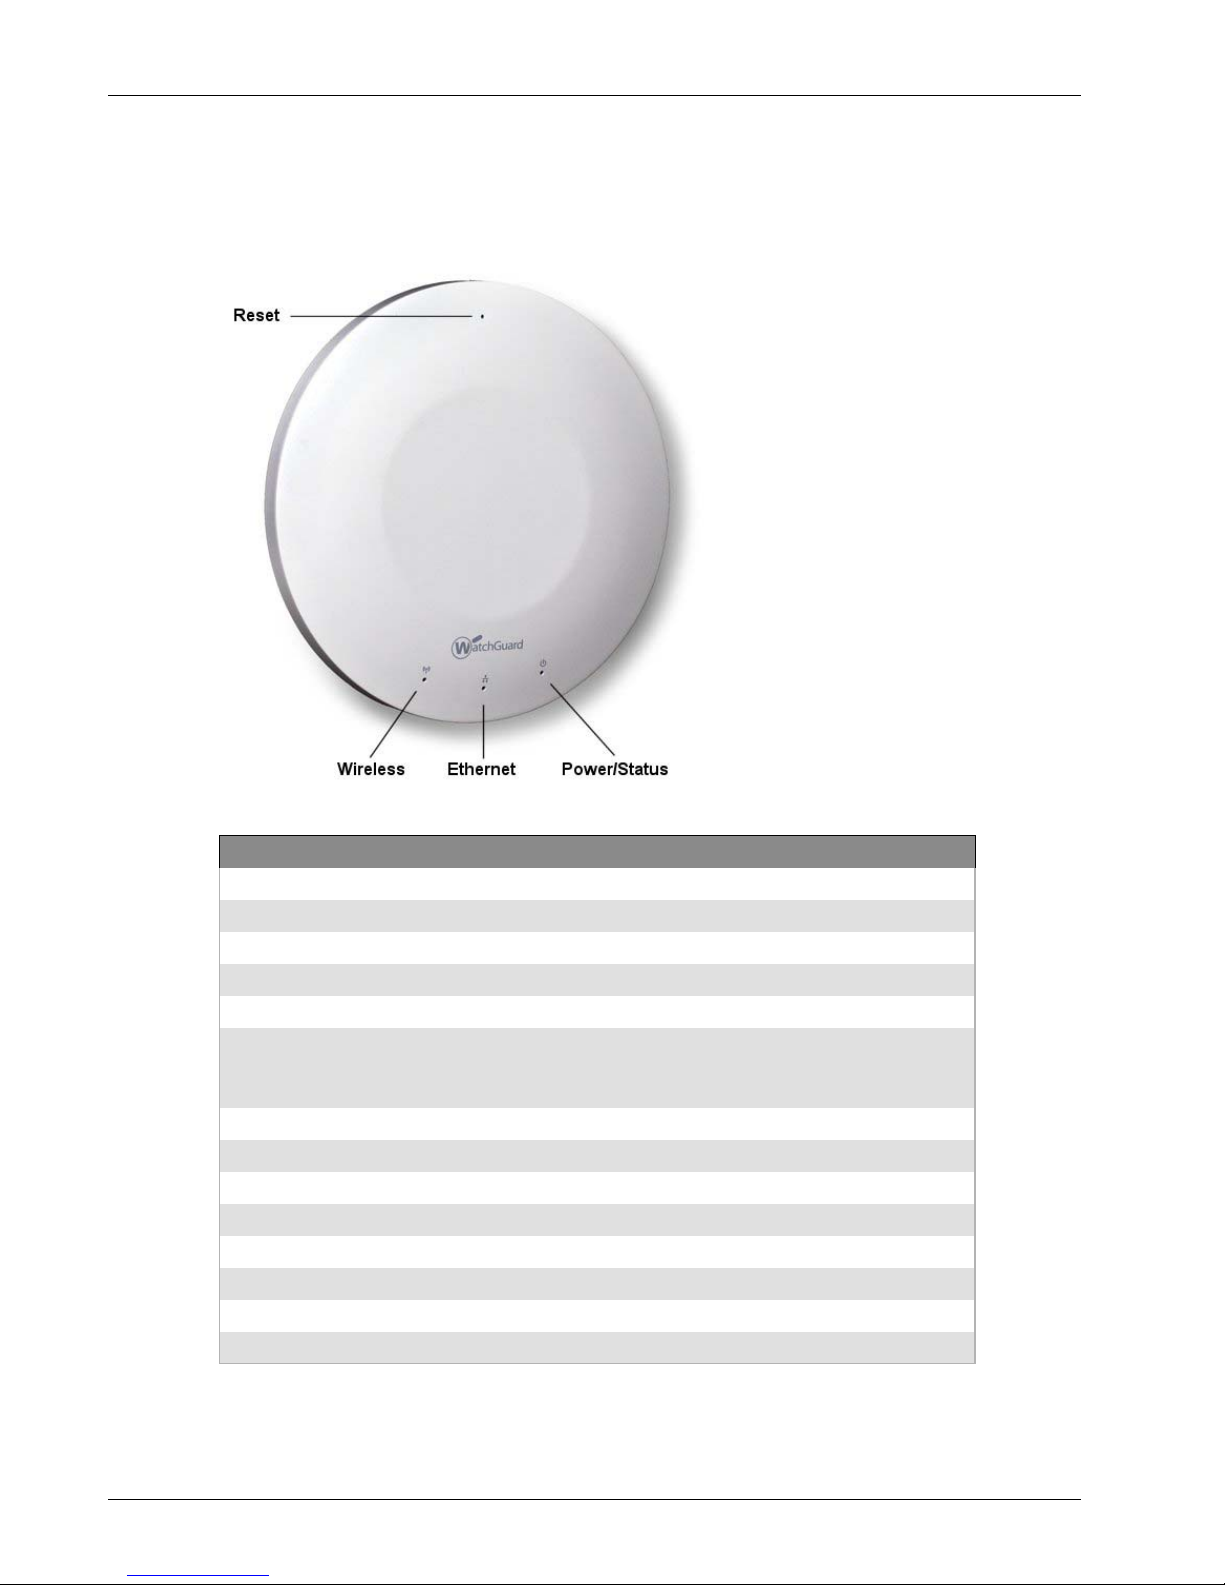
Hardware Description
Device Connections and Buttons
Ethernet Network Interface
Standard RJ45 connector that supports link speeds of 10/100/1000 Mbps.
Power Input
If you use the optional 12V AC adapter, connect the AC adapter to the device and to a power source.
Use only the WatchGuard AC power adapter for this AP device model.
If you use a PoE adapter other than the optional PoE adapter from WatchGuard, make sure that it
complies with the IEEE 802.3af PoE specification. Do not use a PoE adapter that is not IEEE 802.3af
compliant as it can damage your device.
Reset Button
Resets the WatchGuard AP device to factory-default settings. You must use a paper clip or other small
object to press the reset button through the small hole on the top of the device.
To reset the device to factory-default settings, with the AP device powered on, press and hold
the reset button for at least 5 seconds. After you reset the device, the Power/Status light flashes
Amber and Green to indicate that the AP device is not paired to a Firebox or XTM device.
To reboot the device, but not reset it to factory-default settings, press the reset button briefly
(less than 5 seconds).
You can see the current AP device firmware version in the Gateway Wireless Controller on the Firebox
or XTM device that manages the AP device.
Hardware Guide 3
Hardware Specifications
Device Indicators
The front of the AP device has three status indicators.
Indicator Indicator color Interface Status
Wireless Not lit Wireless off or disabled
Amber 2.4GHz network active
Amber flashing Transmitting and receiving data
Green 5GHz wireless network active
Green flashing Transmitting and receiving data
Green flashing
alternating with Power/
Status LED flashing
Red 2.4GHz wireless network active
Red flashing Transmitting and receiving data
Ethernet Not lit No link or disabled
Amber Link speed at 10/100Mbps
Amber flashing Transmitting and receiving data
Green Link speed at 1000Mpbs (Gigabit)
Green flashing Transmitting and receiving data
Power/Status Not lit No power
Power on and ready to pair
4 WatchGuard AP300
Indicator Indicator color Interface Status
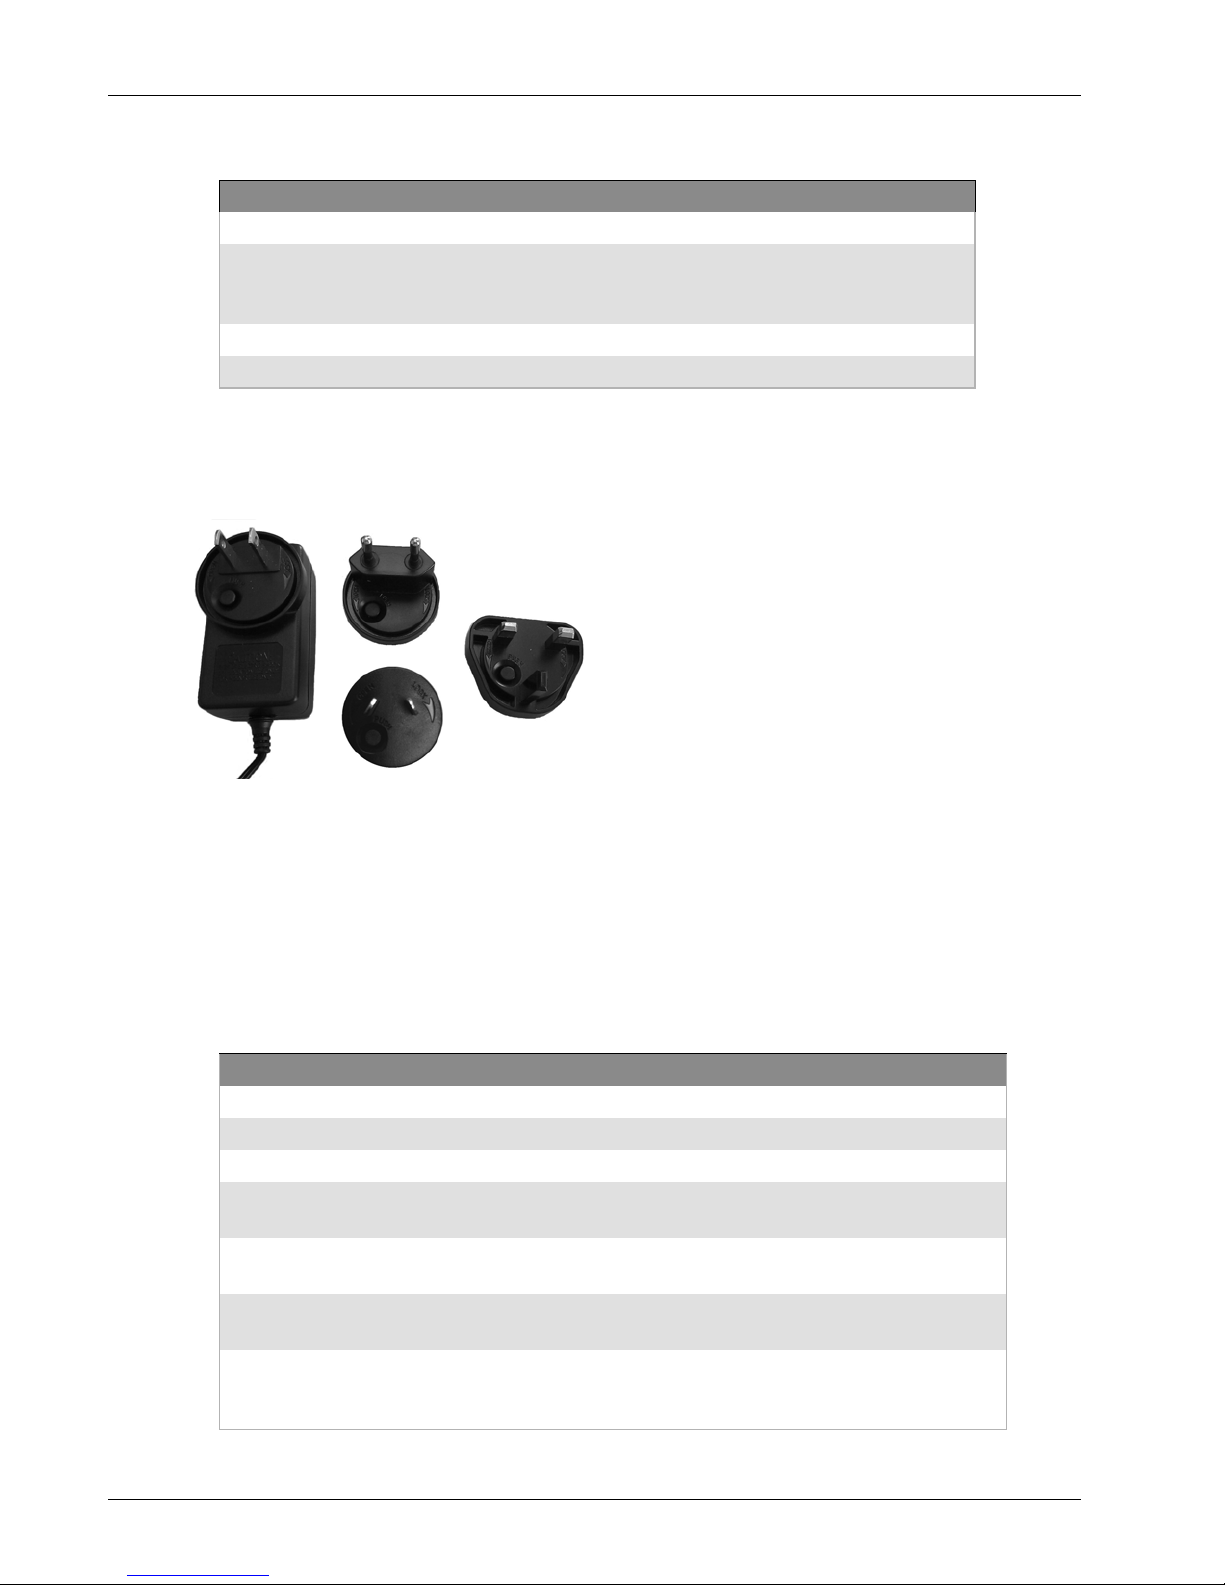
AC Power Adapter
An optional AC power adapter supplies 12V DC power to the WatchGuard AP and includes US, EU, UK, and AU
region-specific adapter disk plugs.
Green flashing Device booting
Green flashing
alternating with Wireless
LED flashing
Green flashing slowly Firmware upgrade in progress
Green Power on and paired
Power on and ready to pair
Hardware Specifications
To connect a region-specific disk plug to the AC power adapter:
1. Insert the round disk plug in the AC power adapter at an angle to align with the slots.
2. Rotate the disk clockwise until it clicks into position.
To remove a disk plug from the AC power adapter:
1. Press the Push button on the round disk plug.
2. Rotate the disk counter-clockwise and pull it away from the adapter.
AC Power Adapter Specifications
AC Power Adaptor
WatchGuard Part # WG8588
AC Input Voltage Rating 100 to 240VAC
Output Voltage DC12V, 1250mA
Region-specific
Adapter Plugs
Temperature Operating: 0 to +40°C
Humidity Operating: 75%
Dimensions L = 70mm (3.15in)
US, EU, UK, AU
Storage: -20 to +70°C
Storage: 95%
W = 39mm (1.77in)
H = 33.7mm (1.29in)
Hardware Guide 5
Hardware Specifications
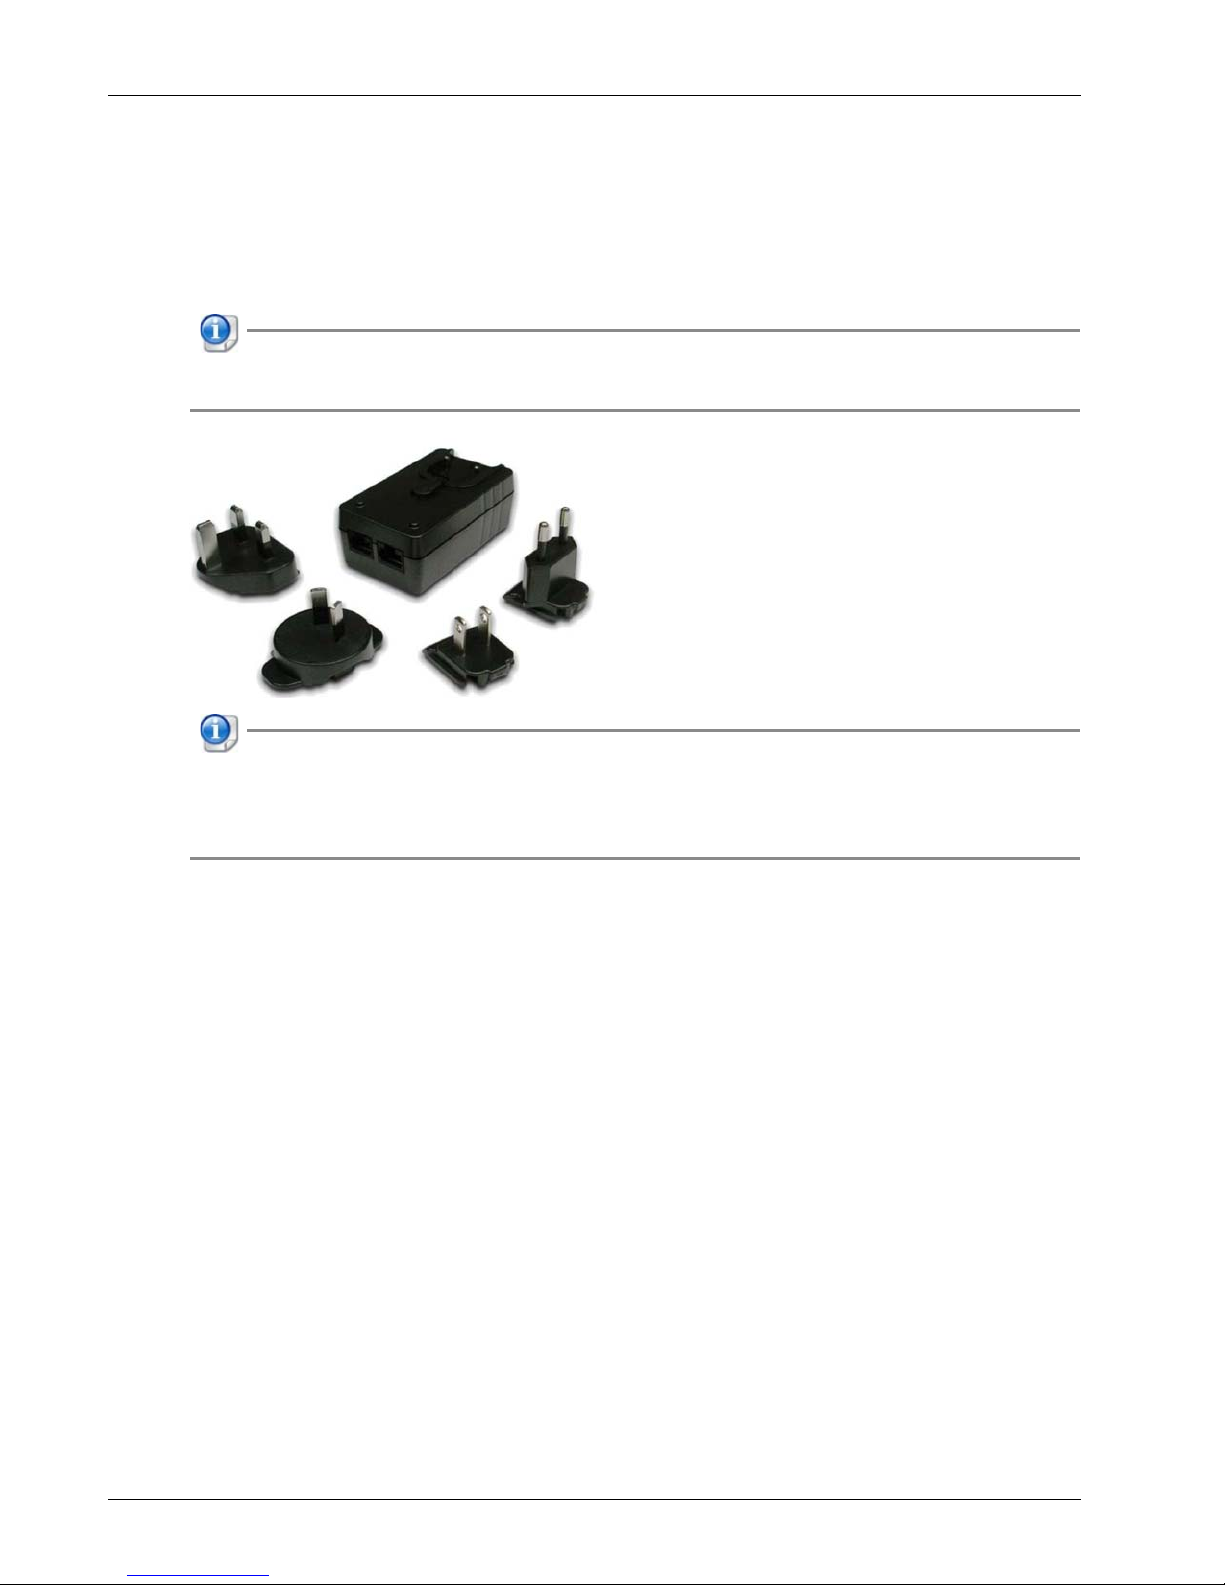
Ethernet Power Injector
You can also power the WatchGuard AP device with an optional Ethernet Power Injector. This Power over
Ethernet (PoE) device allows you to power the WatchGuard AP through an existing ethernet connection. With
this feature, you do not have to position your WatchGuard AP device near a power outlet.
The Ethernet Power Injector provides 56V/15.4W power over a single 10/100 Ethernet port, and also
includes region-specific plugs (US, EU, UK, AU) for connection to a wall outlet.
This device complies with the IEEE 802.3af PoE specification. Do not use any PoE adapters that are not
IEEE 802.3af compliant as they may damage your device.
This device is to be connected only to PoE networks without routing to the outside plant.
Connect the Ethernet Power Injector
To connect an Ethernet Power Injector to the WatchGuard AP device:
1. Attach a region-specific plug to the Ethernet Power Injector.
2. Plug the Ethernet Power Injector into an AC power source.
3. Connect a straight-through Ethernet cable from your network backbone (for example, a router, switch,
or hub) to the IN connector on the Ethernet Power Injector.
4. Connect a straight-through Ethernet cable from the WatchGuard AP device Ethernet interface to the
OUT connector on the Ethernet Power Injector.
6 WatchGuard AP300
 Loading...