

WASPcam HD Action Camera User Manual
User’s Manual
HD
Actio n Camera
1
1 Introducing the Camera
Read this section to learn about the features and functions of the
camera. This chapter also covers system requirements, package
contents, and descriptions of the hardware components.
1.1 System Requirements
The camera requires a PC with the following specifications for full
HD 1080p 30fps and 720p 60fps playback:
• Windows
®
8 /Windows® 7 /Vista / XP (SP2) / MAC OS X
10.5 and later
• Intel
®
/ AMD Dual-Core CPU and later
• At least 1 GB of RAM or higher
• At least DirectX 9 video card, DirectX 10 is recommended
• Standard USB 1.1 port and later
• At least 2GB or greater available hard disk space
1.2 Features
The camera offers a variety of features and functions including:
• Full HD 1080p (60fps.)
• H.264 Video Clip
• 140° Wide Angle Lens
• WLAN 802.11 b/g/n
• 2.4GHz RF remote control
• 16 Megapixel Photos
• Sports Camera functionality
! Note:
A USB 1.1 port will enable you to transfer files to and from your
host PC, but transfer speeds will be faster with a USB 2.0 port.
2
• Li-ion Rechargeable Battery
• External Waterproof Case/Standard Mounts/Watch Remote
• Smartphone App Supported
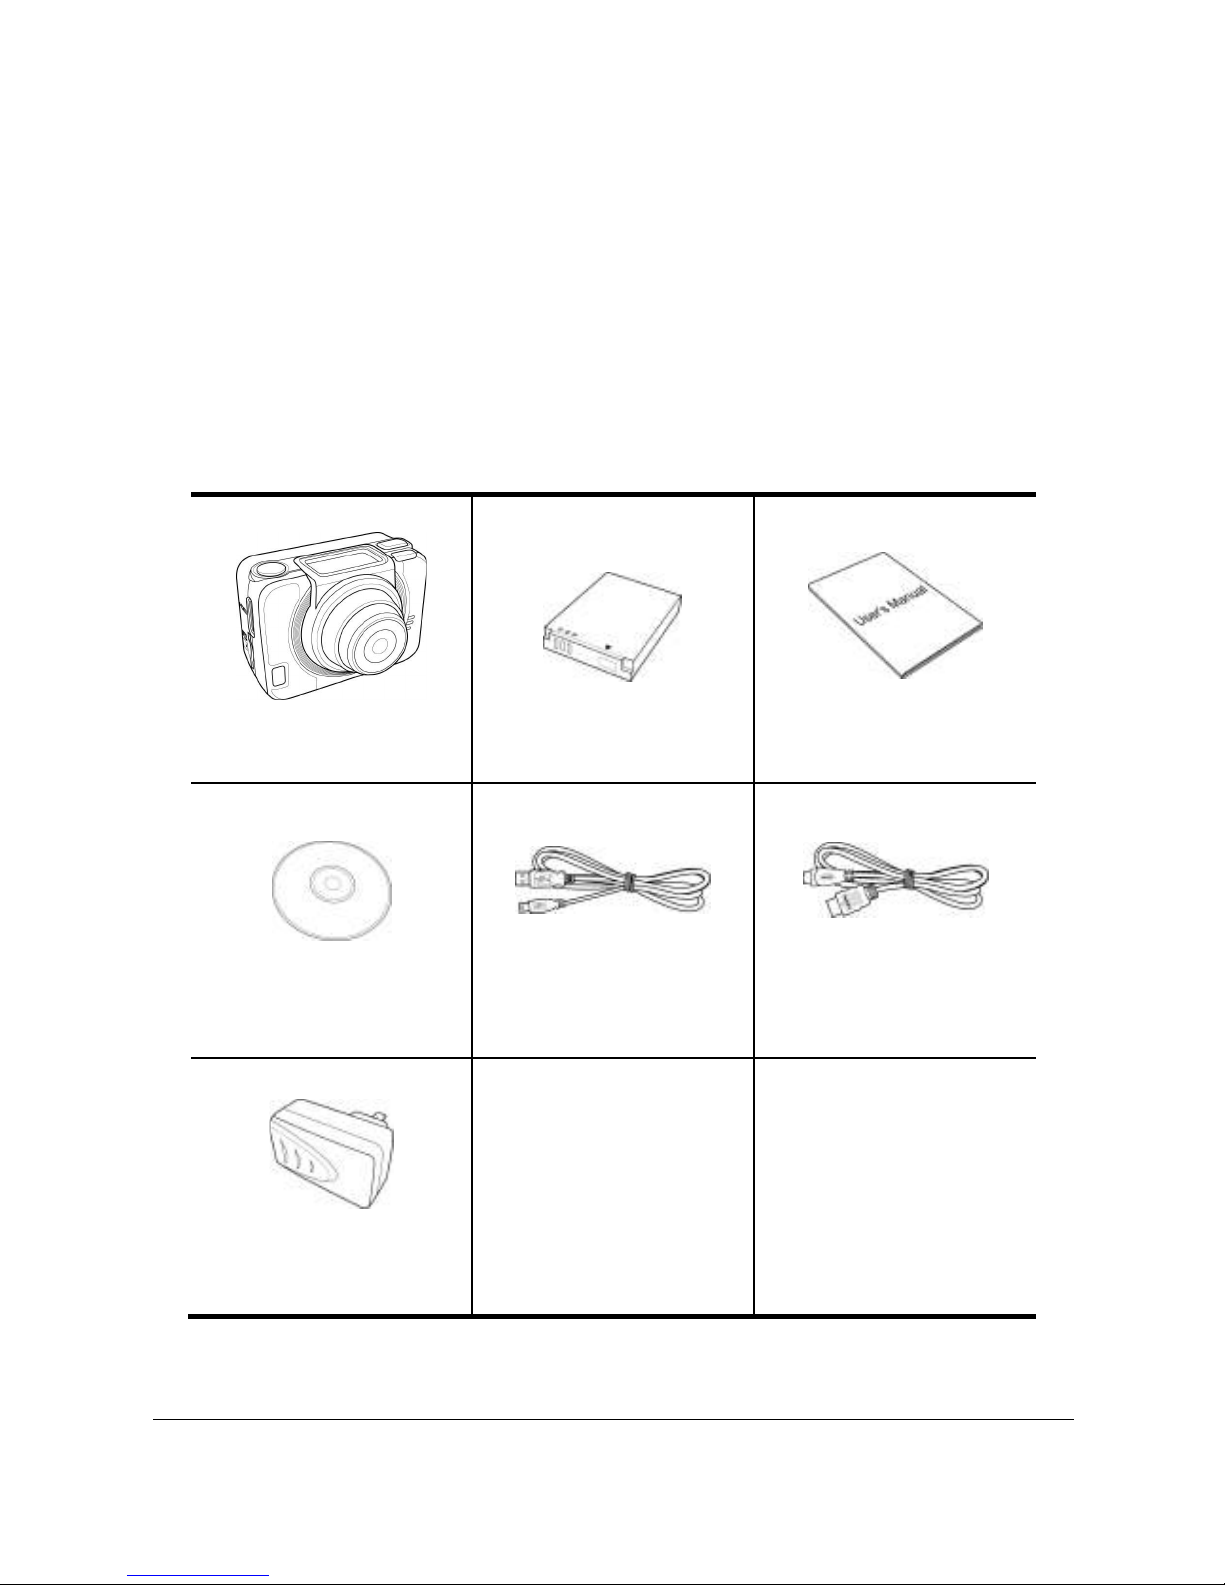
1.3 Unpacking the Camera
The following items should be present in the package. If any item is
missing or appears damaged, contact your dealer immediately.
Camera Li-ion Battery User Manual
CD-ROM Micro USB Cable HDMI Cable
(optional)
AC Adapter
3
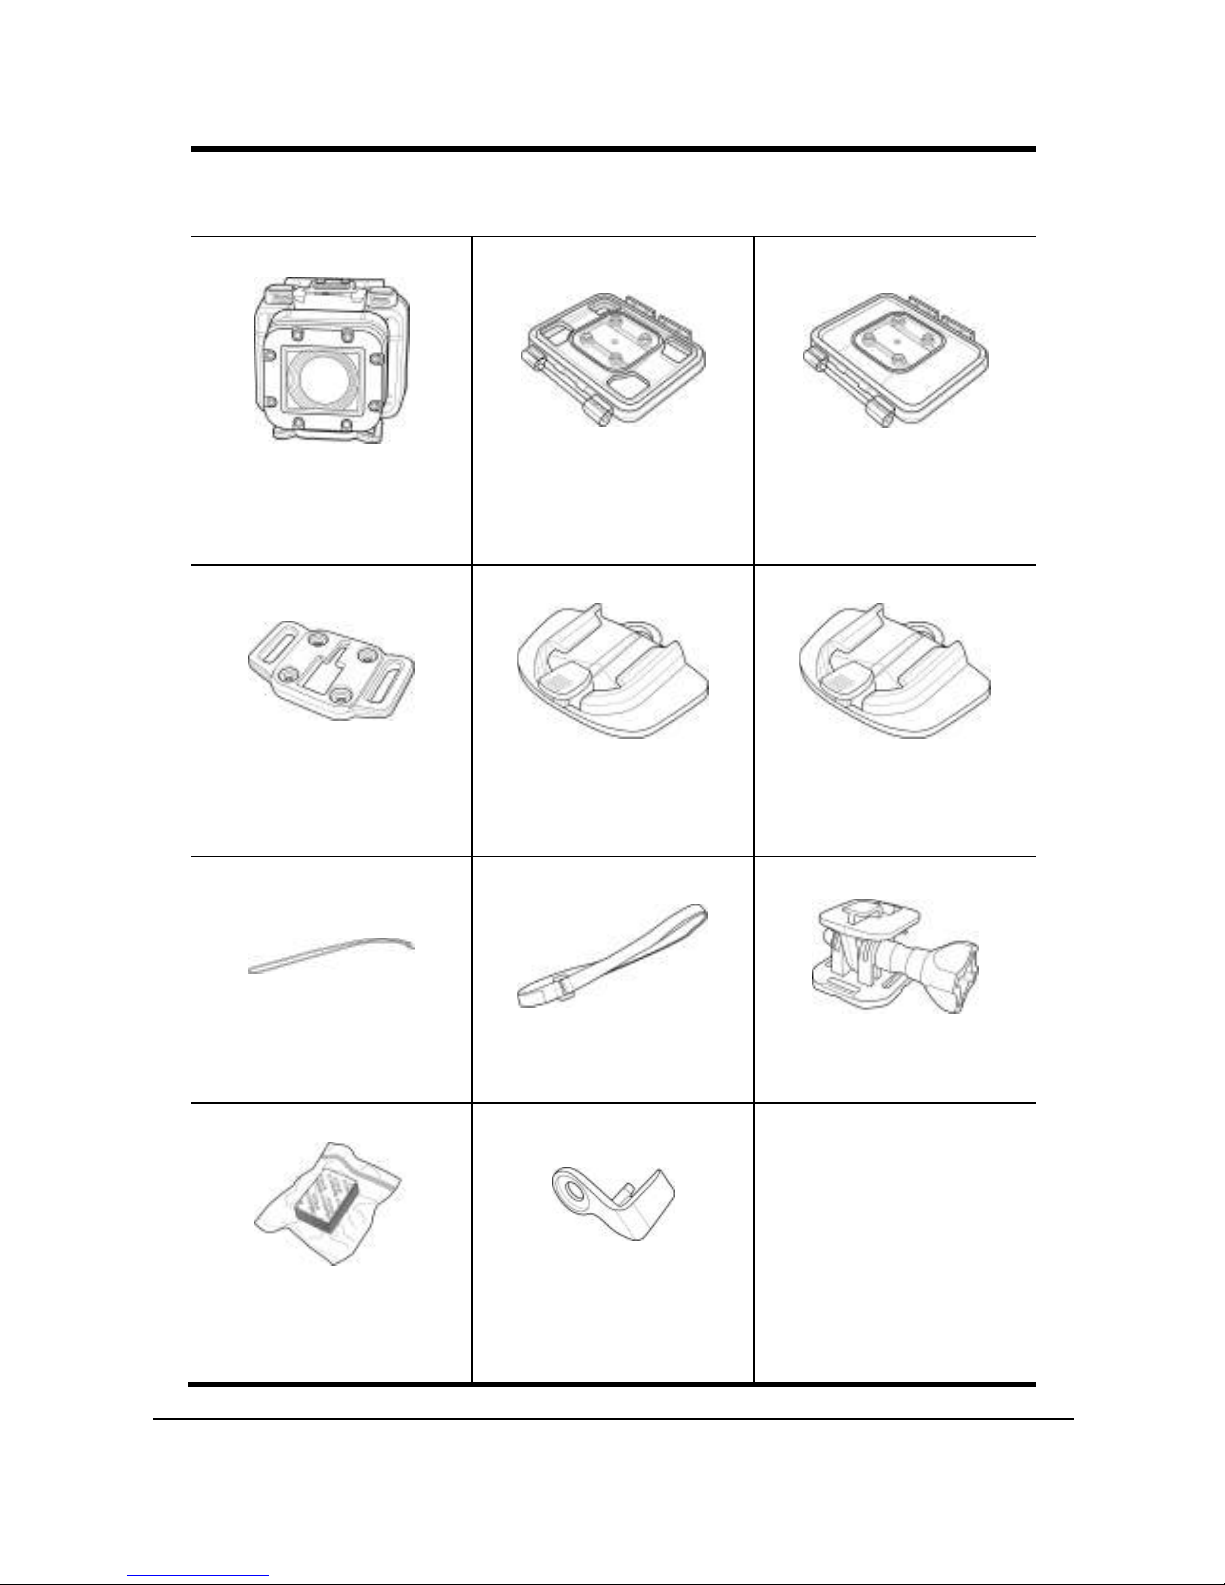
Standard Accessories
Waterproof Case Vented Housing
Backdoor
Waterproof
Housing Backdoor
T Tip Adapter Flat Adhesive
Socket
Curved Adhesive
Socket
Secure Tether Velcro Strap Swivel T Tip
Anti-fog Inserts Safety Lock
4
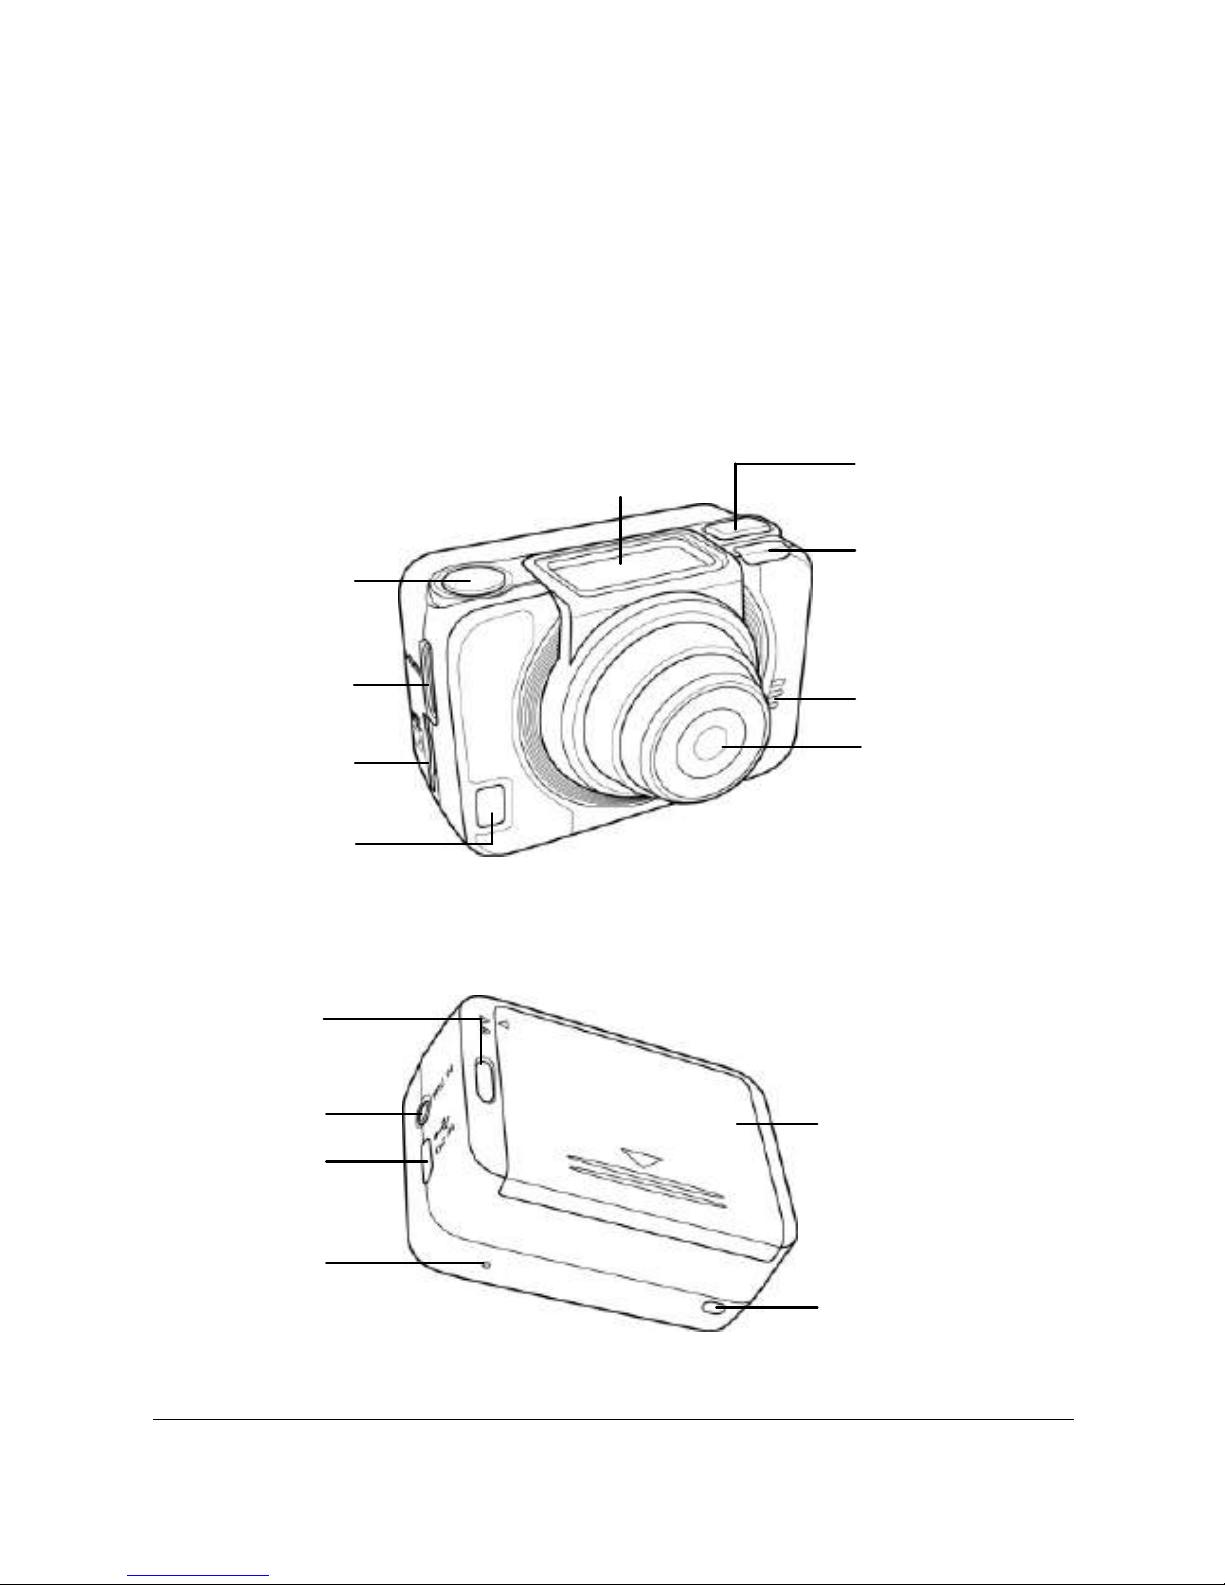
1.4 About the Camera
Refer to the following illustrations to familiarize yourself with the
buttons and controls of this camera.
1.4.1 Camera Views
Power/Status
LED 1
Lens
Speaker
HDMI port
Shutter button
Power/Status/
Battery LED
2
Power / Mode
button
OLED screen
Micro SD
card slot
Battery compartment
cover
Power/Status LED 4
Microphone
jack
Micro USB
port
Microphone
Power/Status
LED 3

5
1.4.2 Button Functions
Power / Mode
Button
• Press and hold for 3 seconds to turn the
camera on or off.
• Press to switch to different modes: Video,
Photo, WiFi, Burst, Time Lapse,
Self-timer, and Set mode.
• In Set mode, press to scroll through menu
items.
Shutter Button
• In Video mode, press to start/stop video
recording.
• In Photo mode, press to take a photo.
• In Set mode, press to select an item.

6
1.4.3 LED Indicators
The camera has four LED indicators.
The Power/Status LEDs are located on top, on the bottom, and on
the back of the camera. These LEDs are designed for users to see the
status of the camera whichever way the camera is held or mounted.
LED Color Description
Power / Status
LED
Green
During startup
Green Blinking Taking photos/ WiFi initial
setup is complete and
connection is in progress
Red Blinking Video recording in progress
Red Blinking
Rapidly
Self-timer
Battery LED
Red Blinking
Battery is charging
Off
Full charge
7
2 Getting Started
Read this section to learn how to start using the camera. This
section covers basic functions such as switching on, installing the
battery and micro SD card, and configuring preliminary settings.
See later chapters for advanced functions.
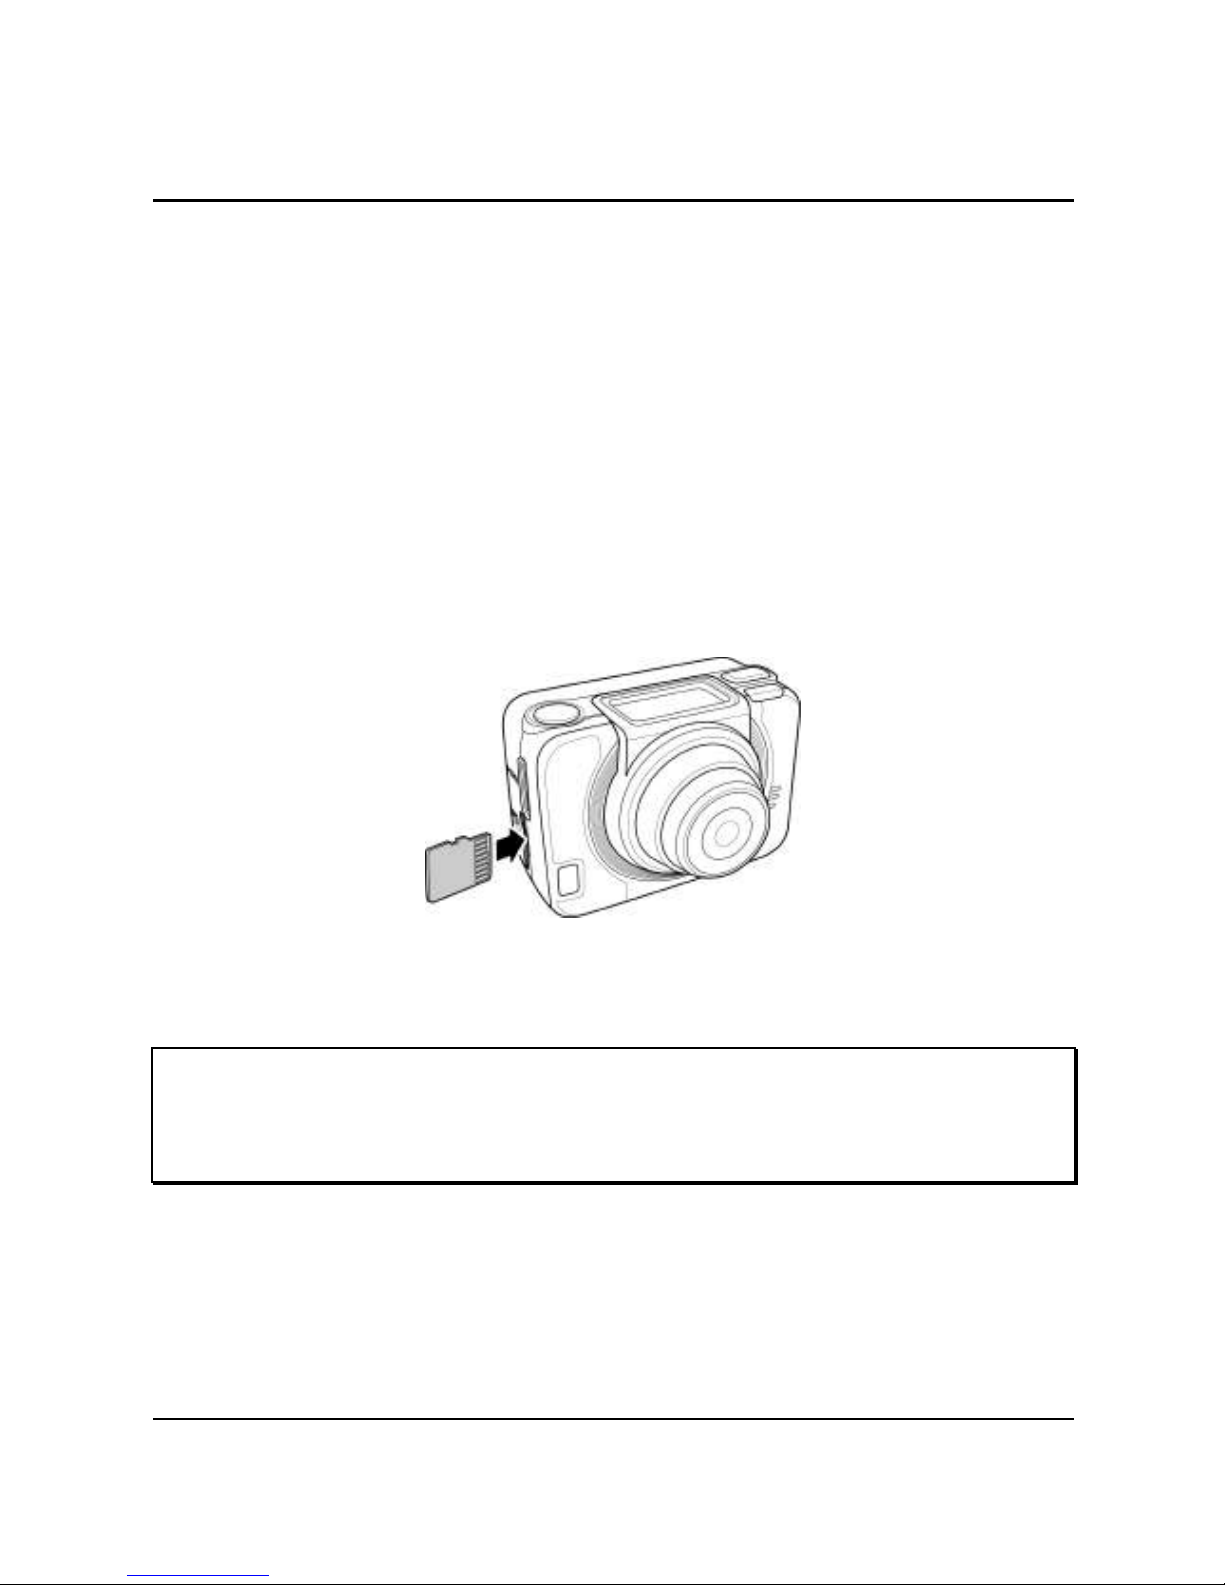
2.1 Installing the Micro SD Card
A micro SD card is required to capture photos and videos. The
camera supports micro SDHC cards up to 32GB.
1. Insert the micro SD card into the card slot with the gold
contacts facing the front of the device.
2. Push the micro SD card until it clicks into place.
" Warning: Do not remove the micro SD card while data is being
recorded. Doing so may corrupt the saved data and damage the
card.
8
2.1.1 Removing the Micro SD card
1. Turn off the camera.
2. With a fingertip, push the micro SD card to eject it from
the slot.
3. Remove the micro SD card.
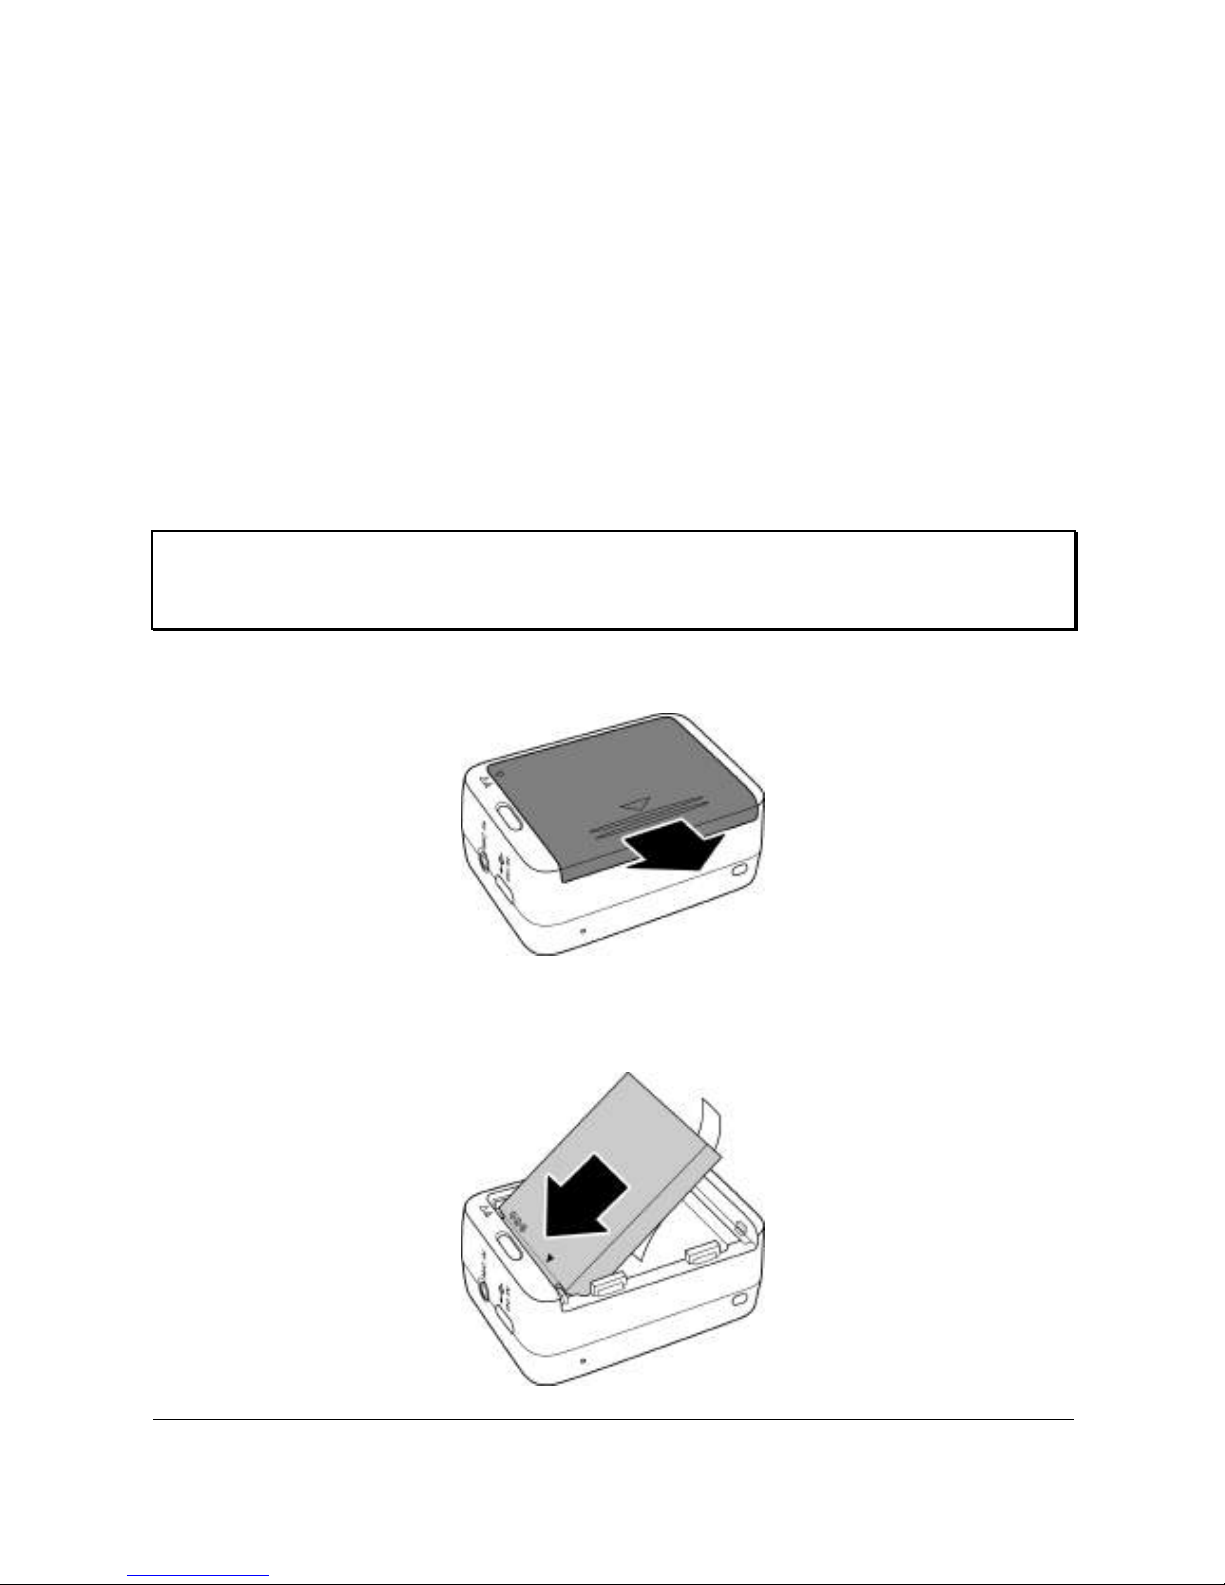
2.2 Installing the Battery
" Warning: Use only the supplied battery or a similar battery
recommended by the manufacturer or the dealer.
1. Push down the battery compartment cover to open it.
2. Align the battery contacts and then insert the battery into
the compartment with the ribbon underneath the battery.
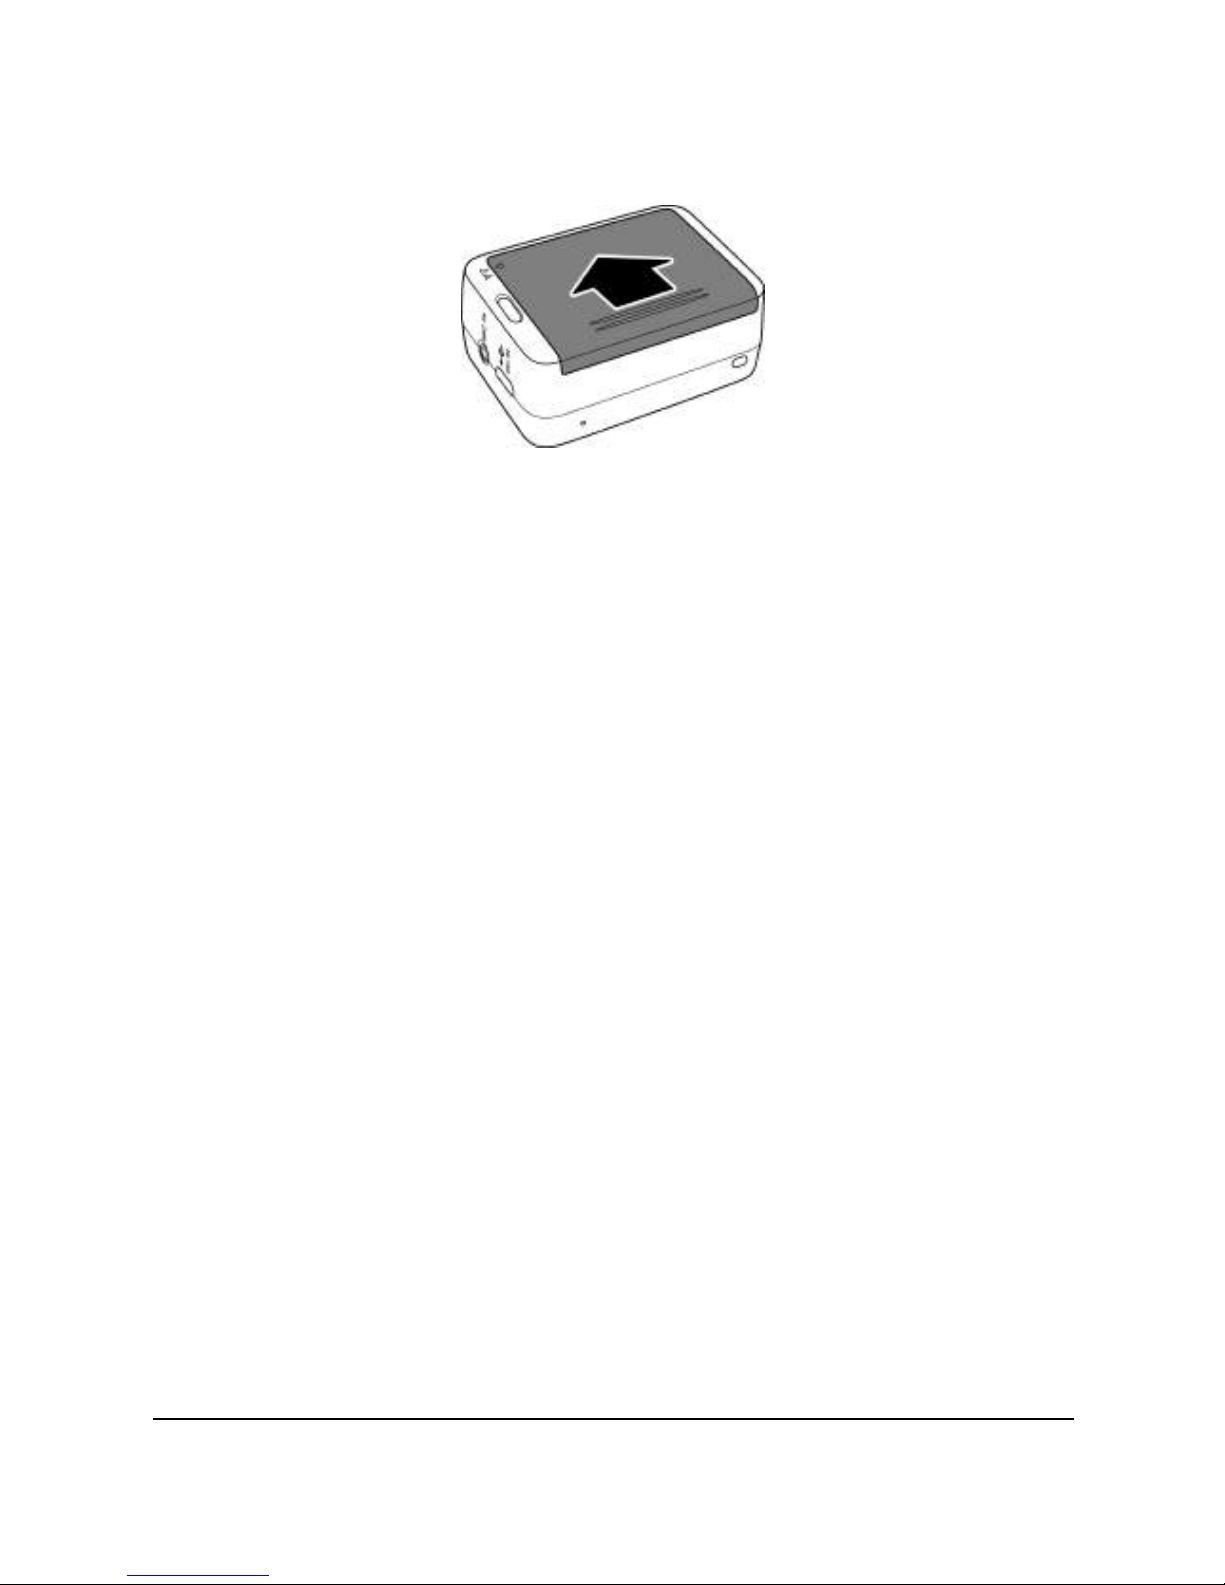
9
3. Close the battery compartment cover.
2.2.1 Removing the battery
1. Open the battery compartment cover.
2. Pull the ribbon to remove the battery.
10
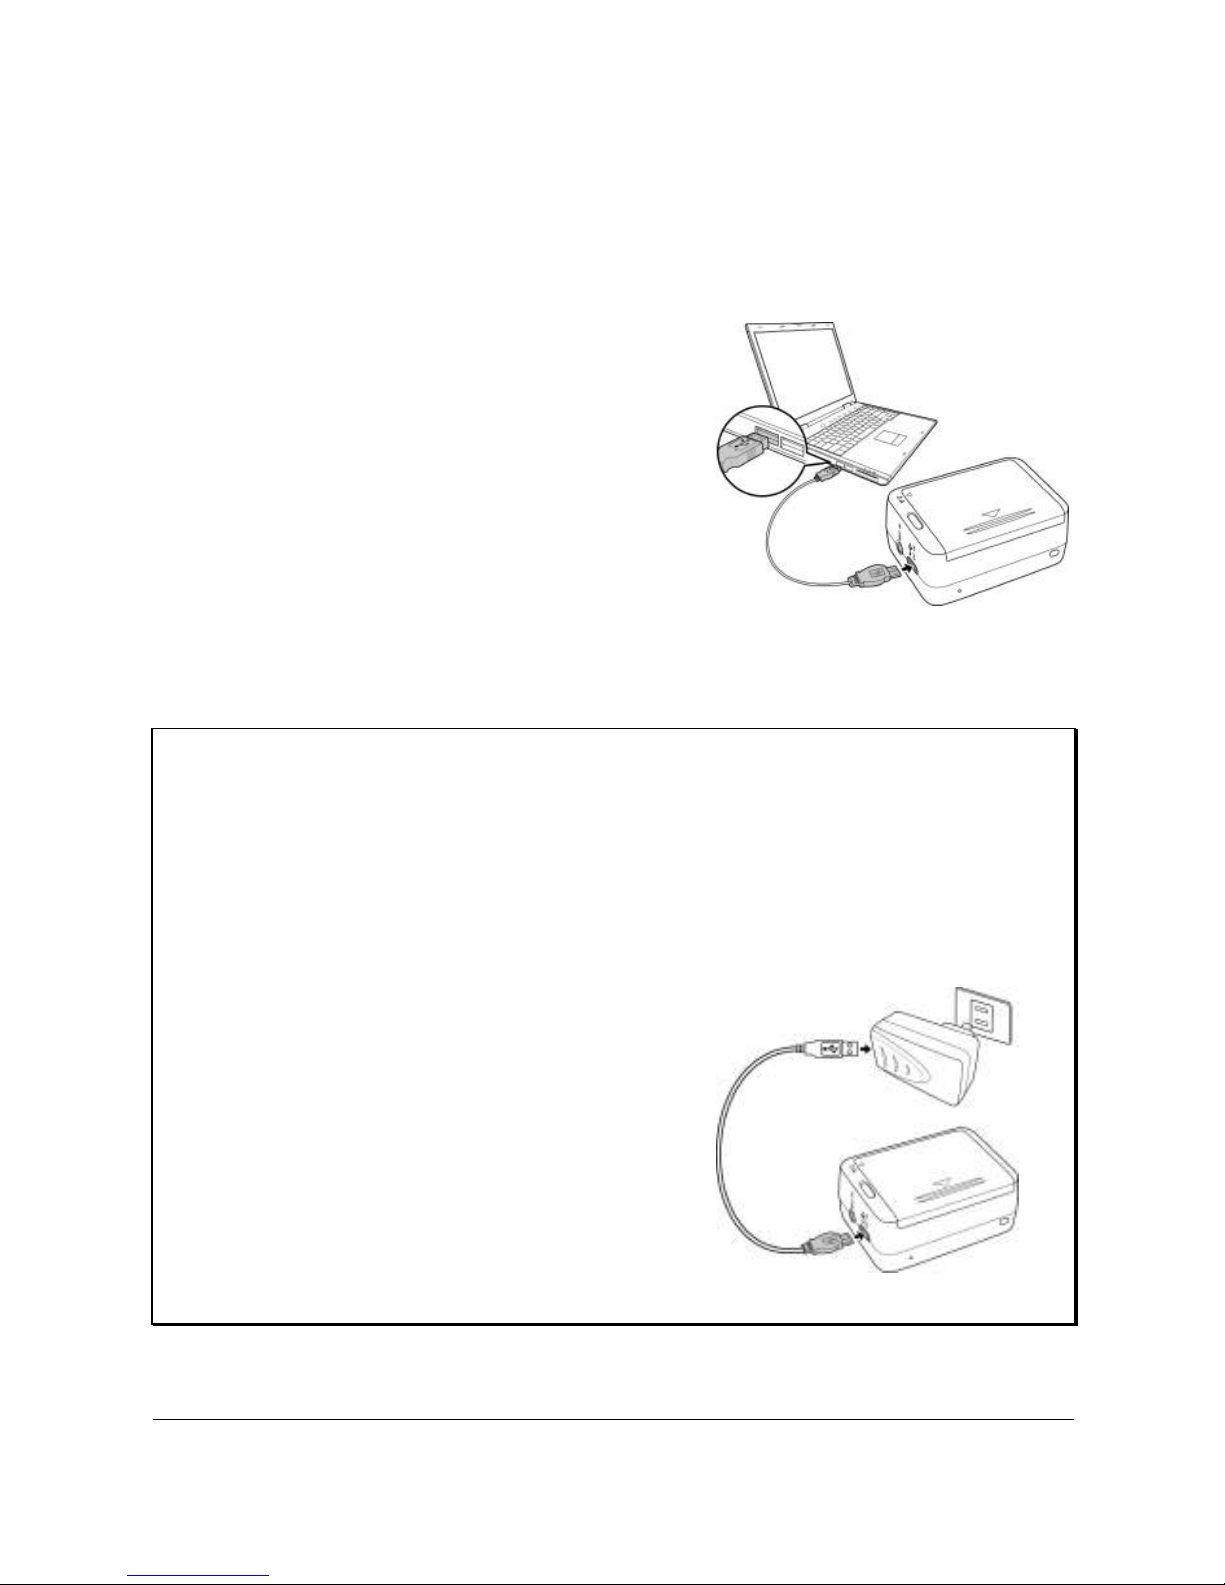
2.3 Charging the Battery
You can charge the battery using the micro USB cable that came
with the camera. Follow the steps below to charge the battery.
1. Install the battery into the
battery compartment.
2. Plug the micro-USB
connector to the USB port
of your device.
3. Plug the other end of the
USB cable to a computer.
Note:
" The battery LED blinks red. After a full charge, the LED turns
off.
" Approximate charging time is 240 minutes with a USB
connection. Actual charging time depends on current battery
capacity and charging conditions.
" You may also use the supplied
AC adapter to charge your camera
battery.
11
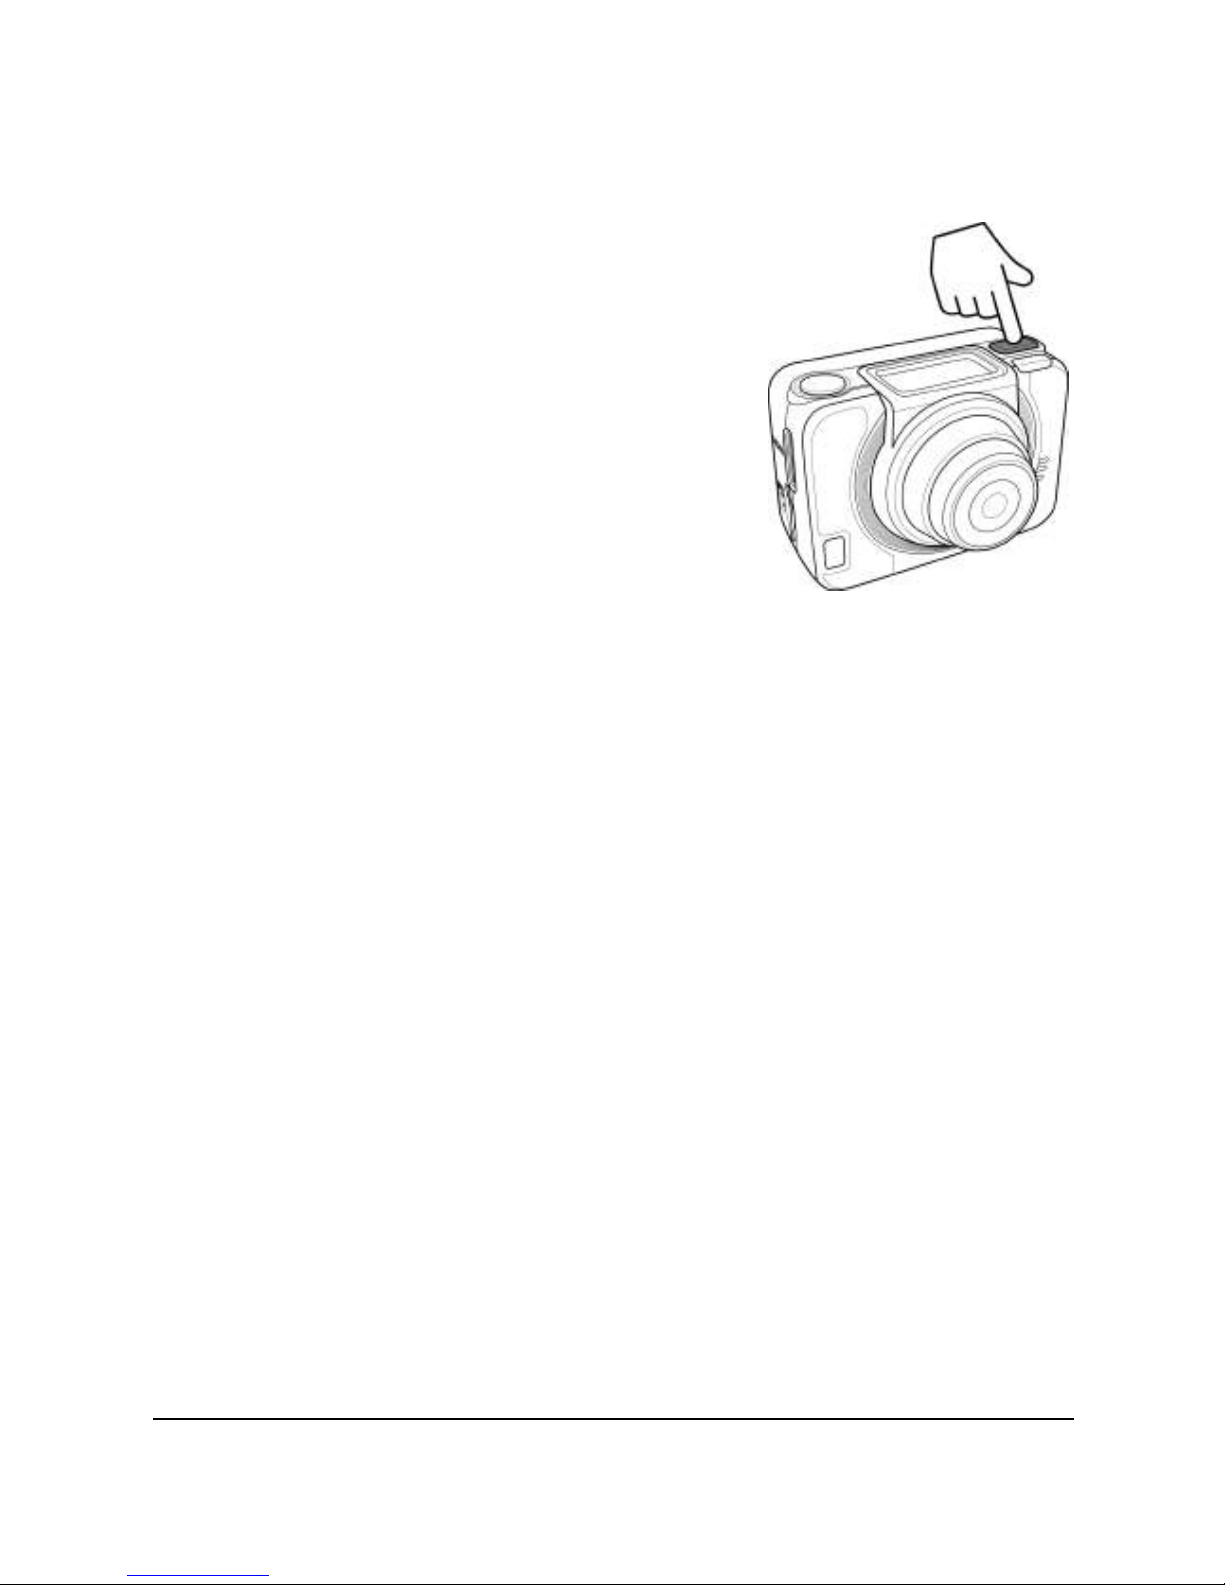
2.4 Turning ON/ OFF the Camera
• To turn on the camera, press the
Power button. The Power/Status
LED indicator lights green for 3
seconds.
• To turn off the camera, press and
hold the Power button for 3 seconds.
12
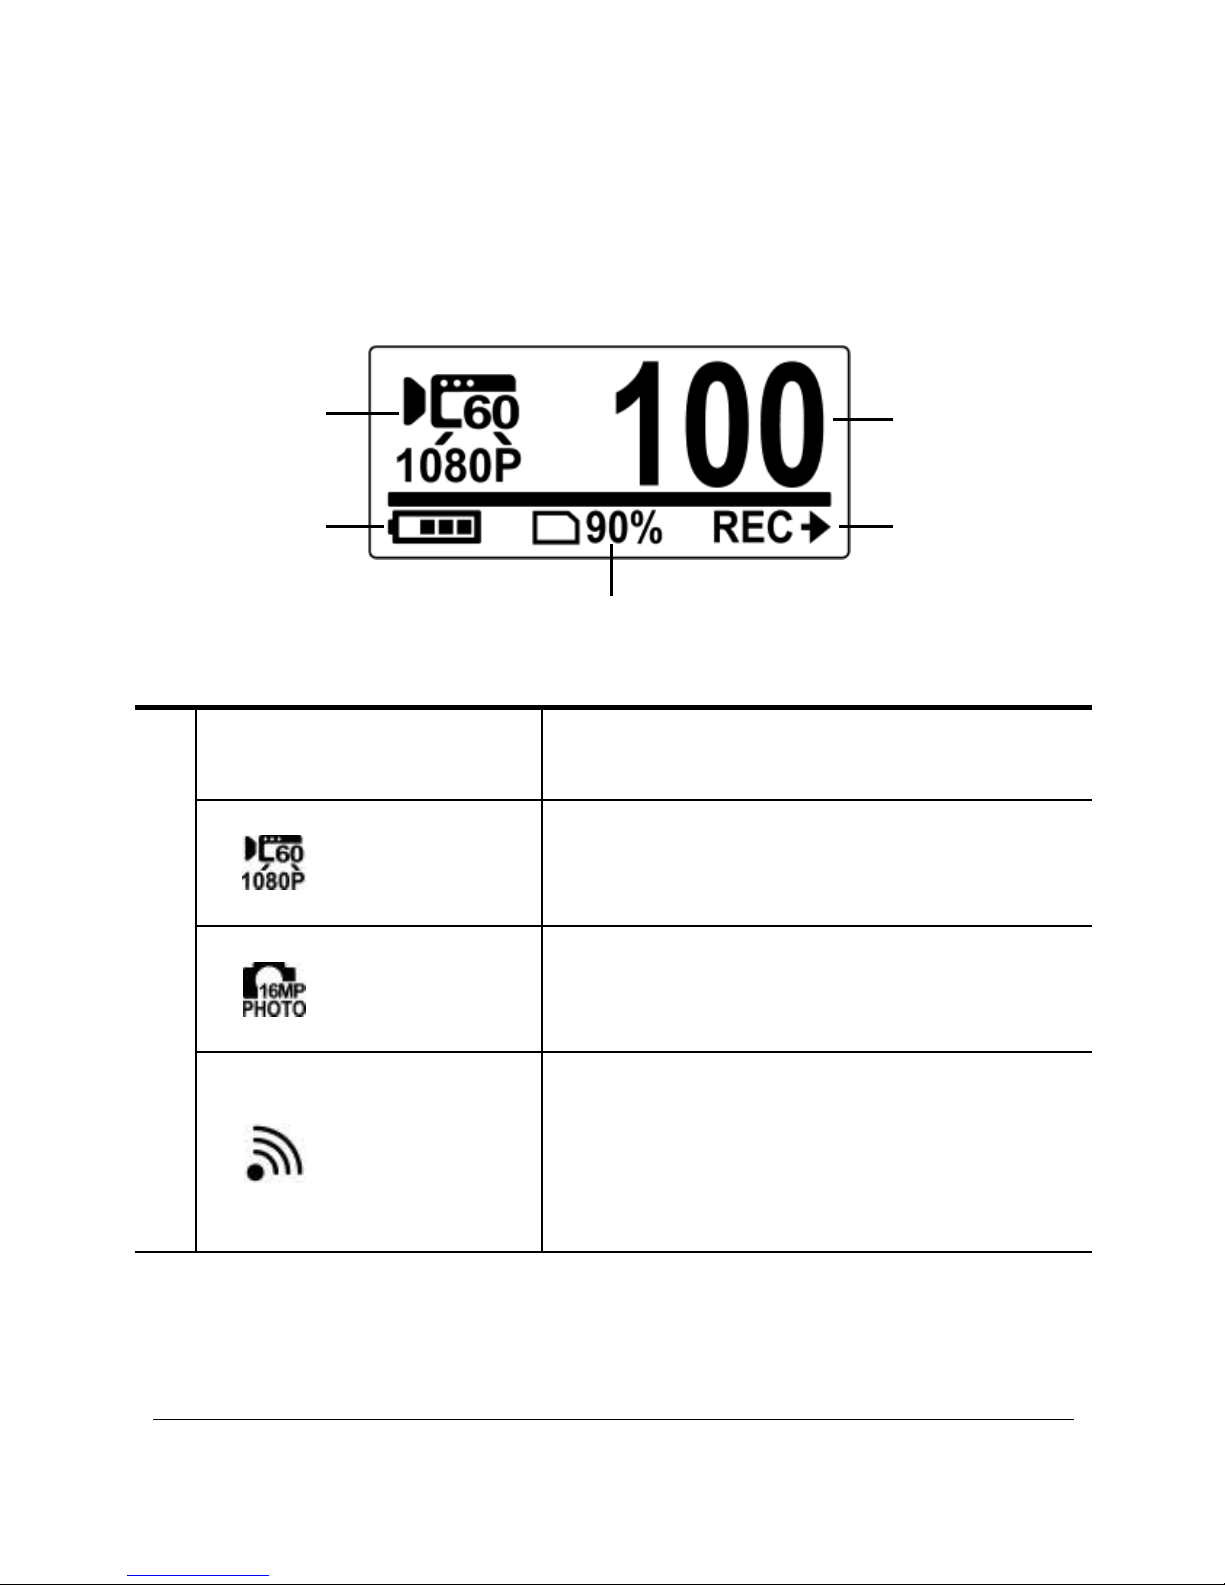
2.5 OLED Screen
When the camera is turned on, the OLED screen displays the
following information:
3
1
4
5
2
1
Current Mode
Displays the current mode of the
camera.
Video
Mode
Use this mode to record videos. The
icon also indicates the current video
recording settings.
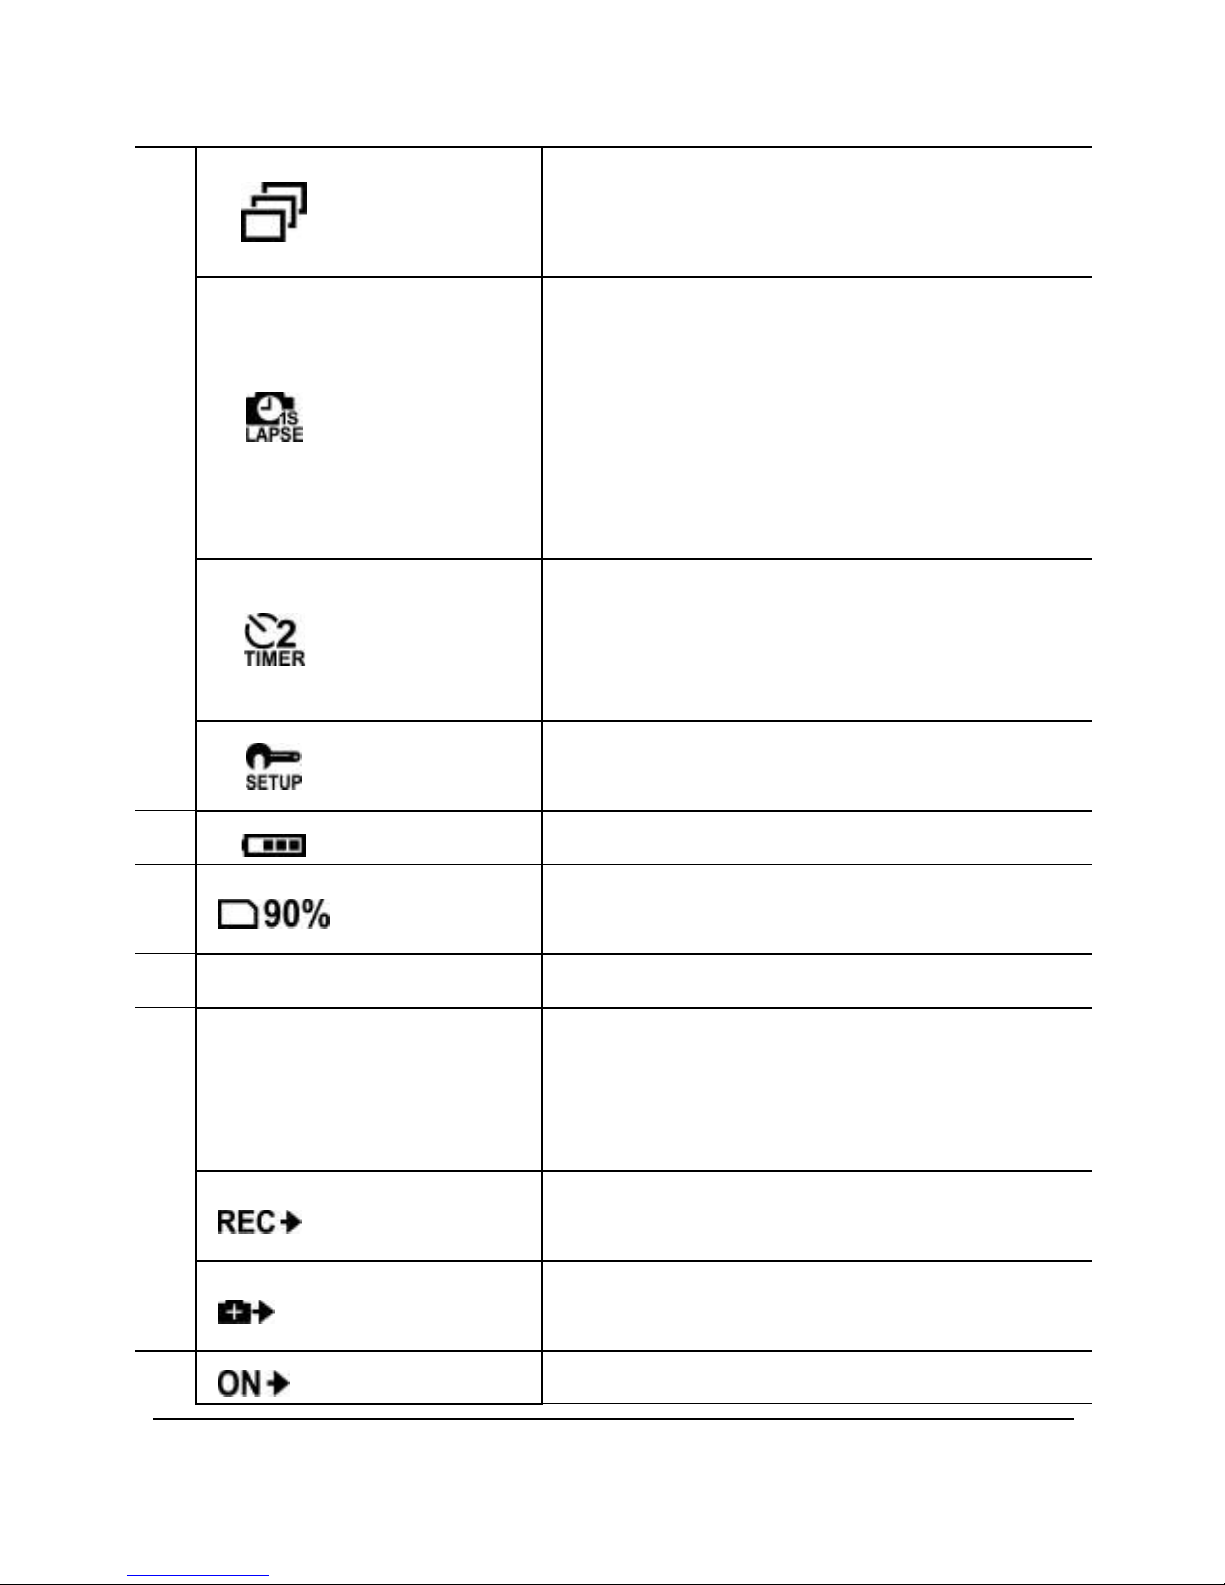
Photo
Mode
Use this mode to capture photos. The
icon also indicates the current
capture settings.
WiFi
Mode
Select to connect the camera to a
smartphone using WiFi connection.
With this feature, videos and photos
recorded from the camera can be
viewed on the smartphone.
13
1
Burst
Mode
Use this mode to capture 10
continuous photos with one press of
the Shutter button.
Time
Lapse
Mode
In this mode, photos are
continuously captured with a specific
interval time when the Shutter
button is pressed. To stop capturing,
press the Shutter button again. The
icon also indicates the current
capture settings.
Self-timer
Mode
In this mode, photos are taken 10 or 2
seconds after pressing the Shutter
button. The icon also indicates the
current capture settings.
Set Mode
Use this mode to adjust the settings
of your
camera.
2
Battery
Indicates the battery capacity.
3
Memory
status
Indicates the memory storage status.
4 Number of Files Indicates the total number of shots.
5
Button Function
Indicates the operation that the
camera will do when the Shutter
button is pressed. The displayed icon
varies depending on the mode.
Record
Press the Shutter button to record
videos.
Capture
Press the Shutter button to capture
photos.
5
On Press the Shutter button to activate

14
Wi-Fi function.
Confirm
Press the Shutter button to enter the
SETUP menu.
15
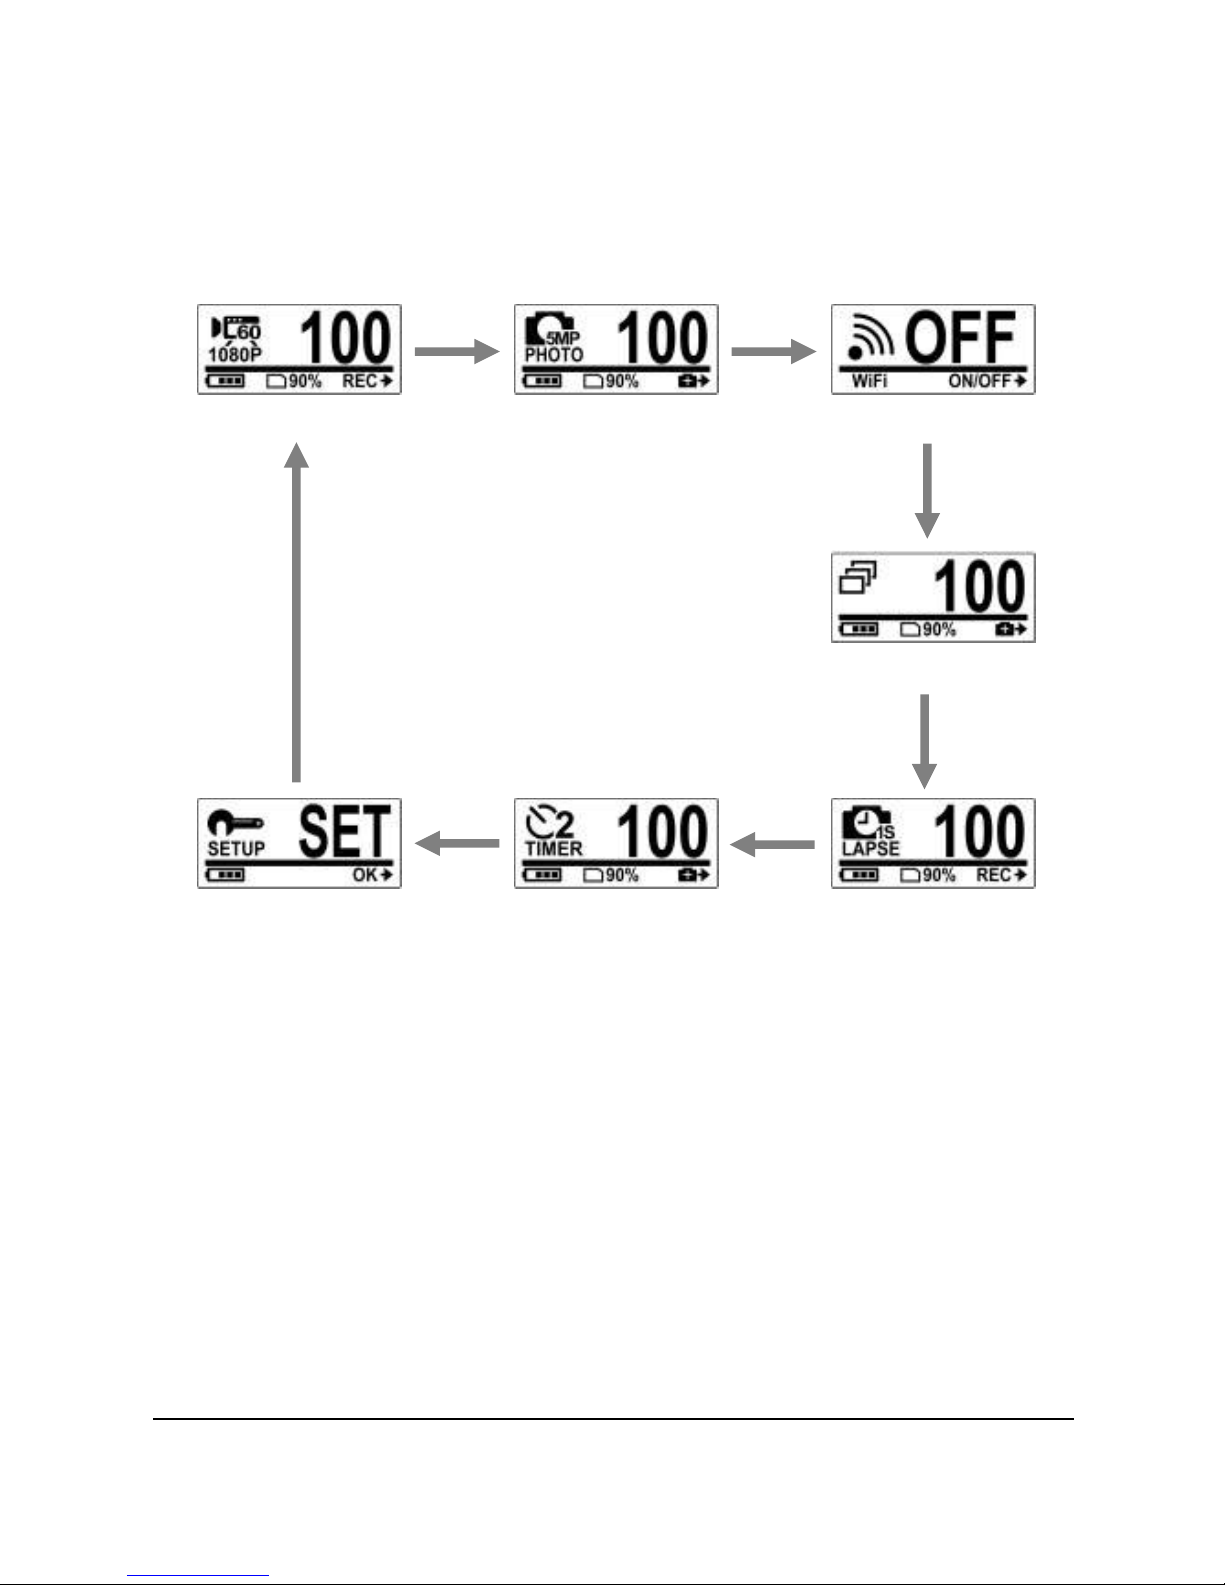
2.6 Changing Modes
Press the Mode button repeatedly to switch modes.
Video Mode Photo Mode WiFi Mode
Setting Mode Self-Timer Mode
Time Lapse Mode
Burst Mode
16
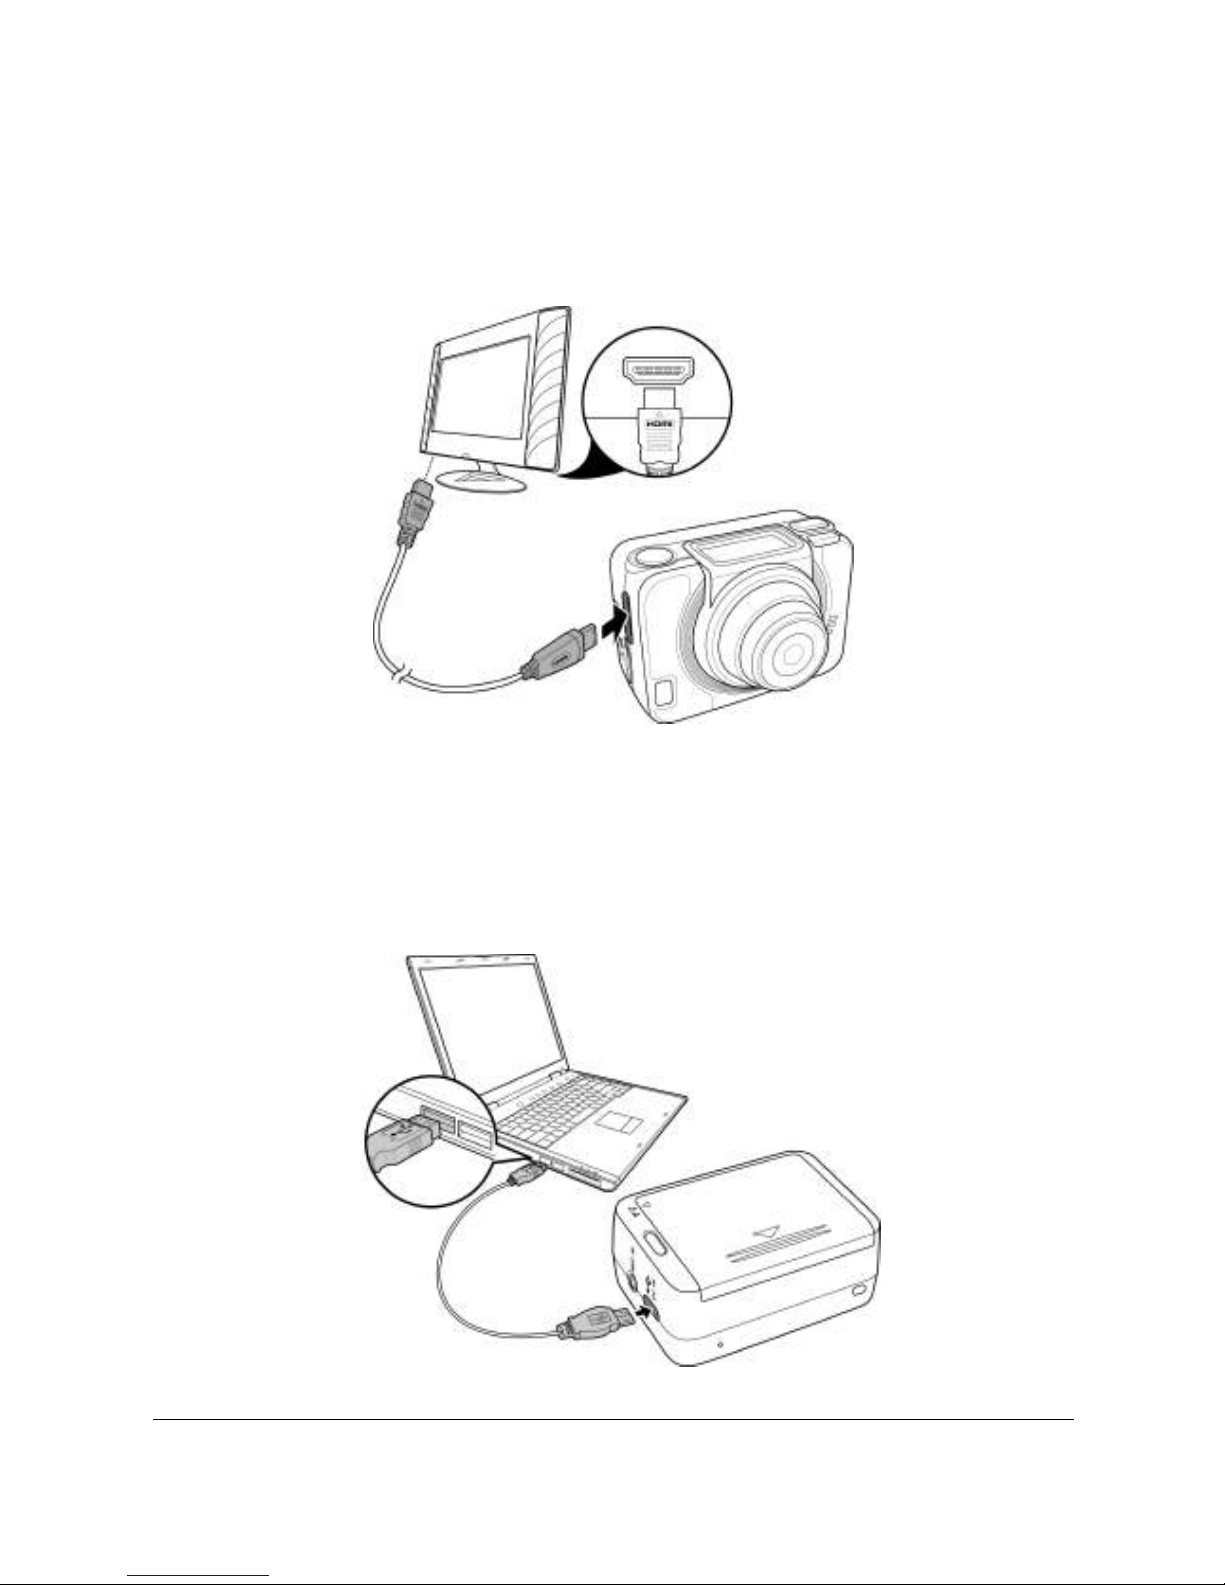
2.7 Connecting to TV (HDMI Cable)
You can also connect the camera to a TV using the HDMI cable
(optional).
2.8 Connecting to PC (Micro USB Cable)
Connect the camera to a computer with the micro USB cable
provided as shown.
17
3 Capturing Videos and Photos
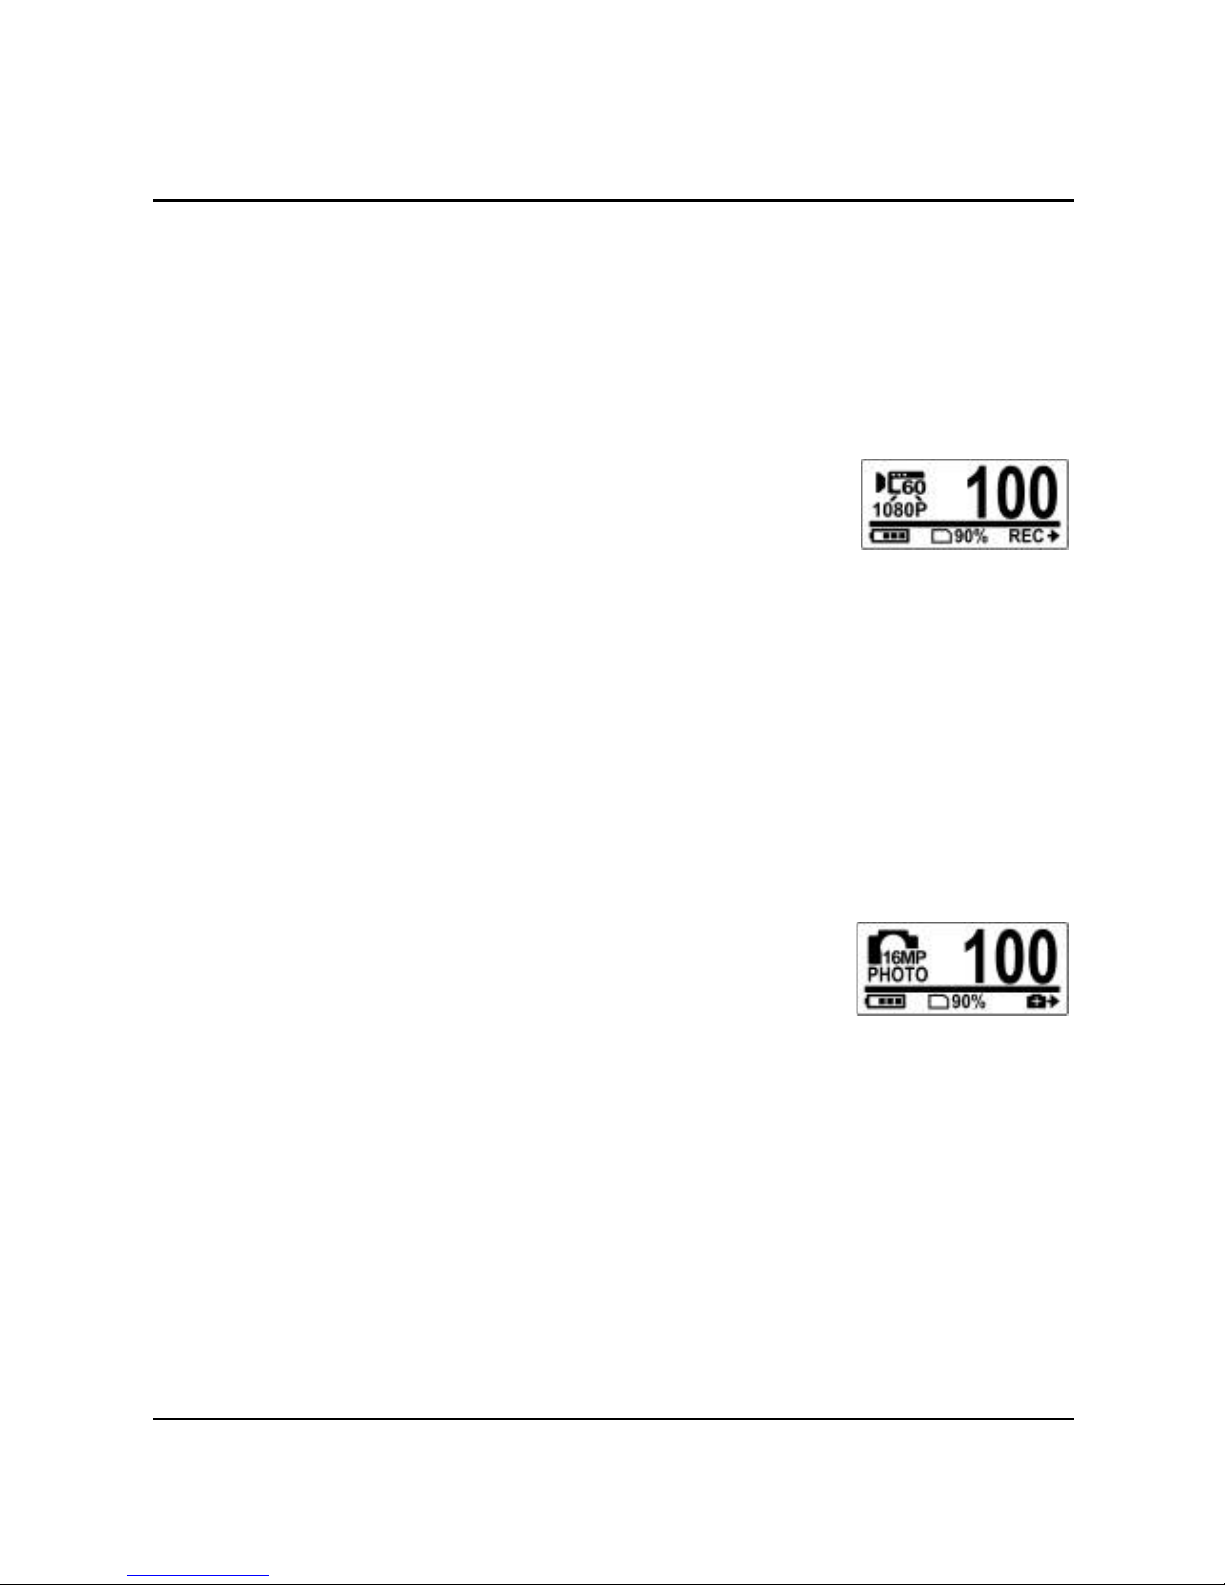
3.1 Recording Videos
Your camera supports Dual Stream recording. When a video is
recorded, two video files of different file size are automatically
saved in the memory card. The smaller file is used to view videos
using a smartphone.
1. Turn on the camera. By default, the
camera automatically opens to Video
mode.
2. Press the Shutter button to start recording.
3. Press the Shutter button to stop recording.
3.2 Taking Photos
1. Turn on the camera.
2. Press the Mode button to switch to
Photo mode.
3. Press the Shutter button to capture a photo.
 Loading...