

Wasp WPL608, WPL610 Quick Start Manual
Media Sensor Calibration
This utility is used to calibrate the sensitivity of
the media sensor. The media sensor should be
calibrated whenever changing the label media
or after printer initialization. Please follow the
steps below to calibrate the media sensor.
Method 1:
1. Make sure the ribbon and label media are
installed properly as described above.
2. Press the
button to enter the
main menu.
3. Press
and buttons to
select the "Setup" option and press
button to enter this option. And
enter the "Sensor"option.
4. When enter this option, the sensor type in
the right side of ">" icon is the current
sensor setting. Press the
and
to select the sensor type, and
press the button to calibrate
the media sensor.
Method 2:
1. Make sure the ribbon and label media are
installed properly as described above.
2. Turn off the printer power.
3. Hold down the
button and
turn on the printer power.
4. Do not release the buttons until printer
LCD shows "Calibrating...".
Printer Initialization
Printer Initialization will restore printer settings
to defaults. Please follow the steps below to
initialize the printer.
Method 1:
1. Press the button to enter the
main menu.
2. Press
and buttons to
select the "Service" option and press
button to enter this option.
3. And press
and buttons
to scroll the cursor to "Initialization"
option and press button to
restore printer settings to defaults.
Method 2:
1. Turn off the printer power.
2. Press and hold
and
button at the same time then
turns on the printer’s power.
3. Do not release the buttons until printer
LCD shows "Initializing...".
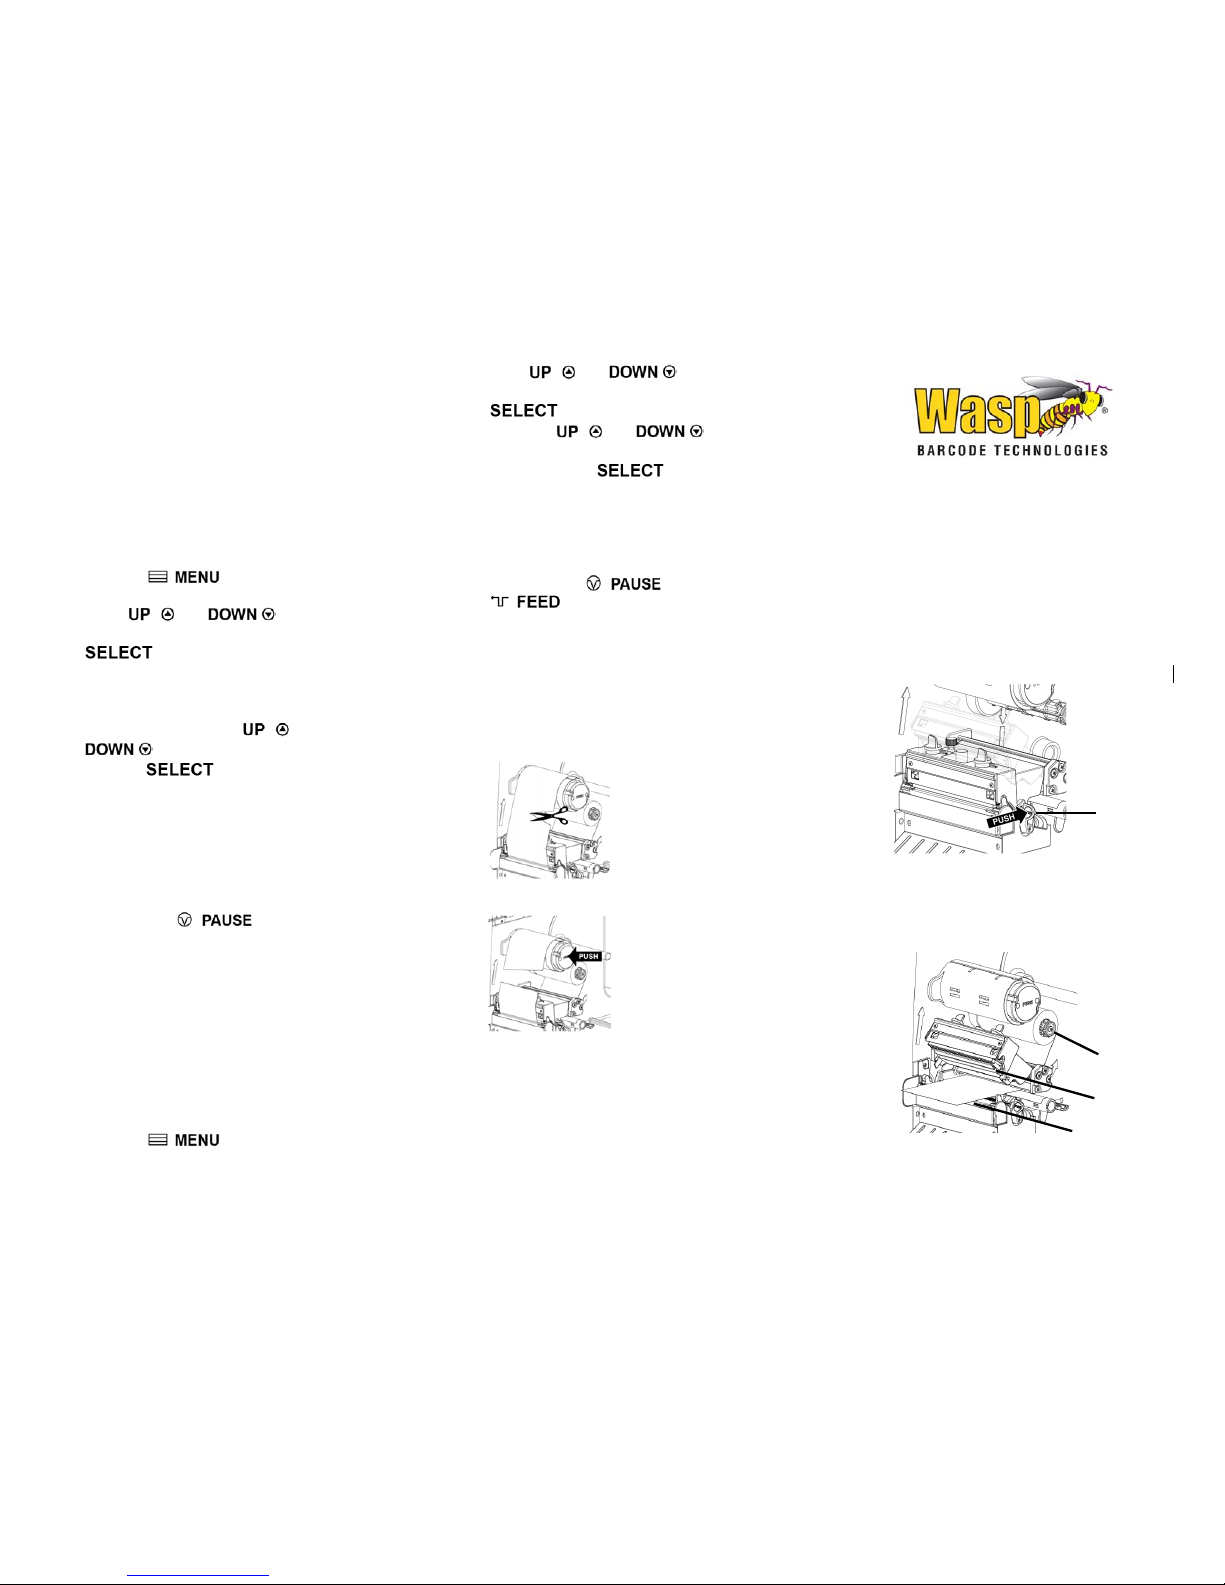
Remove Used Ribbon
1. Break the ribbon between ribbon guide
plate and the ribbon rewind spindle.
2. Push the ribbon release button to release
the ribbon on the ribbon rewind spindle.
3. Then, slide off the ribbon from ribbon
rewind spindle.
© 2008 Wasp Technologies
Wasp 610/608
Quick Start Guide
Loading Ribbon
1. Lift open printer right side cover. Push the
print head release lever to open the print
head mechanism.
2. Install the ribbon onto the ribbon supply
spindle. Thread the ribbon through the ribbon
sensor slot and then through the open space
in between print head and platen.
Print head
release lever
Ribbon Supply
Spindle
Print head
Platen
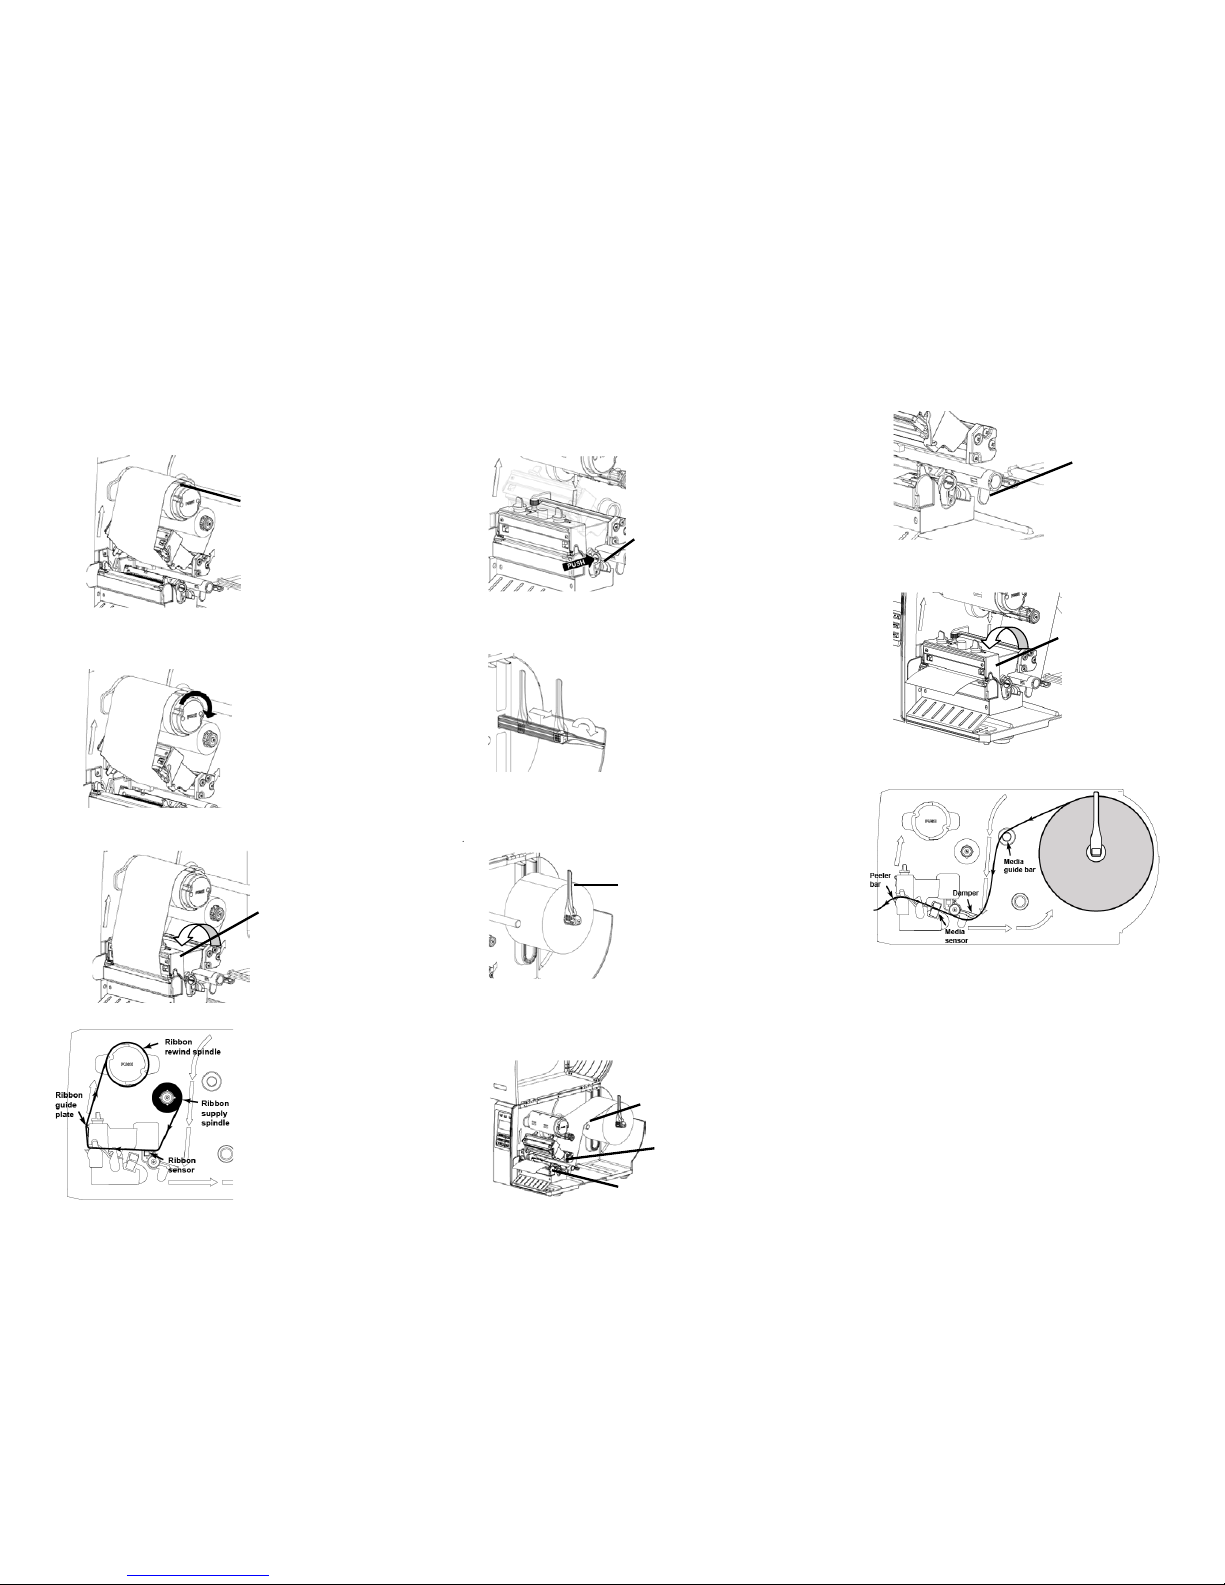
3. Wrap the ribbon onto the ribbon rewind
spindle. Keeping the ribbon flat and without
wrinkles.
4. Wind the ribbon clockwise about 3~5
rotations onto the ribbon rewind spindle until it
is smooth and properly stretched.
5. Close the print head mechanism making sure
the latches are engaged properly.
Loading path for ribbon
Loading Media
1. Lift open printer right side cover. Push the
print head release lever to open the print
head mechanism.
2. Move the label roll guard horizontally to the
end of label spindle then flip down the label
roll guard.
3. Place the roll of media on the label supply
spindle. Flip up the label roll guard. Move the
label roll guard horizontally to gently fit the
width of label roll.
4. Pull label roll leading edge forward through
the media guide bar, damper, media sensor
and place the label
leading edge onto the
platen roller.
5. Adjust the label guide to fit the width of the
label.
6. Close the print head mechanism making
sure the latches are engaged properly.
Loading path for media
7. Using the front display panel, set the
media sensor type and calibrate the
selected sensor.
Note: Please calibrate the gap/black mark
sensor when changing media.
Ribbon rewind
spindle
Print head
mechanism
Print head
release lever
Flip up label roll
guard.
Platen roller
Media guide bar
Media sensor
Print head
mechanism
Label guide
 Loading...