

Page 1
2. Change label stock.
3. Printer initialization.
To do this: Turn off the printer.
Press and hold the Feed button while
turning the power back on. Release the
button when LED becomes red and blinks
2 times.
7. Reset the Printer
This should be done if the printer is not
calibrating the label correctly.
Press and hold the Feed button while
turning the power back on. The LED color
will change in the following order: Amber
Æ red (5 blinks) Æ amber (5 blinks) Æ
green (5 blinks) Æ green/amber (5 blinks)
Æ red/amber (5 blinks) Æ solid green.
Note: Please select gap or black mark
sensor using the GAP or BLINE
command prior to calibrating the
sensor. This can be done in the print
driver.
8. Software
The printer is now ready to print labels.
Labels can be printed from Microsoft Word or
from label printing software. Wasp has
created a full-featured label printing software
program called Labeler that is optimized to
print labels with the WPL205 printer.
9. Documentation
Several documents are included on the CD.
The user guide for the printer includes more
detailed setup instructions and a troubleshooting guide.
#
000000
WPL205
Thermal Printer
Quick Start
Guide
© 2007 Wasp Technologies
Page 2
Steps for setting up the
WPL205
1. Unpack
Remove the WPL205 from the box and
place it on a stable, flat surface. Remove
all tape and padding. Within the plastic
bags containing parts for the printer you
will have:
• printer unit
• Windows labeling
software/driver CD disk
• sample label roll
• label spindle (1 inch
diameter core)
• 2 label spindle fixed tabs
• 2 1.5” core adapter
• Centronics interface cable
• auto switching power supply
• power cord
2. Connect to Your Computer
Make sure the power switch is off.
Connect the printer to the computer with
the Centronics or USB cable.
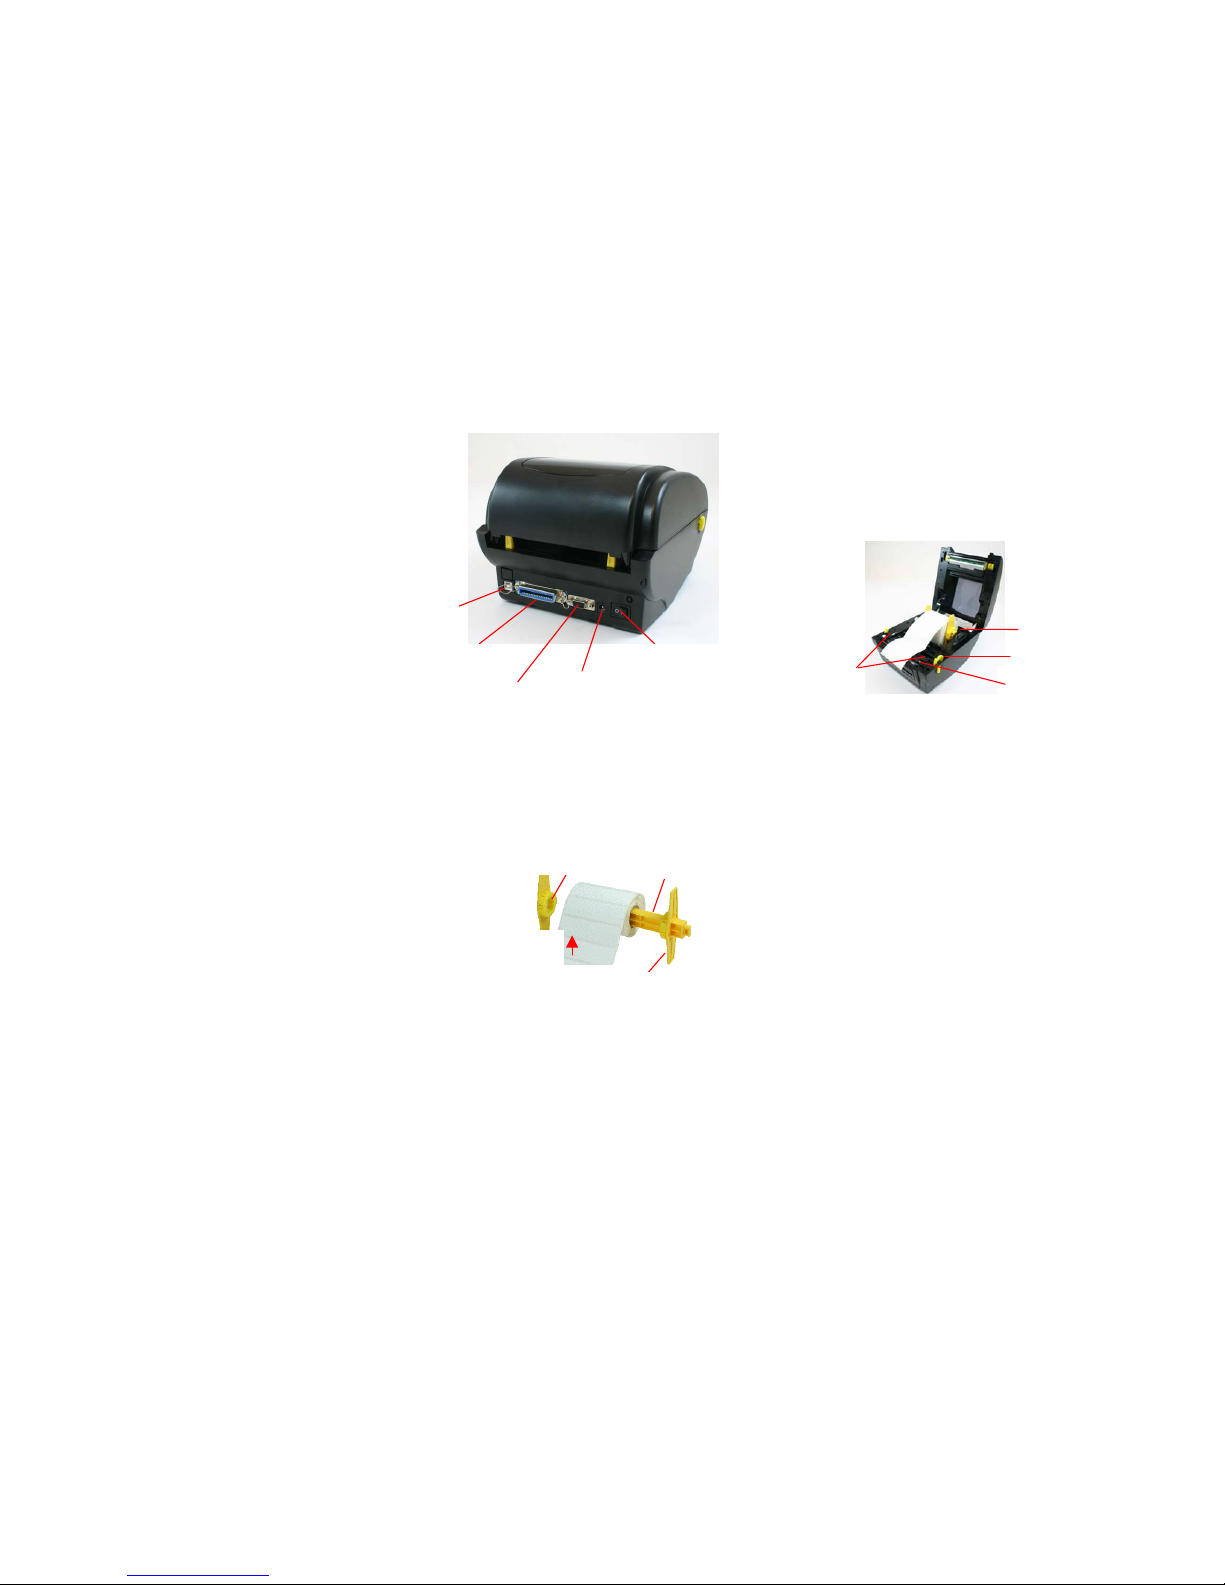
3. Connect the Power
Plug the DC power cord into the power jack
at the rear of the printer, and then plug the
AC power cord into a properly grounded
receptacle.
4. Load Labels
1. Insert the 1” label spindle into the label
roll. If your paper core is 1 inch, you can
remove the 1.5” core adapters from the
fixed tab. If the label width is 4 inches
wide, the two fixing tabs are not required.
Center the labels on the Spindle.
Open the printer’s top cover by releasing
the yellow top cover open levers located
on both sides of the printer and lifting the
top cover.
Place a roll of paper into the internal paper
roll mount.
Feed the paper, printing side face up,
through the label guides and place the
label over the platen.
Adjust the black center-biased label
guides in or out by turning the adjustment
knob so they are slightly touch the edges
of the label backing.
Close the printer top cover slowly and
make sure the cover locks securely.
Note: Failure to securely close and lock
the cover will result in poor print
quality.
5. Install Drivers
Turn the printer on and wait for the LED to
turn green. Put the Driver CD into your CD
ROM drive. The driver install program should
run automatically but if it does not, run
PrnInst.exe on the root of the CD.
Follow the prompts to install the drivers and
set up the printer.
6. Calibrate the Printer
Gap/black mark sensor sensitivity should
be calibrated at the following conditions:
1. A brand new printer.
Label Roll Mount
Platen
Adjustment Knob
Label
USB
RS-232 Connector
Centronics
Power Jack
On/Off Switch
1” Label Spindle
1.5” Core Adapte
r
Printing Side
Face Up
Centering Tab
 Loading...