

Page 1
Point-of-Sale Hardware Quickstart Setup Guide
Point-of-Sale Hardware Parts List
Hardware
1. Pole Display
2. Receipt Printer, Parallel
3. Cash Drawer
4. Cash Drawer Shoe
5. Keyboard
6. CCD LR Bar Code Scanner
7. Scanner Autosense Stand
Cables
1. Pole Display Power Cord
2. Pole Display DB9 Communications Cable
3. Receipt Printer Parallel Cable
4. Receipt Printer Power Supply w/ Power Cord
5. Cash Drawer Communications Cable
(Cable is hardwired to Cash Drawer)
6. Keyboard Communications Cable
(Cable is hardwired to Keyboard)
7. CCD LR Scanner Cable (PS2 Y Cable)
1
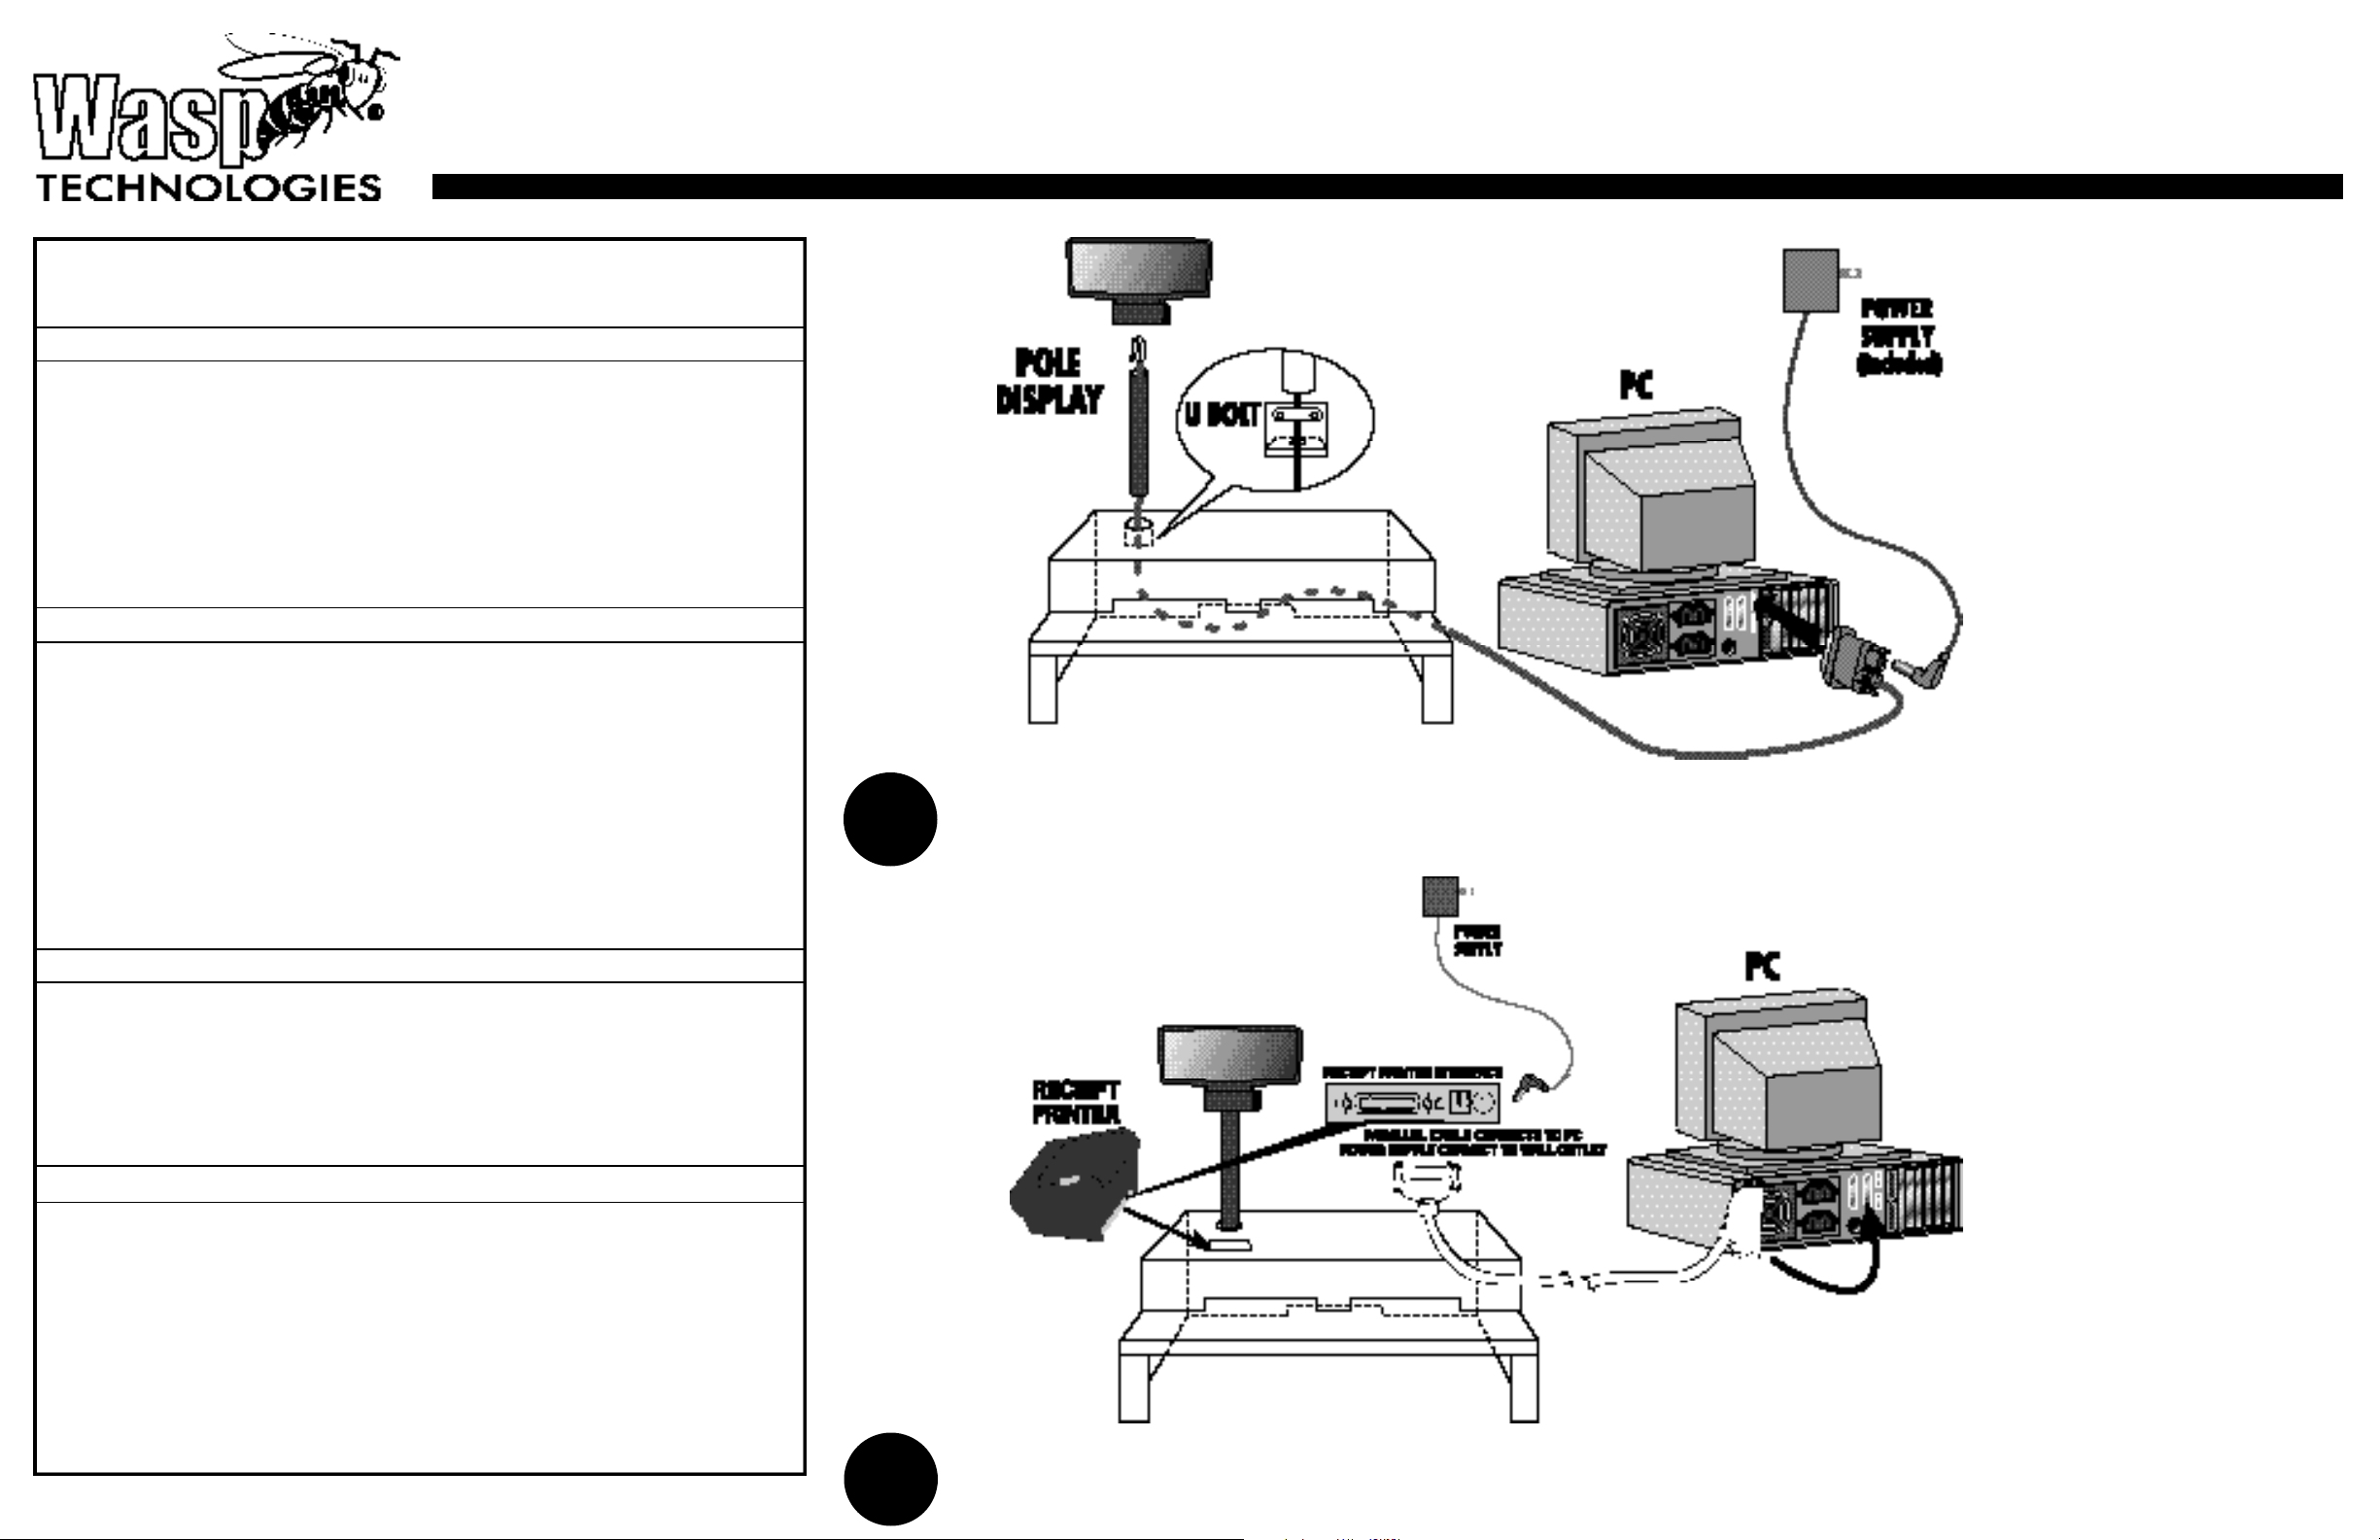
Thread Pole Display Cable through Cash Drawer Shoe, through Pole Display Pole, and connect to the Display Head. Connect Pole to
Display Head, and tighten U-Bolt within Shoe around Pole Display Pole to secure.Thread other end of Pole Display Cable through
back slot of Cash Drawer Shoe, and connect to your PC. Power Supply connects as shown, and plugs in standard wall outlet.
Documentation
1. Quick Start
2. Pole Display User’s Manual
3. Receipt Printer User’s Manual
4. CCD LR User’s Manual
5. Keyboard Utility CD
Software
1. Only included in software bundles
Wasp Technologies
1400 10th Street
Plano,Texas 75074
214-547-4100
Fax: 214-547-4101
www.waspbarcode.com
2
Thread both Parallel Cable and Power Supply Cable up through rectangular slot on top of Cash Drawer Shoe (in front of Pole Display)
and connect to back of Receipt Printer. Thread other ends of Parallel Cable and Power Supply out through back slot of Cash Drawer
Shoe. Connect Parallel Cable to Parallel Port on back of your PC, and plug Power Supply into standard wall outlet.
Page 2
Point-of-Sale Hardware Quickstart Setup Guide
3
5
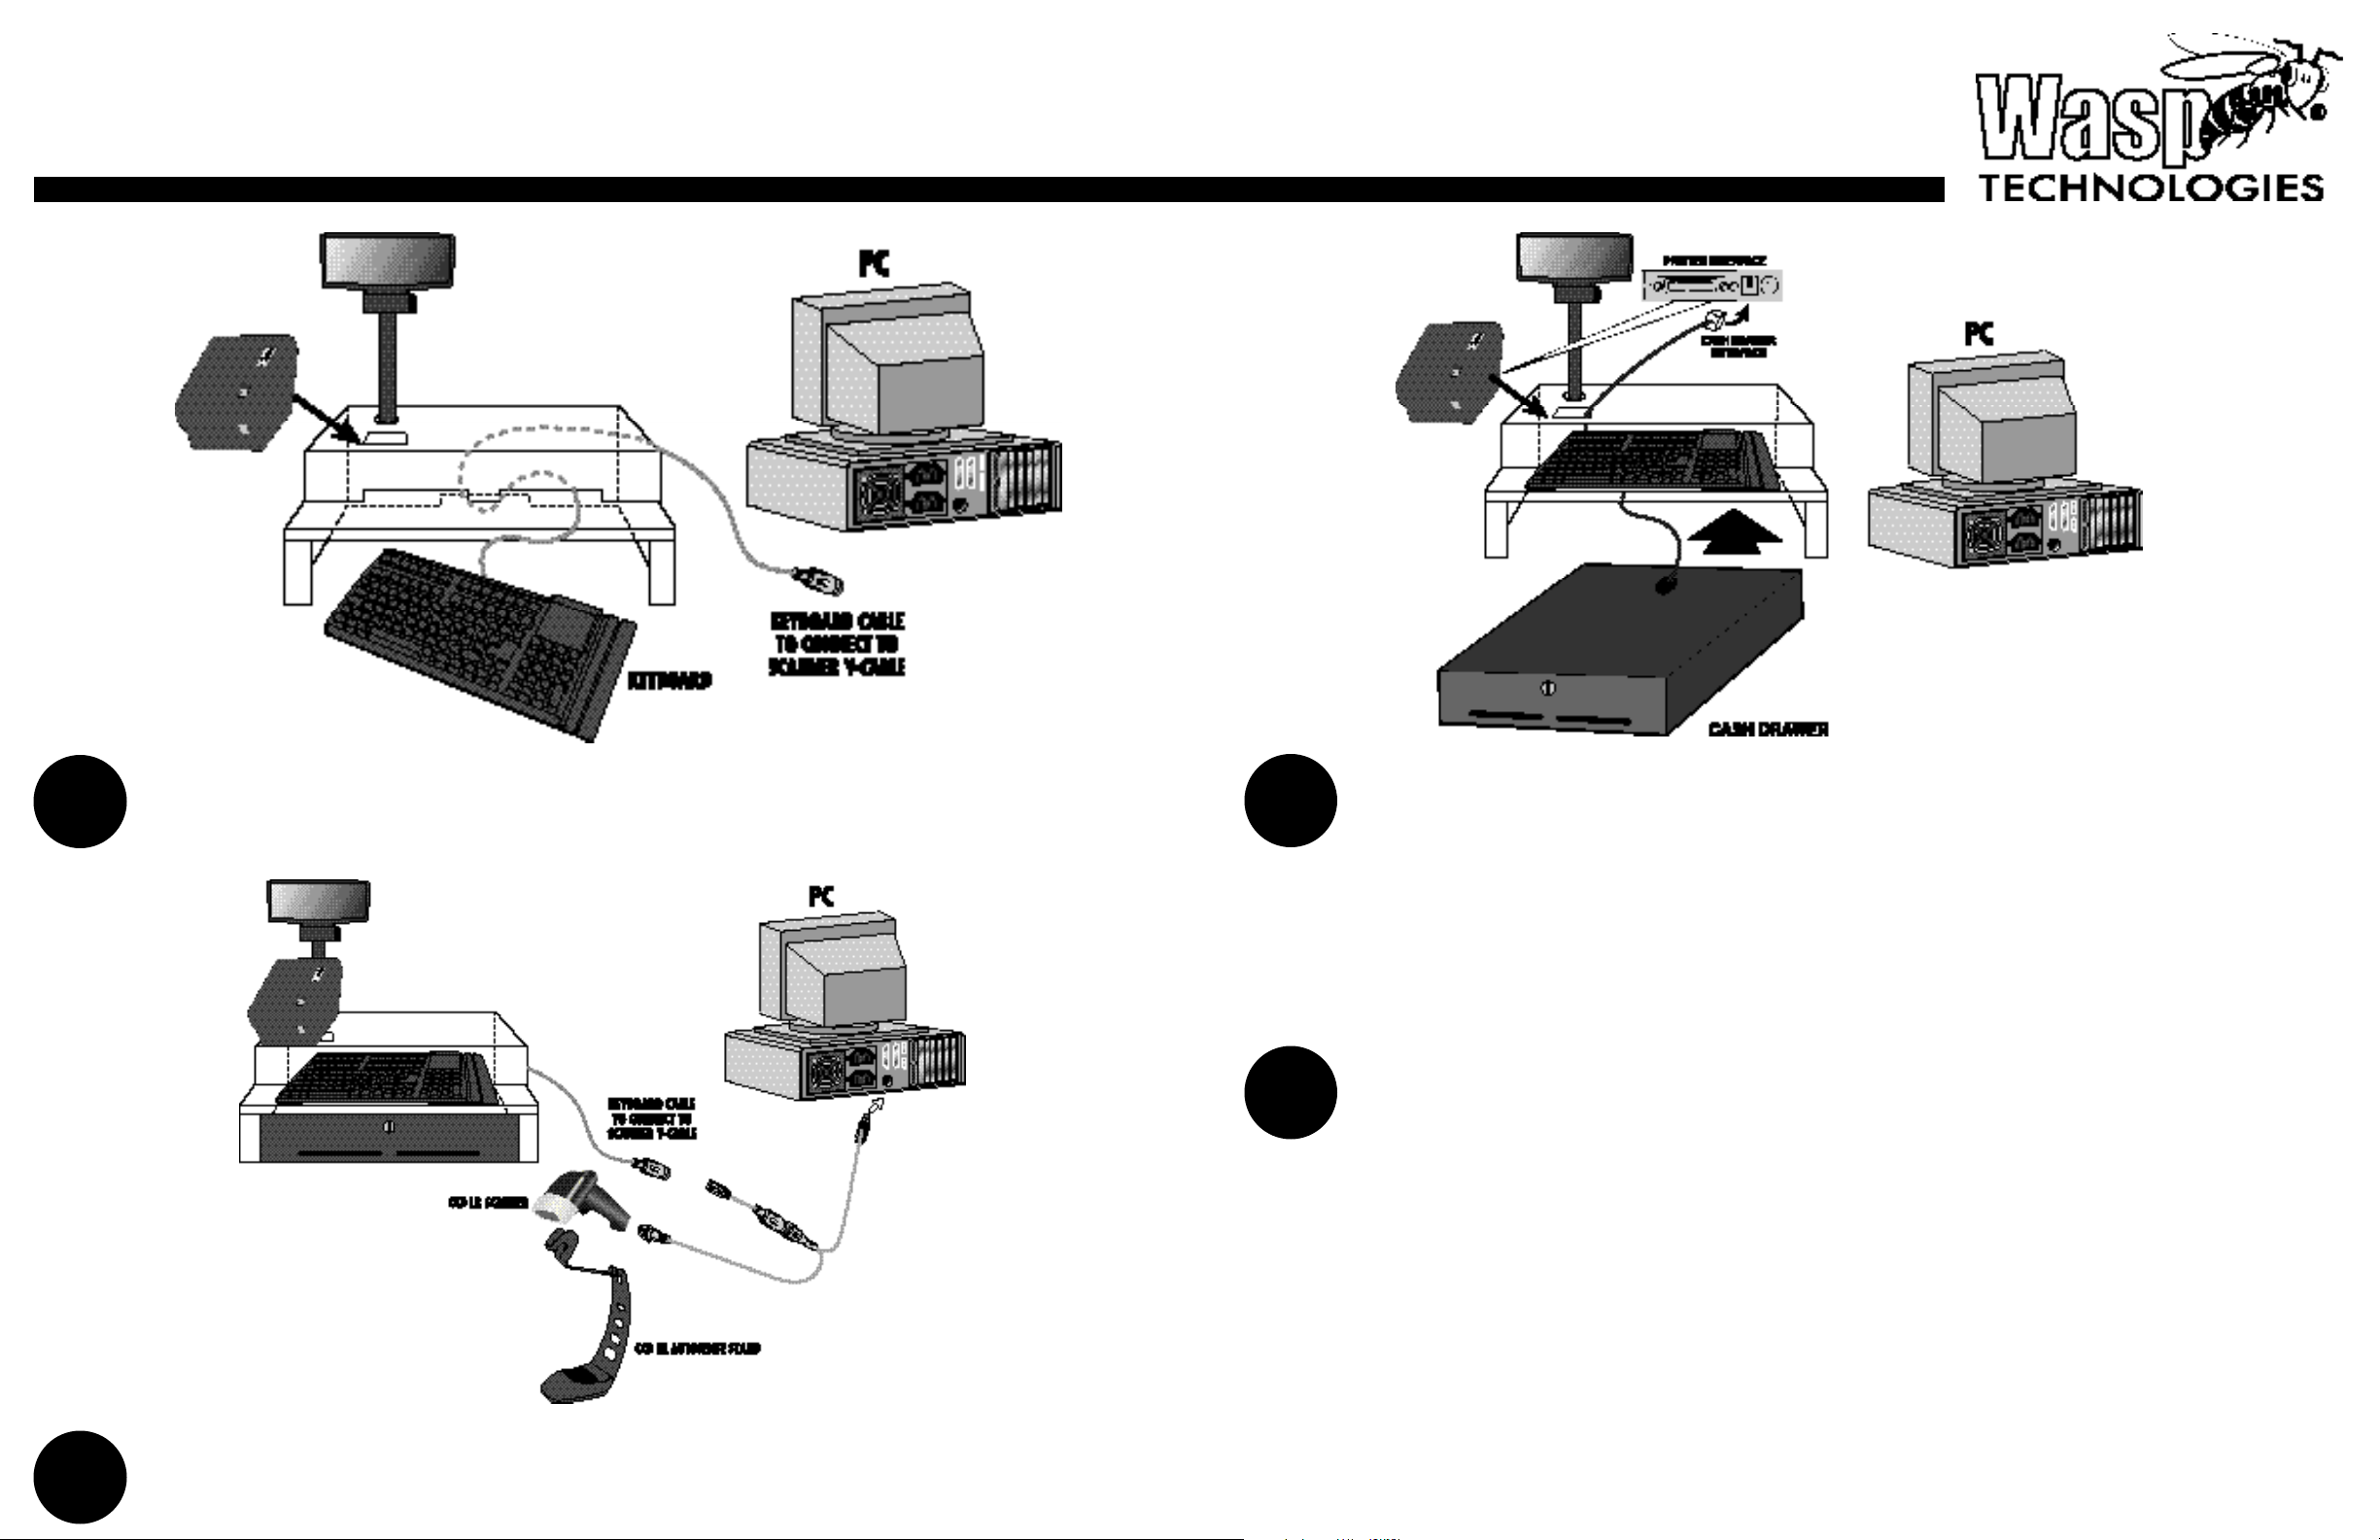
Thread Keyboard Cable through right front slot of Cash Drawer Shoe and out through back slot of
Cash Drawer Shoe. Place Keyboard on lower “shelf.”
Connect Scanner Y-Cable in appropriate slot in the handle of CCD LR Scanner, and place Scanner
in the CCD LR Autosense Stand. Connect other end of the Scanner Y-Cable to the Keyboard Cable
(see diagram 3), and then connect female end of Y-Cable to the keyboard port of your PC.
4
6
Thread Cash Drawer Cable up through rectangular slot on top of Cash Drawer Shoe and connect
to the back of the Receipt Printer, as shown in illustration. Slide Cash Drawer under Cash Drawer
Shoe, and align front of drawer with front of Cash Drawer Shoe
Please reference pages 6-7 of your Receipt Printer Manual for proper loading of receipt paper
into the Receipt Printer, and also please refer to page 6 in the CCD LR Scanner Manual to pro-
gram the Autosense Mode for hands-free scanning using the Autosense stand.
.
Wasp Technologies
1400 10th Street
Plano, Texas 75074
214-547-4100
Fax: 214-547-4101
www.waspbarcode.com
 Loading...