

Page 1
Wasp HC1
Page 2

Page 3

1
Rev. 4/12/2012
Wasp HC1 Quick Start Guide
This Q uick Start Guide takes you through the basic steps to get your Wasp HC1 up and running. For
detai led instructions on the any of the topics c overed in this Q uick Start Guide, and for informati on on
scanning setup barcodes, changing symbologies, power-savin g options, scan m odes, etc., please
refer t o the Was p HC1 Users Manual.
In this Quick Start Guide:
Product Introduction and Accessory Kit ............................................................................ 2
Front and Right View ........................................................................................................... 3
Rear and Left View .............................................................................................................. 4
Turning on the HC1 for the First Time ................................................................................ 4
Installing the Battery ........................................................................................................... 5
Charging the Battery ........................................................................................................... 6
Using the MicroSD Memory Card ....................................................................................... 6
Using the SIM Card ............................................................................................................. 7
Keypads and Function Buttons .......................................................................................... 8
Using Func ti on Keys ........................................................................................................... 9
Page 4
2
Updated 4/12/2012
Wasp HC1 QuickStart Guide
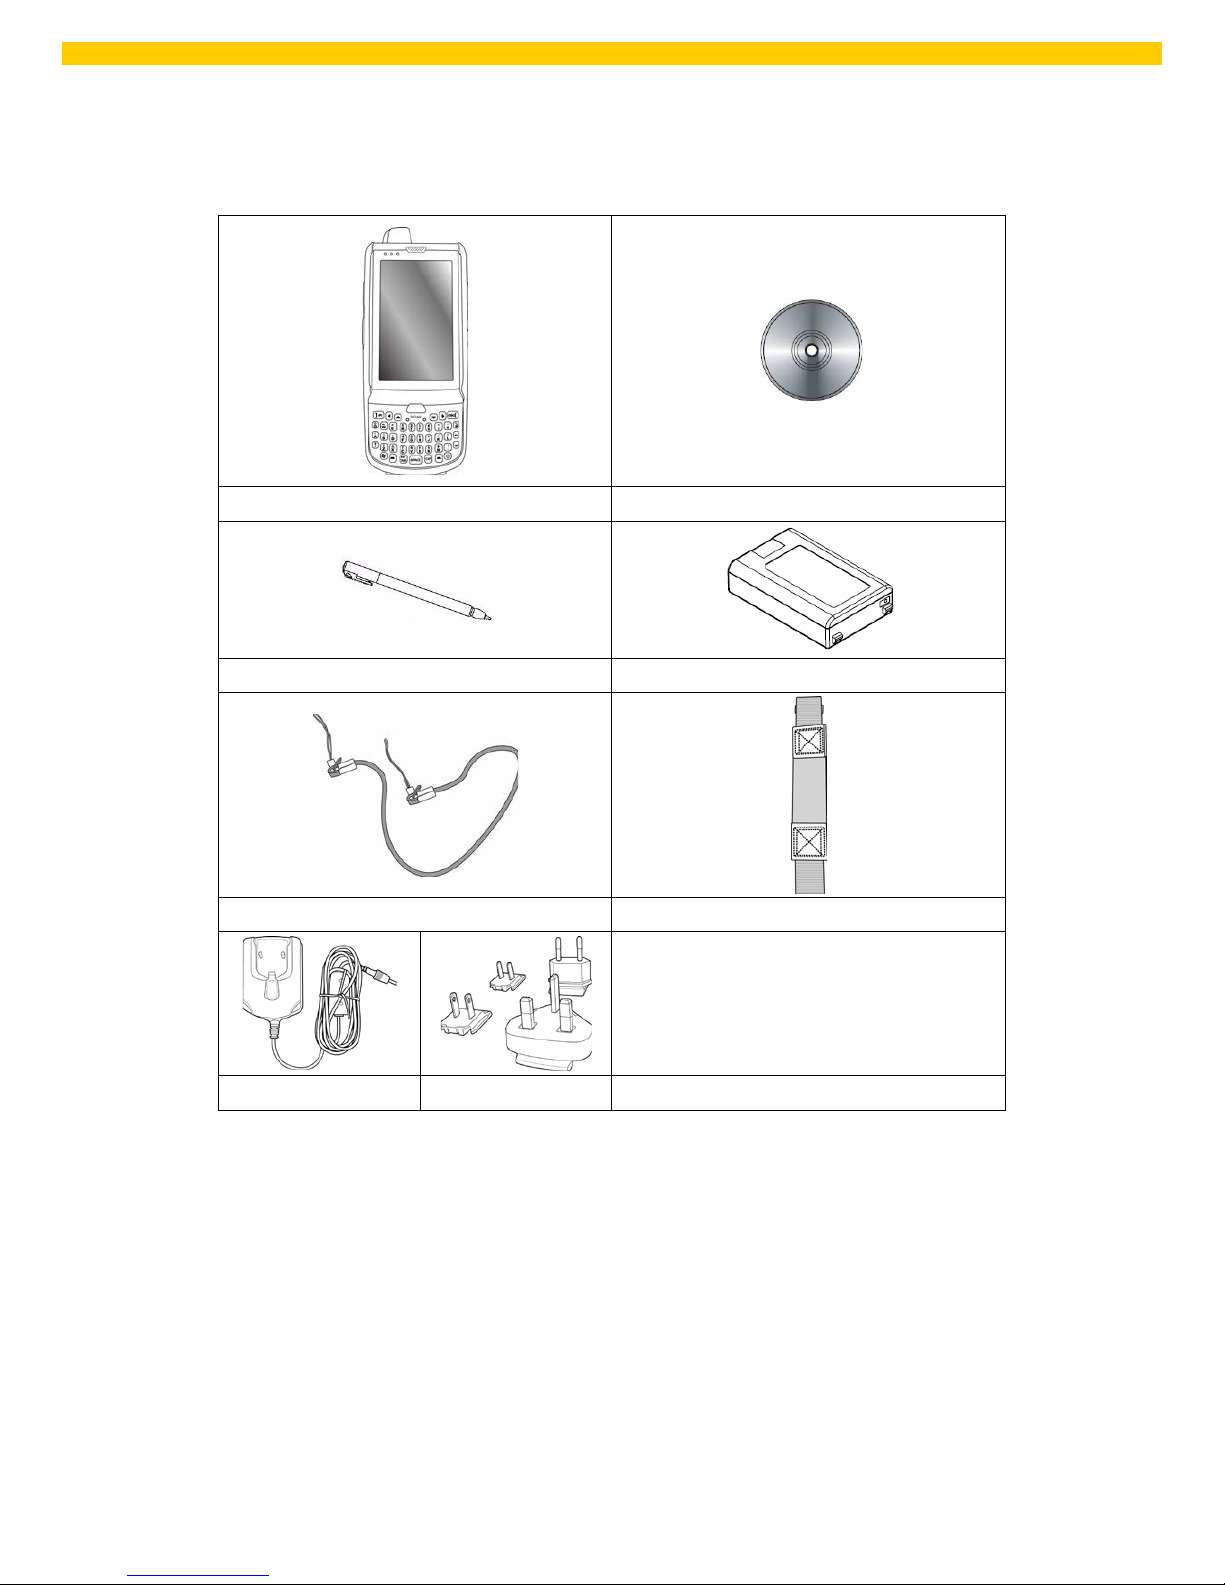
Product Introduction and Accessory Kit
HC1 Terminal Manu al CD
Stylus Battery
Elastic Stylus String Hand Strap
Power Adaptor Plugs
Page 5

3
Rev. 4/12/2012
Wasp HC1 Quick Start Guide
Front and Right View
1
LED indicators
7
Power button
2
LCD tou ch screen
8
Universal connec tor
3A
Microphone
9
Scanner trigger button
3B
Reset button
4
Receiver
10
Mut e / vibration button
5
Scan but t o n
11
Camera button
6
Keypad
12
Memory card slot
4 1 2
3A
5 6 7
9
10
11
12
8
3B
Page 6

4
Rev. 4/12/2012
Wasp HC1 QuickStart Guide
Rear and Left View
1
Barcod e scanner window
7
Speaker
2
Headphone jack
8
5M/AF camera
3
Microphone
9
LED flash light
4
Battery compartment
10
Battery compartment tab
5
Antenna
11
Scanner trigger button
6
Stylus
12
Volume up/down
Turning on the HC1 for the First Time
After you have initi ally charged your device for about 16 hours, the device i s ready to be used. You can
now start up your device. You can then calibrate th e display, learn some bas i c s tylus usage, and set up
the system time z one, date and ti me.
Power-On Button
1
2
3
4
5
6
7
8
9
10
11
12
Page 7

5
Rev. 4/12/2012
Wasp HC1 Quick Start Guide
Turn ON your device by pressing the power button on the front panel.
Installing the Battery
1. Open the bat tery com partment cover by
sliding the tabs on both sides in the
direction of the arrows shown and lift the
cover up.
2. Push up the backup batte
ry switch to the
“ON position by using a st ylus t o turn on
the backup battery.
3. Slide and position the battery pack,
maki ng sure the b attery contacts are
aligned with the contacts in the
compartment.
4. Use your thumb to snap the bat tery down
for it to be in p l ace.
5. Replace the battery compartment c over
by pushing down on the tabs and sliding
them back in to place as shown.
NOTE: M ake sur e the battery compartment cover is securely c l osed, or you may be unable to turn ON
the terminal.
Battery
Compartment
Tab
Backup
Battery
Switch
Battery
Compartment
Contacts
Page 8

6
Rev. 4/12/2012
Wasp HC1 QuickStart Guide
Charging the Battery
CAUTION: Turn ON the backup bat tery switch before ch ar gin g the batter y. Data you entered may not
be properly stored until the built-in backup battery has been adequately charged.
1. Press and hol d the rel ease button on both sid es of the USB charging cable and connect it to the
HC1 (1).
2. Plug the AC adap ter cable into the p ower jack of the USB char ging cable (2).
3. Plug the AC adap ter cord into an elect r i cal outlet (3).
Using the MicroSD Memory Card
1. Remove the two scre ws on the MicroSD
slot shield an d r emove the shield.
2. Insert th e MicroSD card with the notch ed corner as
shown.
3. Push the card into the s l ot until you feel t he Micr oSD card
click into p lace.
4. Screw the Micr oSD compartment cover back in to place.
Page 9

7
Rev. 4/12/2012
Wasp HC1 Quick Start Guide
Using the SIM Card
The HC1 has a slot for a GP R S SIM card inside th e battery compartment.
CAUTION: Before i nst al ling the SIM card, please b ackup your data to pr event d ata loss because of a
low back up ba tt e r y.
1. Remove the battery compartment cover and the main battery.
2. Slide the cover of the SIM card slot to the right to releas e the
latch.
3. Pull open the cover with thumb.
4. Inser t the SIM card into the cover wit h the not ched corner up,
the contact side of the SIM card facin g down.
5. Close the cover over the slot, and then slide the cover to the
left to lock the SIM car d.
6. Put the bat tery back into the b attery compartment and replace t he battery compartment cover.
Page 10

8
Rev. 4/12/2012
Wasp HC1 QuickStart Guide
Keypads and Function Butt ons
Numeric Keypad Qwerty Keypad
Key Description Key Description
Power key
Esc ape key
Enter key
Backspace key
Tab key
Function key
Alpha key, toggl e between
numeric and alphabet i c entry
modes
Windows key
~
Alphanumeric keys
Hang-off ke y
Answer key
Left c ursor key
Right cursor key
Up cursor key
Down cursor key
When the HC1 turns on, the numeric mode is on by default. When you toggle to alpha mode, the CAPS
mode is off by d efault. Us e the Alpha key to toggle to CAPS.
Page 11

9
Rev. 4/12/2012
Wasp HC1 Quick Start Guide
Using Function Keys
For Qwerty Keypad
Key Description Key Description
+
Keypad backlight toggling
+
Screen bac klight toggling
+
Decrease screen backlight
brightness
+
Increase s creen backli ght
brightness
+
Softk ey 2
+
Softk ey 1
+
END T ALK
+
TALK
+
Scanner s etting
+
Task manager exec ution
+
Device i nformati on
+
Power management
For Numeric Keypa d
Key Description Key Description
+
Calibration
+
Screen bac klight toggling
+
Keypad backlight
toggling
+
Power management
+
Device i nformati on
+
Softk ey 1
+
Softk ey 2
+
Decrease screen backlight
brightness
+
Increase screen
backlight brightness
+
TALK
+
END T ALK
+
Task manager exec ution
+
Scanner s etting
Page 12

10
Rev. 4/12/2012
Wasp HC1 QuickStart Guide
Using Alpha Keys
Key
Alpha Off
Alpha On
CAPS Off
CAPS On
0 Space, @, $, “, 0 Space, @, $, “, 0
1 +, -, \, %, 1 +, -, \, %, 1
2 a, b, c, 2 A, B, C, 2
3 d, e, f, 3 D, E, F, 3
4 g, h, i, 4 G, H, I, 4
5 j, k, l, 5 J, K, L, 5
6 m, n, o, 6 M, N, O, 6
7 p, q, r, 7 P, Q, R, 7
8 t, u, v, 8 T, U, V, 8
9 w, x, y, z, 9 W, X, Y, Z, 9
# , ; ! . /
, ; ! . /
 Loading...