

Page 1

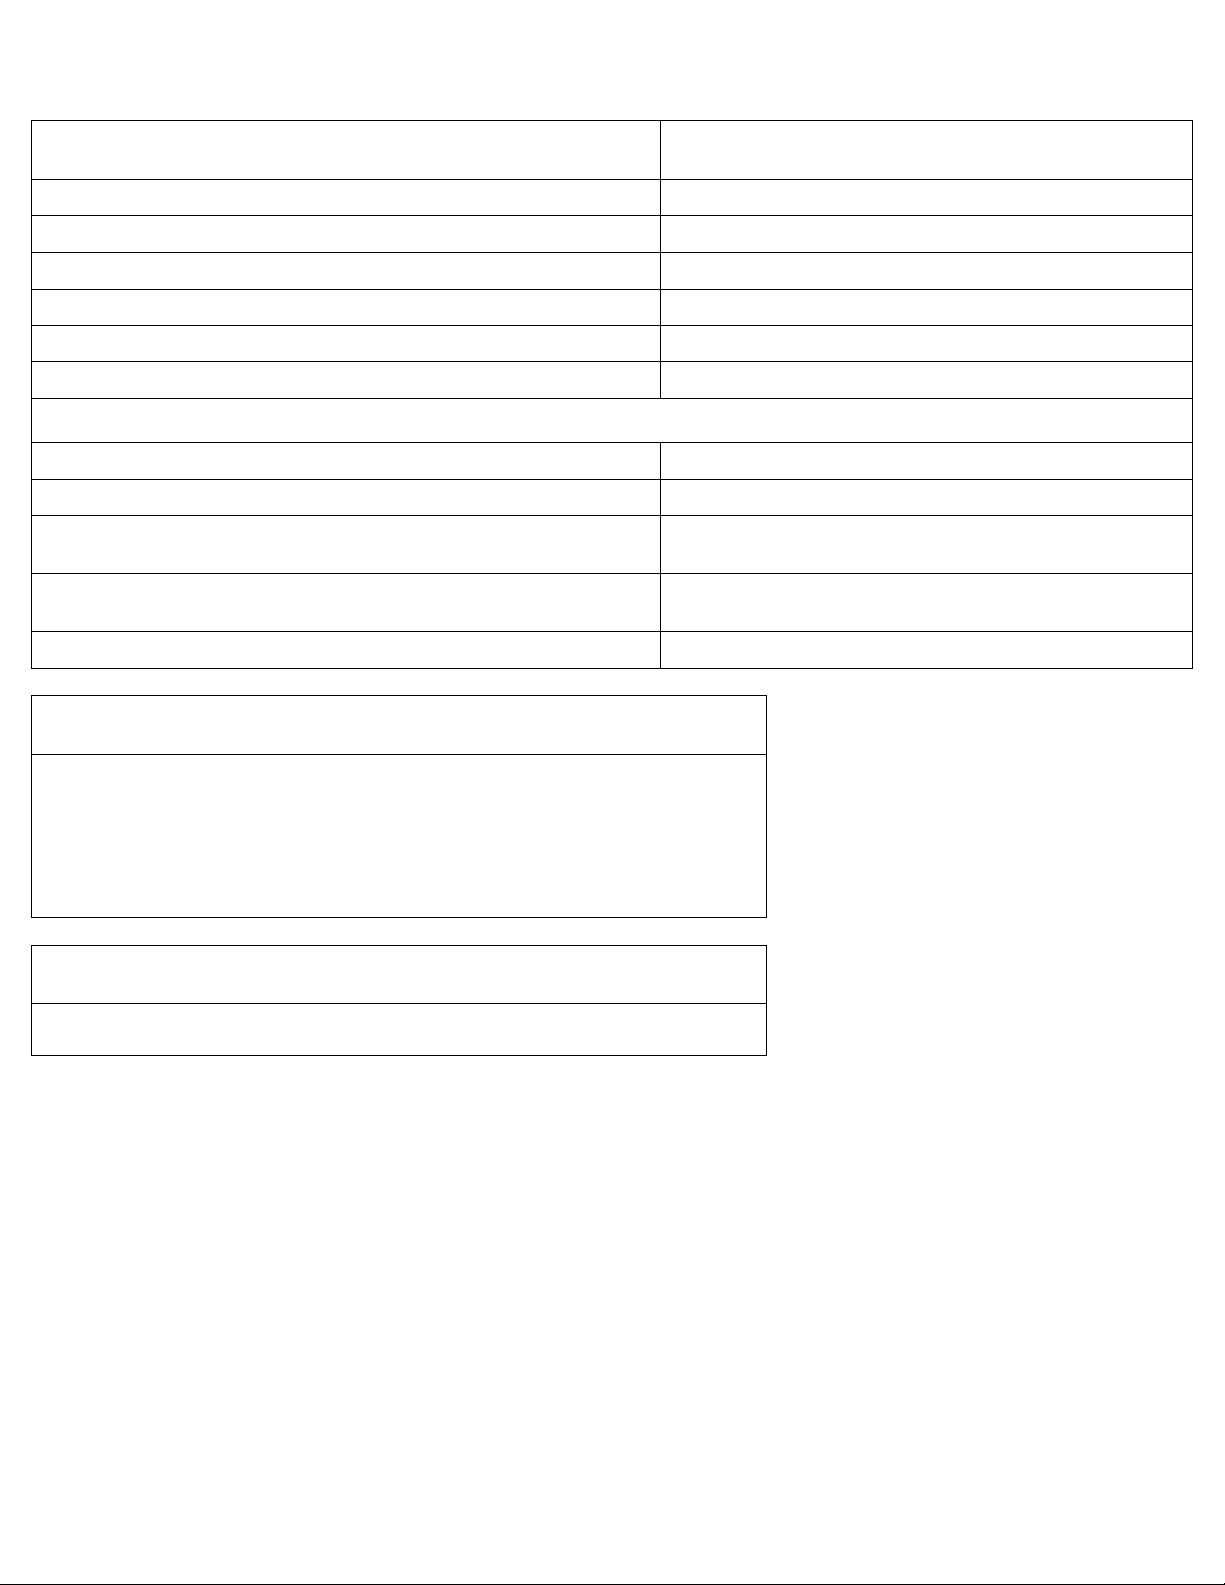
Switch State
Function
Notes
SW 1 Off
SW 2 Off
User Programmed Layer
Default is “QWERTY”
SW 1 On
SW 2 Off
QWERTY Mode (nonprogrammable)
Standard QWERTY Layout
User cannot program the 1 – 4 layers
SW 1 On
SW 2 On
Mac Mode
QWERTY Layout, programmable
Reverses Alt and OS Key Positions
SW3 Off
Scroll Lock LED = Current Layer LED
SW3 On
Scroll Lock LED = Scroll Lock LED
SW4 Off / On
Factory Reset
This action will revert all keyboard settings back to factory defaults. Unplug keyboard
and set SW4 on. Plug in keyboard. All indicator LED’s will flash red for 20 seconds and
then turn solid green which means factory reset is complete.
SW5 Off
Fn Key Enabled
When Fn Key is enabled, you can access the built in multimedia and lighting control
keys.
Default position of the Fn Key is the Menu Key.
SW5 On
Fn Key Disabled
SW6 Off
Pgm Key Disabled
Enable the Pgm Key to access the keyboard’s programming functions.
Default position of the Pgm Key is the right Ctrl Key.
SW6 On
Pgm Key Enabled
V3 / V3B User Manual Version 0.14 Firmware
The V3 keyboard features a DIP switch on the backside of the keyboard to enable or disable various modes of function.
Box Contents
1. Mechanical Keyboard x1
2. USB Cable x1
3. Wire Keycap Puller x1
DIP Switch Settings
Unplug keyboard before changing DIP switch positions. Plug keyboard back in for new settings to take effect.
*Keyboard must be powered off to switch modes.
Page 2

Function Key Shortcuts
Key Combination
Shortcut
Notes
Media Keys
Fn + Insert
Play / Pause
Fn + Home
Stop
Fn + Delete
Previous
Fn + End
Next Fn + Page Up
Volume Up
Fn + Page Down
Volume Down
Fn + Pause
Mute
LED Lighting Controls
Fn + F11
Adjust LED backlighting brightness
CODE Models only
Fn + F12
Turn LED backlighting on / off
CODE Models only
Indicator LED Programming Controls
Fn + F6
Red Level 0 – 9
Accessible only in
LED Programming
Mode
Fn + F7
Green Level 0 – 9
Fn + F8
Blue Level 0 – 9
Macro Programming Controls
Fn + m
Switch to Layer 1
Fn + ,
Switch to Layer 2
Fn + .
Switch to Layer 3
Fn + /
Switch to Layer 4
Fn + 1
Add 10ms delay to macro
Accessible only in
Macro Programming
Mode
Fn + 2
Add 100ms delay to macro
Fn + 3
Add 1000ms delay to macro
Page 3
Action
LED State
LED1 = Caps Lock, LED2 = Scroll Lock
1. Enable Pgm Key and Fn Key
LED1+2 = Normal function
2. Press Pgm + Fn to enter Macro Programming
LED1 = Green
3. Press target key or key combo
LED1 = Red
4. Input Programming
LED2 = Flash red on input
5. Press Pgm to save macro
LED1+2 = Flash green 2 times
6. Go back to Step 3 or press Pgm + Fn to exit Macro Programming
LED1+2= back to normal function
Move Pgm or Fn Keys
1. Enable Pgm Key and Fn Key
LED1+2 = Normal function
2. Press Pgm + Fn to enter relocation Programming
LED1 = Green
3. Press and hold Pgm or Fn key for 5 seconds
LED1 = Red
LED2 = Flash red, then solid green after 5 seconds
4. Input destination key
LED1 = Solid green
LED2 = Flash Green
5. Go back to Step 3 or press Pgm + Fn to exit relocation Programming
LED1+2= back to normal function
Macro Programming Limitations
1. Each layer can record up to 25 macros
2. Each macro can hold up to 32 keys
3. Target can be single key or a combo up to 3 keys
(ie: “W”, “Fn + W”, “Fn + Ctrl + W”)
4. Combo keys will be “released” before macro is sent. Avoid using keys such as Alt and
OS/Win as those keys will trigger an action before sending the macro
5. Layer switching function cannot be moved or programmed
Clear Macro Programming for Layer
Press and hold the target layer key for 10 seconds. LED’s will flash green indicating that layer has
been reset. (For example, hold Fn + m to reset Layer 1)
Macro Programming
Page 4

Indicator LED Programming
Action
LED State
1. Enable Pgm Key
Default position for Pgm key is RCtrl Key
Normal Function
2. Press Pgm + ScrLk to enter LED Programming
Flash green 3 times
3a. To program indicators:
Press the key of the target LED
(ie: Num Lock, Caps Lock, Scroll Lock)
Target LED displays current color
3b. To program Layer 1 – 4 indicators:
Press the Fn + layer key to program layer indicator color
(ie: Fn + m, Fn + , , Fn + . , Fn + /)
Flash red, then displays current color
4. Press Fn + F6, F7, or F8 to cycle through RGB colors
Target LED displays current color
5. Press Pgm to save color
Flash green 3 times
6. Go back to step 3 or press Pgm + ScrLk to exit LED Programming
Back to normal function
 Loading...