


MANUAL FOR MULTIPLE GUITAR CORNER STAND
RS 20885 B/1 FP & RS 20887 B/1 FP

RockStand® Multiple Guitar Corner Stands
RS 20885 B/1 FP & RS 20887 B/1 FP
Congratulations on your purchase of a RockStand® Multiple Guitar Corner
Stand. This high-quality instrument stand ensures the safe storage of your
instruments. In this package you will nd all the pieces you need for assembly.
Please read and follow the instructions of this manual carefully before use.
Characteristics & Advantages:
• Space saving curved corner stand
• Securely holds up to 5 or 7 Electric Guitars or Basses
• Foam padding for extra instrument protection
• Easy to assemble
• Rugged, powder-coated metal construction
• Non-slip rubber feet
• Patent protected
• Color: Black
Make sure that the ground where you assemble your RockStand® Multiple
Guitar Corner Stand is absolutely level and stable. Never use the stand on
uneven surfaces or on surfaces which will not support its weight equally under
each leg. Ensure that all screws are securely tightened before use.
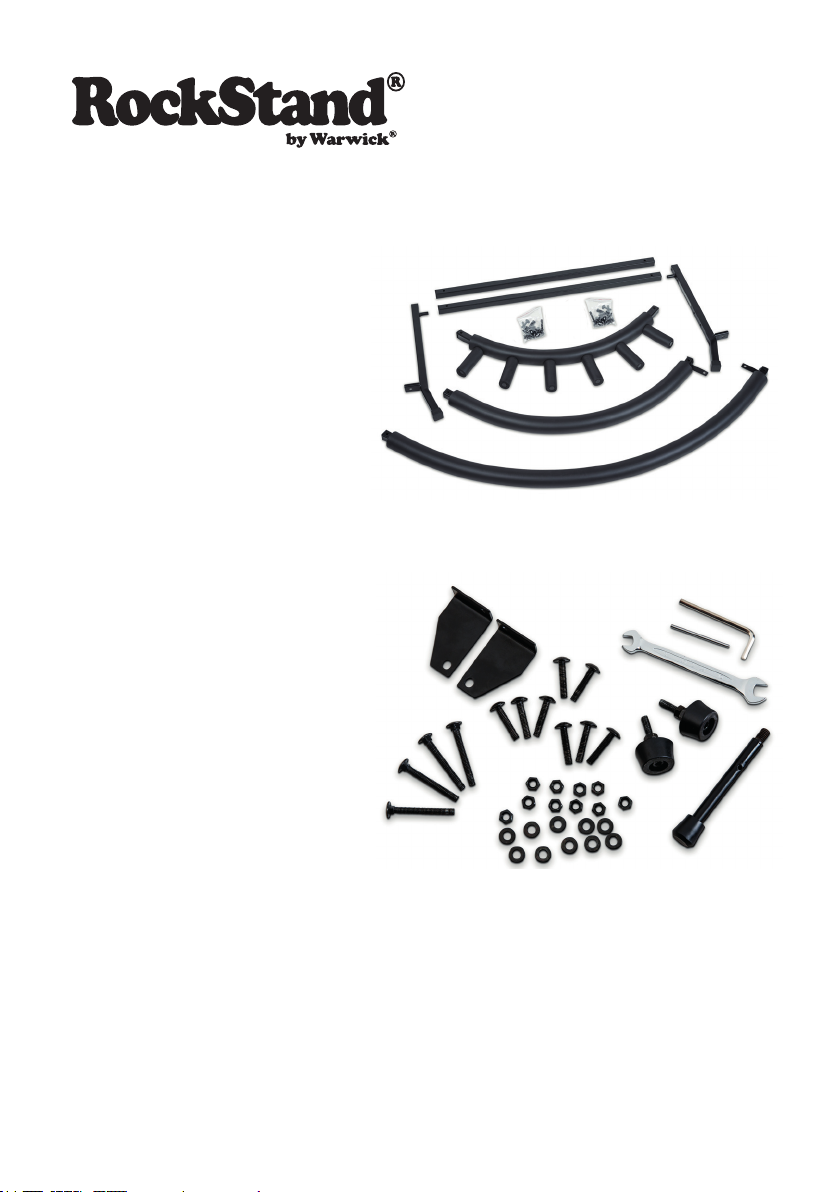
Content:
(1)
1 x Long Arched Rest
(2)
1 x Short Arched Rest
(3)
2 x End Connectors
(4)
2 x Risers
(5)
1 x Top Rest
(6)
2 x Plastic Bag
Content Plastic Bags:
(A)
1 x Wrench
(B)
1 x Hex Key Wrench
(C)
4 x Screw M6
(D)
8 x Socket Screw M6
(E)
8 x Washer
(F)
8 x Nut M6
(G)
1 x Tightening Tool
for Front Leg
(
H) 1 x Front Leg
(I)
2 x Rubber Foot
(J)
2 x Angled Brace
(3)
(C)
(1)
(2)
(4)
(J)
(6)
(5)
(A)
(D)
(3)
(B)
(G)
(I)
(F)
(E)
(H)

Instructions:
1. Screw the front leg (H) in the appropriate hole in the middle of the long
arched rest (1). You can use the tightening tool for front leg (G) to screw
it tight.
2. Place the long arched rest (1) on top of the hole closest to the front edge
of the end connector (3).
Please note that the right side of the long arched rest (1) has two holes,
one for socket screws (D) and one for screws (C).
On the other side only xation with a screw (C) is necessary.
Use a washer (E) and a nut (F) to x the screws. Use the wrench (A) and
hex key wrench (B) to tighten the nuts.
3. Screw the rubber feet (I) into the appropriate holes in the end
connectors (3). Use the hex key wrench (B) to tighten them.
4. Place the short arched rest (2) over the appropriate holes closer to the
angled ap of the end connector (3).
Please note that the right side of the short arched rest (2) also has two
holes, one for socket screws (D) and one for screws (C).
On the other side only xation with a screw (C) is necessary.
Use a washer (E) and a nut (F) to x the screws. Use the wrench (A) and
hex key wrench (B) to tighten the nuts.
5. Take one riser (4) and screw it to the ap of the end connector (3).
Use a socket screw (D), a washer (E) and a nut (F) to x the screws. Use
the wrench (A) and hex key wrench (B) to tighten the nut. Repeat the
process for the opposite side.
6. Place the top rest (5) on top of the risers (4). Screw the angled
brace (J) to the top rest (5) and to the risers (4). Use a socket screw (D),
a washer (E) and a nut (F) to x the screws. Use the wrench (A) and hex
key wrench (B) to tighten the nut. Repeat the process for the opposite side.
Assembly of the RockStand® Multiple Guitar Corner Stand
is now complete.

1 2
3 4
5
6

Intended Use
The guitar stand is meant to be used only to hold guitars or similar instruments, as described in this manual. All other uses not included and described
in this manual are hereby prohibited. Warwick GmbH & Co. Music Equip-
ment KG is not responsible for any damages caused by misuse or wrong
applications of these stands.
Security Guidelines
• Keep children away from the guitar stand and do not let them play
with it. The guitar stand is not a toy.
• Never use the guitar stand as a ladder or support frame for other
things!
• Only place the guitar stand on a level and even surface. Warwick
GmbH & Co. Music Equipment KG is not responsible for any
personal and material damages caused by faulty assembly and
misuse.
• This stand has been tested with various instrument nishes and
found no problems. Still we advise caution with vintage instruments
and nitrocellulose nishes. Sweat, environmental pollutants,
nitrocellulose and age can create chemical reactions that cannot be
tested or predicted, therefore we are not responsible for any
damages to the surface nish resulting in these circumstances.
Maintenance and Care
Use a dry cloth to clean the product. In the case of hard-working screws, use
some oil spray or grease. Please regularly check the rmness of the screws
and tighten them, if they should have loosened.
WARRANTY
The warranty period for this item is 2 years. In case of warranty claim, please
contact your dealer.

Technical Data
Model Size Load Weight
RS 20885 B/1 FP
RS 20885 B/1 FP
Disposal
The symbol shown on the right indicates that the product
must be separated from the normal domestic waste in the
event of disposal, depending on local regulations and regu-
lations. Dispose of the product at your local collection point.
At some collection points and waste collection plants, the
disposal is free of charge. Waste separation and recycling
helps to conserve the resources of nature and guarantees
the proper disposal for the protection of the environment.
Manufacturer Warwick GmbH & Co. Music Equipment KG,
Gewerbepark 46, 08258 Markneukirchen, Germany
102 x 74 x 59 cm
3.4 x 2.43 x 1.94 ft
118 x 74 x 52 cm
3.9 x 2.43 x 1.71 ft
5 Instruments
7 Instruments
4,08 kg
9 lbs
4,58 kg
10.1 lbs

Warwick GmbH & Co. Music Equipment KG, Gewerbepark 46,
08258 Markneukirchen / Germany
info@rockgear.us I www.rockgear.us
www.facebook.de/warwickmusicdistribution
 Loading...