

Warrior 800085 User Manual
Protecting Your Adventure Lifestyle
========================================================================================
QUALITY • INTEGRITY • INNOVATION • SERVICE
Warrior Products, Inc.
16850 SW Upper Boones Ferry Rd
Ste. A
Durham, OR 97224
Phone (888) 220-6861
Fax (503) 692-0364
sales@warriorproducts.com
800085
FJ Cruiser Front Coil Spring Spacer Kit
Installation Instructions
IMPORTANT: Warrior recommends that this kit be installed by a certified technician. While these instructions are
complete, a thorough professional knowledge of disassembly and reassembly procedures, as well as post-installation
checks is important. Installing this system without this knowledge and expertise may compromise the operating safety of
the vehicle.
Before beginning this installation, take a look at the end of the install instructions. You will find a torque specification
chart. Reference this chart when tightening any bolts. This chart is located toward the end of the step-by-step
instructions.
Disassembly
1. Set the parking brake. You may also want to chock the rear tires.
2. Raise the front of the vehicle and secure it on a level surface with jack stands on the frame.
3. Remove the front tires.
4. Mark each strut driver and passenger so that you do not switch them during re-installation.
5. Unbolt and remove the front skid plate.
6. Unbolt and separate the sway bar end links from the knuckle. Twist the sway bar up
and out of the way as far as you are able to.
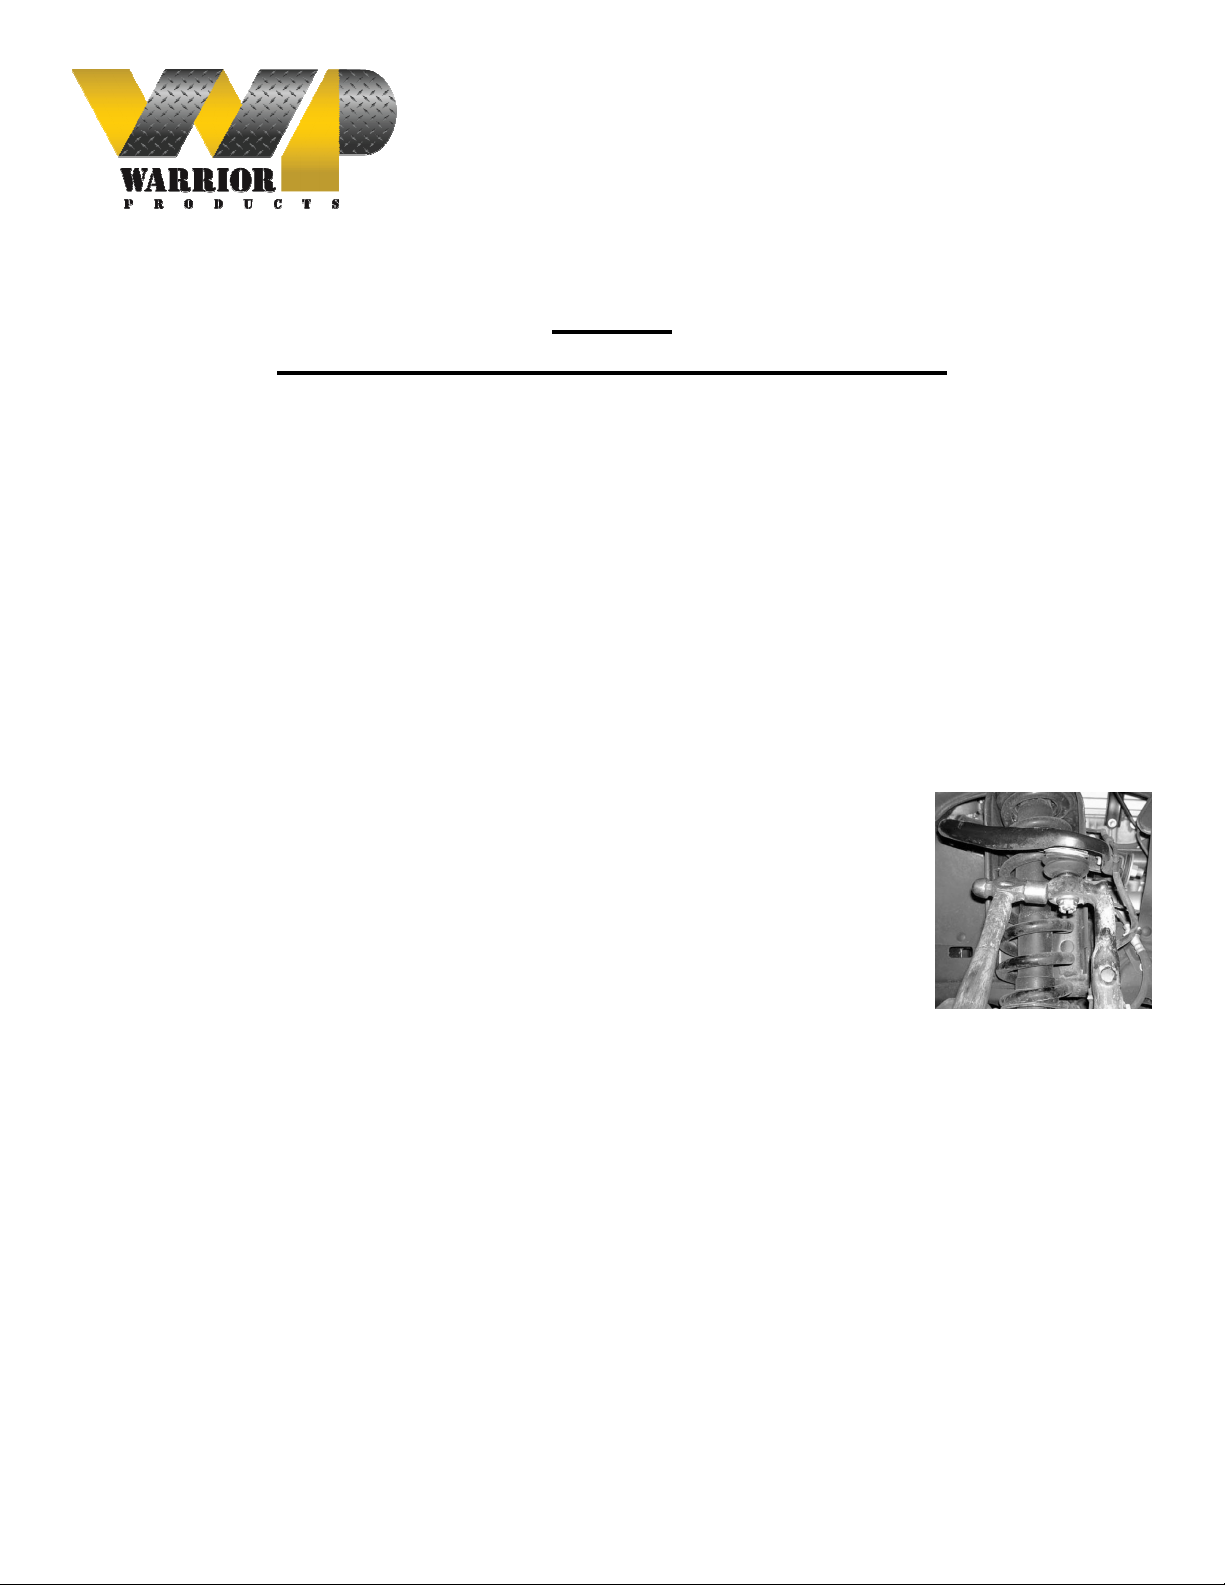
7. Remove the cotter pin from the castle nut that holds the upper control arm to the
knuckle. Loosen the nut most of the way, but do not remove. You now need to break
the ball joint taper free from the knuckle. Illustration 1 shows the location at which you
can safely strike the knuckle to break the taper free. Once the taper comes loose,
remove the castle nut. Repeat on both sides of the vehicle.
8. Remove the 3 nuts from the top of each strut that secure the strut to the frame.
9. Remove the lower bolt on each side that secures the strut to the lower control arm.
10. Carefully remove the struts from each side of the vehicle.
Assembly
1. Place one of your new front coil spring spacers over the studs on top of each of the struts and use the factory nuts
removed in step 8 above to secure them to the strut. Tighten to torque spec using the reference chart below.
2. Slide the struts back into place and attach to the lower control arm re-using the factory hardware.
3. Attach top of strut with new spacer installed to the frame bracket using the included flat washers and nylock nuts.
4. Re-assemble knuckle to upper control arm. Torque down and re-install cotter pin.
5. Install sway bar links back into knuckle.
6. Use chart below to be sure you’ve torqued all bolts and nuts to the proper specification.
7. Re-install lower front skid plate.
8. You may now finish your installation by re-installing your wheels and tires and lowering the vehicle back onto the
ground. Be sure to double check all bolts and nuts, including lug nuts to ensure they are tight. Test drive and
check again. It is also recommended that after a few hundred miles, all bolts be passed over and re-torqued.

Protecting Your Adventure Lifestyle
========================================================================================
QUALITY • INTEGRITY • INNOVATION • SERVICE
Warrior Products, Inc.
16850 SW Upper Boones Ferry Rd
Ste. A
Durham, OR 97224
Phone (888) 220-6861
Fax (503) 692-0364
sales@warriorproducts.com
STANDARD BOLT TORQUE SPECIFICATIONS
INCH SYSTEM
METRIC SYSTEM
Bolt Size
Grade 5
Grade 8
Bolt Size
Class 8.8
Class 10.9
Class 12.9
5/16
15 Ft – Lbs
20 Ft – Lbs
M 6
5 Ft – Lbs
9 Ft – Lbs
12 Ft – Lbs
3/8
30 Ft – Lbs
35 Ft – Lbs
M 8
18 Ft – Lbs
23 Ft – Lbs
27 Ft – Lbs
7/16
45 Ft – Lbs
60 Ft – Lbs
M10
32 Ft – Lbs
45 Ft – Lbs
50 Ft – Lbs
_
65 Ft – Lbs
90 Ft – Lbs
M12
55 Ft – Lbs
75 Ft – Lbs
90 Ft – Lbs
9/16
95 Ft – Lbs
130 Ft – Lbs
M14
85 Ft – Lbs
120 Ft – Lbs
145 Ft – Lbs
5/8
135 Ft – Lbs
175 Ft – Lbs
M16
130 Ft – Lbs
165 Ft – Lbs
210 Ft – Lbs
_
185 Ft – Lbs
280 Ft – Lbs
M18
170 Ft – Lbs
240 Ft – Lbs
290 Ft – Lbs
 Loading...