

Warmup WLFH-140W/1260, WLFH-140W/280, WLFH-140W/700, WLFH-140W/560, WLFH-140W/1680 Installation Instructions
...Page 1

Warmup®
Under carpet / Vinyl Installation
(Addendum to the Warmup Foil
Installation Manual)
Warmup® Insulated Underlay
The Warmup® Insulated Underlay is a thin insulation barrier
that reects heat upwards, making the underoor heating
system more efcient and effective. The insulated underlay
has been specially developed for installation under the
®
Warmup
Warmup
Dual Overlay system in combination with the
®
foil heating system.
The world’s best-selling electric floor heating brand
TM
Warmup® Dual Overlay
The Warmup
providing a perfectly smooth, stable surface to which Carpet
and Vinyl type ooring can be xed.
The Warmup
board. An interactive adhesive, bonds each layer together, providing a stable base. The boards
can be worked easily and cut without producing dust or debris.
®
Dual Overlay is a oating over boarding system
®
Dual Overlay consists of a composite base board with a precision-nished top
Technical specication
Warmup® Insulated Underlay Warmup
Composition Grooved polystyrene with a silver
foil with adhesive overlap.
Size Width – 1200mm
Length – Cut to size to cover areas
of 2.5sqm,5sqm,10sqm and 25sqm.
Thickness – 6mm
RM Value 0.19 0.07
The combined thickness of the Warmup® Dual Overlay and the Warmup
13mm.
®
Dual Overlay
MDF, tted with an interactive adhesive.
600mm x 1200mm.
Total -7mm thickness
Top board 4mm
Base Board 3mm
®
Insulated Underlay is
Compatible oor coverings
Floor coverings such as carpet, vinyl and linoleum can be laid directly on to the surface of
®
Warmup
cushioning from step impacts. It is important that any adhesives used are suitable for use with
underoor heating.
Dual Overlay as the Warmup®Insulated Underlay below the foil heaters will provide a
NOTE: The heating MUST NOT exceed 27°C and should always be controlled via a oor sensor thermostat.
Warmup® Under Carpet/ Vinyl Manual addendum 2011 v2.0
Page 2
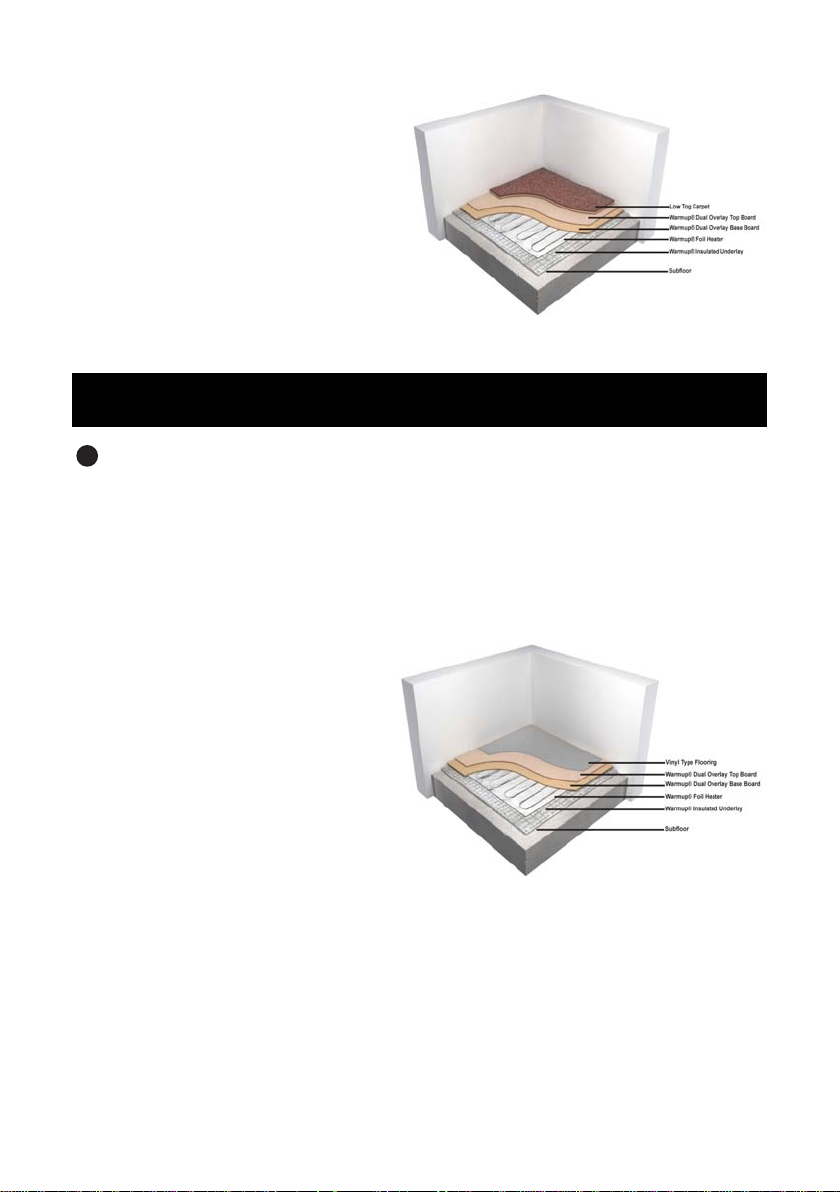
Carpets and Underlays
Carpets and Underlay have a higher TOG
value and a greater resistance to heat
transfer, so it is important to choose carpets
and underlays that have low Tog ratings.
The thicker the carpet and underlay the
longer the warm up time; this will have the
effect of slowing the heat transfer of the
ooring into the room.
It is important to check the suitability for use
with underoor heating. If you need to use
an additional underlay ensure it has a low
Tog rating, no greater than 0.8Tog, ideally 0.5 Tog.
NOTE: The maximum Tog rating for the carpet, underlay and the Warmup
Tog.
i
Important Notes for xing Carpet
®
Dual Overlay should not exceed 2.5
When xing carpet to the Warmup® Dual Overlay it is recommended to use a tackier adhesive
or the double stick method of carpet installation.
If using the stretch method of installation the gripper must be installed before the heating system.
In order for the gripper to function correctly, the top surface of the gripper should be level with
the top surface of the Warmup® dual overlay system or insulated underlay. This can be achieved
either by using an architectural gripper or a timber spacer under a conventional gripper to raise it
to the correct level.
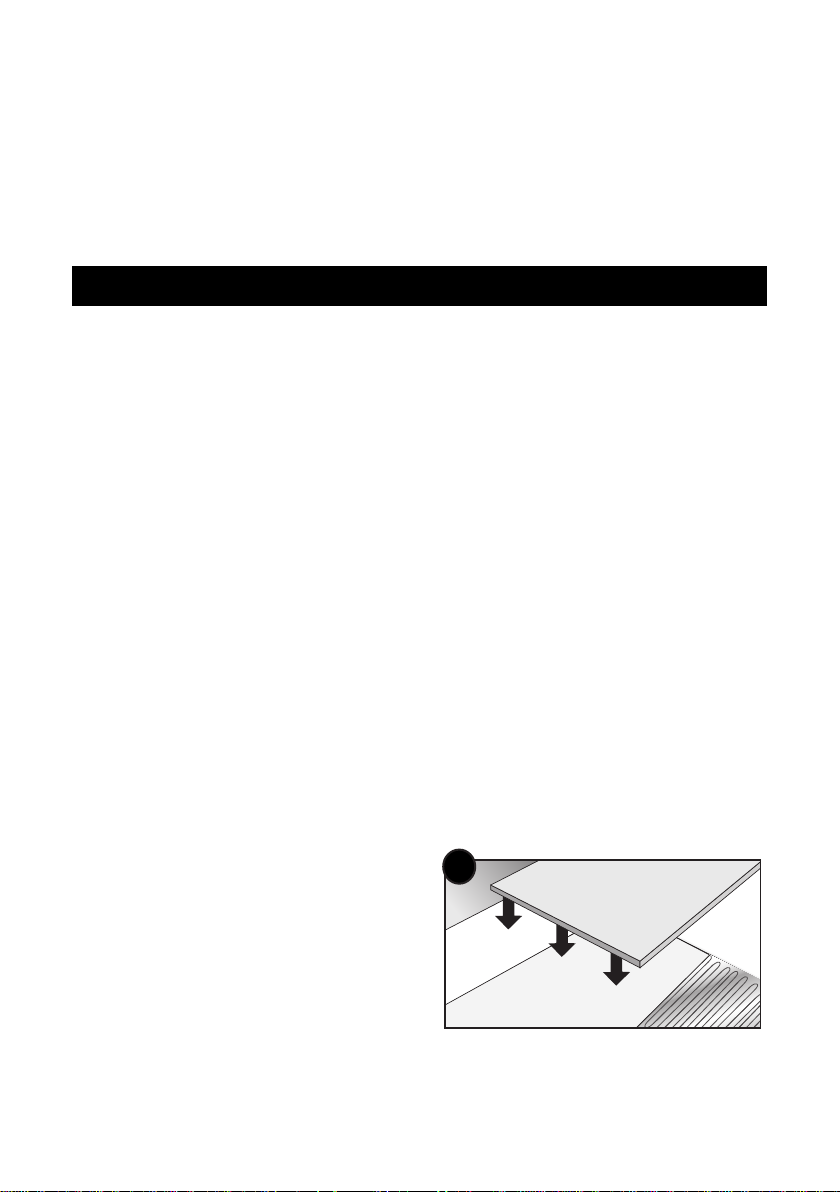
Vinyl Type Flooring
This type of oor may be used over the
®
Warmup
Dual Overlay, but it is important to
remember that high temperature adhesives
suitable for underoor heating must be used.
When vinyl oor coverings are to be
glued, t the Warmup® dual overlay 24 hours
before.
Installation Instructions
Step 1 Warmup
Ensure that the base is clean and dry. Install the insulation with the silver foil facing down. After
tting the rst rows, roll out the next section of underlay. Remove the protective lm from the selfadhesive overlap and stick both rows together, creating a damp proof situation.
®
Insulated Underlay Fitting instructions
If another form of insulation such as the Warmup
manufacturer’s instructions.
®
insulation board install as per the
Warmup® Under Carpet/ Vinyl Manual addendum 2011 v2.0
Page 3
Step 2 Install the Warmup
®
Foil heater
The Foil heater should be installed as per the manual.
Step 3 Warmup
®
Dual overlay tting instructions
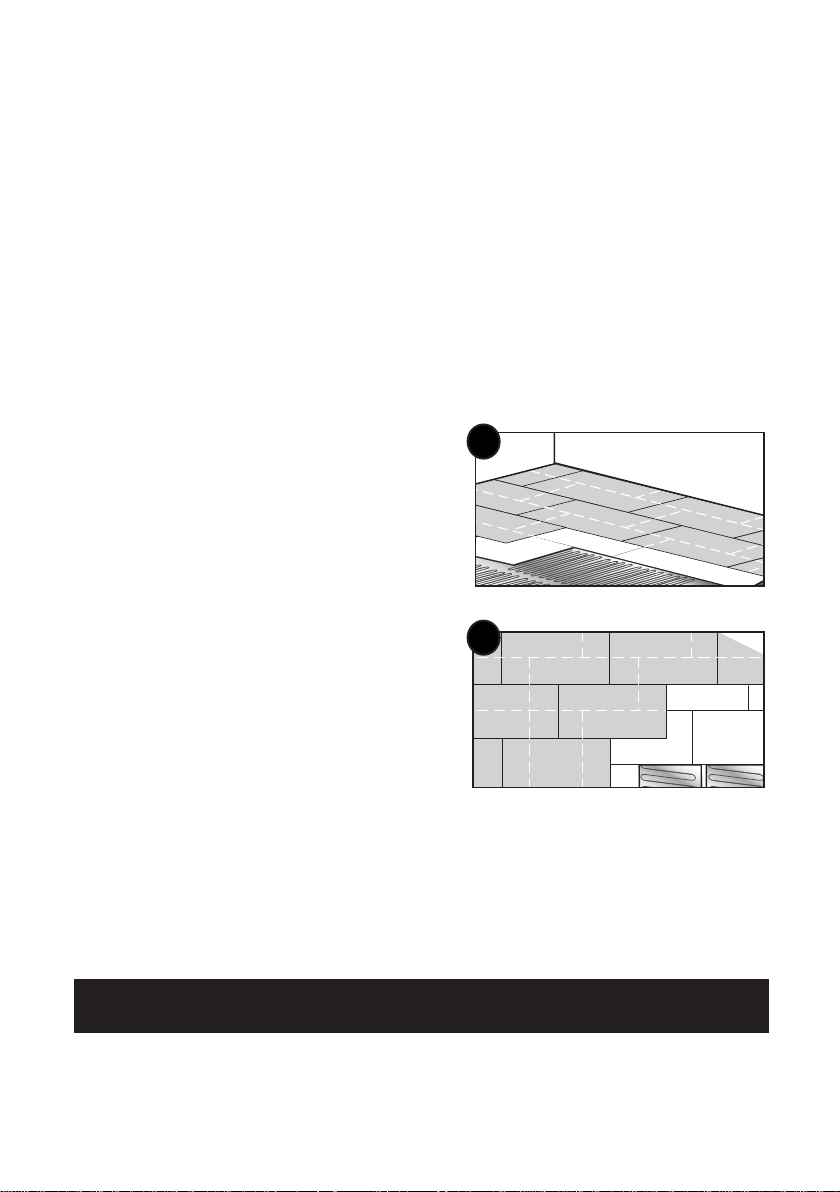
Once you have laid the heater and tested the system you are ready to install the Warmup® Dual
overlay.
NOTE: The heating system MUST be switched off before installation.
The Warmup
®
Dual overlay boards must acclimatise in their sealed packaging, in the room where
they are to be tted, for at least 48 hours, at a temperature of at least 18°C.
Before starting your installation it is important that you ensure your oor is permanently dry, clean
and free of dust.
Cutting the boards
When cutting, we recommend that you use a Retractable bladed knife or similar and a straightedge. Score the boards two or three times and then snap along the cut. This avoids making
sawdust which would prevent the adhesive from bonding correctly.
Installation Overview
The Warmup® Dual Overlay is a oating sub-oor. It is not xed to the oor below. Each layer is
laid out with staggered joints and arranged so that the top boards overlap the joints in the baseboards.
Baseboards are thinner and have a protective plastic lm to keep the self-adhesive coating clean.
This is laid facing upwards and the lm is left in place until cutting and tting is completed.
The top boards are thicker and have no plastic lm over the adhesive coating. They are carefully
positioned, adhesive side down, so that they overlap all the baseboard joints. It is important
to check that any trimming of the top board is accurate and that the adhesive coating is free
from dust or fragments before removing just sufcient amount of the protective lm from the
baseboards to allow the top board to be bonded in place. The adhesive will allow adjustments to
be made for accurate positioning until pressure is applied. Ensure close contact of the adhesive
coatings so to produce a strong, permanent bond. Take care to position boards accurately as it is
very difcult to separate them once bonded.
Baseboard rst row (picture 1 )
The rst row of baseboards is created
by splitting boards in half lengthways and turning
the cut edges towards the wall. The rst
piece is shortened to 3/4 of its length with both cut
edges against the walls in the corner. Lay out the
other pieces end to end in a line along the wall,
adhesive side up, leaving the protective lm in
place.
Leave an expansion gap of 8-10 mm all around
the perimeter and around pipes and other xed
objects,this also applies to the nal oor nish.
1
Baseboard 300mm x 1200mm
This board must be placed
with an expansion gap
of 8-10mm from
the wall.
Top board 600mm x 1200mm
Baseboard
600mm x 1200mm
Warmup® Under Carpet/ Vinyl Manual addendum 2011 v2.0
Page 4
Baseboard second row.
Boards in the second row are laid out in the same direction as the rst row. Start by cutting a
board to 1/4 of its length and place this piece, with the cut end to the wall, next to the rst row.
Now place a full sized baseboard end to end with it and alongside the rst row.
The large off-cut
will be used to start the third row of baseboards. Do not remove the protective lm at this stage
and keep the job clean and free from dust.
Top boards rst row.
The top boards are laid in the same direction as the baseboards, but with the adhesive side down.
The rst board of this row is full size and positioned into the corner overlapping both the rst and
second rows of baseboards. If the board ts neatly into the corner no trimming is required, in
which case it can be lifted out and the plastic lm can be peeled back from the baseboards that
it will cover. Avoid removing more lm than is necessary to accommodate the top board on the
adhesive. The top board is carefully repositioned and adjusted for alignment, at the same time the
baseboards should be checked for any gaps and adjusted if required; nally the top board is xed
in place by tapping down with the rubber mallet.
Top boards second row (picture 2)
For the best result it is important to keep the joints
2
Leave an expansion Gap along
the side of about 8-10mm.
between the top boards as tight as possible. The
easiest way to achieve this is by starting the second
row of top boards with a half-length piece, followed by
a full board and pushing all the edges tightly together
before tapping down. Adding further boards, alternately,
to the rst two rows keeps the lines straight and so
prevents gaps from developing.
Due to possible inuences of air humidity, glue the oor
covering on the Warmup
48 hours.
®
Dual Overlay no later than
3
Every room should be tted separately, leaving an
expansion gap of at least 8 -10 mm and 16mm in door
openings when Warmup® Dual Overlay is continued in
the adjoining area.
If the oor covering is to be glued onto the total
surface and should not to exceed the edges of the
®
Warmup
Dual Overlay Boards.
This method of installation will provide a stable surface for the oor nish to rest on and avoid any
joints showing through the nal oor nish.
Now you have installed the Warmup® Dual Overlay boards you can either glue your nal oor
nish to the boards as a nal layer or simply lay it freely upon them.
Before installing the nal oor nish test the Warmup® foil heater(s) and oor sensor to ensure that
no damage has occurred during the installation.
Note: If the oor nish is to be glued the underoor heating system must not be switched back on
until the glue has completely set. Temperatures should then be increased gradually.
If you need any further assistance regarding the product all installation or
operation of the heaters please contact the Warmup Technical Support help line
on 0845 345 2288.
Warmup® Under Carpet/ Vinyl Manual addendum 2011 v2.0
 Loading...